


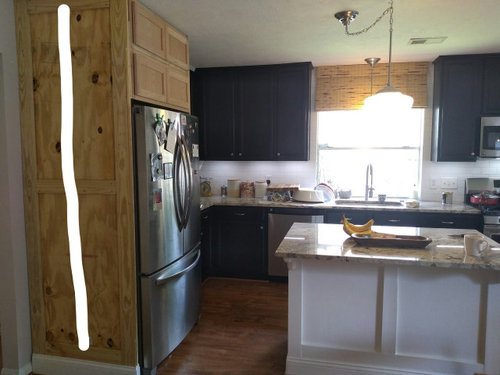
how to finish diy cabinet over fridge
User
4 years ago
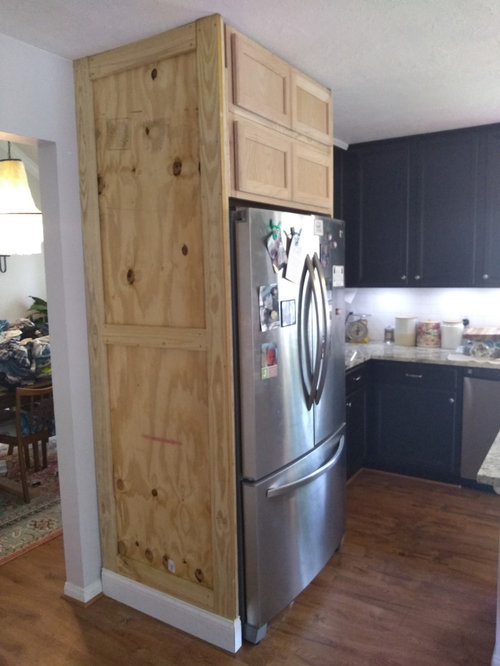


Add center board vertically

Add two horizontal boards
Featured Answer
Sort by:Oldest
Comments (38)

User
4 years ago
GreenDesigns
4 years agolast modified: 4 years agoRelated Professionals
Green Bay Kitchen & Bathroom Remodelers · Independence Kitchen & Bathroom Remodelers · Effingham Cabinets & Cabinetry · Lakeside Cabinets & Cabinetry · Suamico Design-Build Firms · Carlisle Furniture & Accessories · Nixa Furniture & Accessories · Albany General Contractors · Chowchilla General Contractors · Carlsbad Flooring Contractors · Cartersville Flooring Contractors · Fishers Flooring Contractors · Marlborough Flooring Contractors · Raleigh Flooring Contractors · Redmond Flooring ContractorsUser
4 years agoUser
4 years ago
salex
4 years agoUser
4 years agoUser
4 years agosalex
4 years agoUser
4 years ago
stillpitpat
4 years ago
zmith
4 years agoUser
4 years agoherbflavor
4 years ago PRO
PROCreative Design Cabinetry
4 years agobry911
4 years agolast modified: 4 years agoherbflavor
4 years agoUser
4 years agolast modified: 4 years agoUser
4 years ago PRO
PROKitchen Tune-up Zeeland, Sales & Design
4 years agoUser
4 years agoUser
4 years agokudzu9
4 years agoUser
4 years agokudzu9
4 years agolast modified: 4 years agoUser
4 years agokudzu9
4 years ago
decoenthusiaste
4 years agoUser
4 years ago
THOR, Son of ODIN
4 years agolast modified: 4 years agoUser
4 years agoOliviag
4 years agoUser
4 years agost5330
4 years ago- PRO
Kitchen Tune-up Zeeland, Sales & Design
4 years ago zmith
4 years agoUser
4 years agodecoenthusiaste
4 years ago

Related Stories

MOST POPULARFrom the Pros: How to Paint Kitchen Cabinets
Want a major new look for your kitchen or bathroom cabinets on a DIY budget? Don't pick up a paintbrush until you read this
Full Story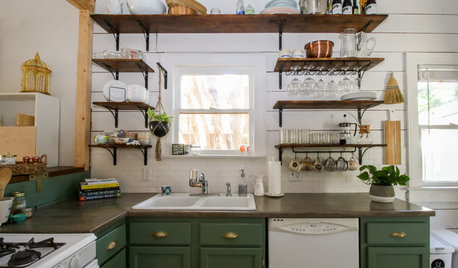
MY HOUZZMy Houzz: Friends Help With the DIY Redo of a San Antonio Kitchen
A Texas homeowner and her pals transform the room with green painted cabinets, open shelving and shiplap walls
Full Story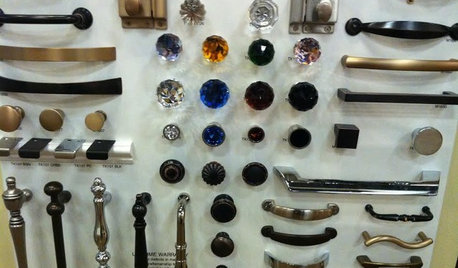
KITCHEN DESIGNGet a Grip on Kitchen Cabinets With the Right Knobs and Pulls
Here's how to pair the right style, type and finish of cabinet hardware with your kitchen style
Full Story
KITCHEN CABINETSHow to Update Your Kitchen Cabinets With Paint
A pro gives advice on when and how to paint your cabinets. Get the step-by-step
Full StoryKITCHEN CABINETSKitchen Cabinet Color: Should You Paint or Stain?
Learn about durability, looks, cost and more for wooden cabinet finishes to make the right choice for your kitchen
Full Story
KITCHEN CABINETSPainted vs. Stained Kitchen Cabinets
Wondering whether to go for natural wood or a painted finish for your cabinets? These pros and cons can help
Full Story
KITCHEN DESIGN3 Steps to Choosing Kitchen Finishes Wisely
Lost your way in the field of options for countertop and cabinet finishes? This advice will put your kitchen renovation back on track
Full Story
KITCHEN CABINETSColorful Ways to Make Over Your Kitchen Cabinetry
Try these inspiring color updates to spice up your kitchen a little — or a lot
Full Story
HOUZZ TOURSMy Houzz: Creative DIY Personalizes a 2-Bedroom Bungalow
Stenciling, custom finishes and furniture, and Scottish-inspired style give a 1920s home personality and warmth
Full Story
KITCHEN CABINETSYour Guide to Choosing Kitchen Cabinets
Updating your kitchen? See designers' top choices for kitchen cabinet styles, hardware choices, colors, finishes and more
Full Story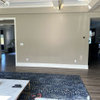


kudzu9