


Remodeling Guides

Kitchen Design

Contractor Tips: Countertop Installation from Start to Finish
From counter templates to ongoing care, a professional contractor shares what you need to know

The secret to a good countertop installation is preparation — and installing a countertop involves a lot more than considering which materials to use. Counter installation is one of the last things to happen in your kitchen or bath renovation. Before your installer shows up to template, all cabinets must be permanently installed — nothing can move between template and install.
Below you'll find information you'll need to be prepared with on template day and helpful tips for after the counters are installed.
More: How to Remodel Your Kitchen
Below you'll find information you'll need to be prepared with on template day and helpful tips for after the counters are installed.
More: How to Remodel Your Kitchen
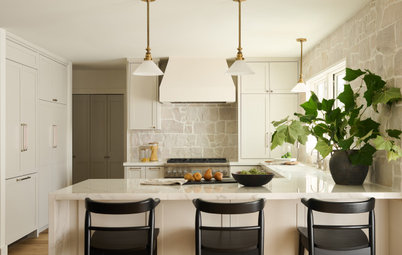
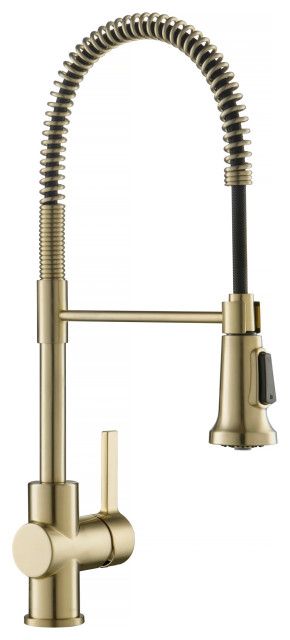
2. Wall-mounted faucets. It is much easier to wipe a counter down with a wall-mounted faucet. To get this piece right, you’ll need to know where the finished wall surface will fall once the backsplash is installed and where the sink will be centered so you have a faucet that comes out above the drain. Before the plumbers start roughing in pipes, every decision needs to be made or you risk ending up with elements that don’t work well together.
3. Overhangs. If any section of your countertop will overhang the cabinets, consider how you will support this area. Overhangs of 6 to 12 inches are possible without bracing, depending on the material, but an attractive bracket adds support and peace of mind should someone hop up and sit on your counter.
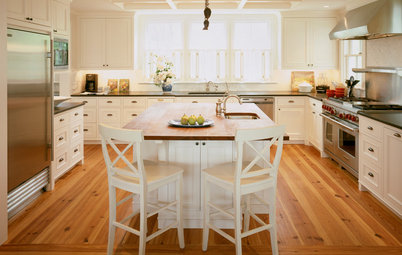
4. Counter height. Different people and tasks require different counter heights. If custom cabinets are not in your budget, one way to vary the finished height of the counter is to use materials of different thicknesses set on standard cabinets. A standard kitchen counter is 36 inches off the floor, but if you have someone tall in your family, 39 inches may be a more comfortable height. Here, a butcher block set lower than adjacent tops gives the person chopping more leverage.
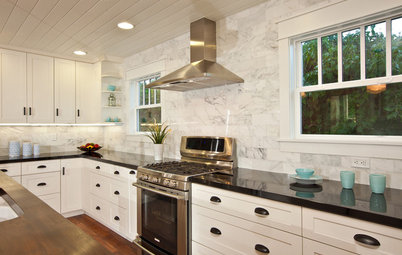
5. Countertop support. In most spots, your cabinetry will provide the support for the countertops, but think about what will support the counter around the appliances. A slide-in range like the one pictured has a 2-inch strip of counter behind the cooking surface. Because it is tricky to move two large slabs connected by a 2-inch strip, this spot will often be seamed together onsite. Make sure you install wood blocking flush with the top of the adjacent cabinets so the contractor can properly attach this strip.
Another common trouble spot is where a counter ends on a dishwasher. The dishwasher can't support the counter, so provide structural support on the side — ideally more than a ¾-inch fill panel.
Another common trouble spot is where a counter ends on a dishwasher. The dishwasher can't support the counter, so provide structural support on the side — ideally more than a ¾-inch fill panel.
On template day, you may still need to make some decisions.
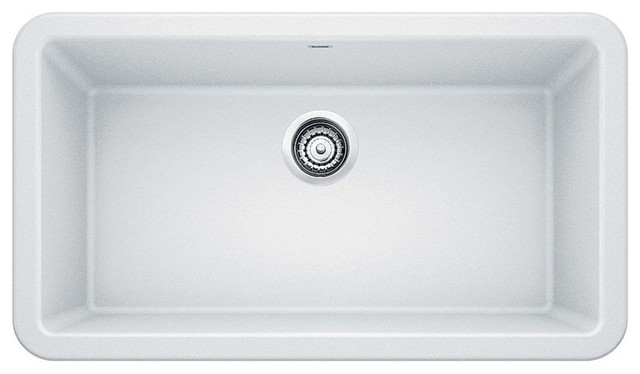
Decide how much of the sink will show on an undermount install. If keeping the sink clean with little hassle is a priority, have the contractor bring the edge of the countertop flush with the walls of the sink. If you prefer the look shown here, where some of the top flange shows all around, let your installer know.
Ask where the seams will be. Very few counters lack seams. In stone with veining, you may be able to hide a seam along a vein, and colored epoxies should make all seams hard to spot.
Templates are usually done in one of two ways. The low-tech way is to use strips of thin luan plywood and a hot glue gun to form rectangles that fit the spaces in your kitchen. High-tech templates may use paper targets placed around the kitchen and photographs of the spaces in a process called photogrammetry, or your installer may use a laser templating system. Both methods can produce flawless results.
Once the templating is done, you’ll usually have to wait one to two weeks for your countertops to be fabricated. Make sure you get a firm date from your installer, because you’ll want to schedule your plumber for right after the counters are installed.
The sink will be clamped and siliconed in place, and the faucet holes drilled, on install day, but your plumber will need to hook up the faucet and drain before you can use it. Silicone and the epoxy used to seam materials together give off powerful fumes, so make sure the room is well ventilated that day.
The sink will be clamped and siliconed in place, and the faucet holes drilled, on install day, but your plumber will need to hook up the faucet and drain before you can use it. Silicone and the epoxy used to seam materials together give off powerful fumes, so make sure the room is well ventilated that day.
After the countertops are installed, it’s time to think about backsplash installation and painting. Your counter sets the lower line for your tile, so even though you could install the tile before templating, you’ll get a better-looking backsplash if you wait. Muscling a heavy counter into place is a difficult job, and some walls inevitably will get bumped or dinged. Save your finish painting until after the install for this reason.
Find a professional tile and countertop installer
Find a professional tile and countertop installer
One last tip: If you have recycled paper counters (as in the previous photo), or ones made of soapstone or wood, I recommend Real Milk Paint's Soapstone & Wood Sealer. This finish is made from food-grade walnut oil (meaning it's safe for food to touch the surface without fear of contamination) and T1 carnauba wax flakes. There are no solvents, which means no VOCs (volatile organic compounds) or added fragrances.
More Contractor Tips: Installing Tile | Installing Windows | Building a Deck
More:
Kitchen Countertops 101: Choosing a Surface Material
12 Ways a Kitchen Countertop Changes Everything
More Contractor Tips: Installing Tile | Installing Windows | Building a Deck
More:
Kitchen Countertops 101: Choosing a Surface Material
12 Ways a Kitchen Countertop Changes Everything


Sponsored
Columbus Area's Luxury Design Build Firm | 17x Best of Houzz Winner!
If you are installing an apron-front sink, there can be several different ways to place the bowl. Think about the spot where the front edge of the counter and the sink meet. Some sinks have a notch into which the counter fits. In this photo, the counter was coped around the edge. The way this detail will align with your counter overhang should be decided in advance of template day.
As for placement of the faucet, it shouldn’t always be centered on the sink. The sink drain may be offset. You may want to center the faucet on a window or other architectural detail on the wall rather than on the sink.