Getting Started in Houzz Pro for Interior Designers
Welcome to Houzz Pro – we are so happy you're here!
You're probably wondering how to get started and where to find the features you need. This Getting Started Guide will help you get acclimated and show you the resources you need to learn the ins and outs of Houzz Pro.
If you need any help along the way, we're just a chat or a phone call away!
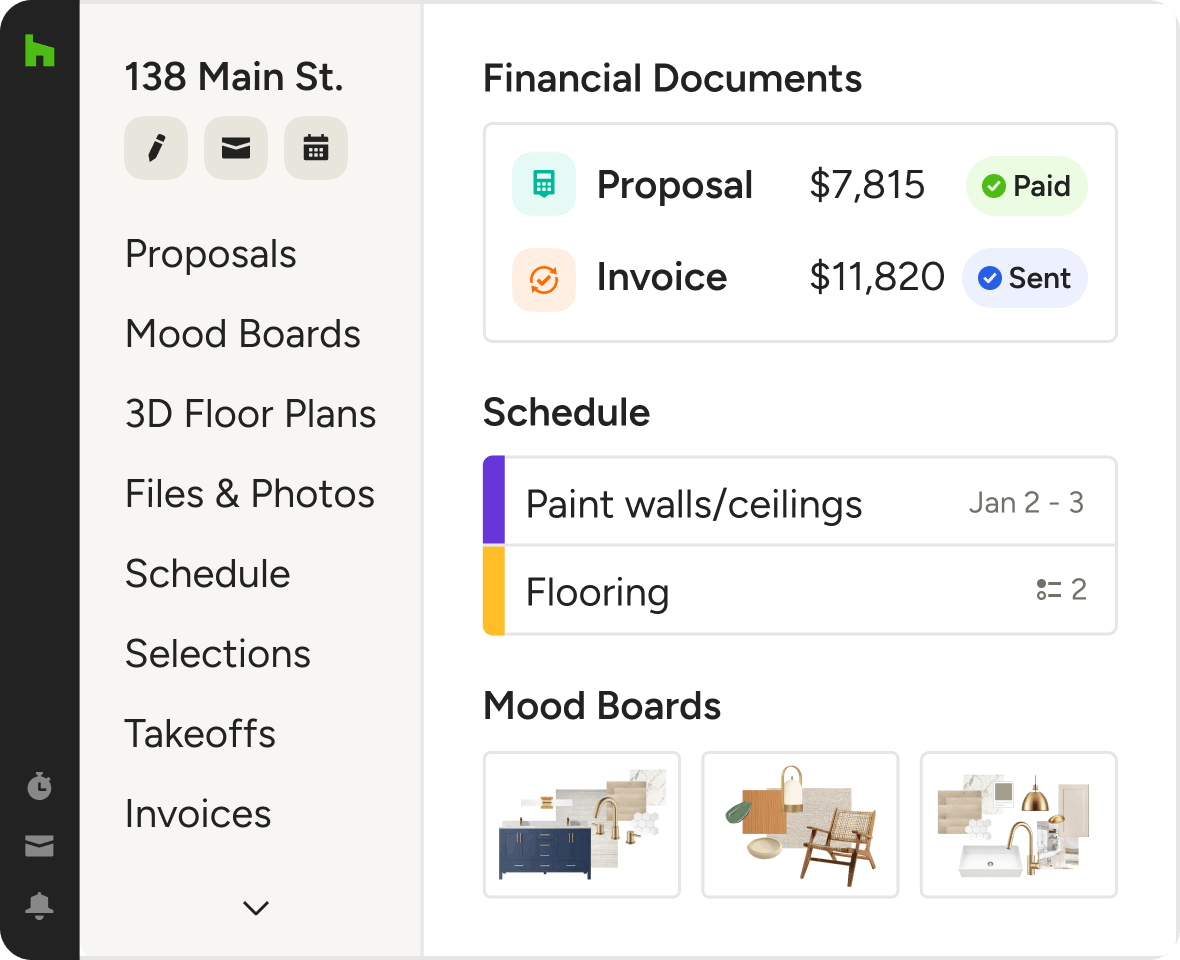
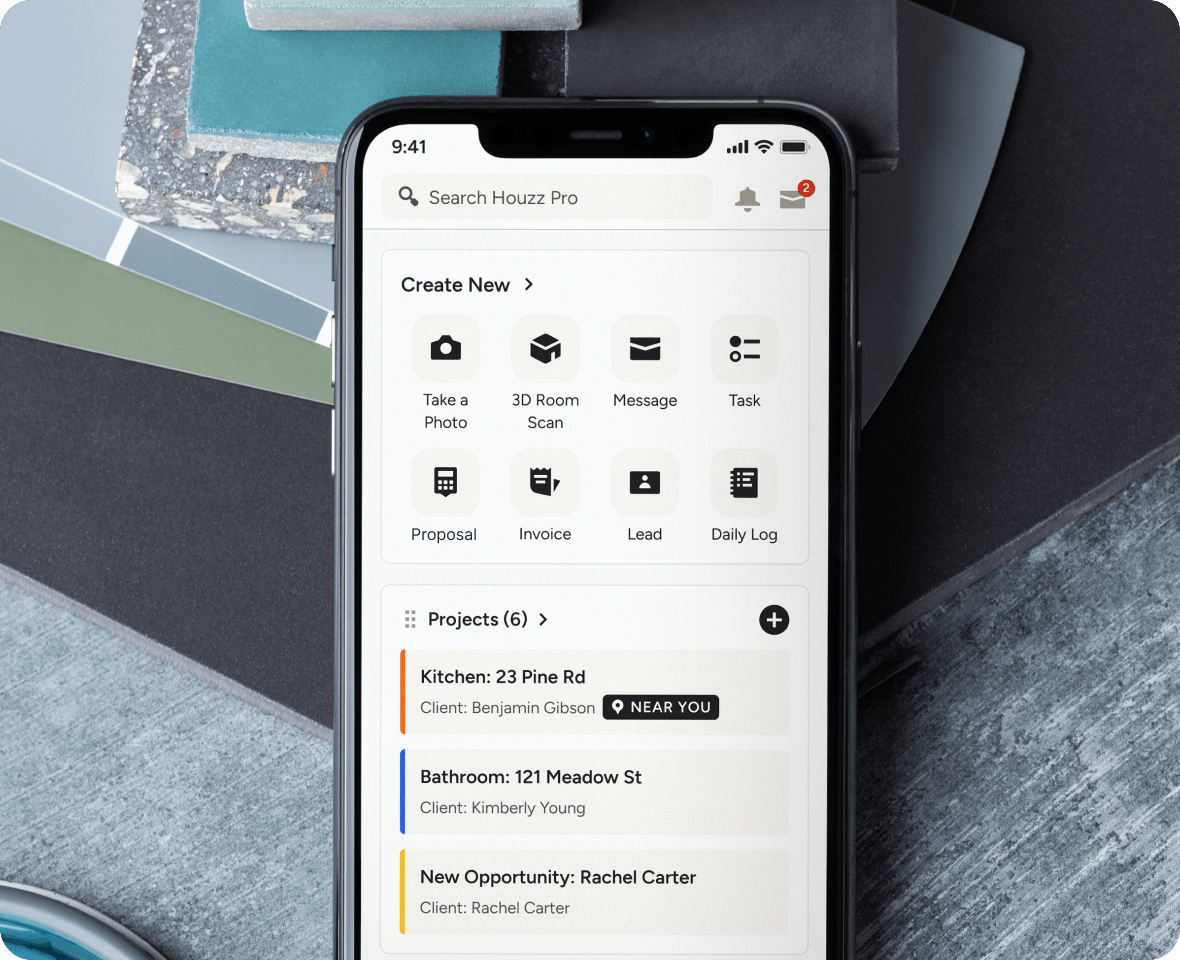
Create your first project to manage all project information in one central location.
- Click “+ New” under the projects tab to create your first project.
- Or if you have a lead you are ready to move forward with, convert the lead to a project.
- Add any project specific files or images to your project to keep everything in one place. See how here.
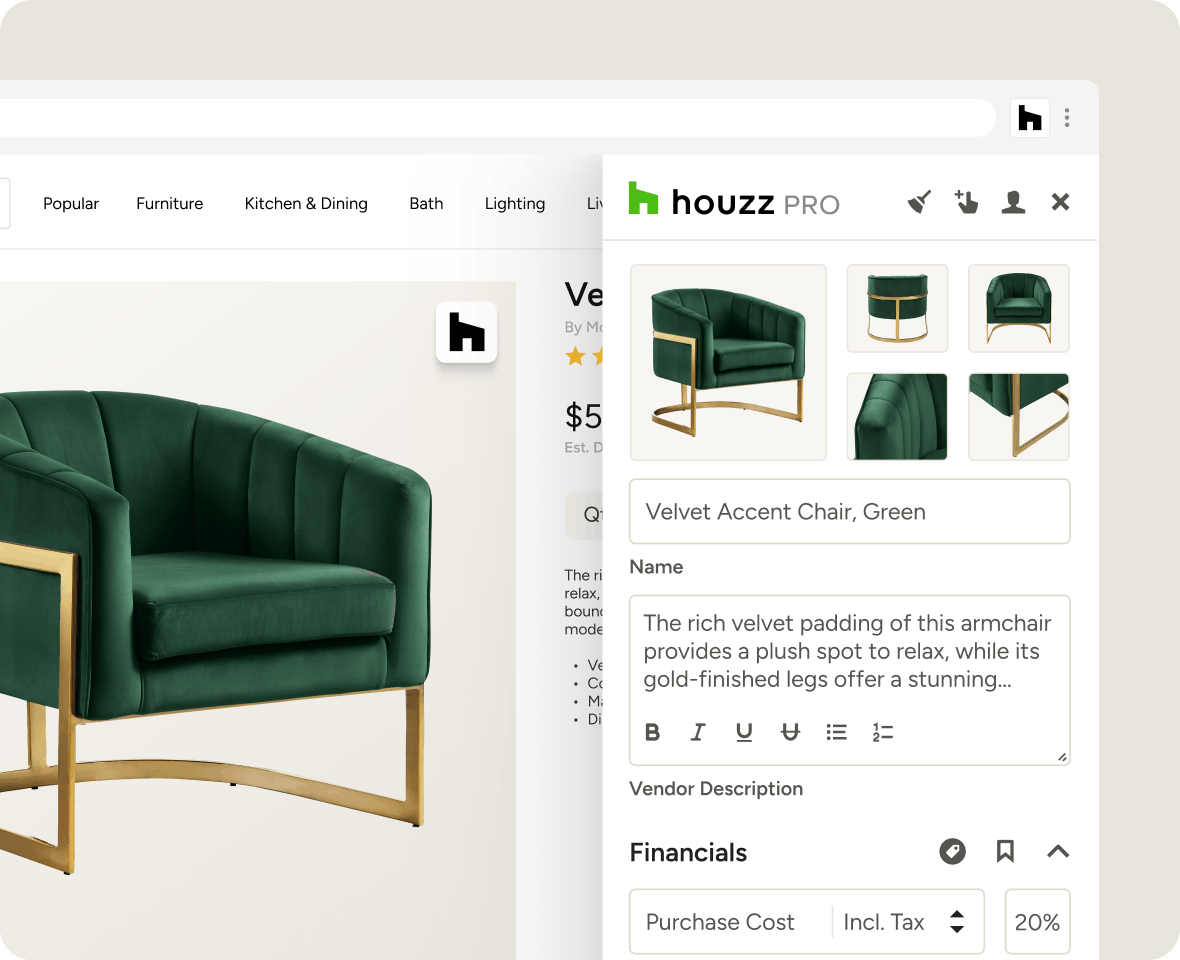
Download the Clipper to quickly save your favorite products to your library or specific projects.
- The Clipper lets you save product details and images from any site to your Houzz Pro Library to use on multiple projects.
- Click here to learn all about it and here to download the Chrome extension. You can use these products as line items in your proposals, invoices, purchase orders, Selection Boards, and tear sheets.
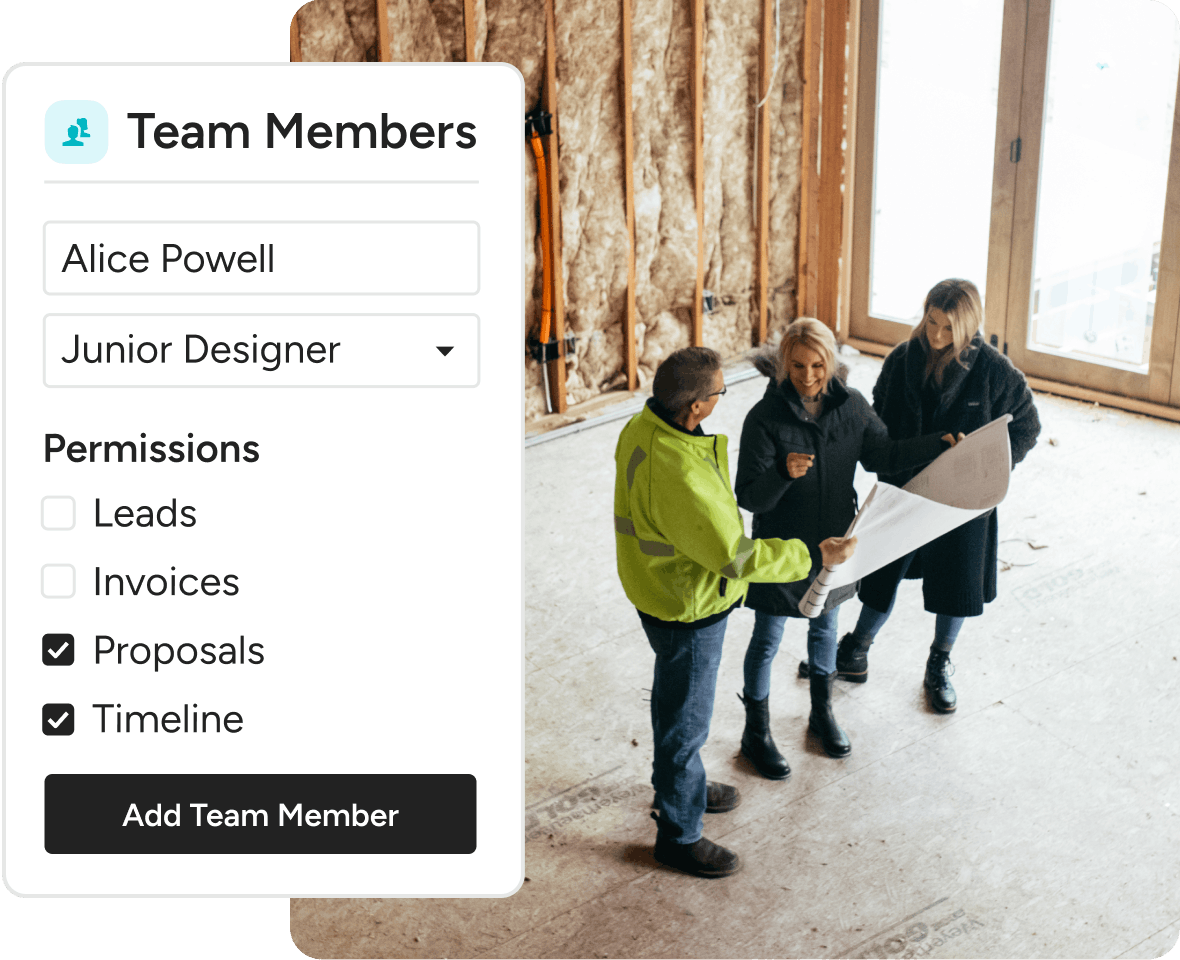
Invite your team members to join you on Houzz Pro so you can start collaborating.
- You control permissions for each project, so relevant team members only see what they need to see. Watch the tutorial video to see how to get started here.
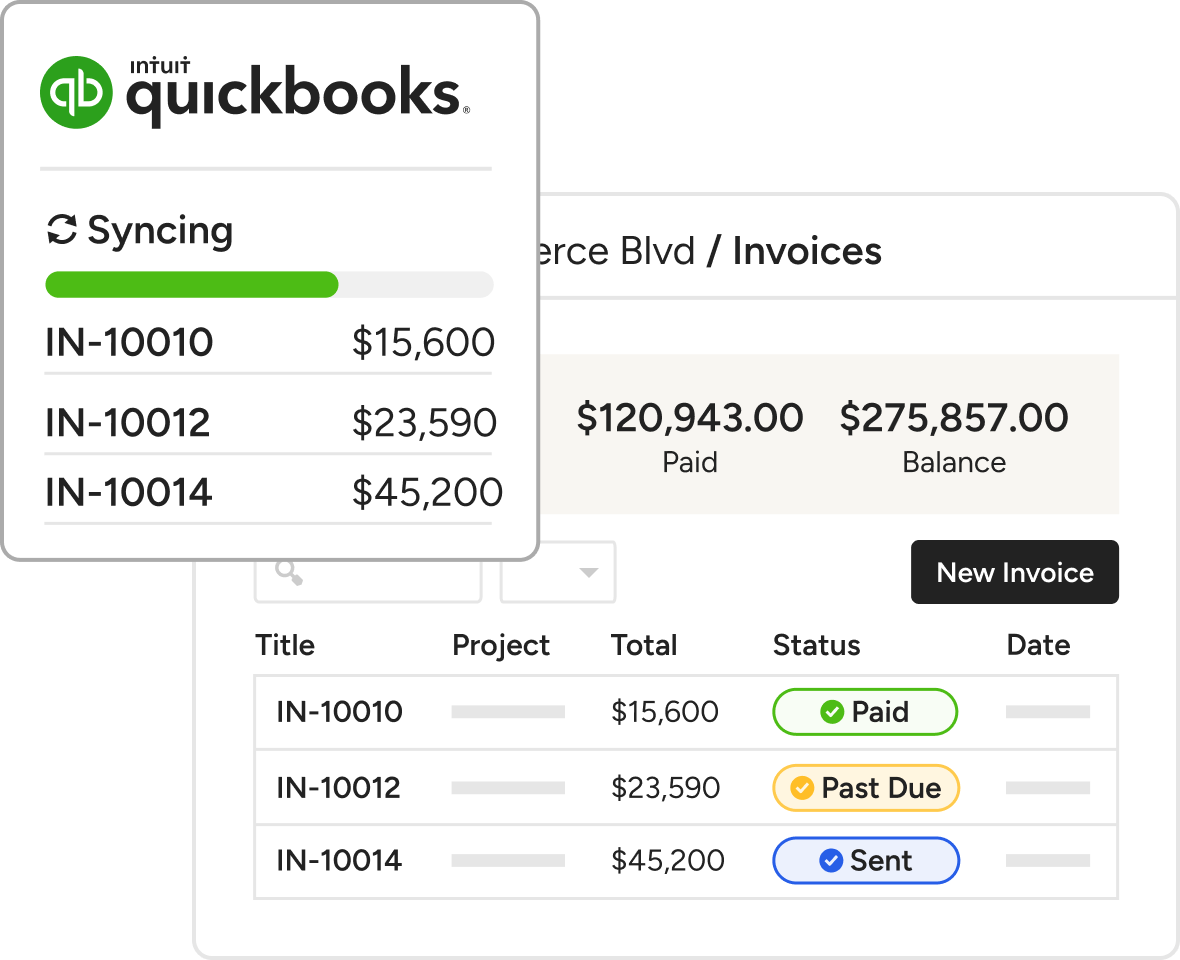
Integrate your QuickBooks Online to save time on bookkeeping
- Connect your Houzz Pro account to QuickBooks Online to automatically sync invoices and reduce double entries. Learn how here.

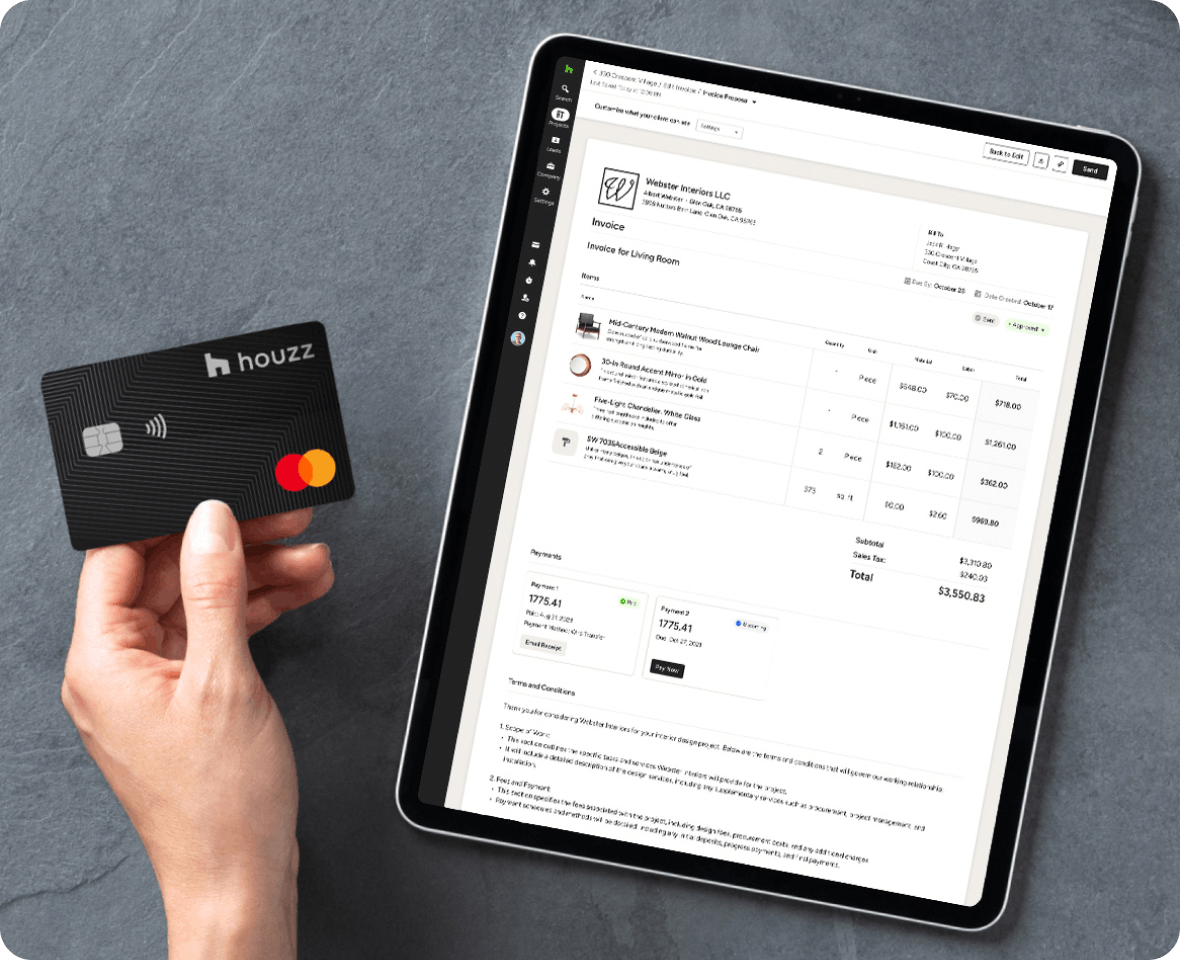
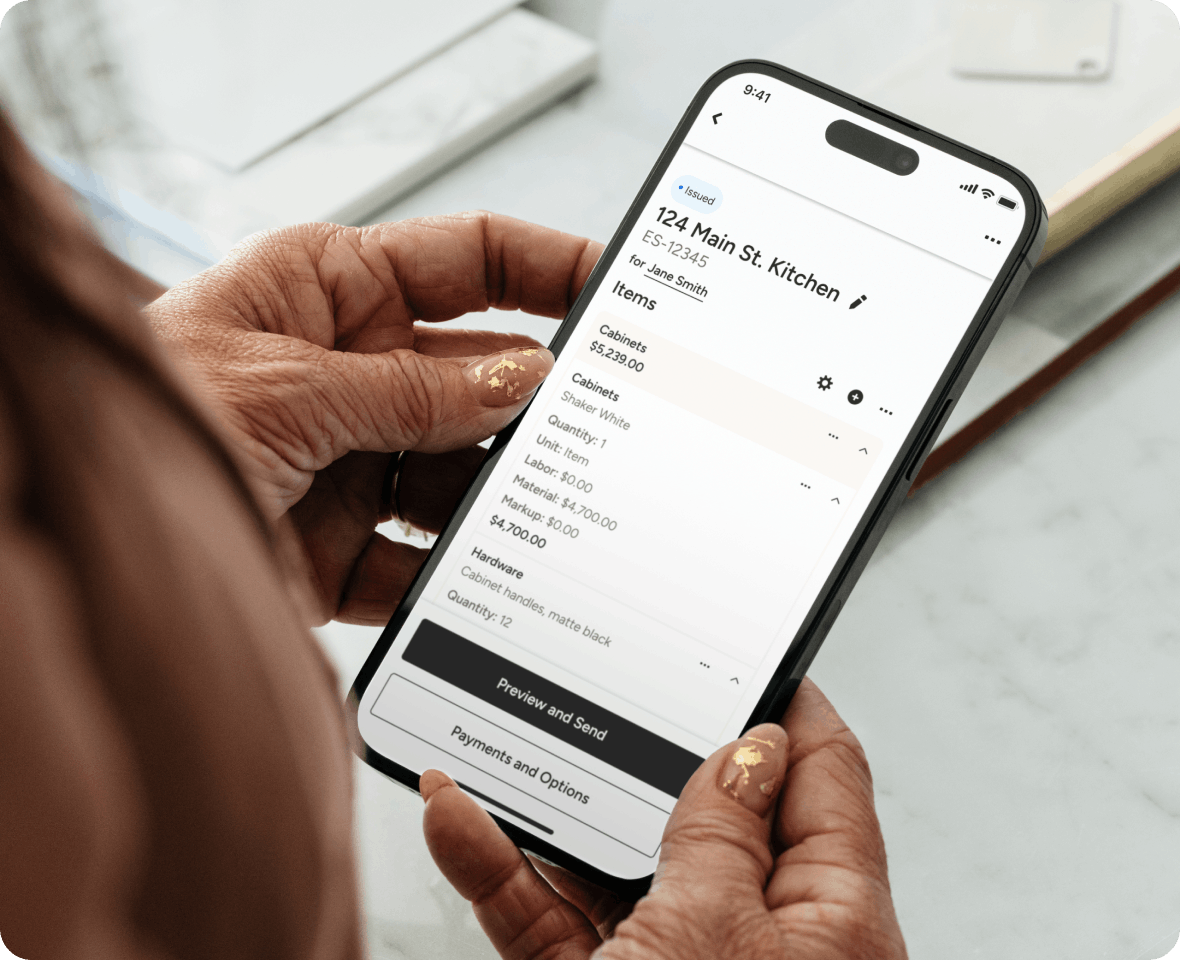
Create a professional Proposal to share with your client
- Get started by creating a new proposal from scratch, uploading an existing proposal, using a template or converting an approved Selections Board. See how to create a proposal here.
- Add line items from your library of clipped products or choose from your own products and services to build out your proposal.
- Once you have a completed proposal, you can set up the payment schedule to let clients know when their bills are due and so you know when you’ll get paid. Learn how here.
- When you’re ready to share the proposal with your client, they can access it anytime anywhere through the Client Dashboard, which is branded with your business logo. Learn about the client dashboard here.
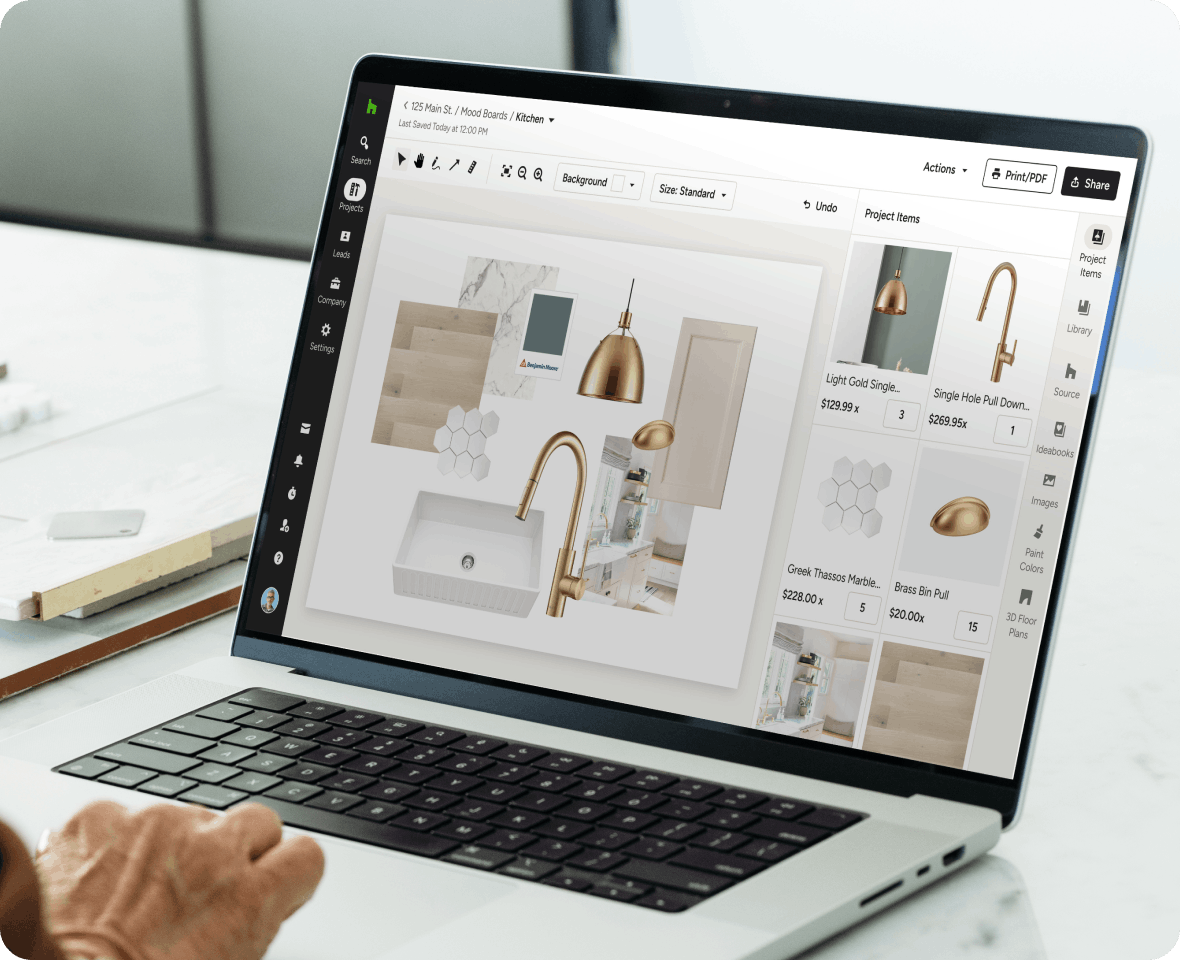
Create a Mood Board to get your clients’ buy in on the overall design vision.
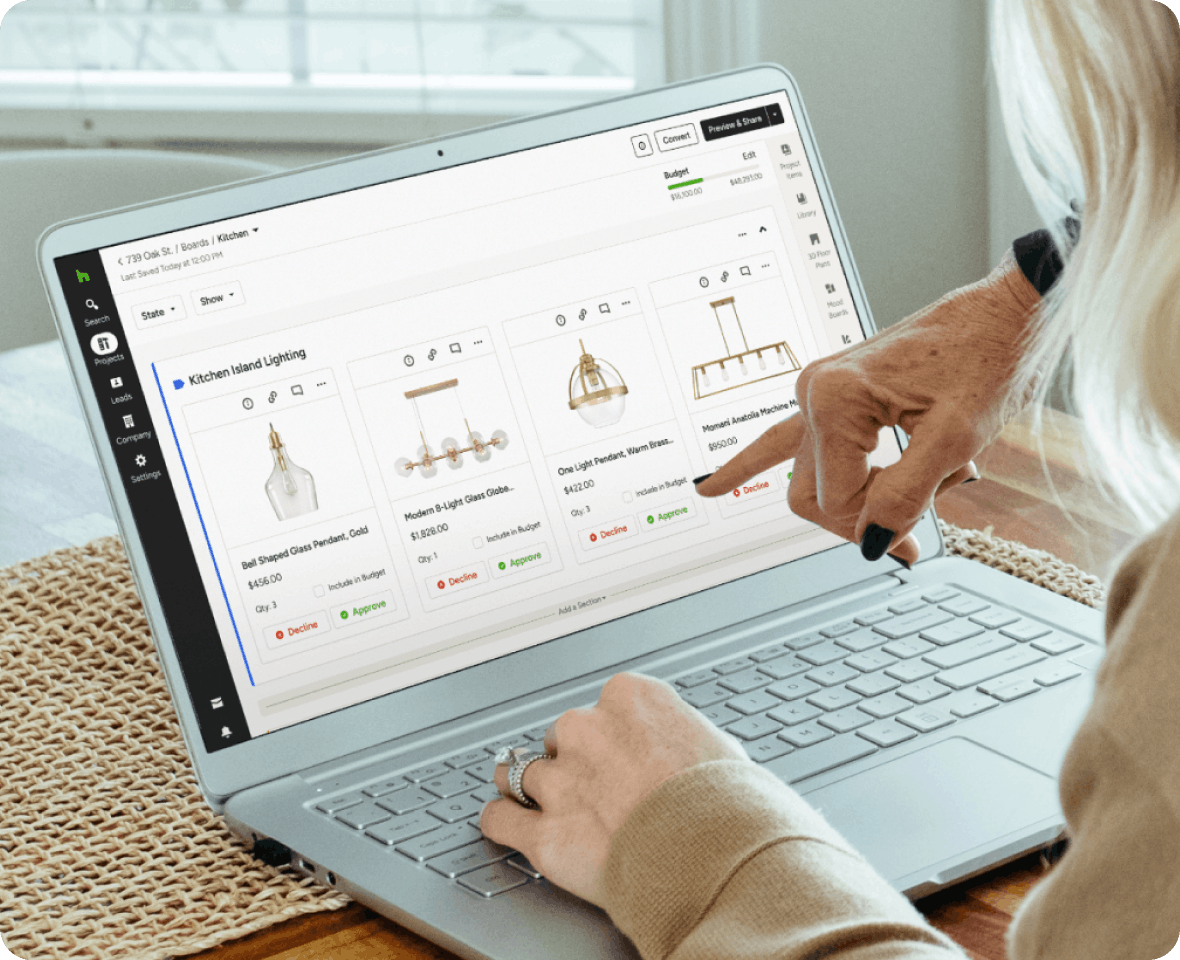
Create a Selections Board to house all your design ideas, client feedback, and budget considerations in one place.
- Once you have a project set up and the Clipper installed, see how to create your first board here.
- Organize your boards by room, by product type, or however works best for you. Drag and drop products from the Clipper or your Library into your Selections Board. Add 3D Floor Plans, architectural plans, Mood Boards and more to create a single source of information for the project.
- The Selections Tracker allows you to track product details, order status, tracking information, and more - in one centralized place. You can customize the Tracker with your own columns and even export your tracker to share with team members, vendors or clients. See how to use the Selections Tracker here.
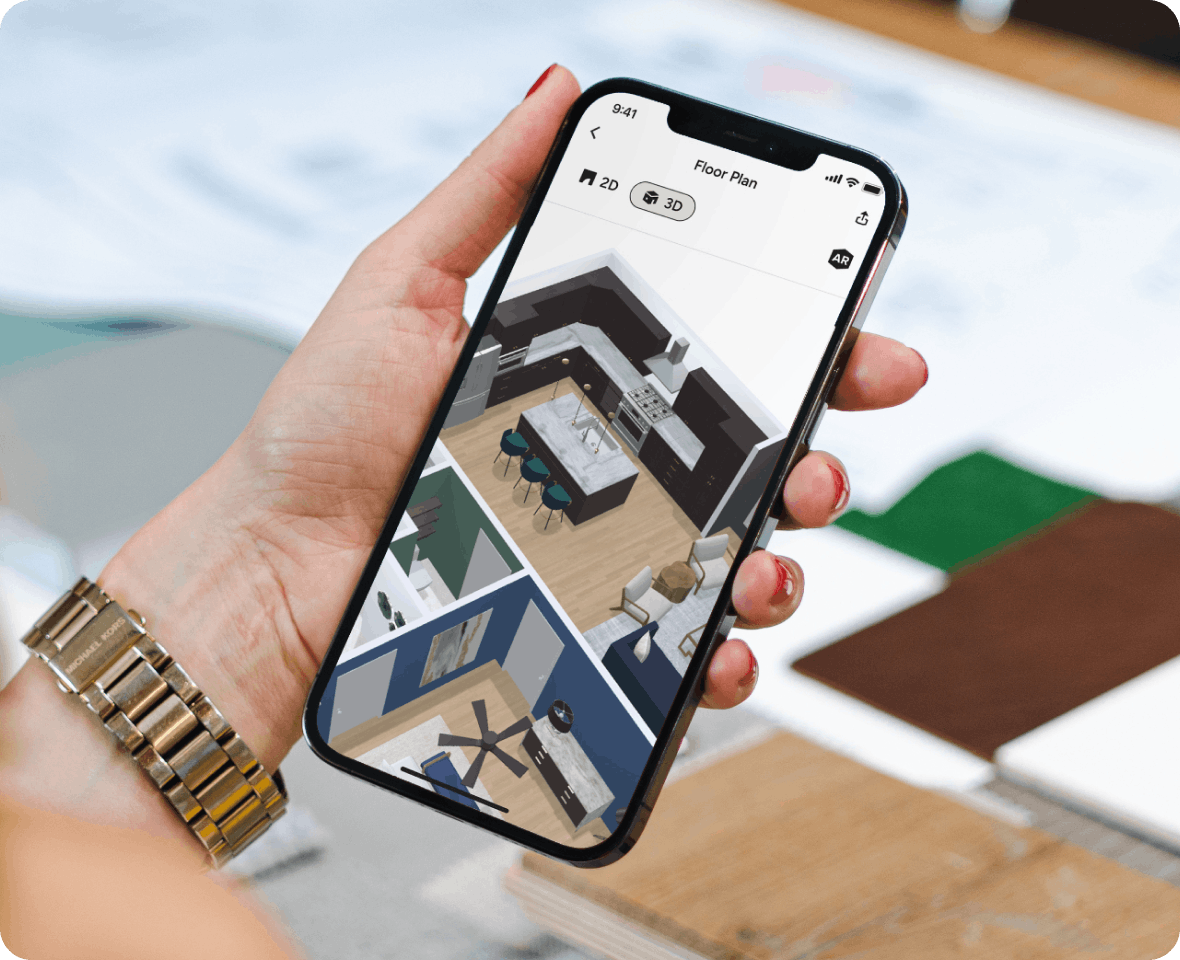
Create a 3D Floor Plan to help your client visualize the design of their space, or use it as a tool to help you pitch and win jobs.
There are four ways to get started:
- Scan rooms with your phone: Download the Houzz Pro app and use your mobile device’s camera to quickly make a virtual model. Watch our tutorial.
- Build a room from scratch: Click on the pen icon in the top toolbar to start drawing walls. Then add windows, doors, and other structural elements with a couple clicks.
- Begin with a template: We offer templates for popular project types like kitchens, bathrooms, bedrooms and living rooms. Check out our templates here.
- Import a 2D Drawing: If you already have a 2D drawing, watch this video to save time by importing, then tracing over it to create your floor plan.
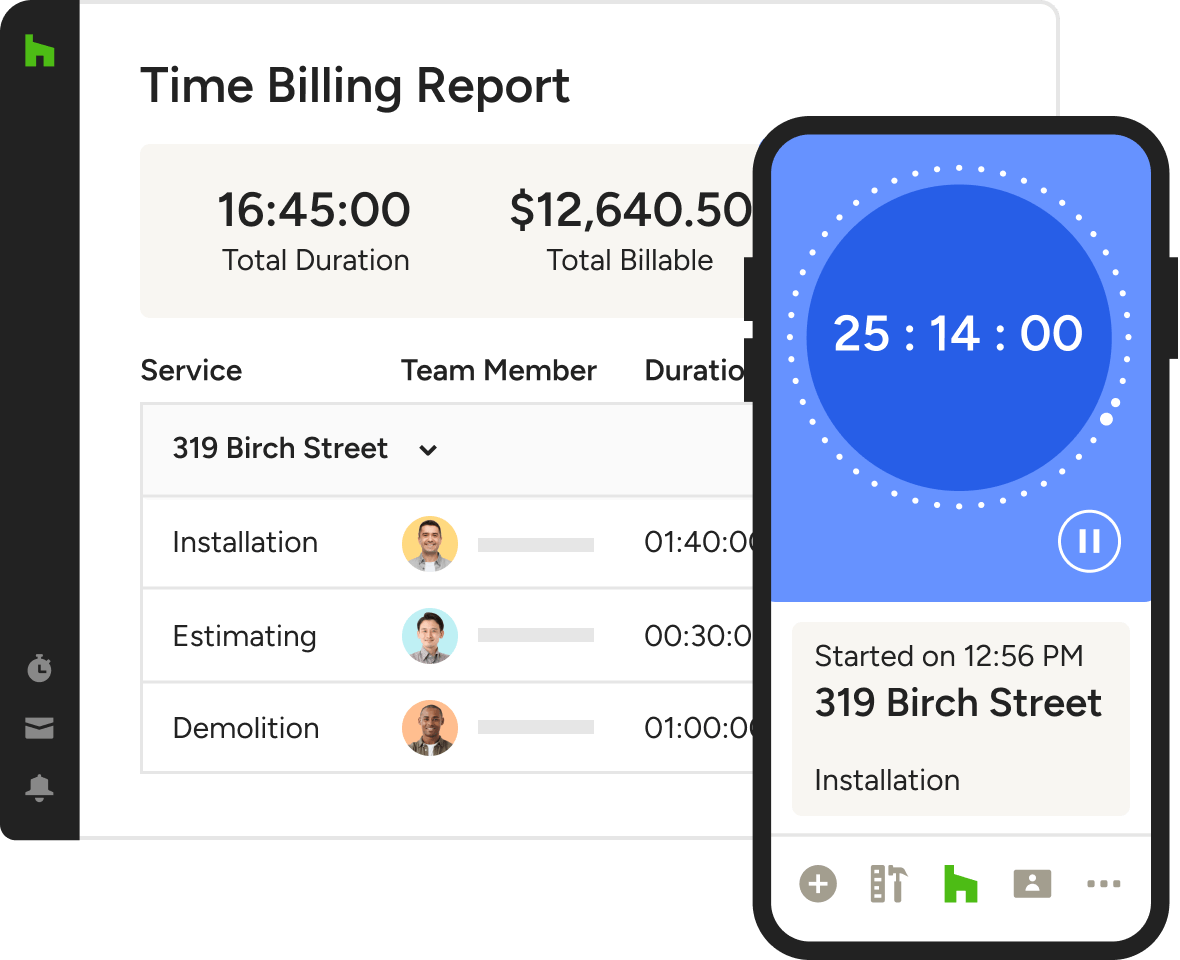
Keep track of your time and expenses
- Manage your time and expense rates for different team members so you have an accurate view for each project. You can track time using the stopwatch icon, or enter time manually. See how here.
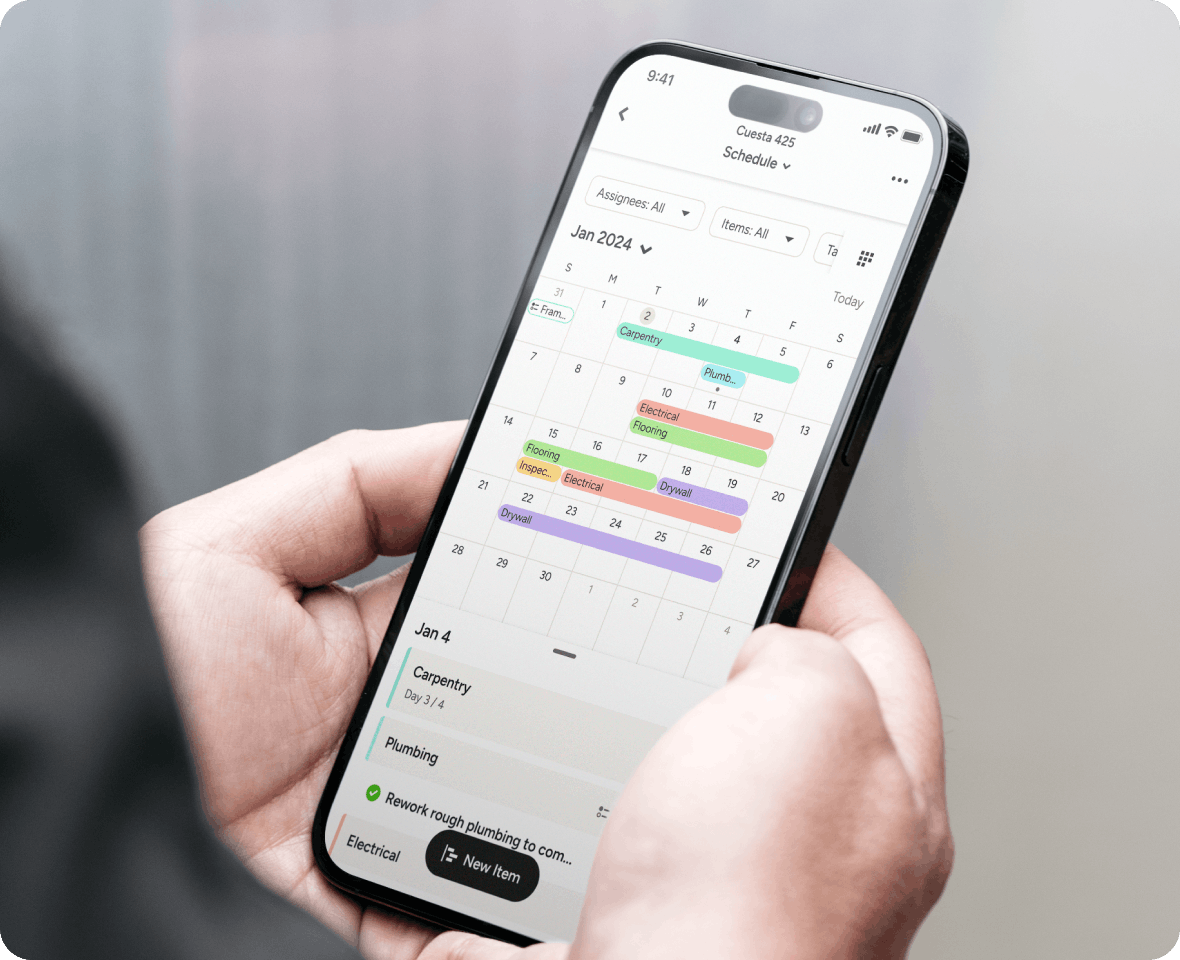
Build a Schedule so you can keep track of each phase of your job without missing a beat.
- See how to create your first schedule here.
- You can add activities, create dependencies, and delegate tasks.
- Save any schedule as a template for future projects.
Need help? As you’re learning your way around, here are some resources you can check out:
- The Houzz Pro Help Center - It’s filled with short video tutorials and articles to walk you through how to use each feature. Access the help center here.
- Our team is only a click away in live chat, available Monday-Friday from 6am- 5pm PST or at (833)-452-3779.
Still need help?