How to Create a Project

Projects are a key organization tool within Houzz Pro. Within a project, you can request payments, collaborate with clients, communicate with your team or subcontractors, share a project schedule, create a floor plan, financial documents, mood boards and more. With this full set of tools, you’re set to manage your workflow and bring every project to completion.

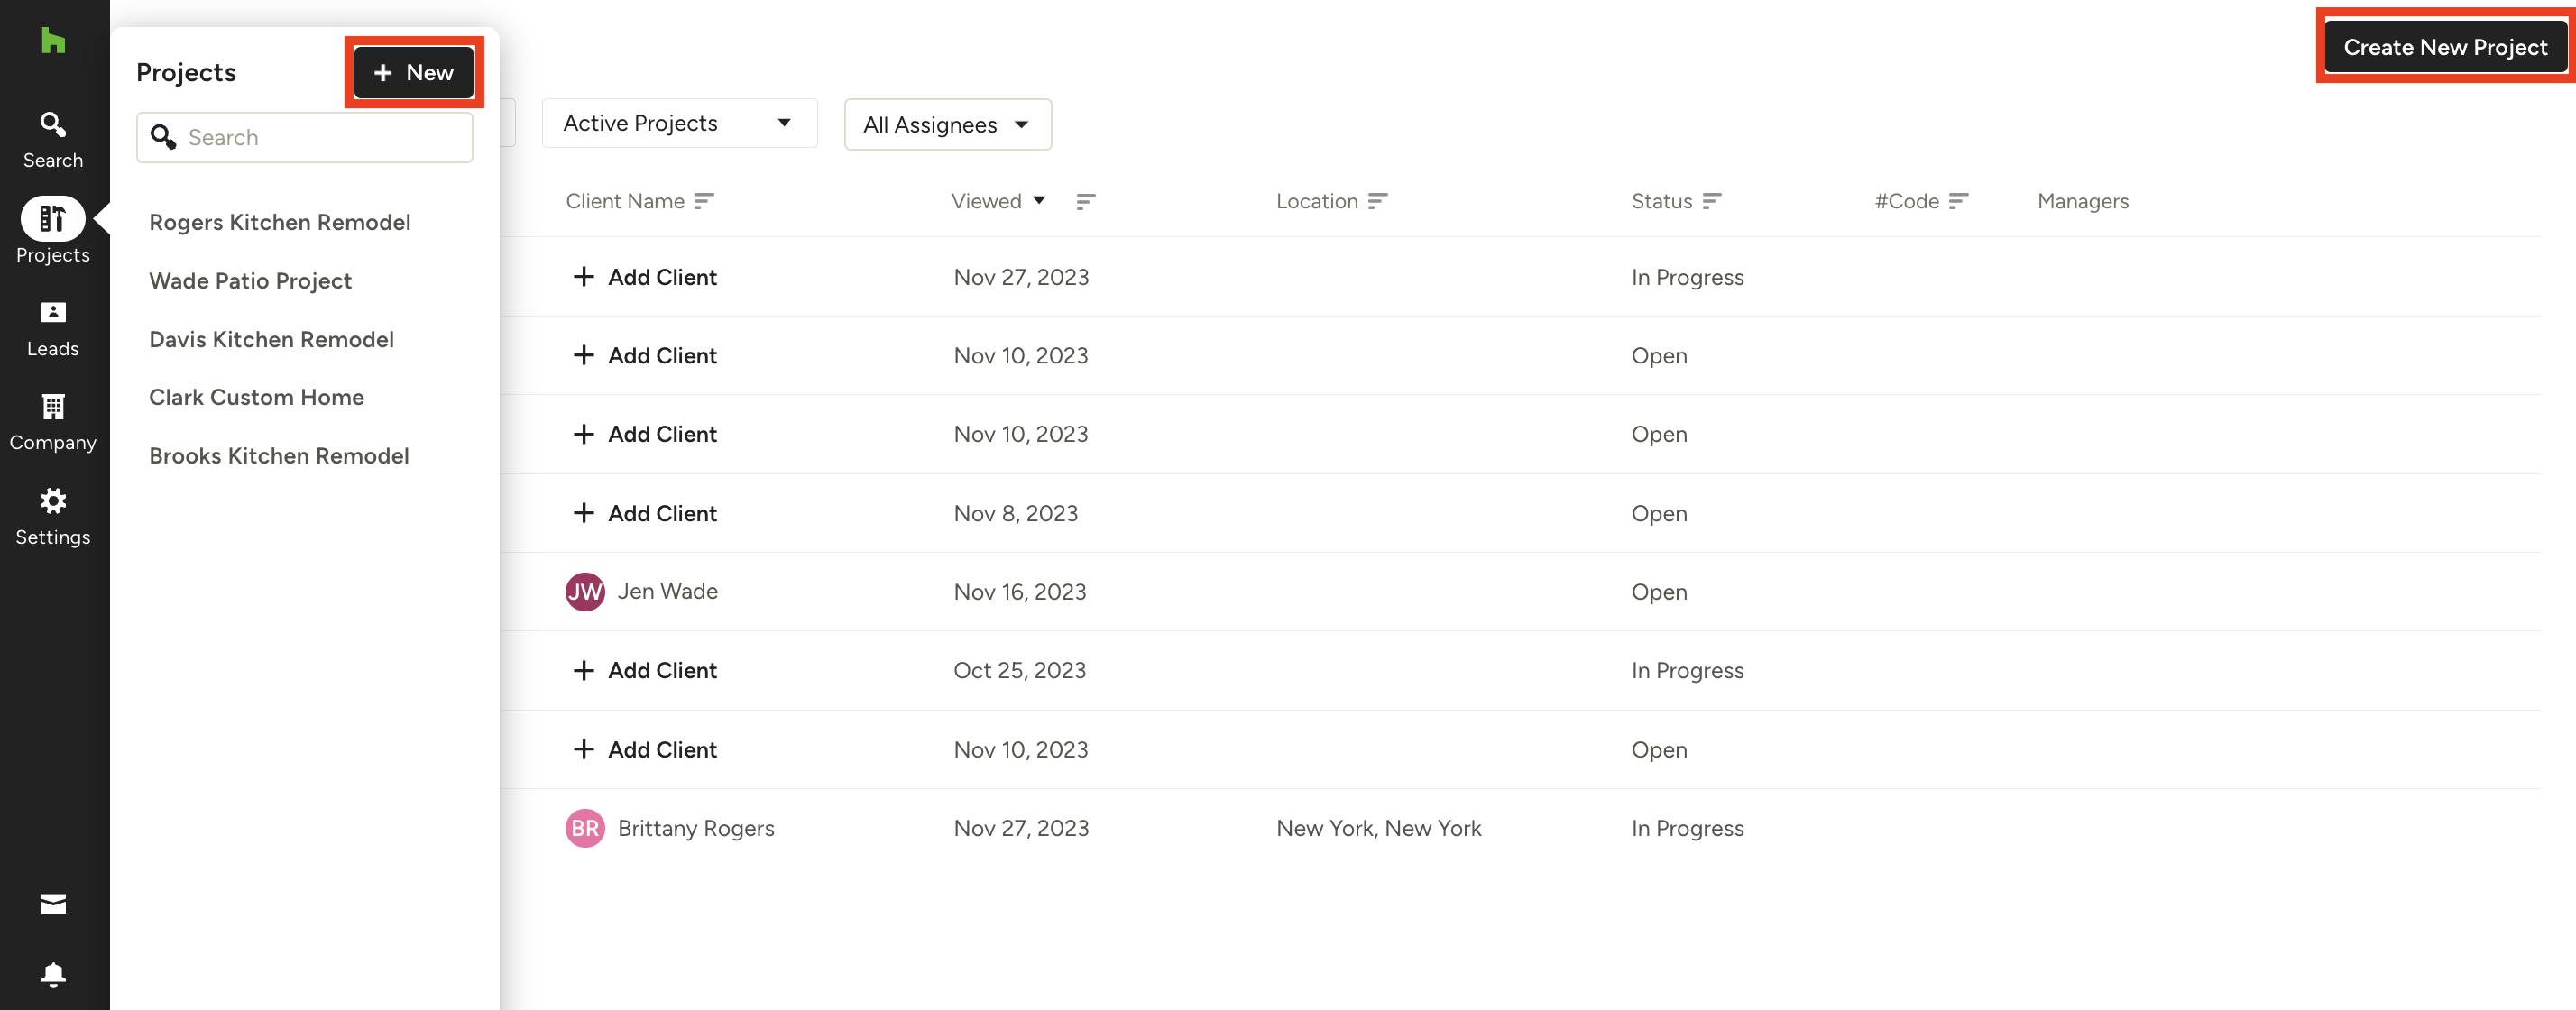
There are several ways to create a new project. You can:

1. Select the Create New Project button in the Projects module on the home page.

2. Select the Projects icon from your left navigation and click the New button (as shown below).

3. Select the Create New Project button from your All Projects page (as shown below).

4. Create a new project while creating a document, such as an estimate or proposal.

You only need to enter the project name to create a new project, though you can also invite team members if you'd like. Everything else, such as client information and budget, you can add in later on.

Be sure to click Create Project once complete.

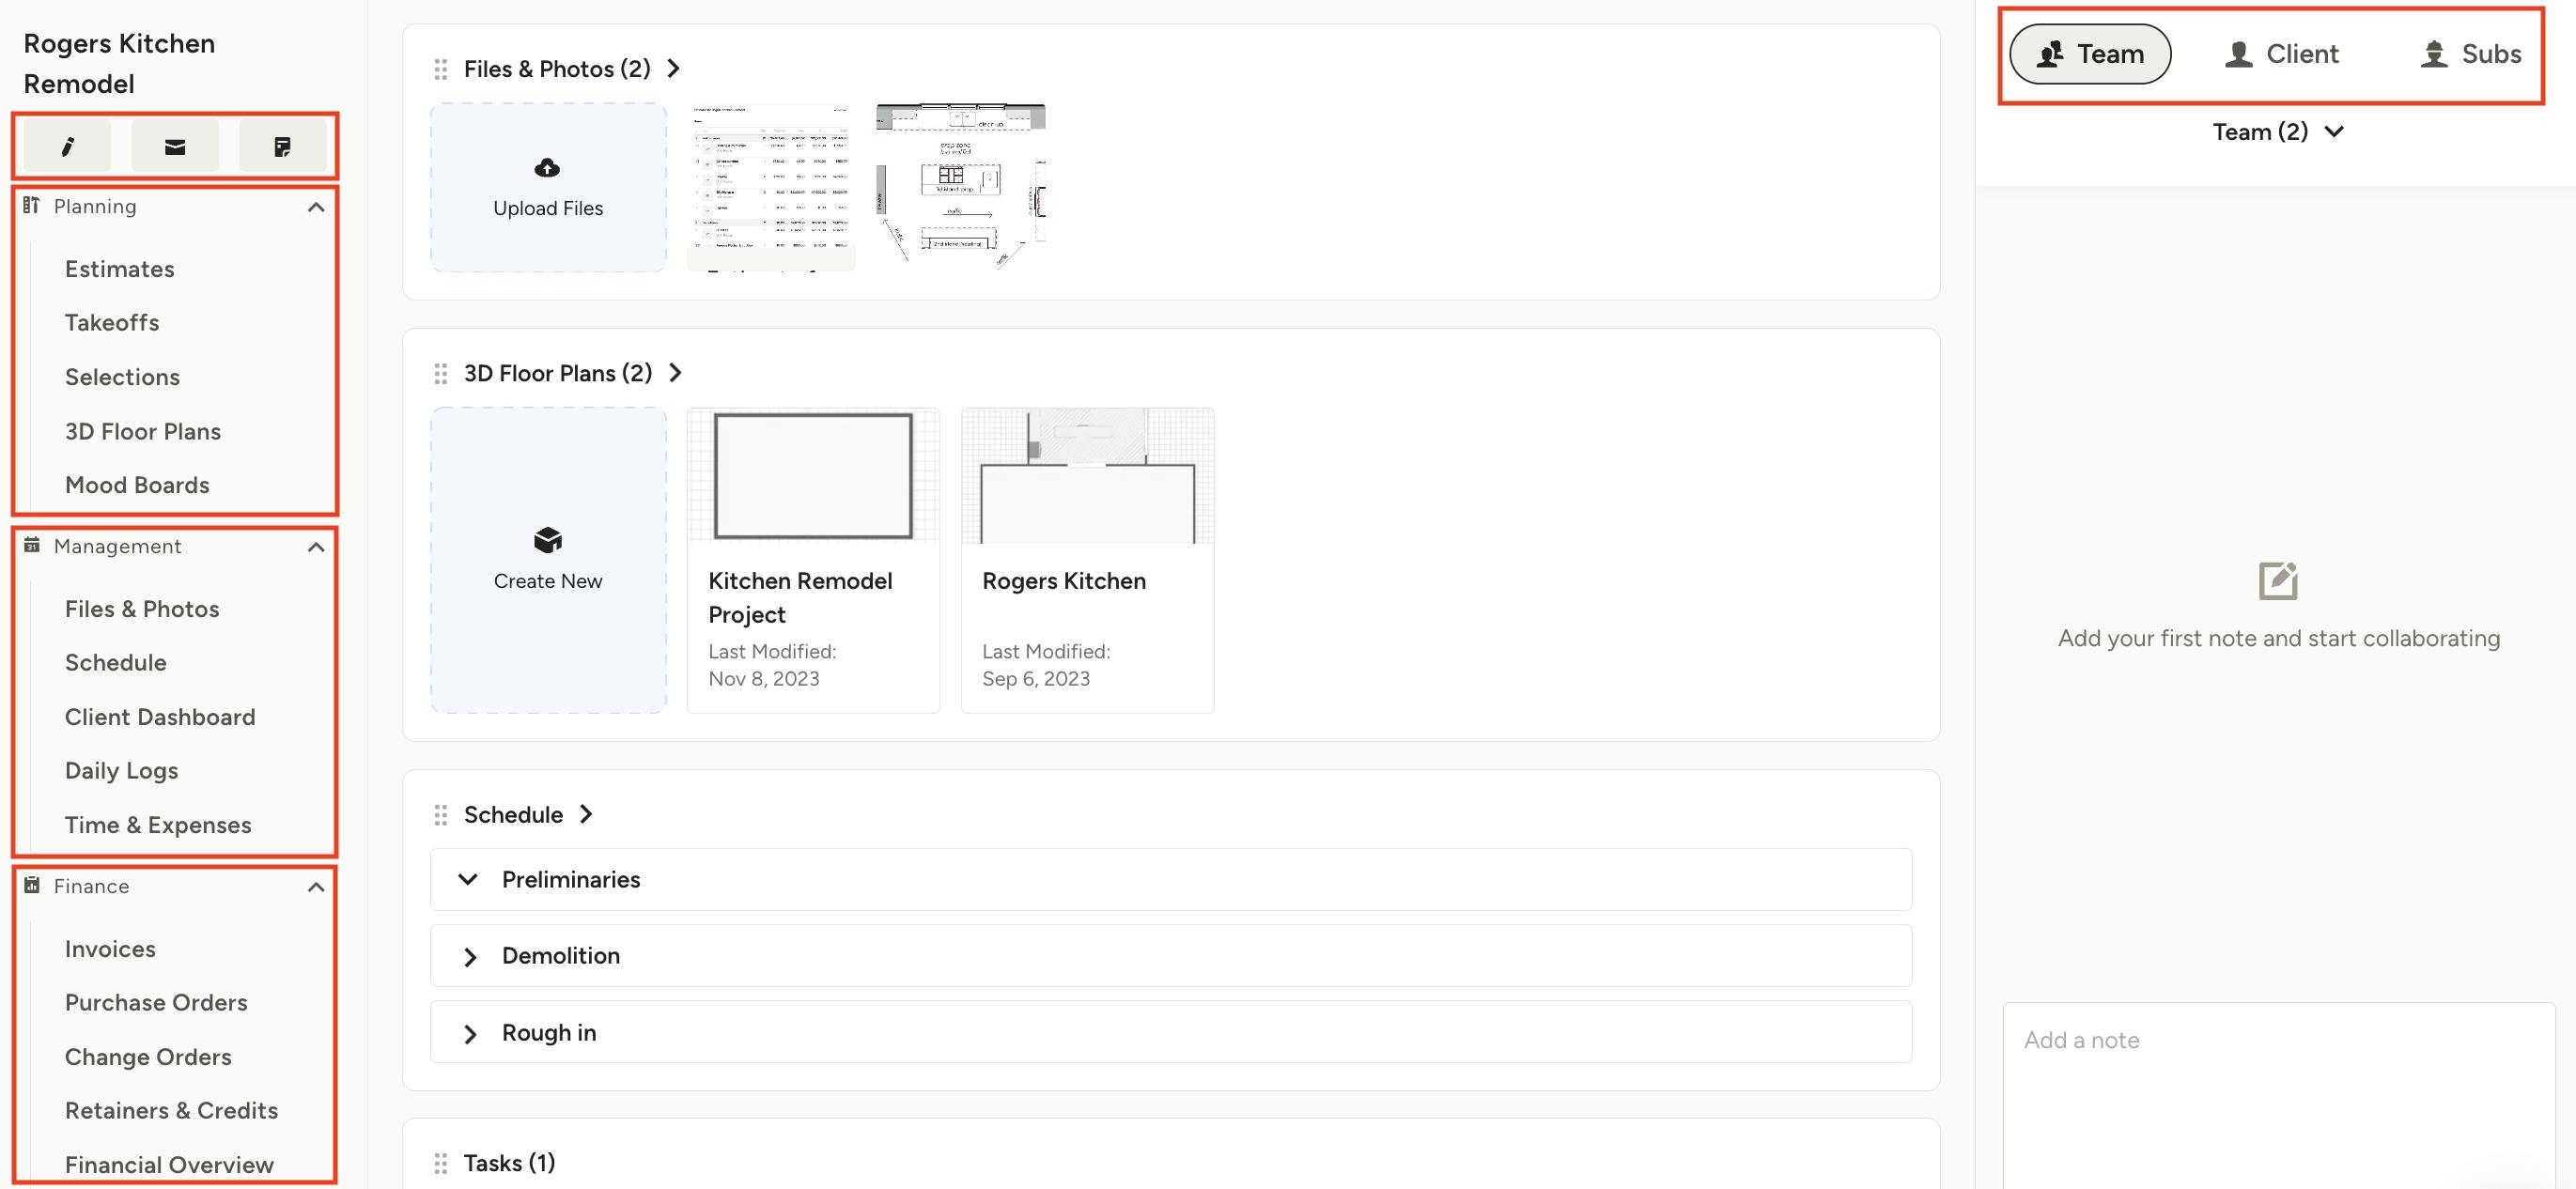
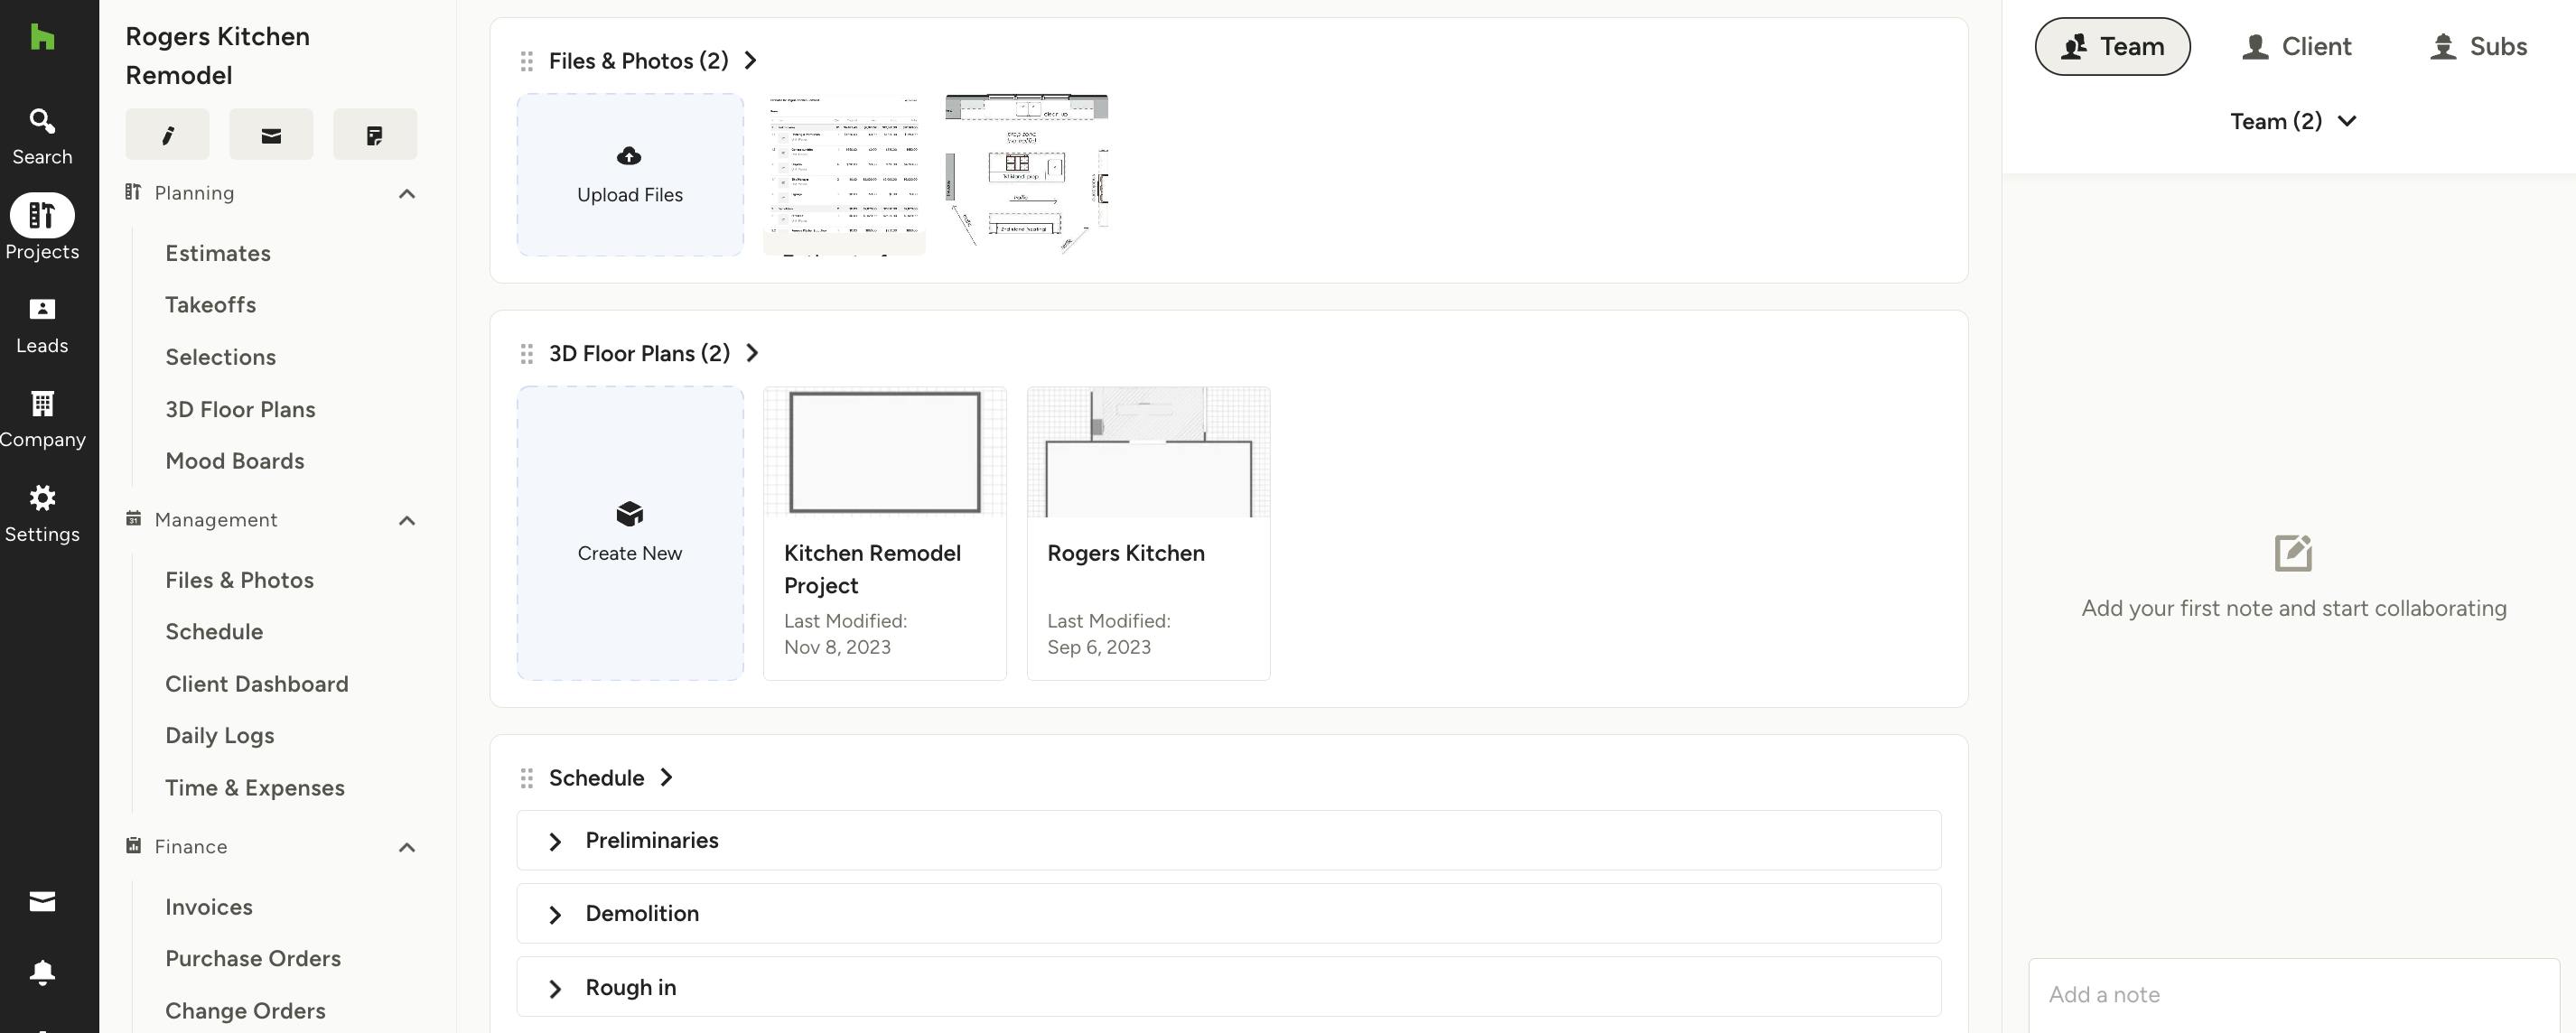
Project Overview Page

Once you have created your project, you can access the project overview page to see key information all in one place. Here are some actions to get you started.

  • Quick View Project Summary: At the top of your project, view a quick summary of your project, including project status, client information and project address.
  • Edit Project Information: Click on the gear icon in the top left of your project page to add more details about the client or the project scope (see more details below).
  • Send Messages: Click on the Message icon in the top left of your project page to send or view client messages.
  • Save Notes: Click on the Notes icon in the top left of your project page to add notes about the project.
  • Project Planning: In this section, you can create content related to your project, including estimates/proposals, takeoffs, 3D floor plans, mood boards, selection boards, and selections tracker.
  • Project Management: In this section, you can organize your project details with files & photos, schedule, tasks, client dashboard, daily logs, and time & expenses.
  • Project Financials: In this section (not shown), you can request and document payments with invoices, purchase orders, change orders and retainers/credits. You can also view Financial Overview to get a big-picture overlook for your project.
  • Client, Team and Sub Access: On the right-hand side (shown below), you can add new team members, clients and subcontractors to your project so they can access project information.

Track Project Activity

At the bottom of each project overview page you will find a Project Activities section. This provides you with a feed of activities related to the project you're viewing, enabling better collaboration and awareness among team members, clients, and subcontractors, while also improving transparency and accountability.

You can click on the action to the right of each activity to be taken directly to the feature it pertains to, as well as sort by oldest to latest or latest to oldest using the Sort option at the top of the feed.

Edit Project Details

If you need to make changes to general information about the project, including client and project information, project settings and payment details, you can do this within the Project Details page. To access, click the gear icon underneath the project name, then select the relevant tab at the top of the page.

Client Information

In the Project & Client tab, you can view details about the client connected to the project. Click Edit Client Details to make changes to the client information, including name, email address, phone number, home address, and any internal notes you would like to include.

Project Information

Below client details, in the Project & Client tab, you will see project information, including project name, project status, project color, project type, project code, project address, project budget and additional information. Also in this section, you can delete the entire project by selecting the Delete Project button at the bottom. Read How to Delete a Project to learn more about project deletion.

  • Project Name: The project name is required to create a project, but it can be adjusted here.
  • Project Status: The project status helps you keep track of where you are in the process. Options include Open, In Progress, Done or Closed. You can also add a custom status as well. Read How to Change Project Status to learn more.
  • Project Color: The project color allows you to customize your project color to better organize your projects within Houzz Pro. Your project color will be used throughout Houzz Pro for easy identification.
  • Project Type: The project type defines the scope of the project. There are dozens of options to choose from, or you can add a custom project type as well.
  • Project Code: The project code is used to simplify classification for related project documents. It is optional and and can be a combination of any letters or numbers. If you use a project code, that code will appear on any new associated documents for that project. For example, a project code of RK will appear as ES-RK-1001 in an estimate for that project. If you don't use a project code, that same estimate will appear as ES-1001 and not include a project code. Read How to Edit Your Document Settings to learn more about document codes.
  • Project Address: The project address will default to the address listed in the client's detail page. If the project address is different and you would like to edit the listed address, deselect the "Same as Client Address" checkbox. You will then be able to edit the address as needed and deselect or select the billable address and shipping address checkboxes as needed. Read How to Add Multiple Addresses for a Project to learn more.
  • Project Budget: The project budget is where you can input the total budget for the project.
  • Additional Info: The additional info section is a great place to put notes about project scope, preferences, and more.

Project Settings

In the Project Settings tab, you can set a default project tax rate that will apply to all new financial documents within the individual project. Learn more about tax settings in How to Set Tax Rates.

Online Payment Details

In the Payment Details tab, you will see online payments information. You can set up online payments, if you haven't already, or adjust which payments are available for that project, if online payments are set up. Read How to Set Up Online Payments and How to Edit Online Payment Settings to learn more about the process.

View All Projects

Your All Projects page, accessible by clicking the Projects icon in the left navigation, gives you an overview of every project, along with key details including client, location, status, type and manager. You can find projects by using the search bar and/or filters at the top, or sort your projects by clicking on the column header that you wish to sort by.

Pin Projects for Quick Access

When you have multiple active projects, it can feel challenging to quickly locate high-priority or frequently accessed projects in a long list. With the pin feature, you can add important projects to the top of your All Projects page for easy access. To pin a project you can either click the pin icon to the right of a project's name, or open the three dot menu to the far right of the project row and select Pin Project. Once pinned, a project will appear at the top of the page.

To unpin a project you can either click the pin icon again, click the three dots on the pinned project tile and select Unpin Project, or open the three dots menu to the far right of the project row and select Unpin Project.

Still need help?