How to Create Accurate Wall Lengths, Angles, and Connections

When creating walls in the 3D Floor Planner, precise measurements are key to ensure an accurate, actionable floor plan. There are many different ways you can quickly and easily get the precise wall measurements you need.
To start, select the Draw Walls pencil icon in the top left of your 3D floor plan. Click your grid to start drawing the line.

Input Precise Wall Measurements
When you add a new wall or click on an existing wall, you can input the precise wall measurements in a few ways.
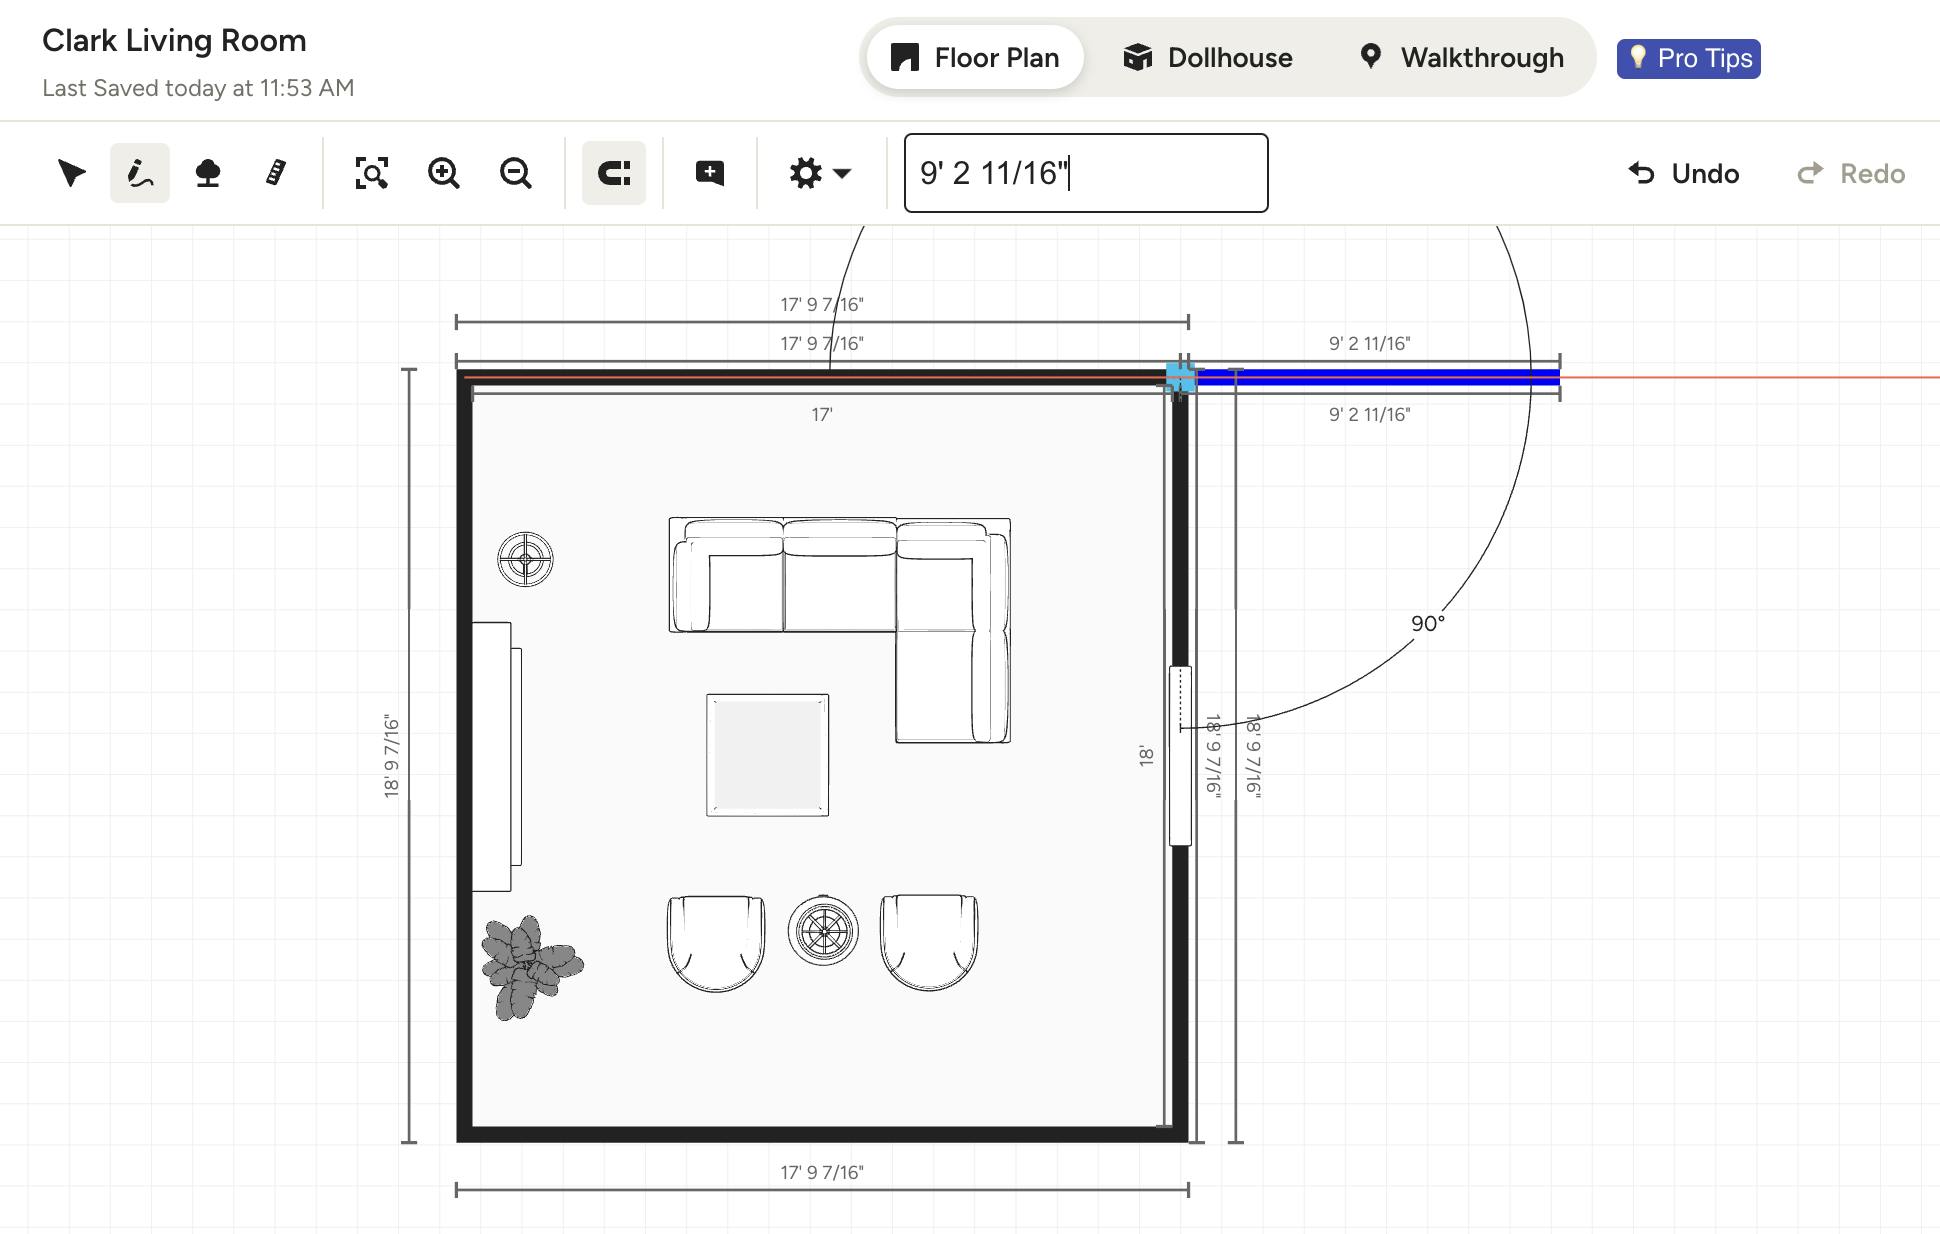
1. First, as you are drawing the line, you can type in the wall length with your keyboard. The wall will update to that exact length.
Note that the wall length input here is for the wall length center line, since the lengths of the outer and inner sides of the wall will be slightly different due to the wall thickness and number of corners.
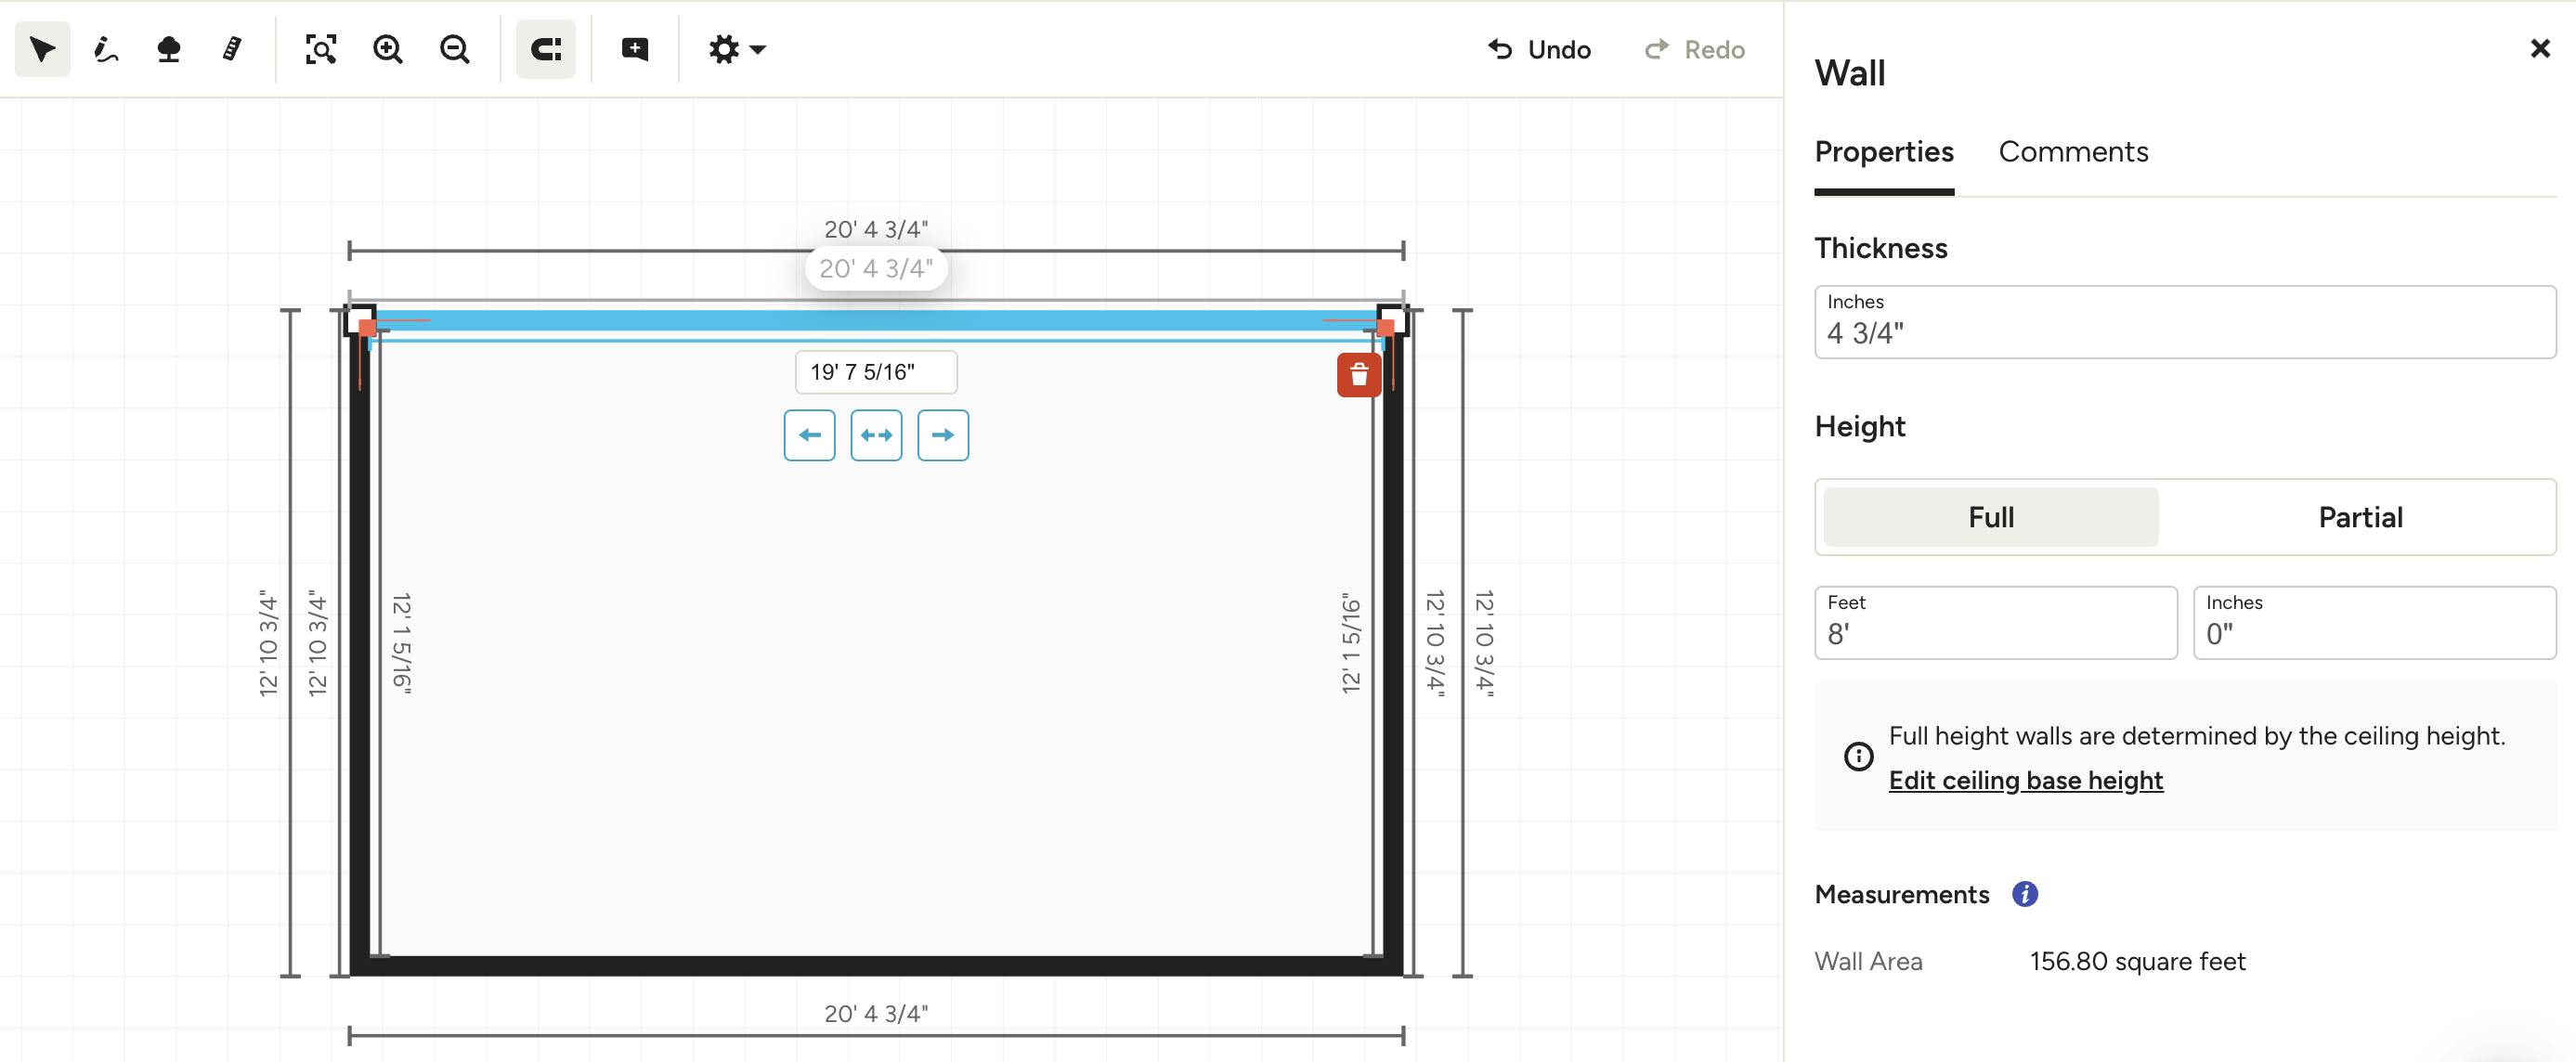
2. You can also adjust the wall length on the grid itself. After drawing the line, click on the measurement for your wall, and type in the exact length. From here, you can use the arrows to adjust the wall length in a specific direction.
Draw Walls in Straight Lines
Use the red tracking lines to guide you to draw your walls in straight lines. The red tracking lines will appear on the grid in parallel and perpendicular positions to your other walls. Wall angles will also appear on the grid.
Drag and Adjust Connected Walls
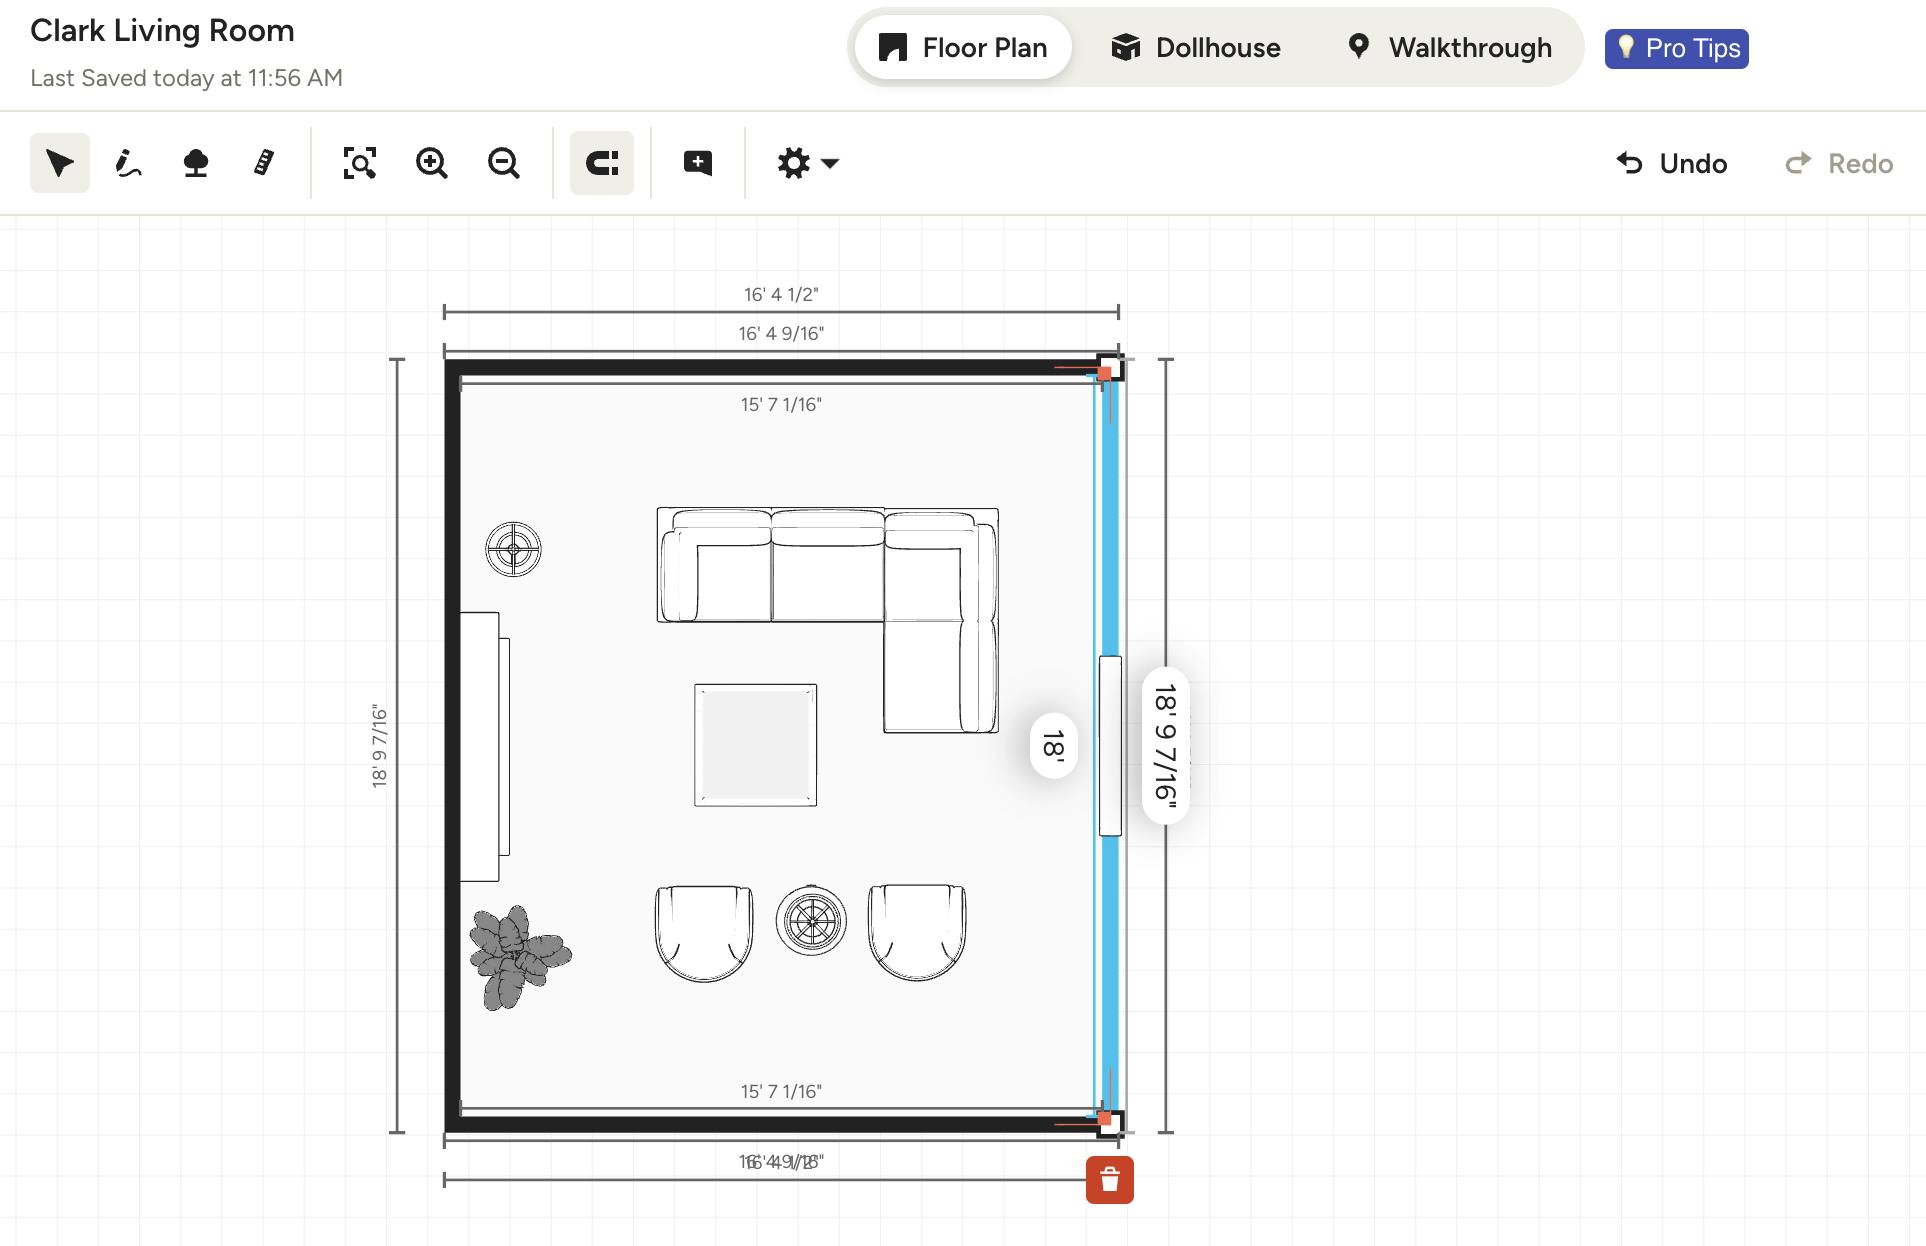
To move one wall but keep it attached to its adjacent walls, click on the wall you want to change and just drag it where you want to move it. It will remain connected to the other walls and at the same angle.
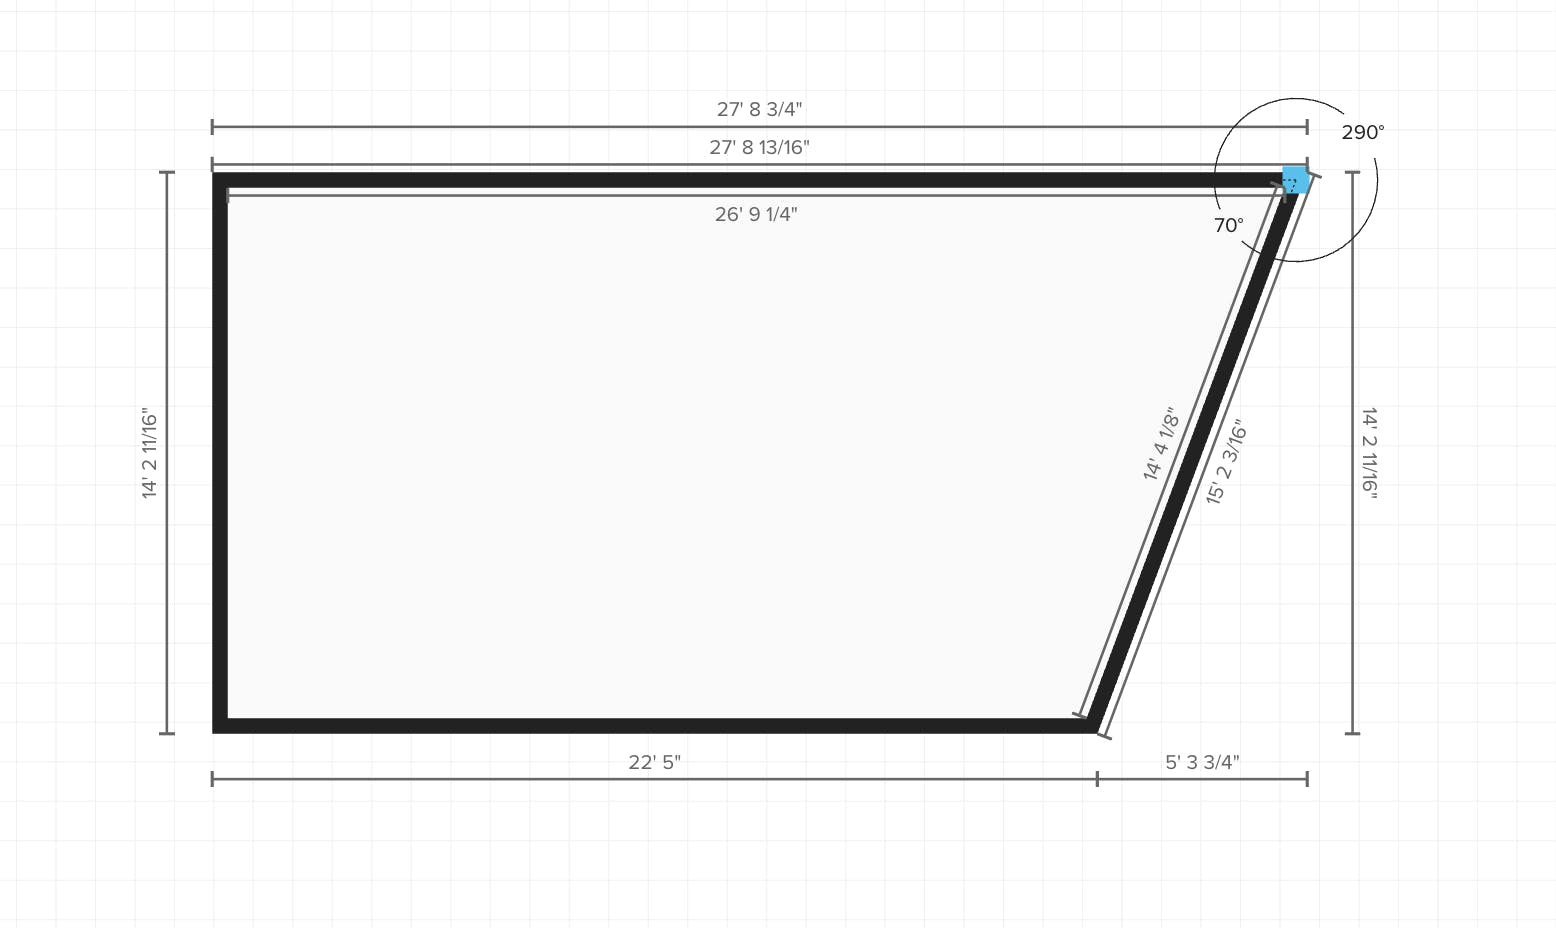
Change the Wall Angle
You can also change a wall's angle and still keep it attached to adjacent walls. Just click on a corner of the wall and drag it where you want to move it.