How to Use the Takeoffs Toolbar

When you are creating Takeoffs, the Takeoffs toolbar is the go-to spot for working with your canvas. Here, you can make measurements, create groups, annotate, add counts and more.
The Takeoffs toolbar is found at the top of your canvas. Let’s go through what each icon means.
Creating Measurements
The rectangle, polygon and length icons are how you create measurements in Takeoffs. The measurement shape determines which tool you need.
When using the measurements tools, please note that you cannot edit a completed measurement. If you need to adjust your measurement size, click the pointer icon and move, edit or delete.
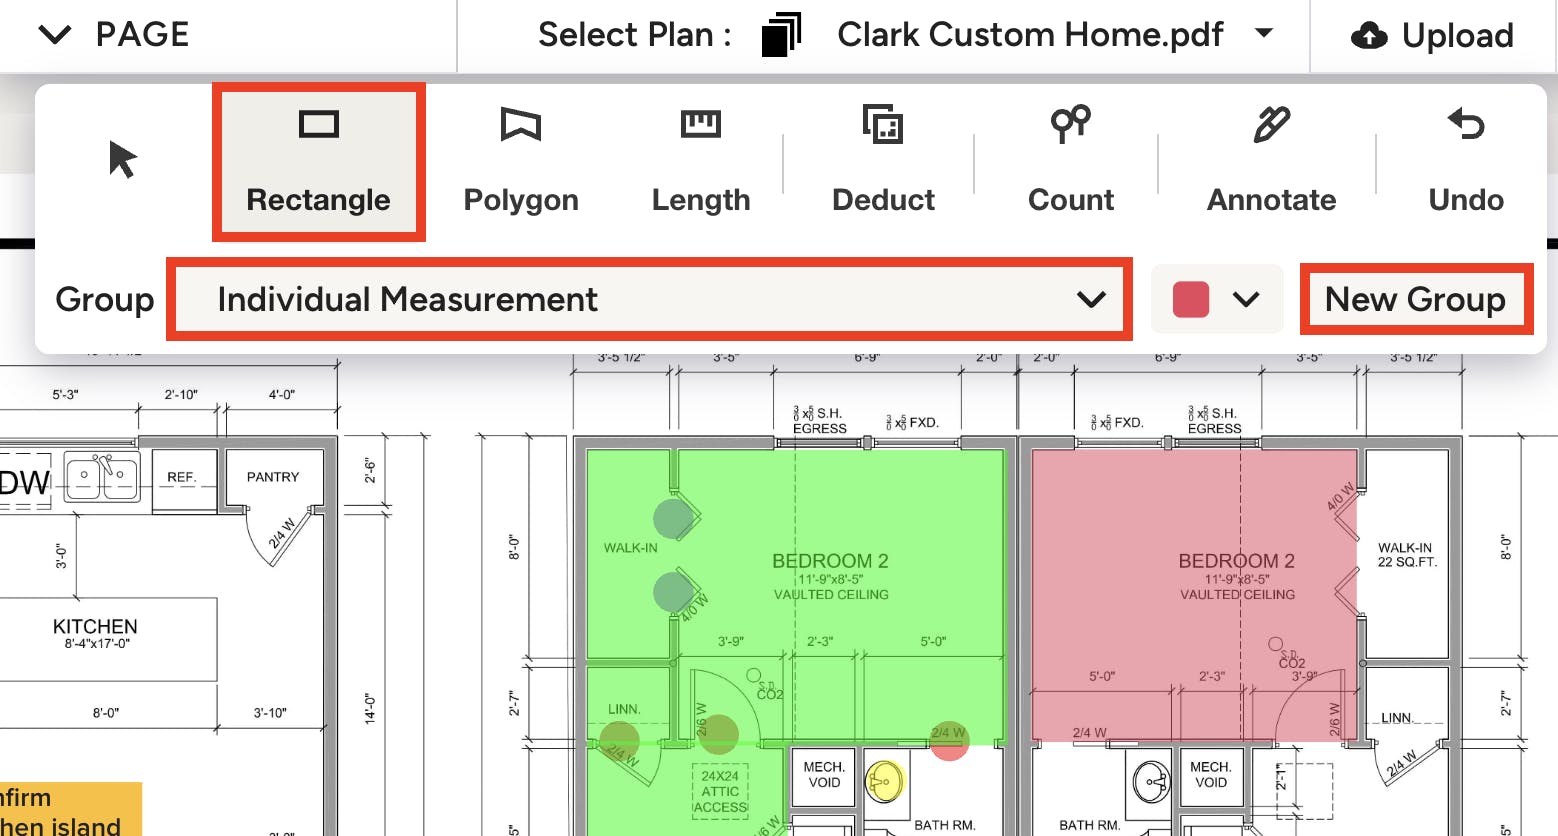
Rectangle
If the shape of your space is a classic rectangle, the rectangle icon is the fastest, most efficient way to complete your measurements.
To start, click on the rectangle icon, and select the relevant group or create a new group (more on groups below). Then, click and drag your cursor from one corner of your space to the next corner. Let go of your cursor once the rectangular measurement is complete.

Polygon
If the shape of your space is more unique, the polygon icon is the best way to customize your measurements.
To start, click the polygon icon, and select the relevant group or create a new group (more on groups below). Click on one of the corners of your space. This will create a line — drag the line to the next corner and click. Continue to drag the line and click on corners until the measurement is complete. Once you are done, double click on the final corner to complete your measurement.
Length
The length icon is very similar to the polygon icon — it allows you to customize measurements for perimeters, but it can also be used for a simple linear measurement from one point to another.
To start, click the Length icon, and select the relevant group or create a new group (more on groups below). Click on one of the corners of your space. This will create a line — drag the line to the next corner and click. Continue to drag the line and click on corners until the measurement is complete. Once you are done, double click on the final corner to complete your measurement.
Editing Measurements
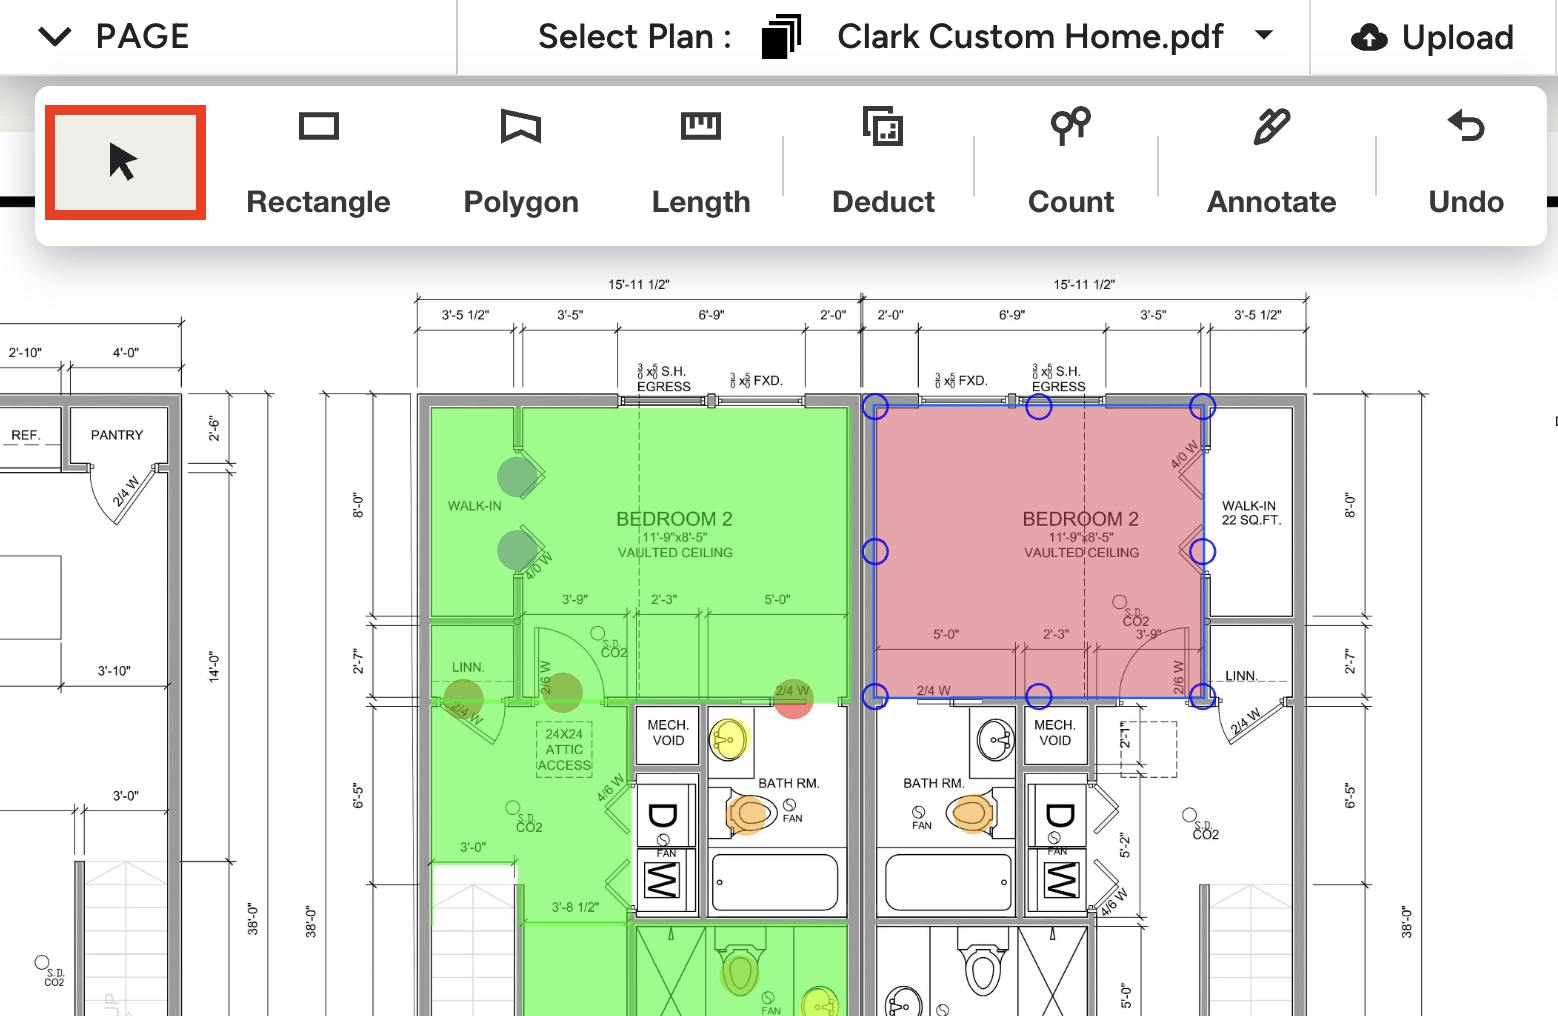
Pointer
The pointer icon is used whenever you want to make changes to existing measurements or counts, such as moving, editing and/or deleting.
To move/edit: Click the pointer icon, then click and drag the measurement or count where needed. To adjust the size, click on a corner or middle dot on a line to change the height or length.
To delete: Click the pointer icon, then click the delete button on your computer keyboard.
The pointer icon also allows you to move and click freely within Takeoffs, such as when you are changing pages, adjusting the scale, or reviewing/editing your Measurements Drawer.
Grouping Measurements
Setting up your categories and groups early on in the measurement process will help you stay organized while creating your Takeoffs. Grouping measurements makes it easier for you to get project material totals — it's also easier for clients and/or other team members to understand.
To use an existing group, click any of your measurement tools in your toolbar menu, then click on the group dropdown. Select the relevant group from the list.
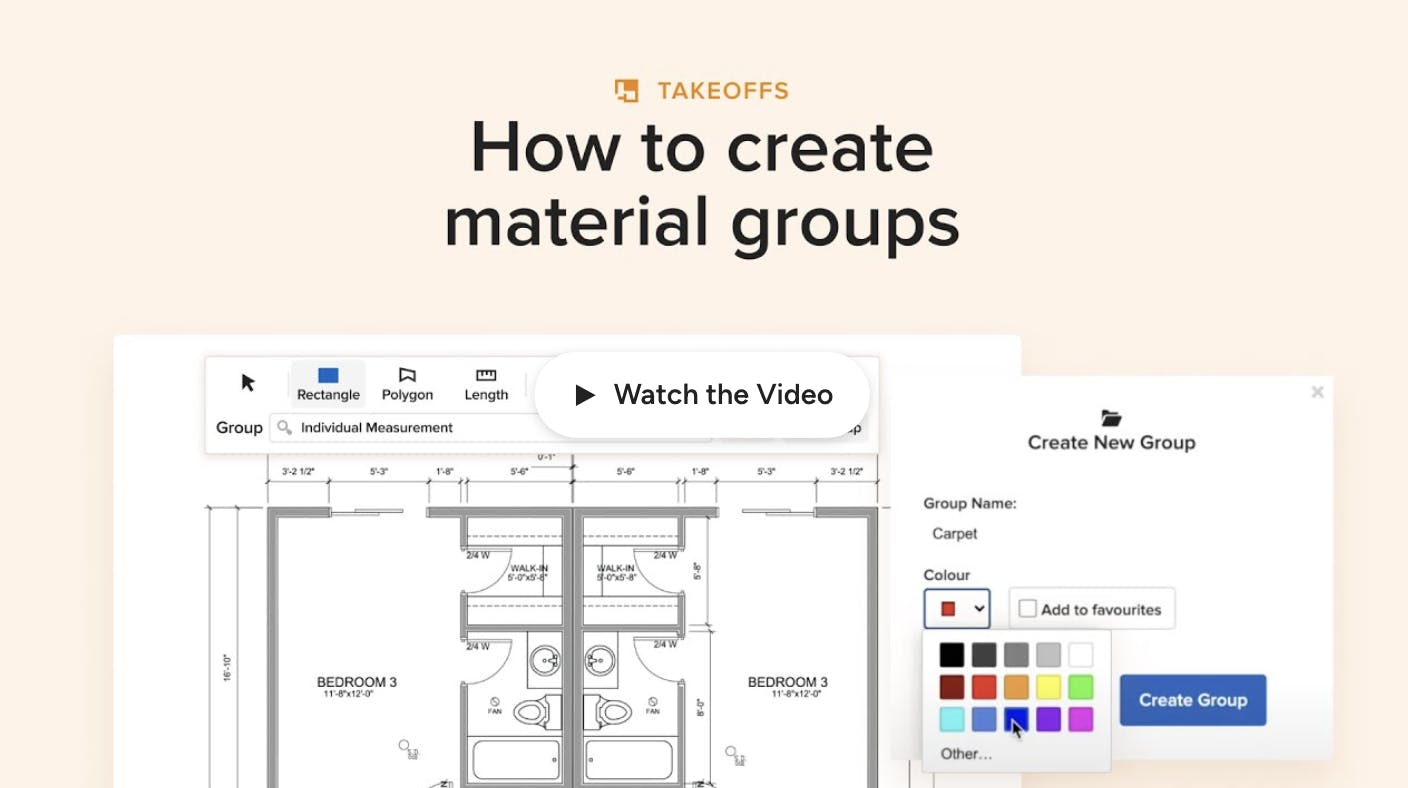
To create a new group, select New Group. A new screen will appear where you can add the group name, category (new or existing), and color, as well as add to favorites if you plan to re-use. Be sure to click Create once complete.
Watch the video below to learn more about groups.
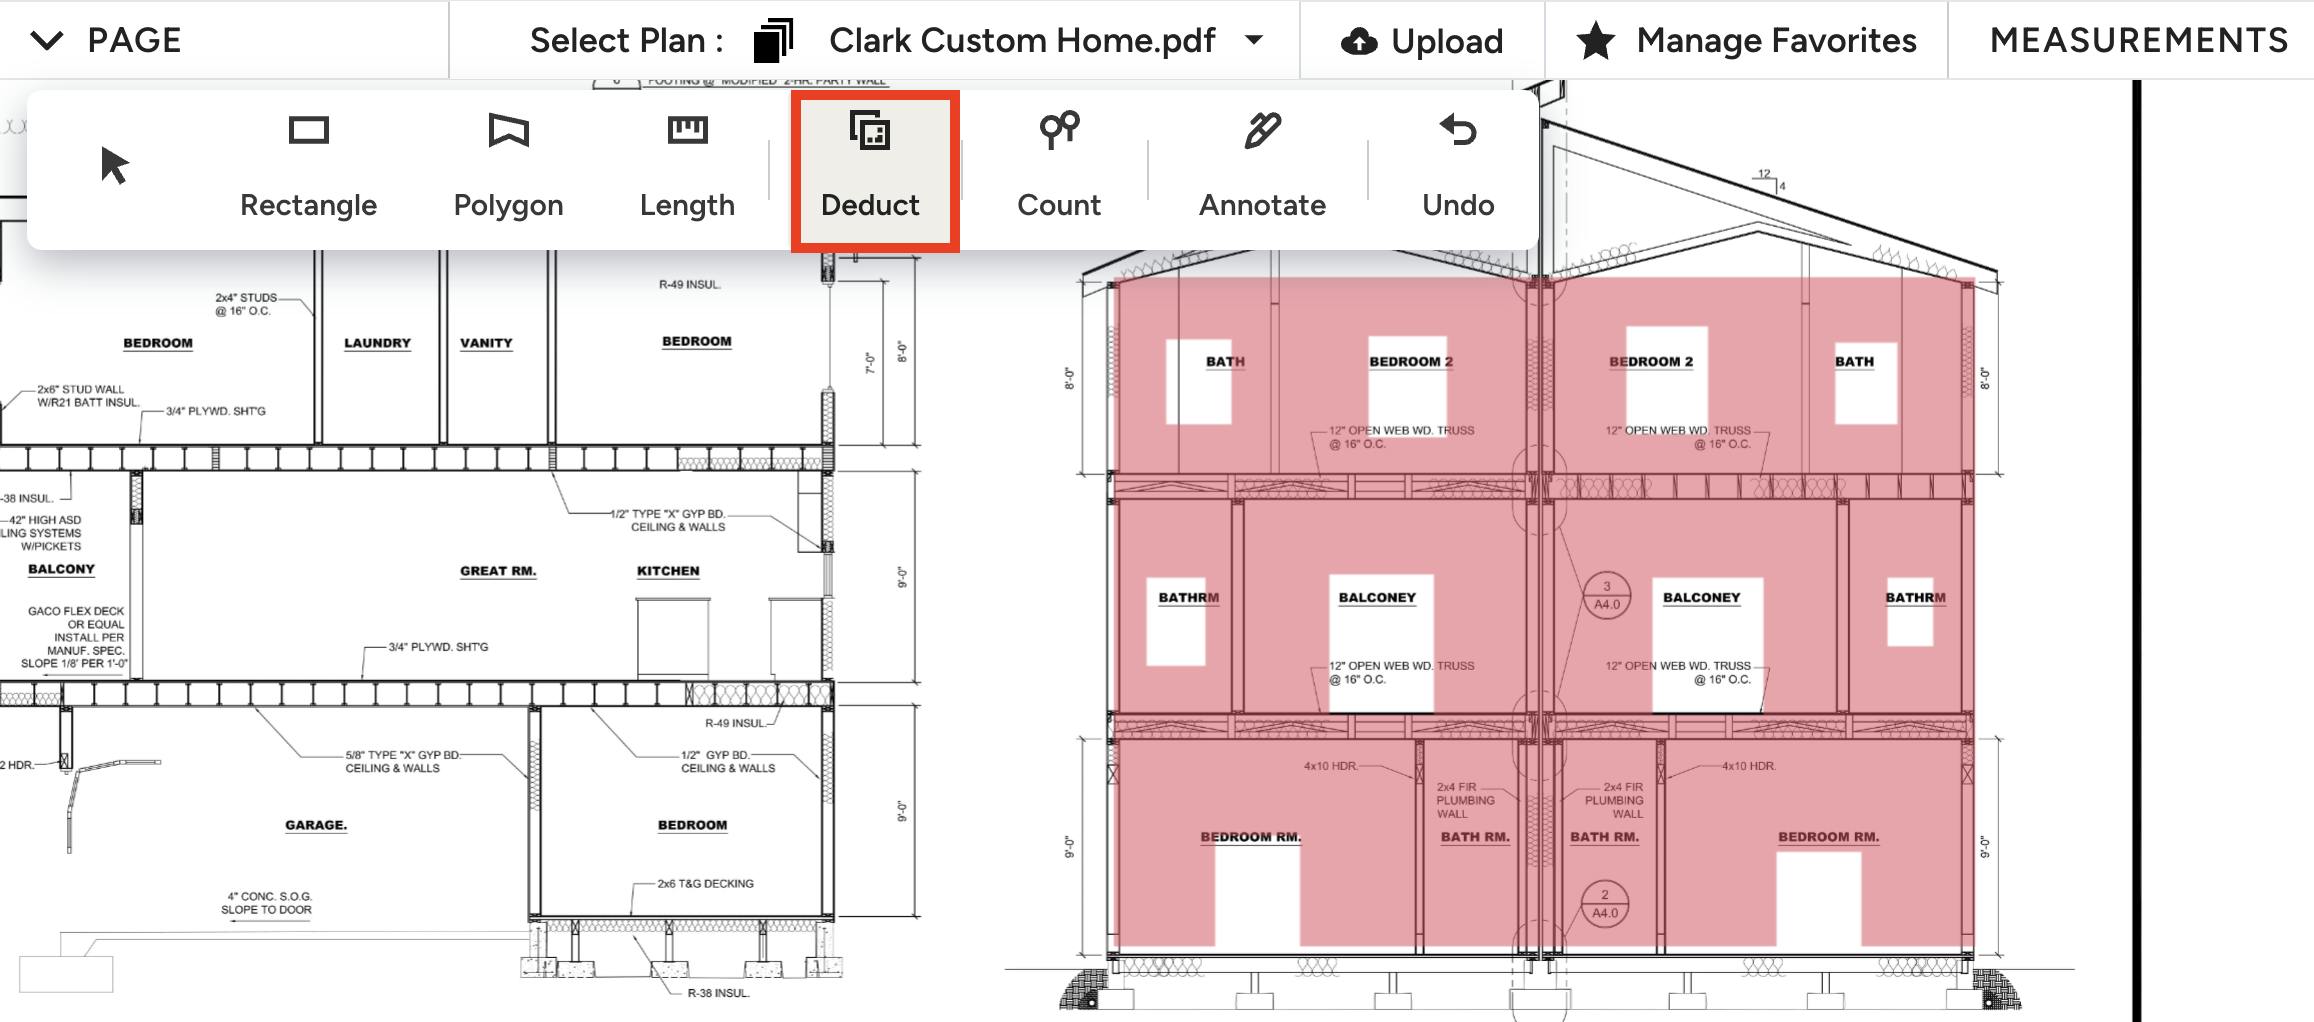
Deducting Measurements
The deduct icon allows you to remove an area so it is not included in your measurements total. This is useful when you are deducting windows and doors from siding, for example.
It works the same as the rectangle. To start, click the deduct icon, then click and drag your cursor from one corner of your space to the next corner. Let go of your cursor once the measurement is complete.

Counting Items
The count icon allows you to count items in your Takeoffs, including toilets, vanities, electrical sockets, doors, windows and more. This is a very flexible feature — since you are able to name your group, you can customize and count whatever you need.
To start, click on the count icon, then select whether you would like to add the count to an existing group, or create a new count.
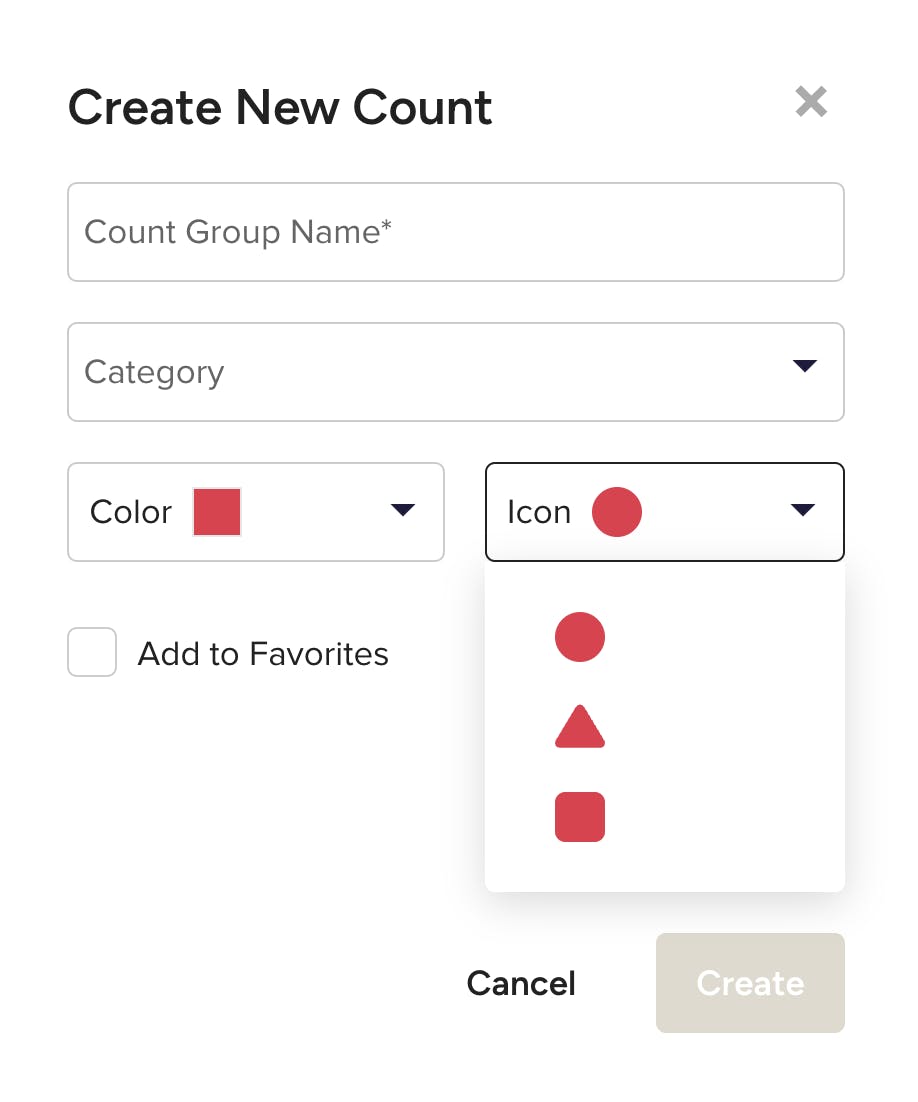
If you select New Count, a new screen will appear where you can add the count name, category, color and icon, as well as add to favorites if you plan to re-use. Be sure to click Create once complete.
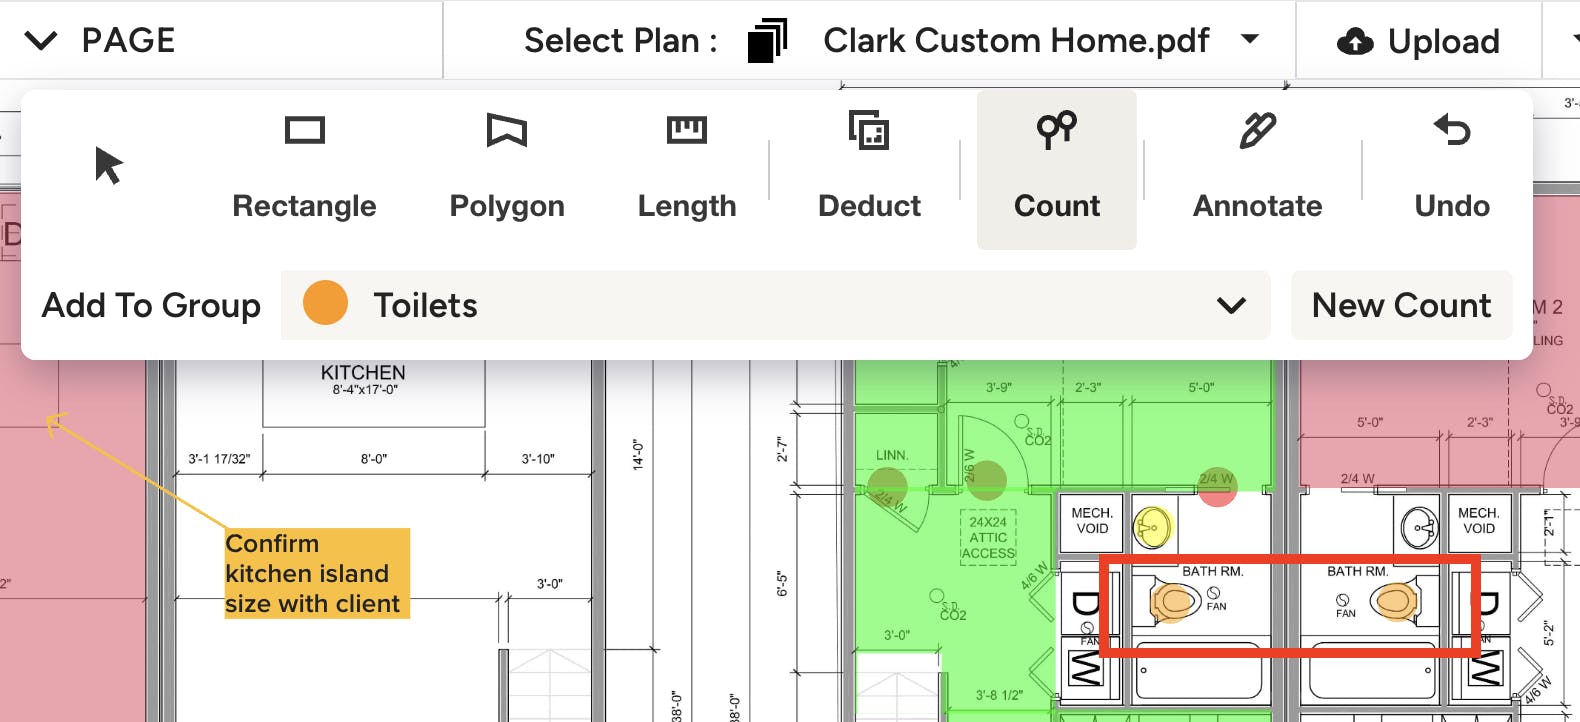
Once your group is selected, just click the canvas, and the icon will automatically show up. In this example, the orange circle is counting the number of toilets.
Creating Annotations
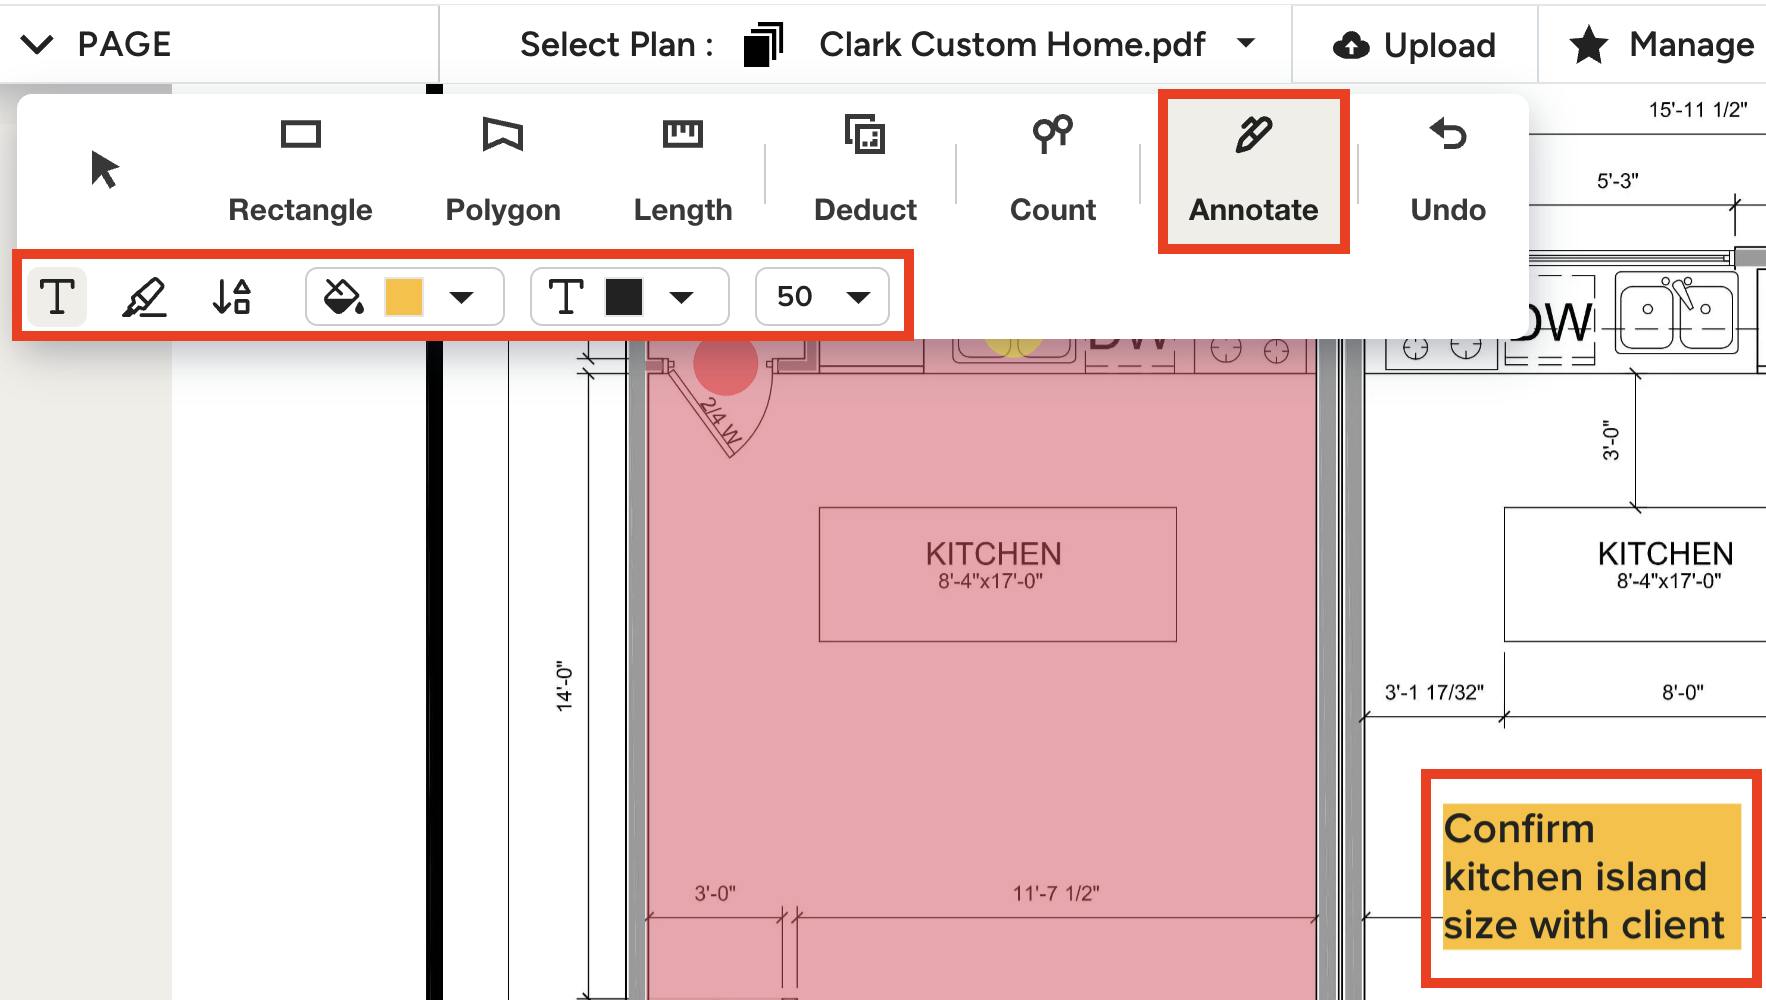
The annotate icon allows you to write notes directly on the canvas. These notes will appear on any PDF, so you can easily share with your client and/or team.
To start, click on the Annotate icon, then select the T icon to add text or the pen icon to draw. Click directly on the canvas where you would like to add your note. Start drawing or typing your text — you can customize text formatting such as background color, text color and size.
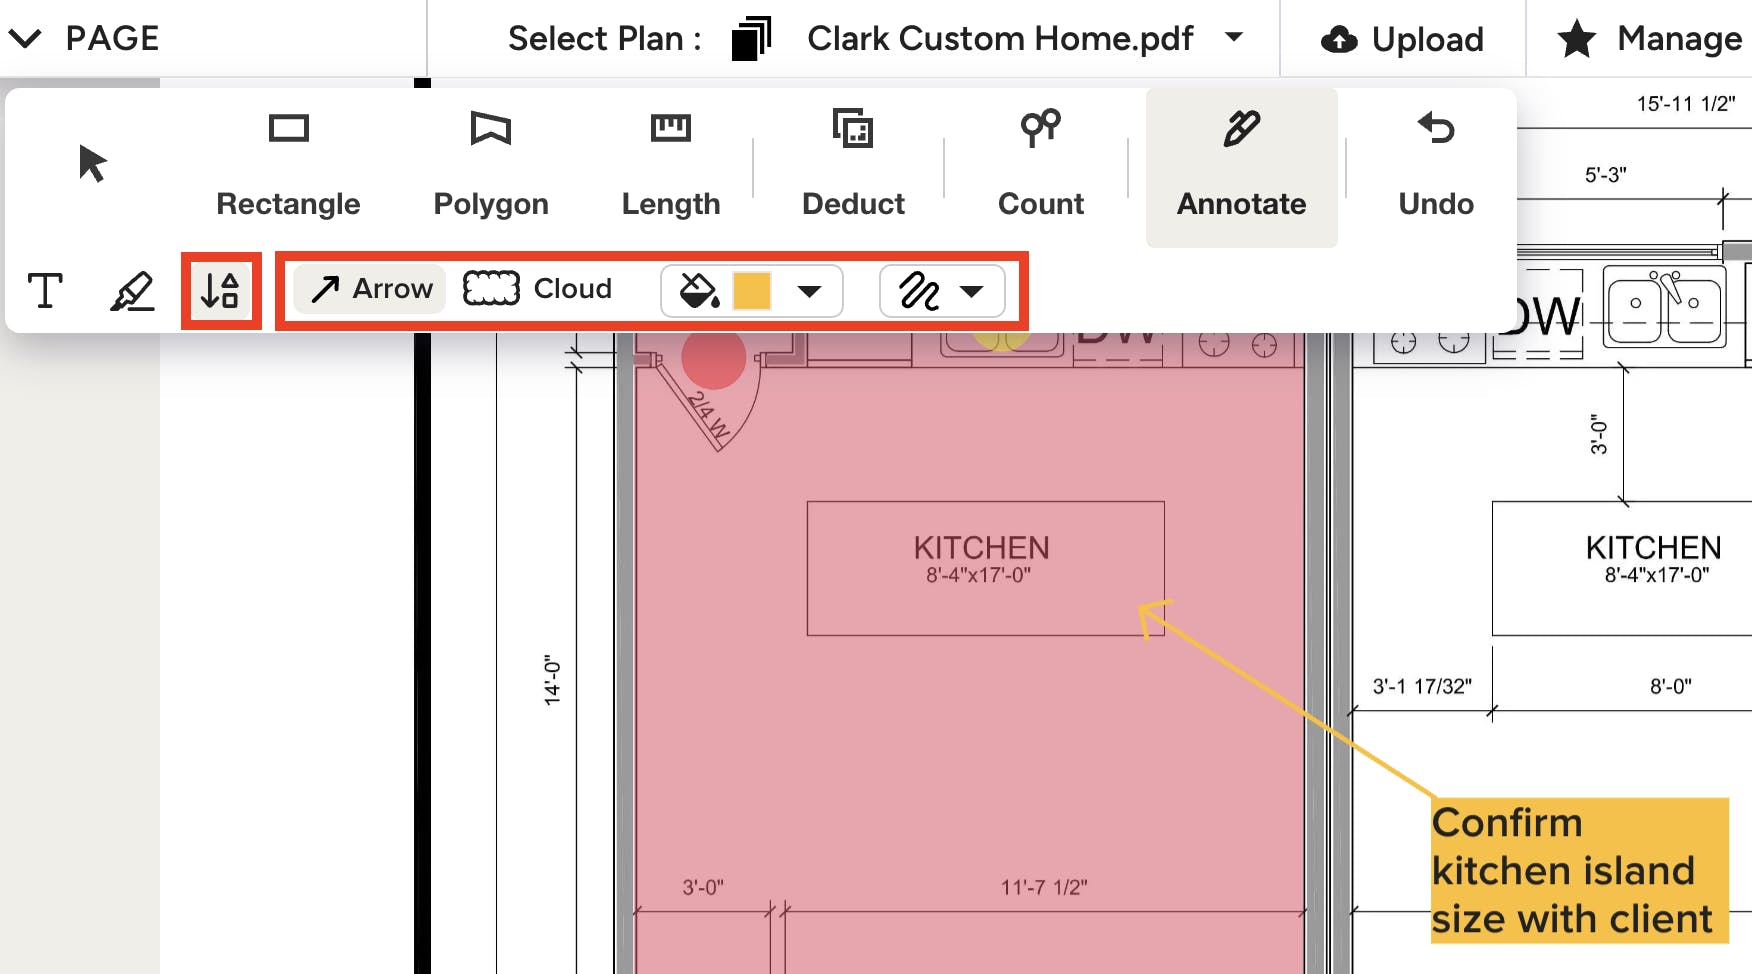
If you want, you can add an arrow to point directly to the relevant part of the plan so the note is clear. To do this, click the arrow icon, then select either Arrow or Cloud, depending on the shape you prefer. Create the arrow by clicking the corner of your note, then dragging to the relevant part of your plan. When you let go of the cursor, the arrow will appear.

Undo Actions
The undo icon allows you to revert changes you recently made in case you make an error. Simply click the Undo icon, then your recent change will disappear.

Rotate Plan
The rotate icon only appears in your toolbar before you make measurements on your plan. Once you make a measurement, you will no longer be able to rotate your plan. Simply click the Rotate icon, and your plan's orientation will adjust.