Sending Messages To Your Clients
Houzz Pro makes it easy to communicate and collaborate with a potential or existing client through our messaging feature. Within messages, you can send an email or a text message, include attachments, add links and more.

How to Message a Lead
To send a message to a lead, select the relevant lead from the Leads icon in your left navigation. From here, click on the Messages option from the left menu.
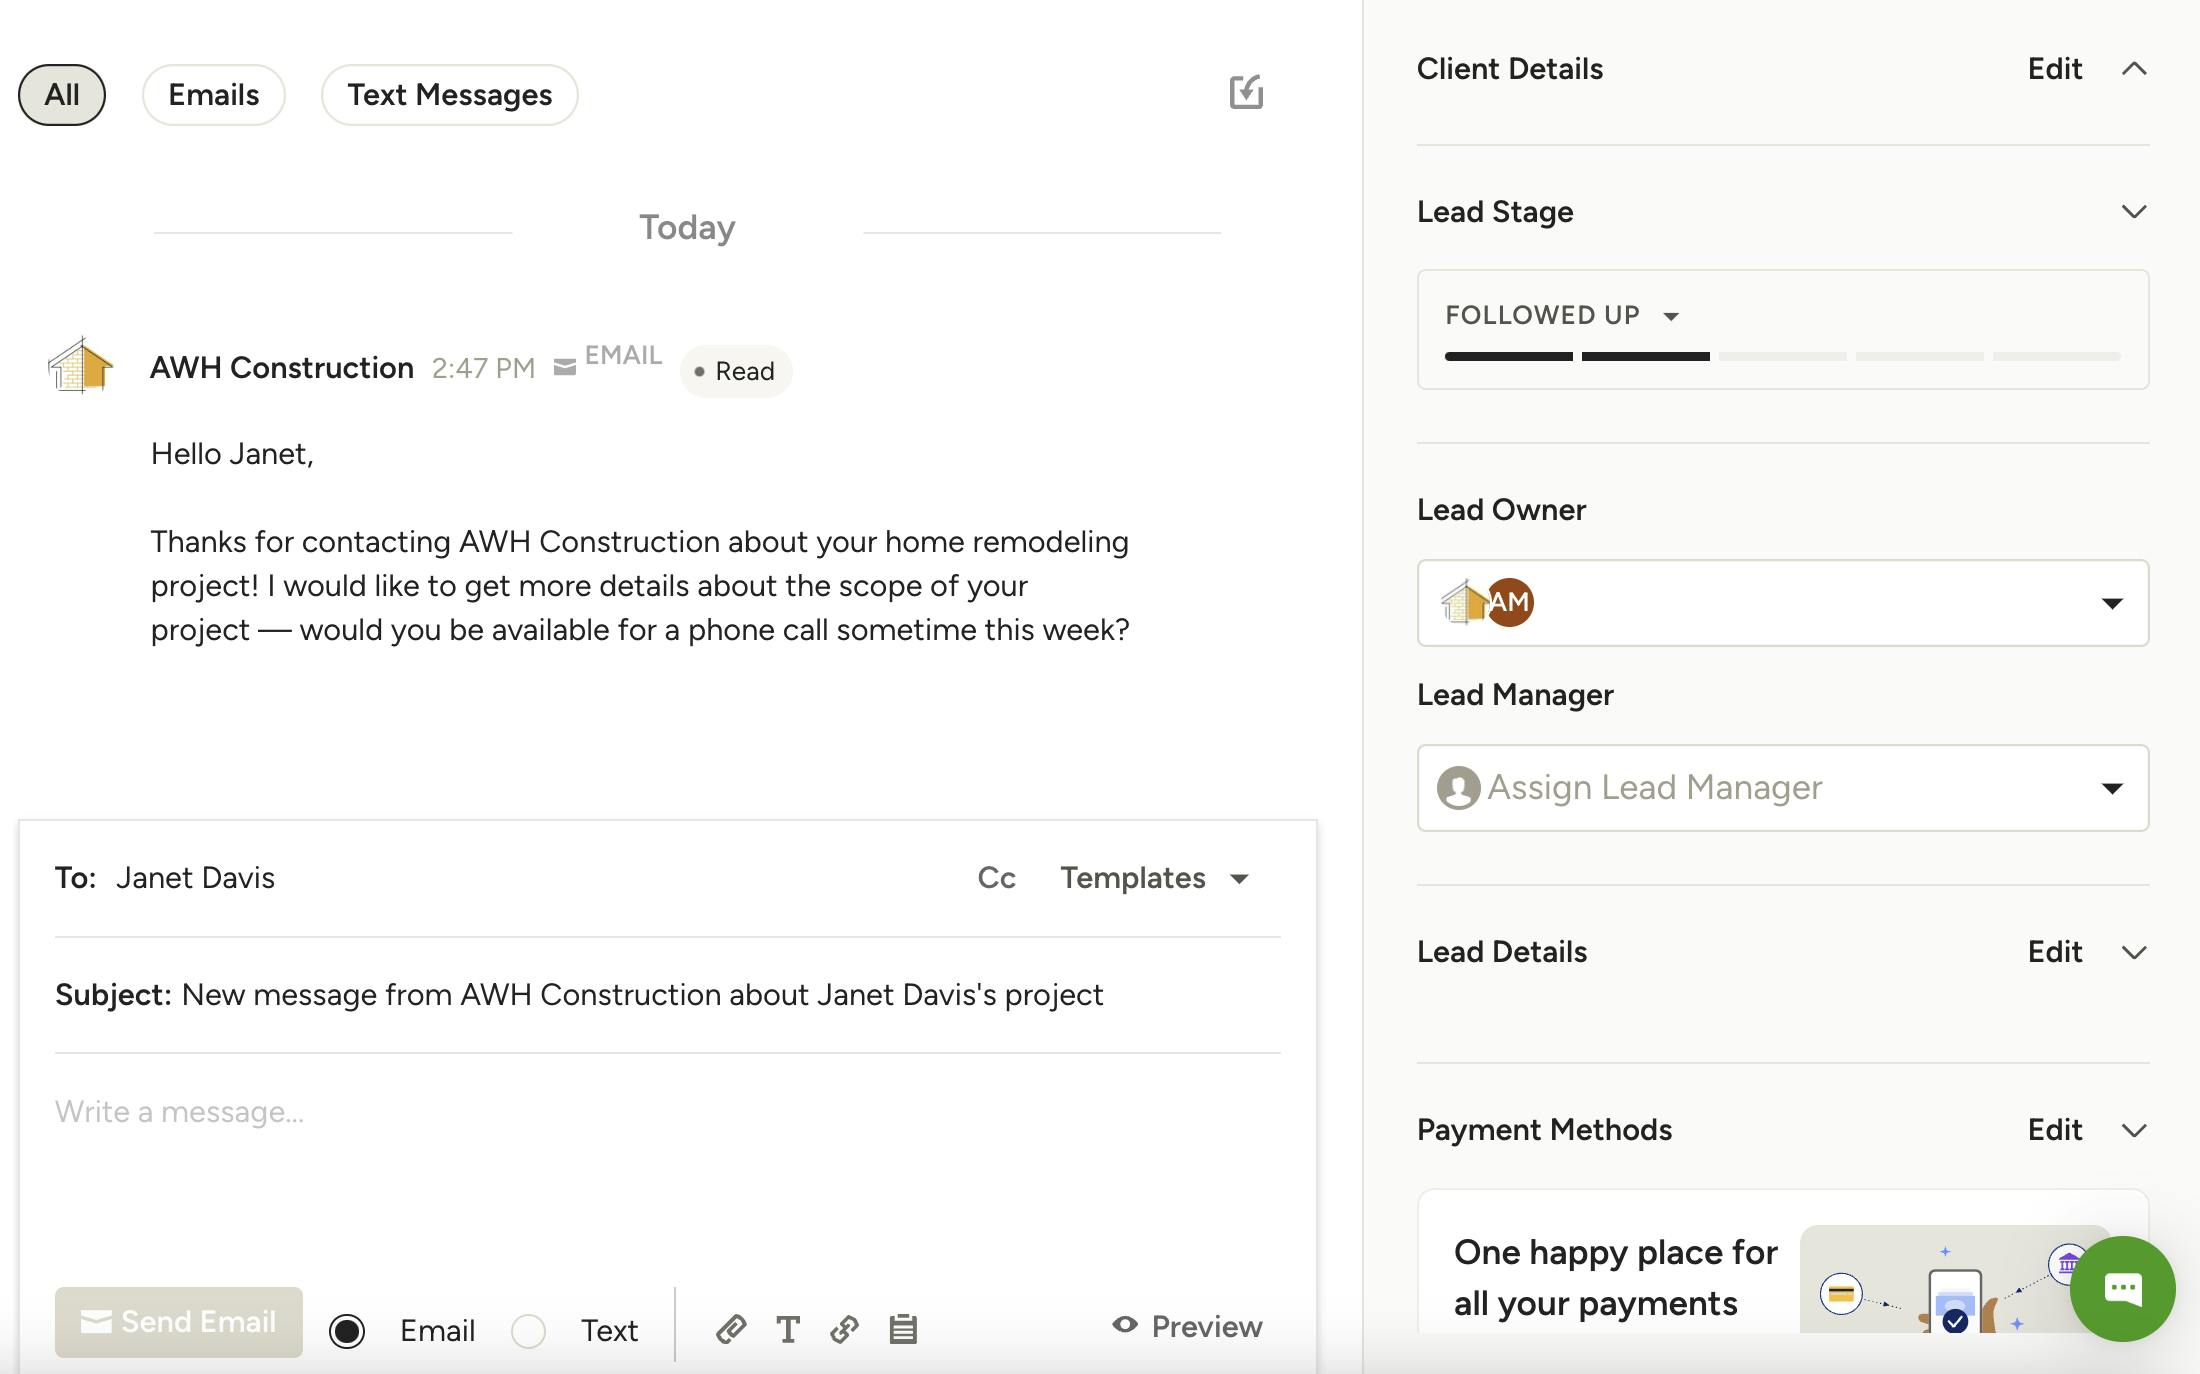
Within the messages section, you can view all your existing messages with this potential client. On the right, you can view all the client details and lead details, including lead stage, lead owner and lead manager.
To send a new message, scroll down to the open text box and type in your message directly. You can choose to send either an email or a text message.
For a text message, you can only attach a file. For an email, you can customize your text formatting, attach any relevant documents, or add any important links. You can also send along a lead questionnaire to better understand the scope of the project. If you want to create your own branded email format, you can do this by clicking Preview — learn more about branded email formats here.
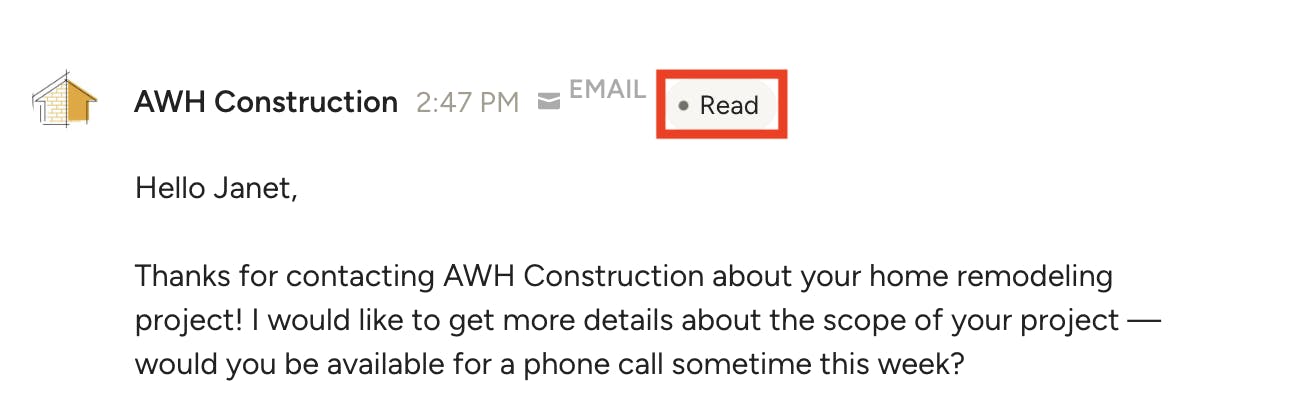
Once you send your email or text message, your lead will receive the message and can reply directly from their email account or phone number. Their reply will arrive to you both in the messages section and as an email notification. In the messages section, you can also see the status of a message — whether it has been delivered or has been read by the potential client.
How to Message a Client
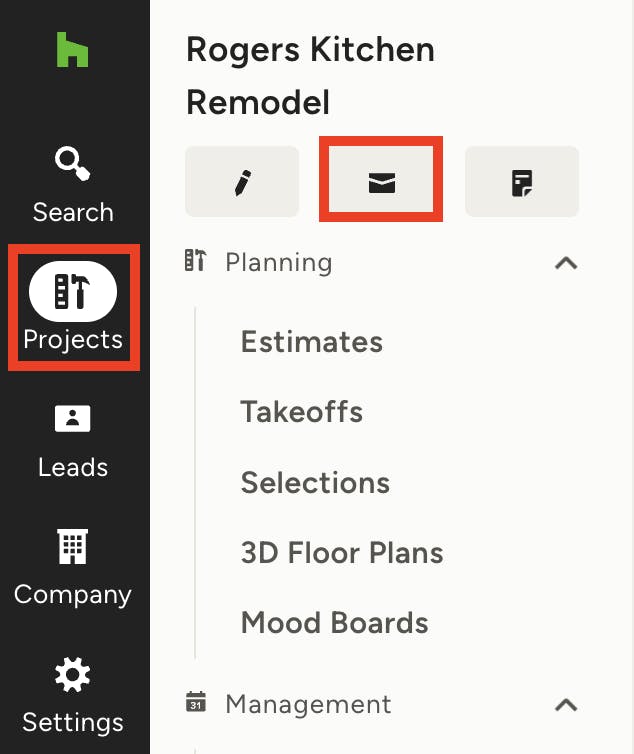
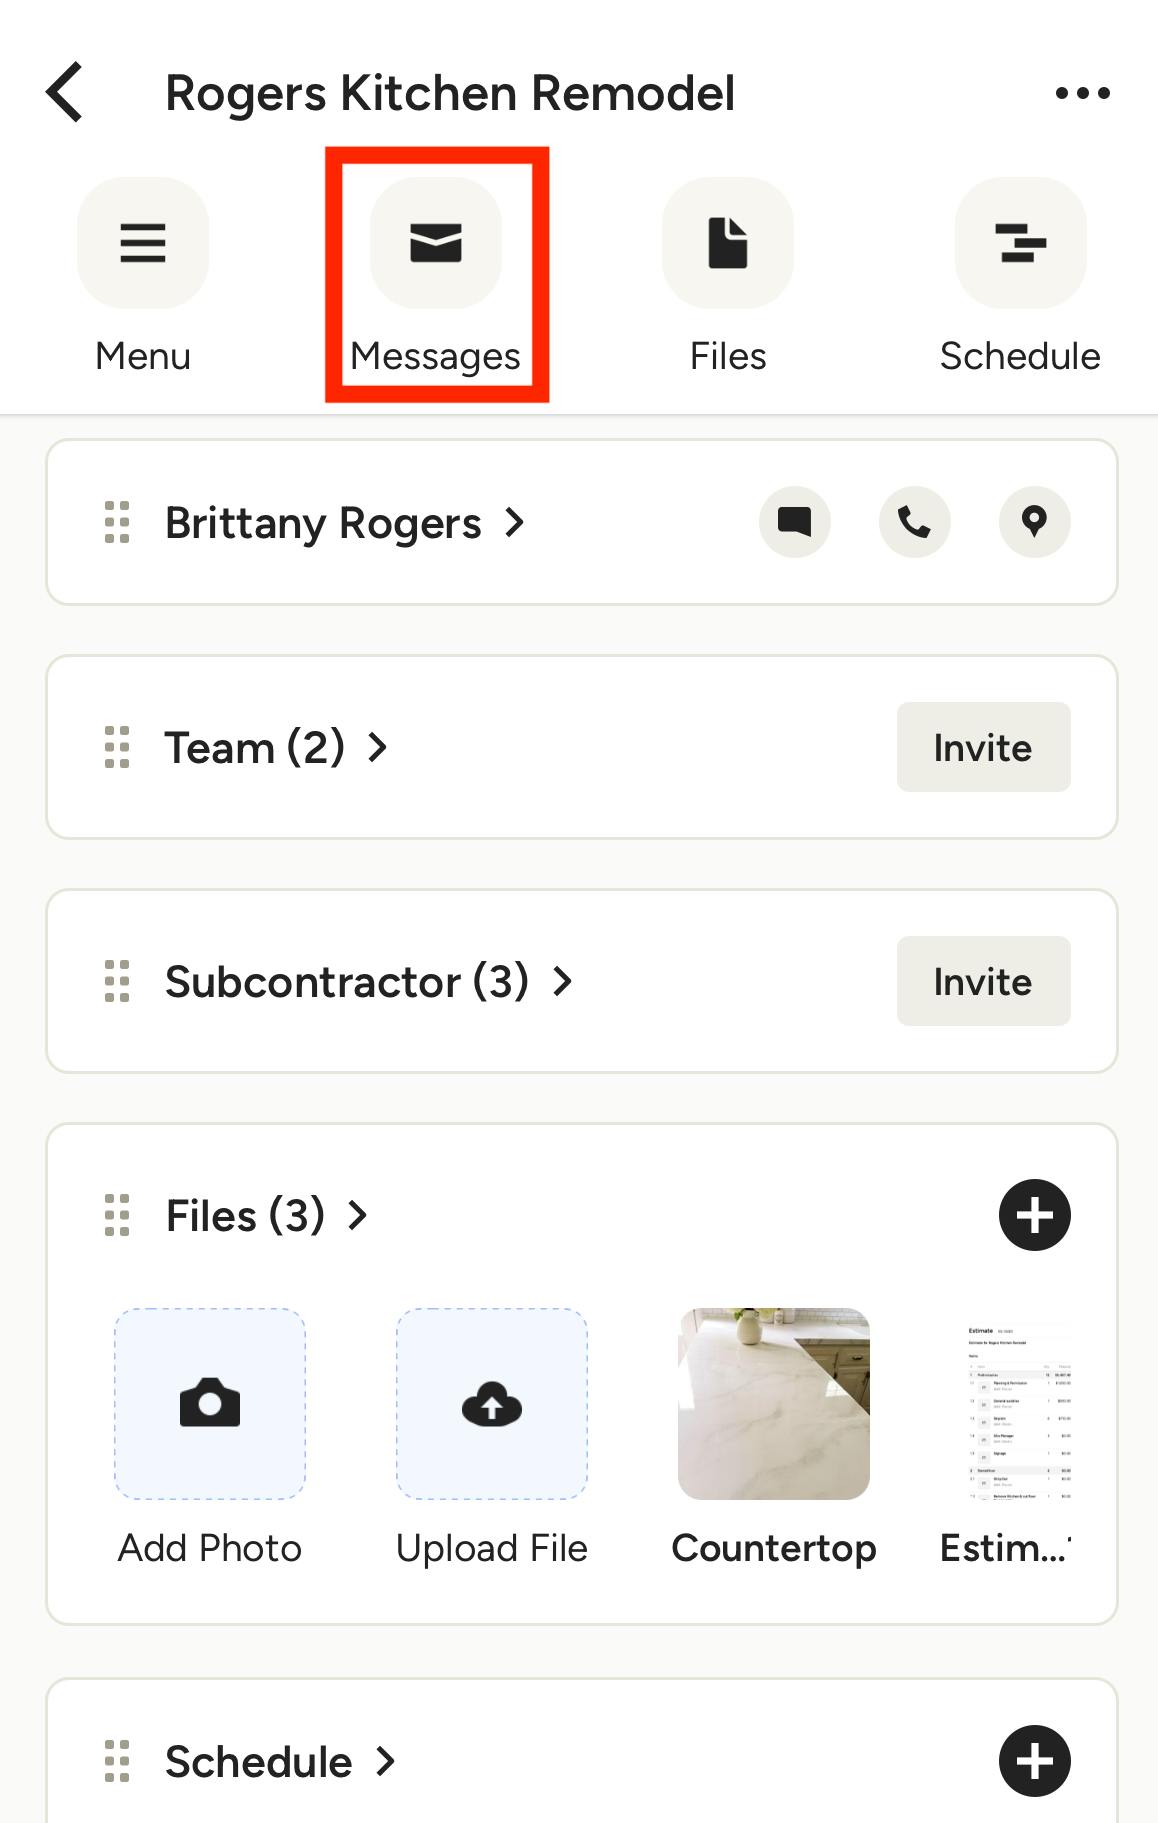
To send a message to a client, select the relevant project from the Projects icon in your left navigation. From here, click on the Messages icon underneath the project name.
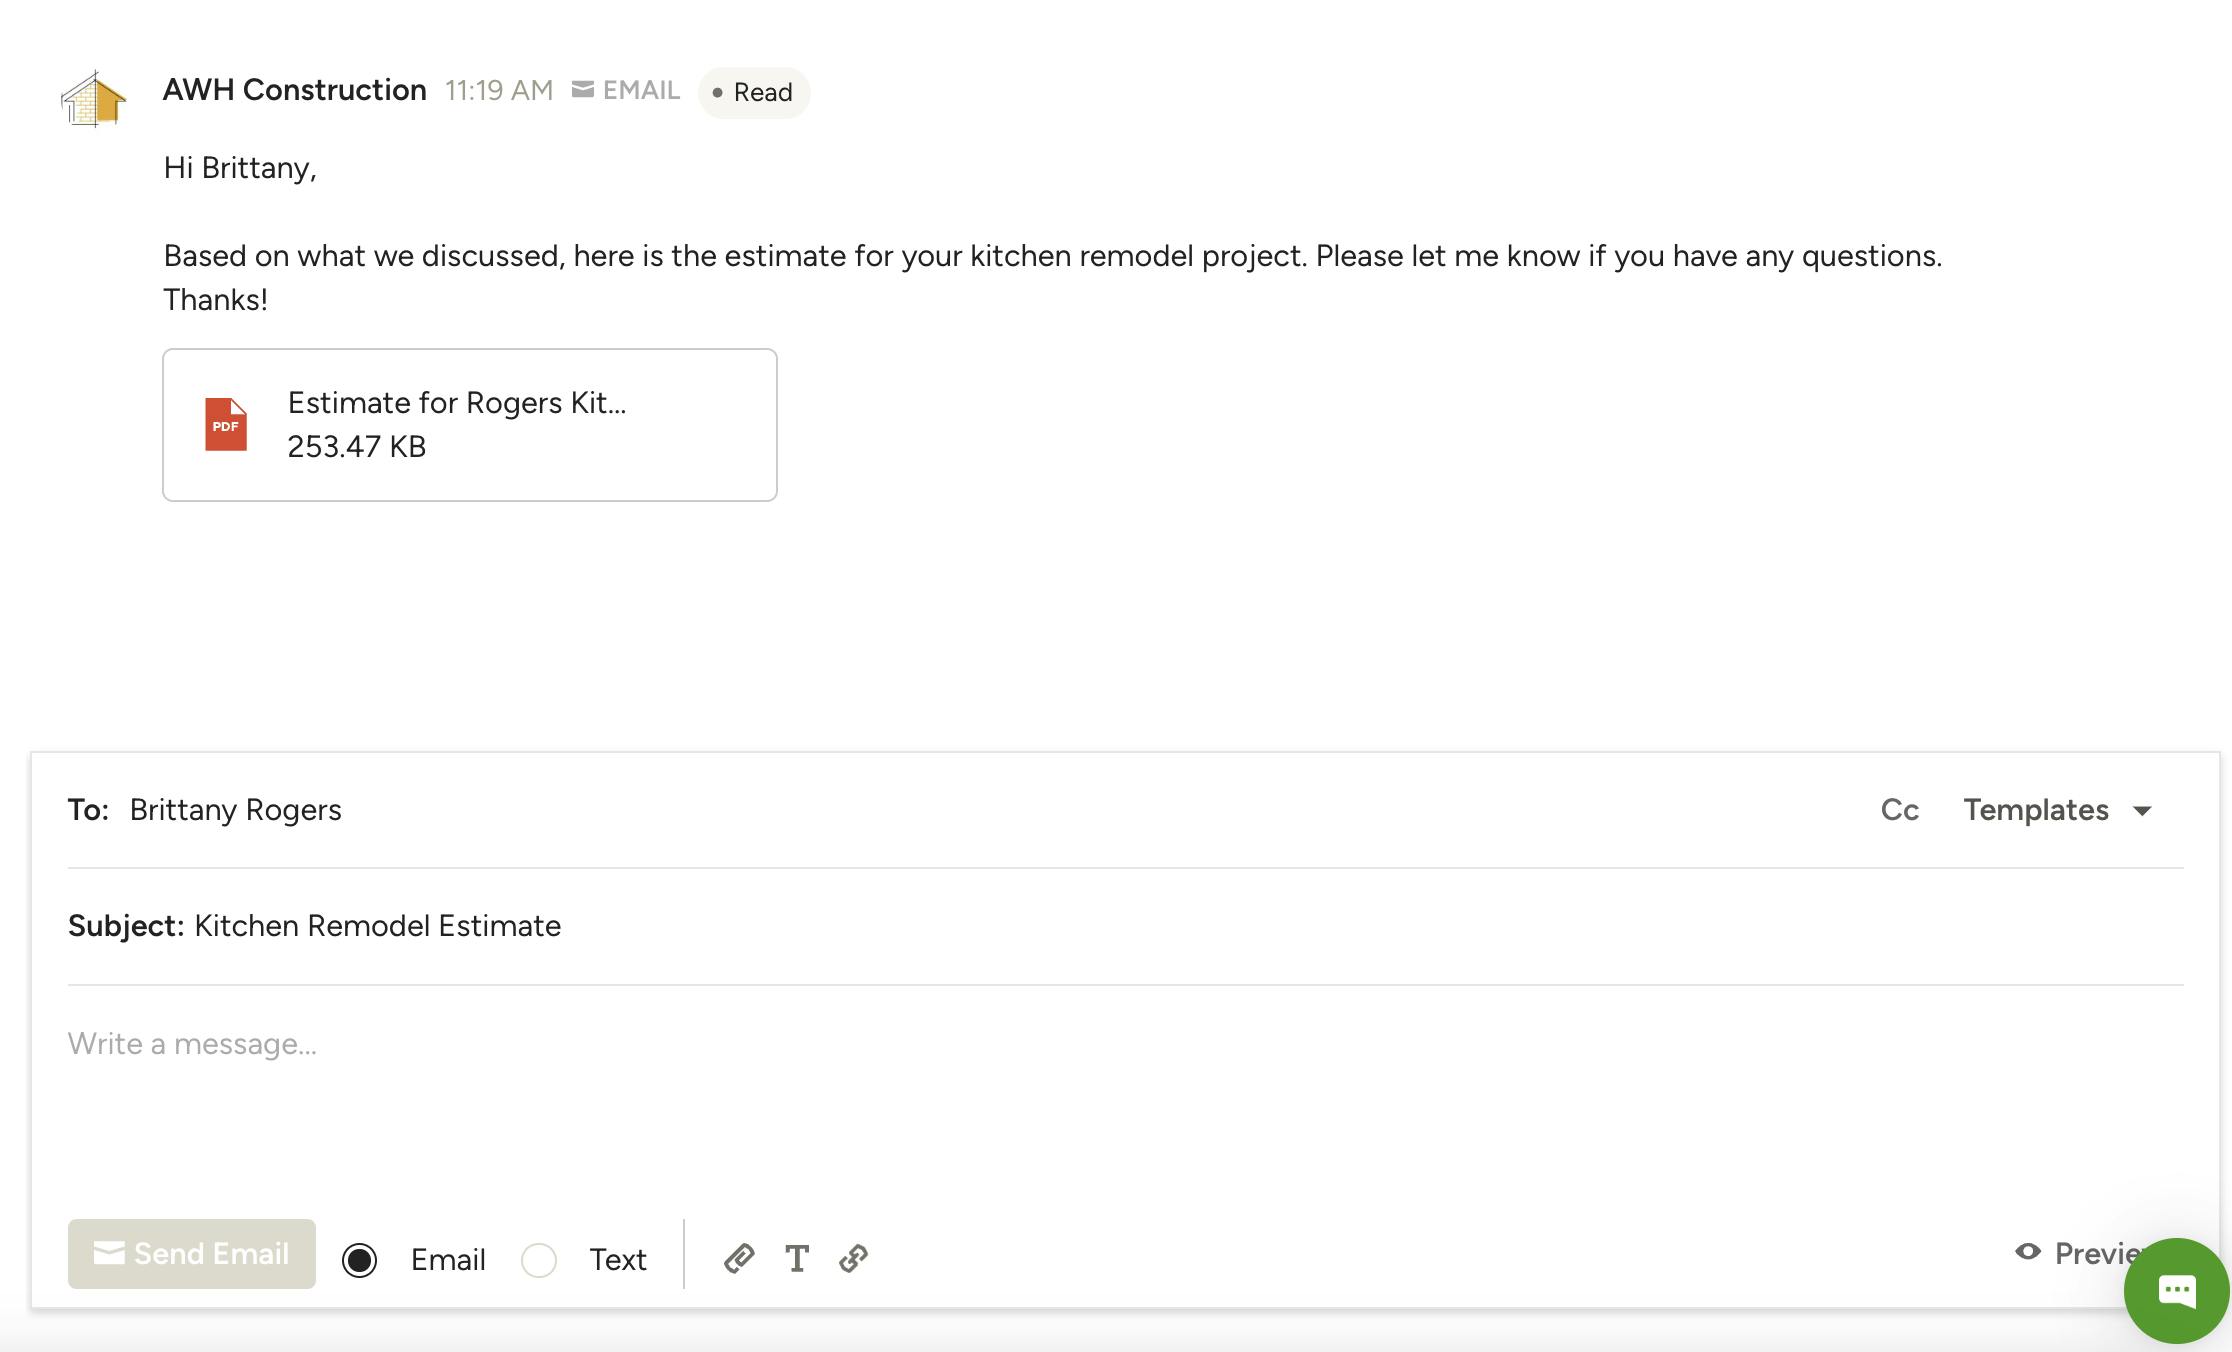
Within the messages section, you can view all your existing messages with this client.
To send a new message, scroll down to the open text box and type in your message directly. You can choose to send either an email or a text message.
For a text message, you can only attach a file. For an email, you can customize your text formatting, attach any relevant documents, or add any important links. If you want to create your own branded email format, you can do this by clicking Preview — learn more about branded email formats here.
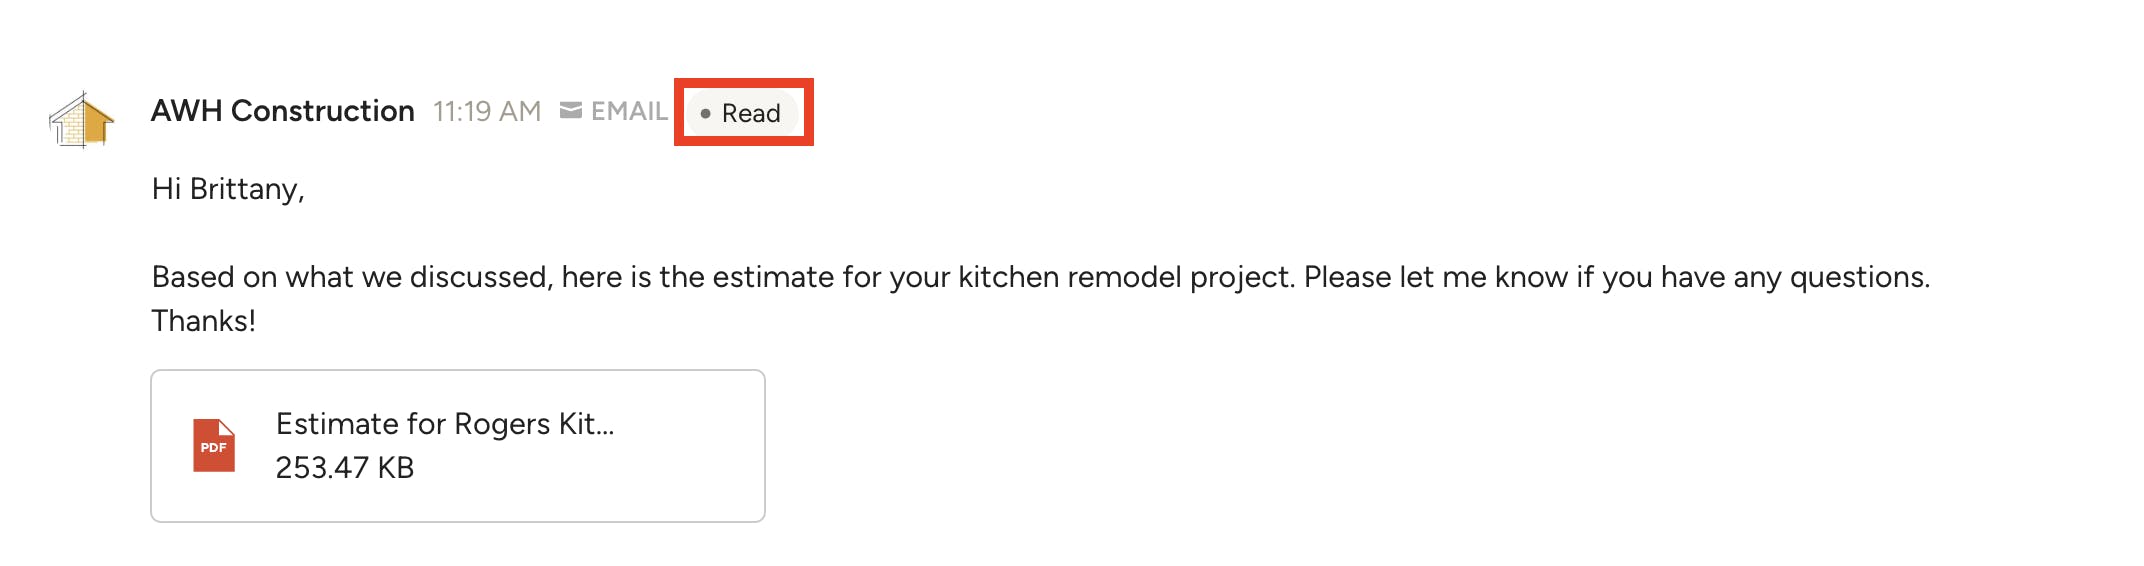
Once you send your email or text message, your client will receive the message and can reply directly from their email account or phone number. Their reply will arrive to you both in the messages section and as an email notification. In the messages section, you can also see the status of a message — whether it has been delivered or has been read by the client.

How to Create Custom Message Templates
If you'd like to save time, you can easily create custom message templates that will apply to both leads and clients.
Within the message section, go down to the open text box and select Templates on the right side.
From here, you can select and edit one of our short pre-populated templates — Interested, Unavailable, Not a Fit — or you can select Customize Templates to create your own.
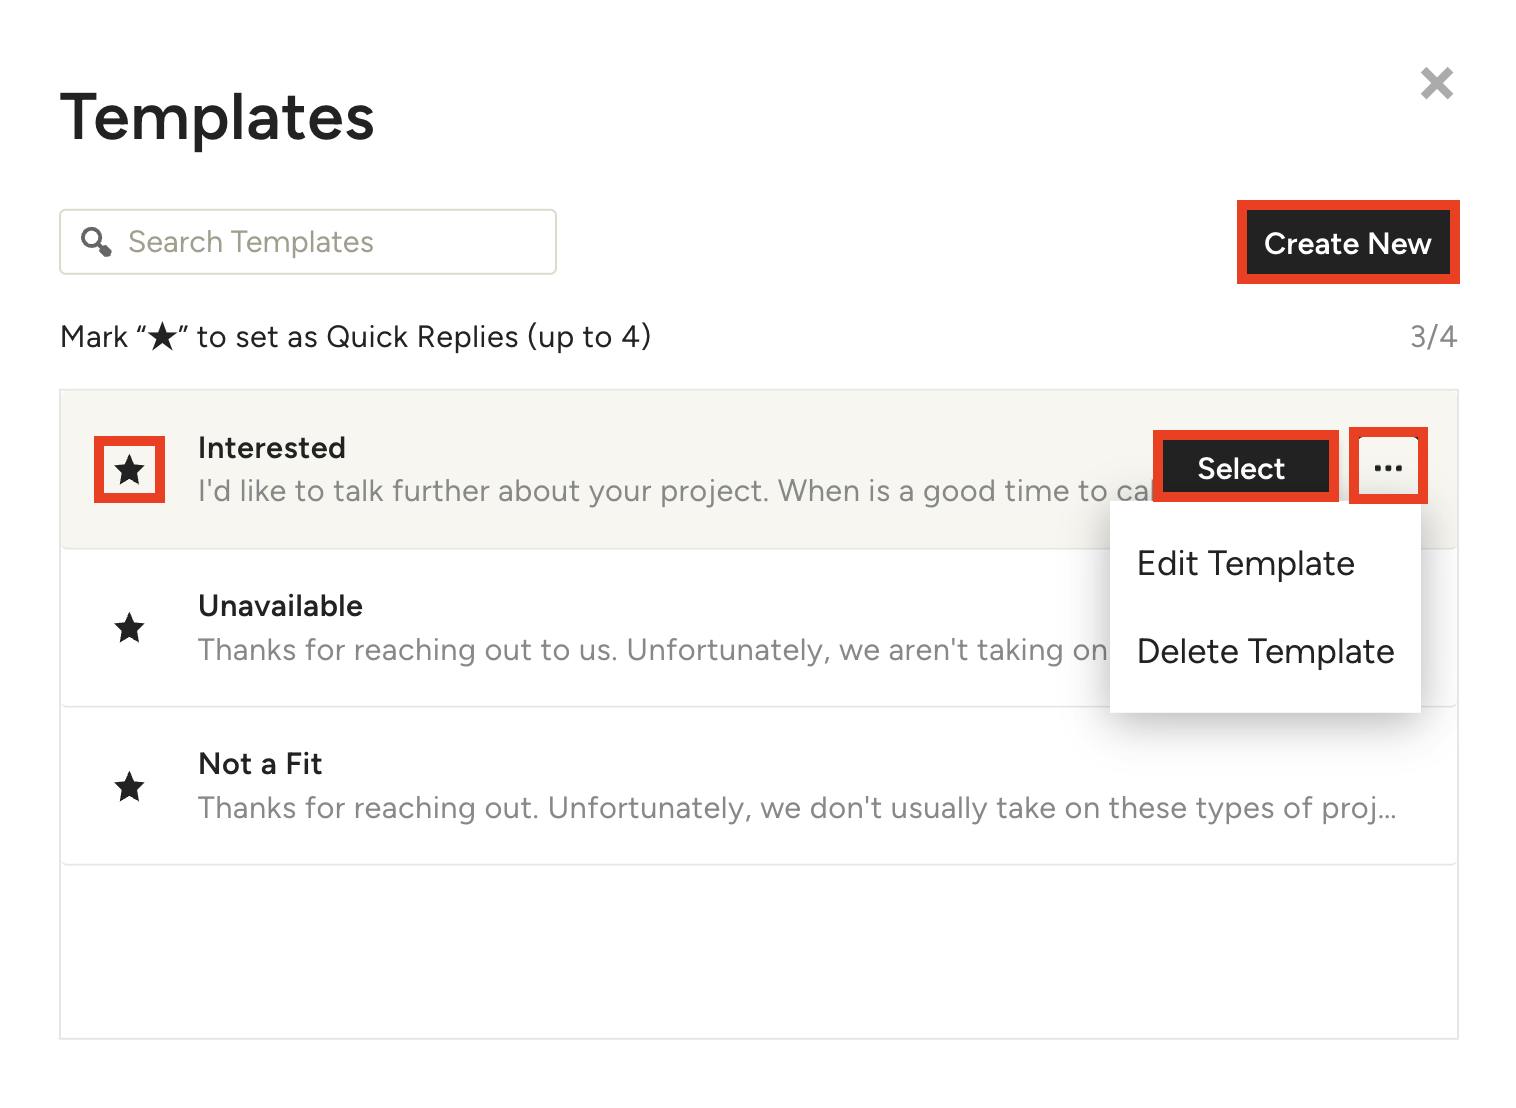
If you select Customize Templates, you can edit existing templates by clicking the three dots icon and selecting Edit Template. From here, you can also Delete Template.
You can select Create New to start a new message template from scratch. A new screen will appear where you can add template name and message; you can then decide whether to Save and Go Back to use later, or Save and Select to use for this message.
If you would like to use a message template as a quick reply option, click on the star to the left of the template (you can select up to four default templates).
To use a template in a message, click Select.
Messages on Mobile App
To send a message to a lead or client on the Houzz Pro app, select either the Projects icon or Leads icon from the bottom menu. You can then select the relevant lead or project, and click on the Message icon at the top of your screen.
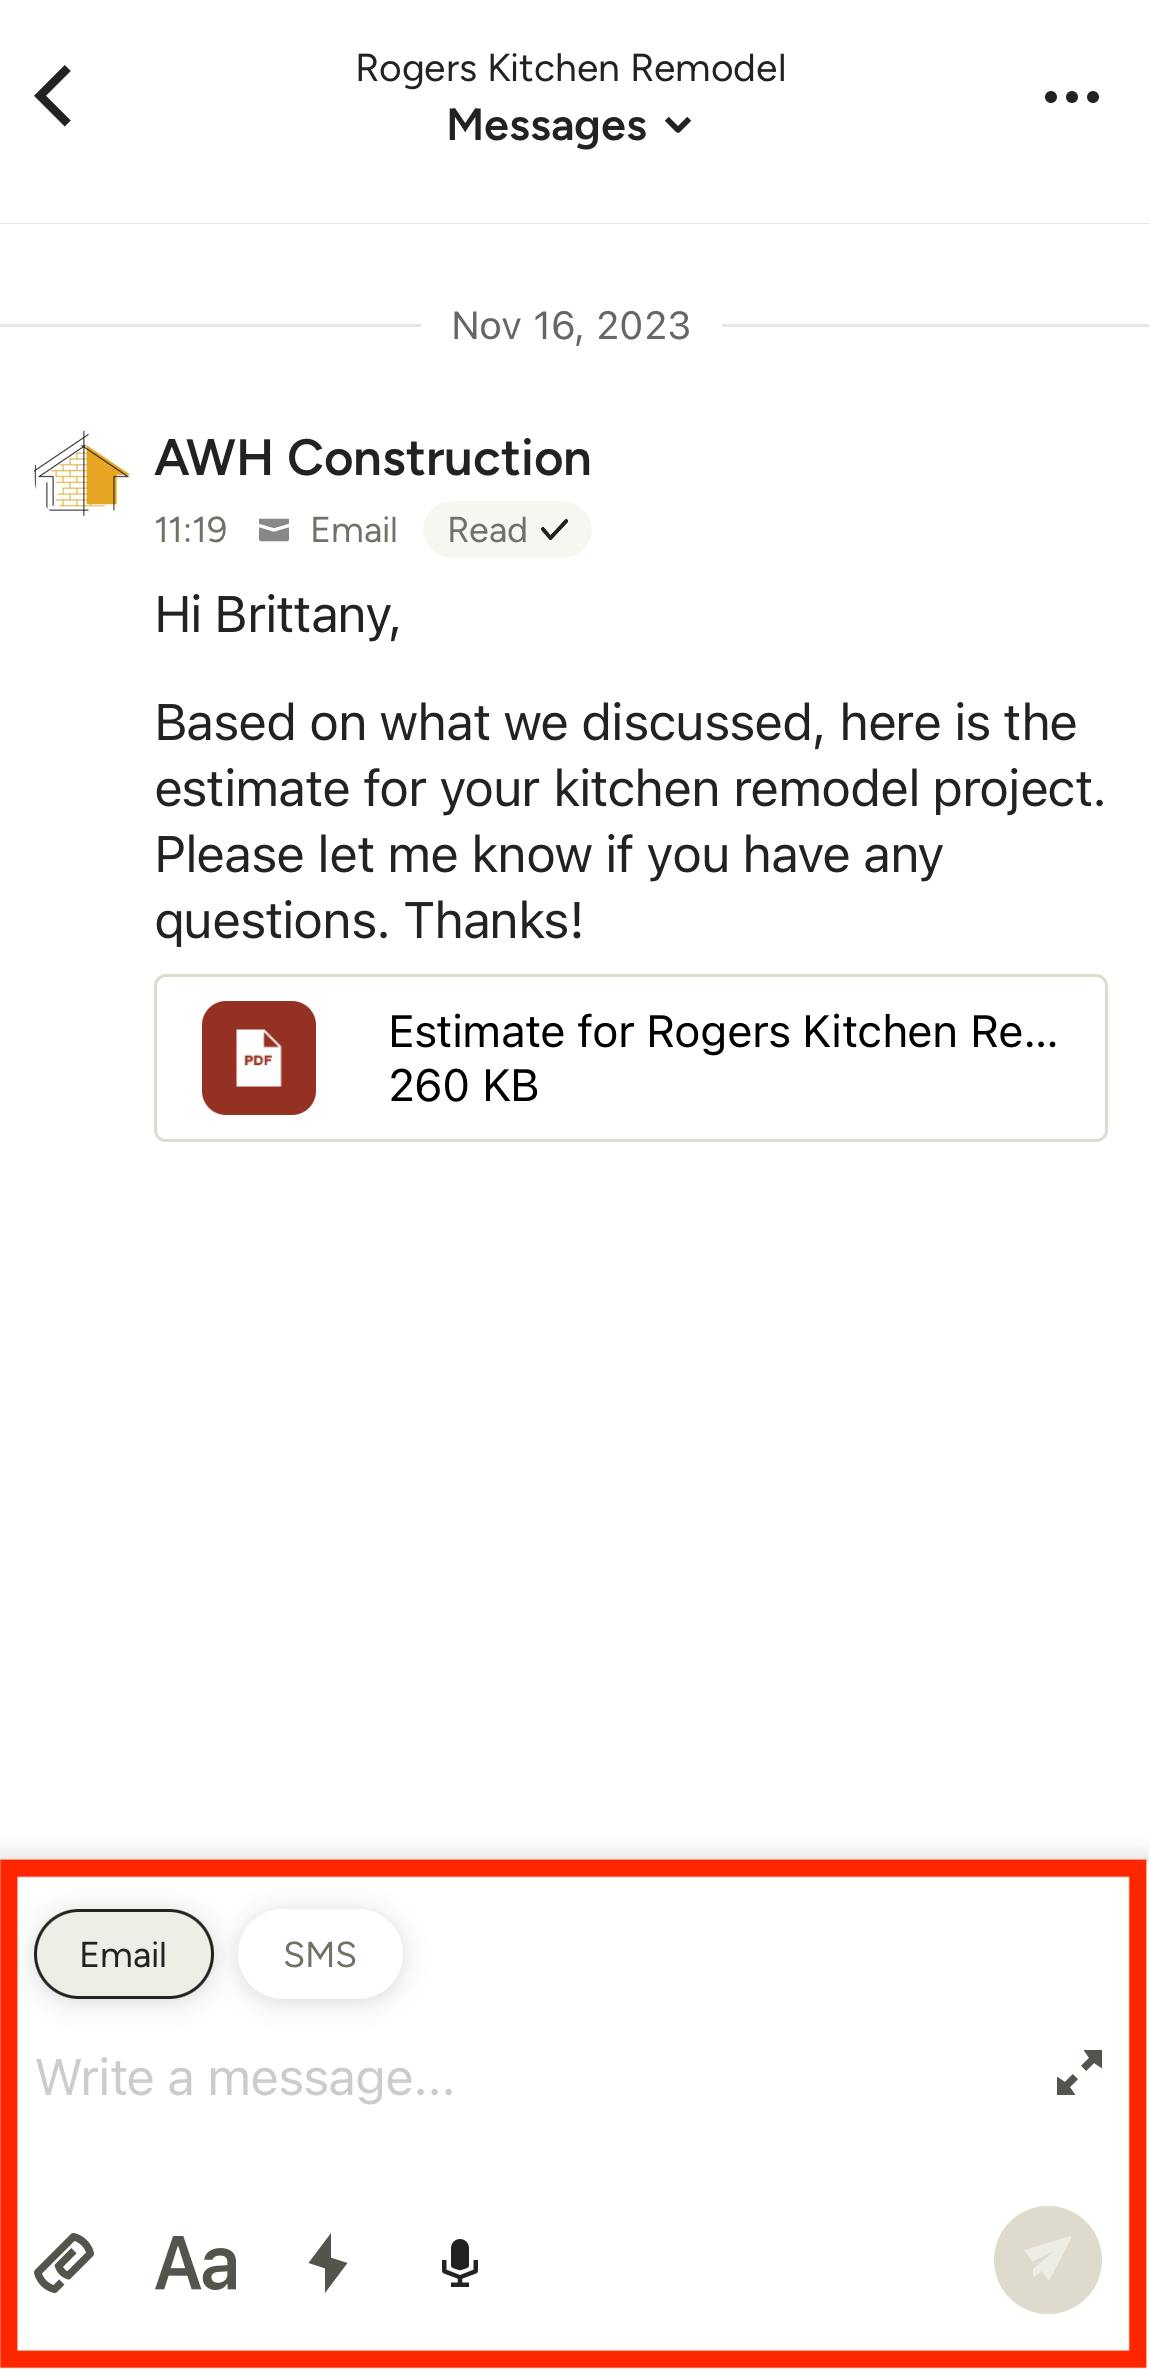
Within the messages section, you can view all your existing messages with this lead or client.
To send a new message, click on the open text box at the bottom of your screen, and type in your message directly. You can choose to send either an email or a text message.
For an email, you can customize your text formatting, attach any relevant documents, or add any important links.