Creating, Editing and Using Templates in Your Houzz Pro Mood Boards
Templates allow you to design consistent headers, footers, or cover slides that can be applied to your boards, ensuring a uniform look across all Mood Boards within your company.
How to create a template
Creating a template follows the same process as creating a new Mood Board. Numerous designers initiate a new Board named "Template." Just go to “+ Create from Scratch” and start crafting your new template.
Feel free to incorporate any images you want into your template, such as your logo, lines, arrows and more. You also have the option to include editable information like the project name and room. This information can be easily modified whenever you use the template to align with the specific project you are currently working on.
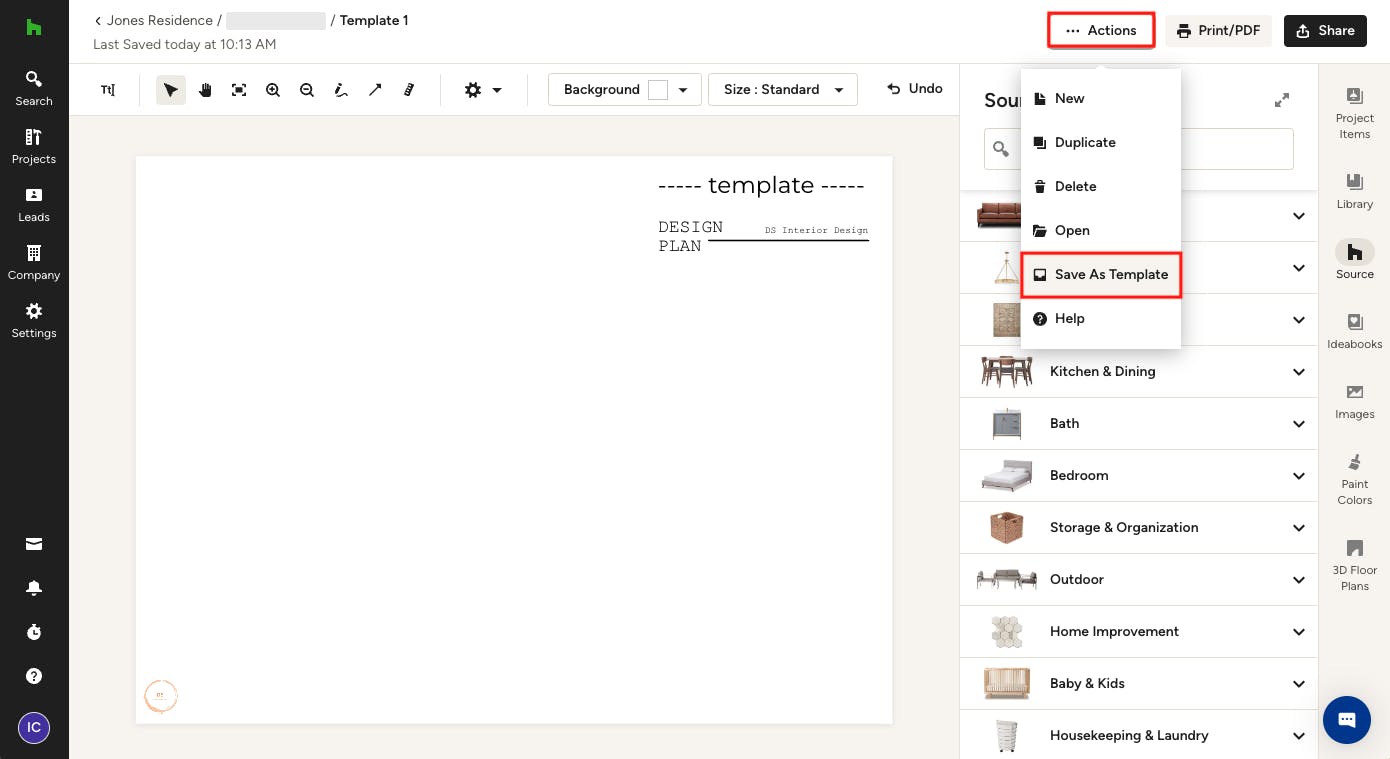
When you're happy with the look of the template and ready to save it, click on "Actions" in the upper right corner and then choose "Save as Template".

How to rename, edit or delete a template
Renaming or deleting a template is very straightforward. On your Mood Boards overview page, hover over the template which you want to rename or delete. 3 dots will appear in the upper right corner of the frame, giving you the option to ‘Edit Template’, 'Rename' and ‘Delete’. Alternatively, you can perform the desired action by clicking 'Edit Template' to open it. Changing the name can be done by clicking on the title. If you want to delete the entire template, click on “Actions” and choose “Delete”.

We know things can change, which is why you have the option to edit a template once it's created. You might want to add some text, change the color scheme, or just tweak a few minor details. Whatever the case may be, editing existing templates in Houzz Pro is quick and easy:
- Open the template you wish to edit by clicking on it. Once the template is open, you will notice a badge saying ‘Template’ in the upper right corner. This is your reminder that you are currently editing a template, rather than a Mood Board related to a project.
- Click on any element to edit it, or add new elements to your template.
- Once you are happy with your edits, the updated template can be used right away. Just go back to your project and start creating your next Mood Board.
Pro Tip: All edits that you make to your templates are automatically saved, without the need to push any button. You will see a small note below your title letting you know that changes have been saved successfully, together with a timestamp.

How to use a template
Once you have created one or more templates, you can use them as a starting point for creating a new Mood Board. All your templates are accessible in your Projects under the “Mood Boards” tab.
Next to the “+ Create from Scratch” you will see all your templates listed. Just pick the one you want to use and everything saved in the template will be loaded. From there you can make any desired edits and proceed with your design.
Watch the video tutorial below to learn how to create, edit and use Mood Board templates.