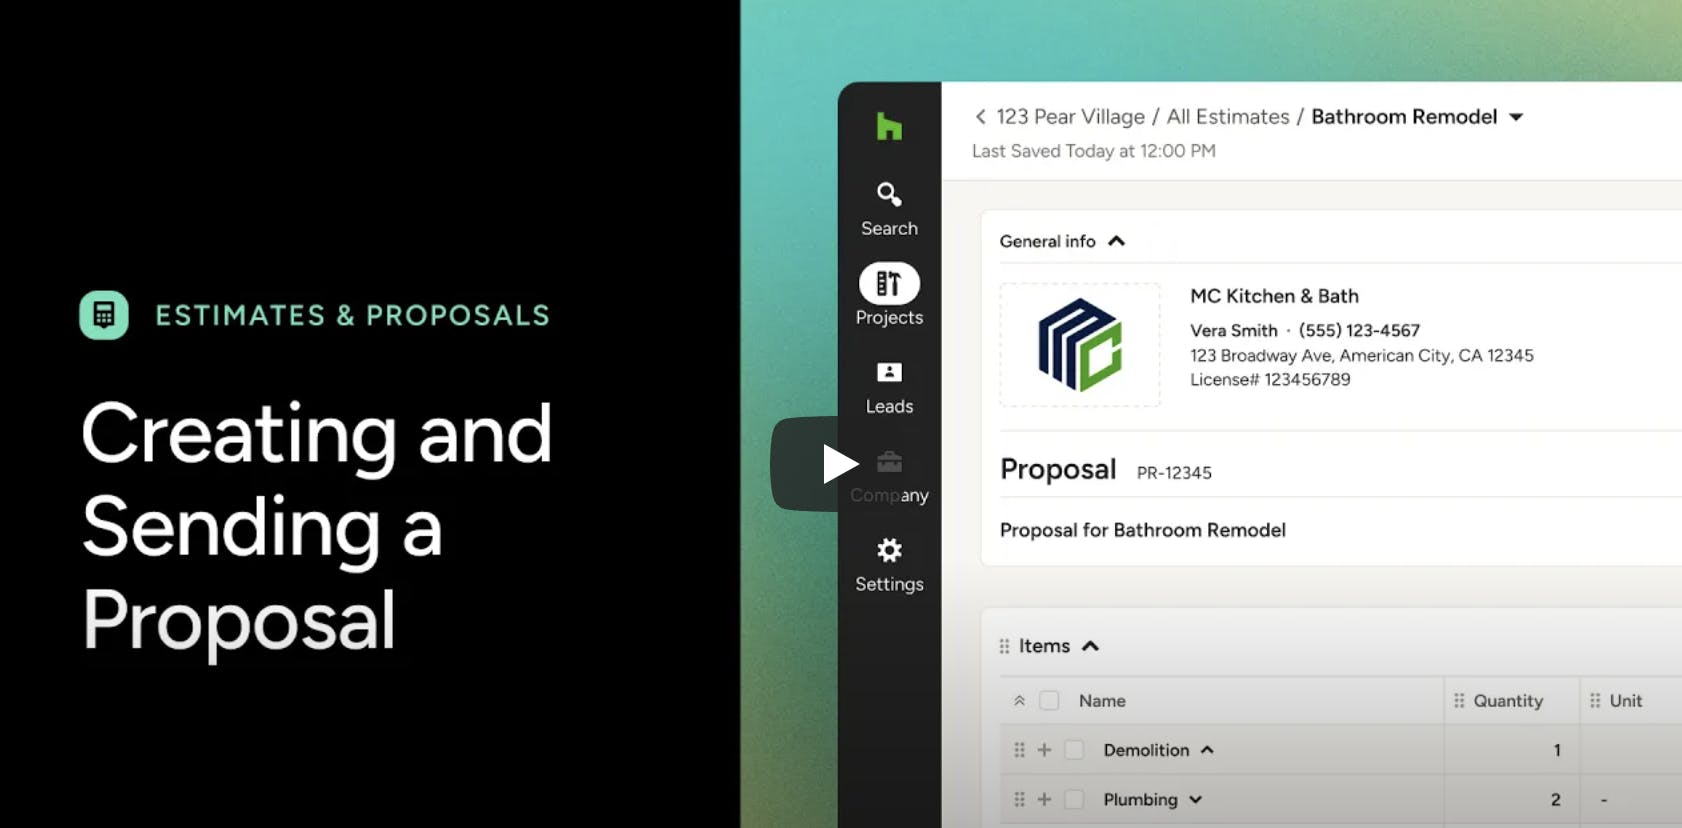
How to Create a Proposal
There are several options to choose from when creating a new proposal for your project. You can:
- Create a proposal from scratch
- Create your own proposal template
- Upload an existing proposal
- Duplicate an existing proposal from another project
To start:
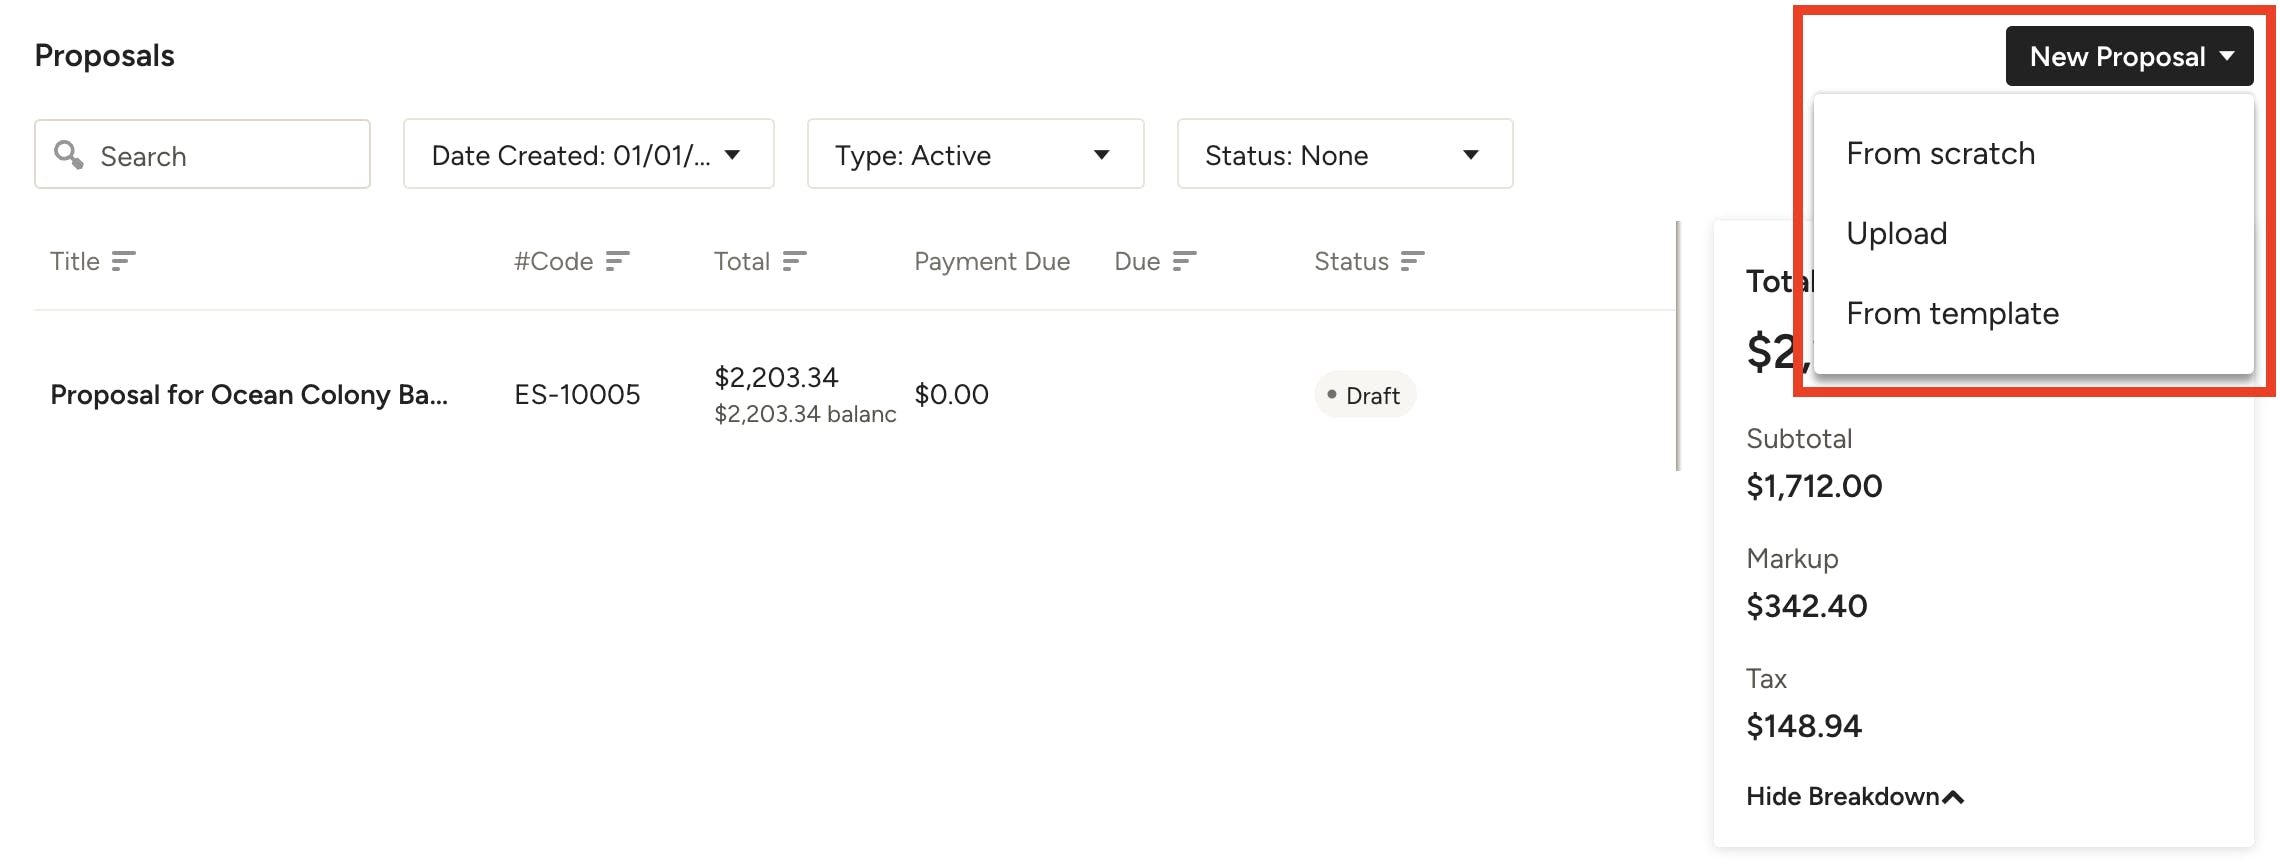
1. Go to the project where you would like to create a proposal. From within the Proposal section of that project, click on the New Proposal button.
2. From the dropdown menu, select From Scratch, Upload, or From Template.

Create Proposal from Scratch
If you would prefer to start from the beginning with your proposal, select the From Scratch option in the New Proposal dropdown. You will then be able to add line items, custom columns and descriptions as needed.
To add line items, quickly search through your own library by selecting the From Library button on the right.

You can then view Project Items and Library. Project Items (the chair icon) shows you all the items that have been added to that specific project, whether added manually or added through the Clipper.
The Library (the lights icon) shows you all the items you have previously added to all other projects, whether those were added manually or added through the Clipper.
You can either select an existing product by clicking on the product in the right menu, or you can add a new product by selecting Add a Product. When you add a new product, you will have to manually input all the details.
You can customize the proposal to fit your needs by easily clicking into a field and editing it or adding your own custom fields. Arrange your proposal how you want by grouping your line items by category, room, any single-select custom field you added, or no grouping at all. These groupings will also be applied to the downloaded PDF and client view of the proposal.
Create Your Own Proposal Template
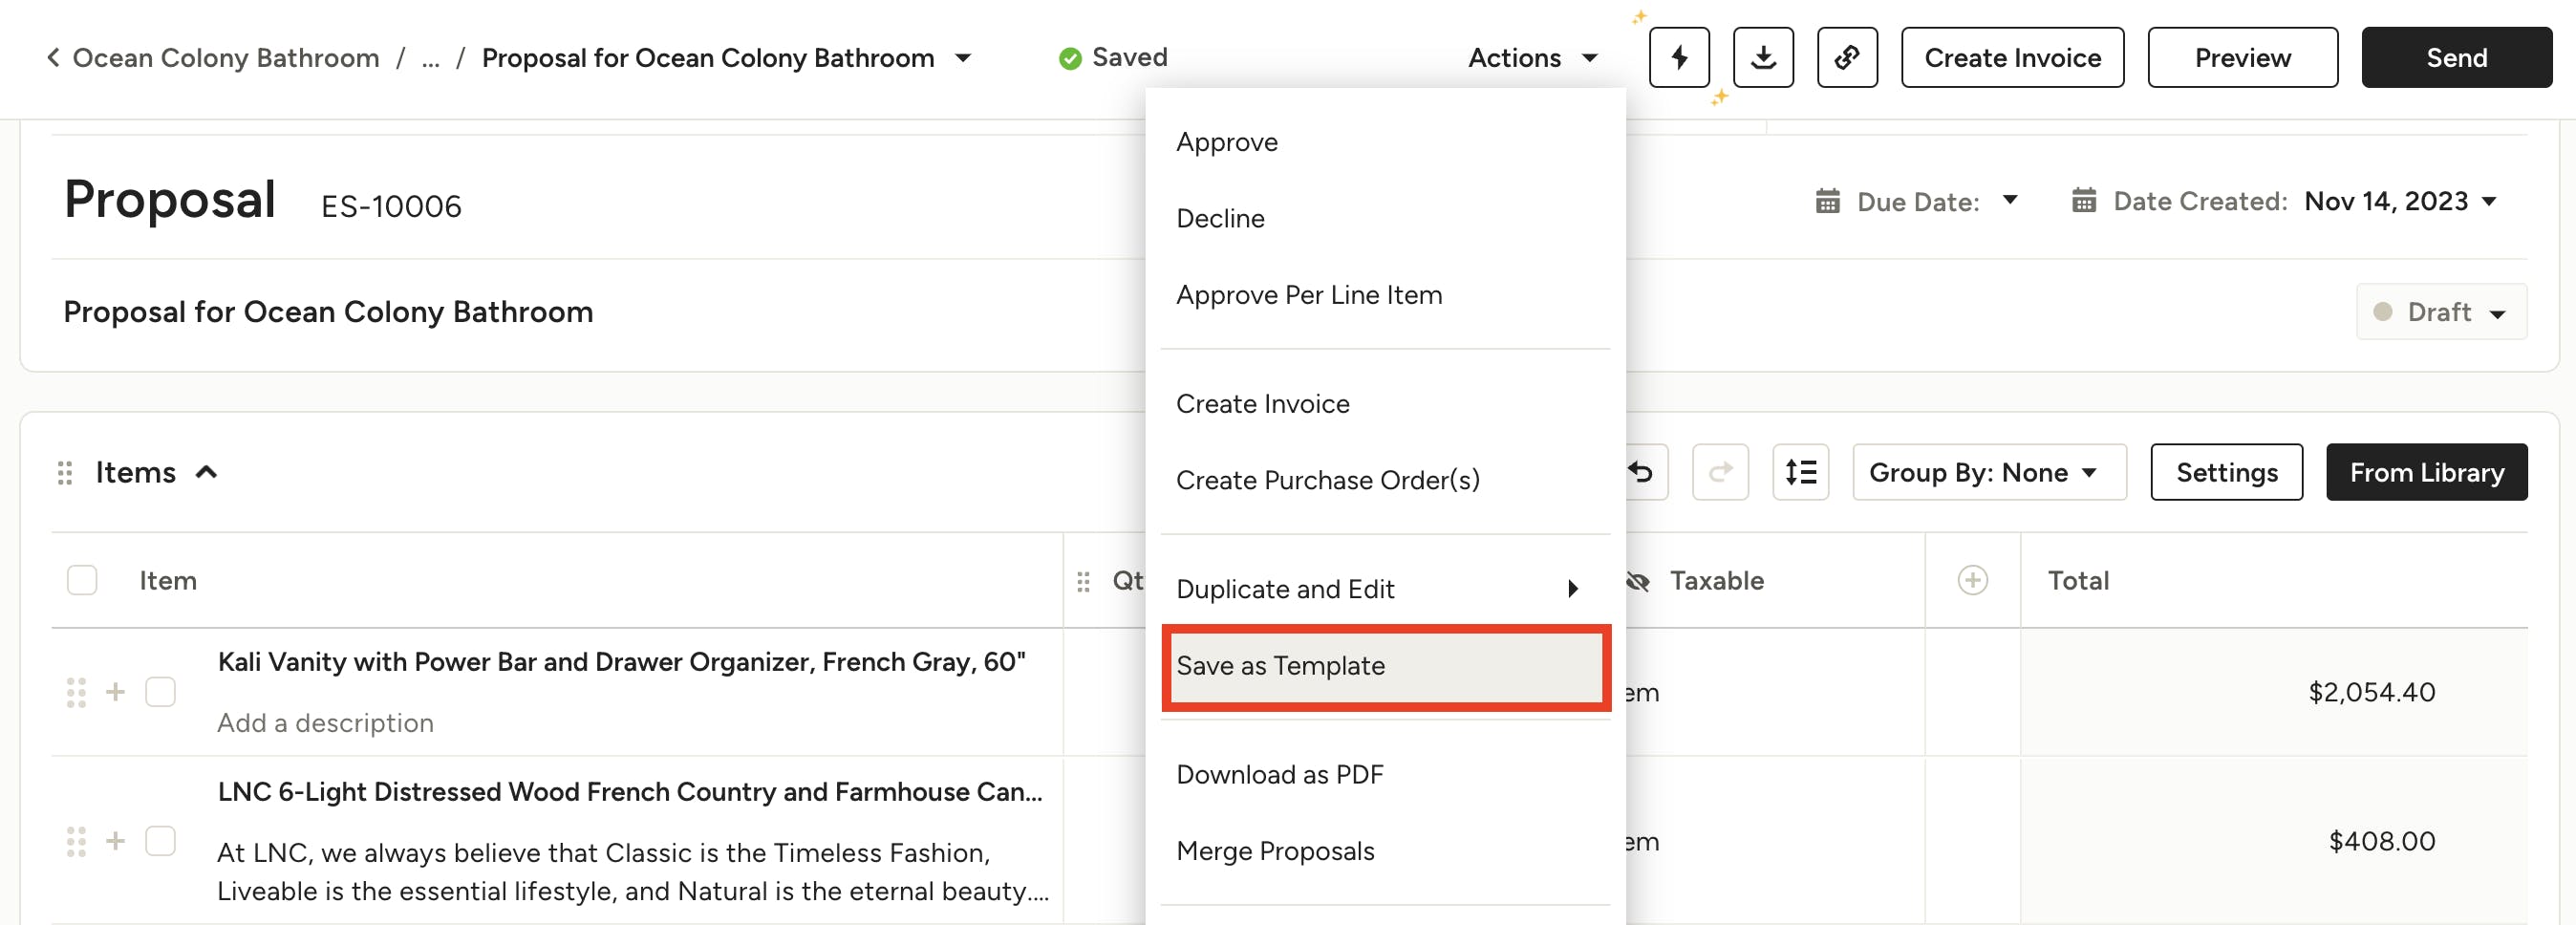
If you have a standard template for your business that you would like to use time and time again, you can create your own custom template.
Once you create your proposal with your preferred format, select the Actions dropdown, and find Save as Template.
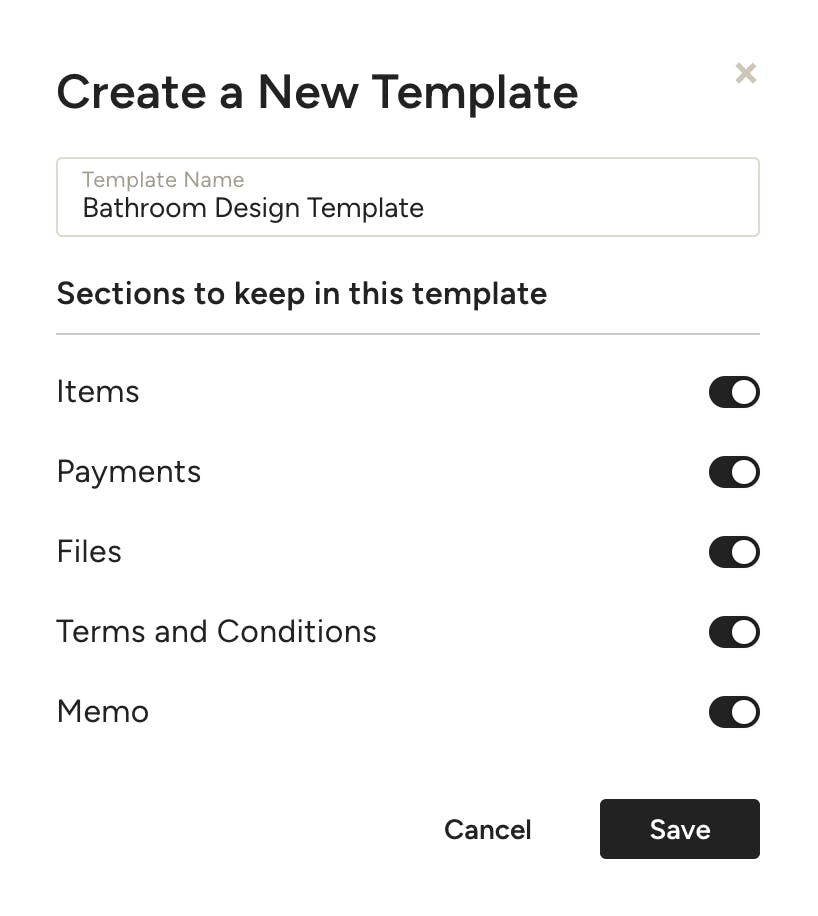
From there, you can name your template and select all the sections you would like to keep for your proposal template. Click Save.
Once you create your template, you will be able to access it in the Template Center whenever you need it. To find templates from the navigation, select the Company icon from your left navigation, then Templates.
When you are creating a new proposal, you can also select From Template in the dropdown to use your saved templates.

Upload Proposal File
If you already have a proposal that you would like to upload into Houzz Pro, you can do this as well. Here's how:
1. Select the Upload option in the New Proposal dropdown.

2. Choose the file from your computer you want to upload as a proposal.
3. Once your proposal loads into Houzz Pro, you will need to add in the proposal total in the text box at the top right of your screen. This ensures that there is a total amount due for the proposal, which you can use to create a payment schedule, an invoice, and/or receive online payments.
You can also adjust other details, such as title, due date, scheduled payments, terms and conditions, memos, and more.
Duplicate Existing Proposal
If you have a proposal that you used in a previous project and would like to use again, you also have the ability to duplicate that proposal and move it to another project.
To start:
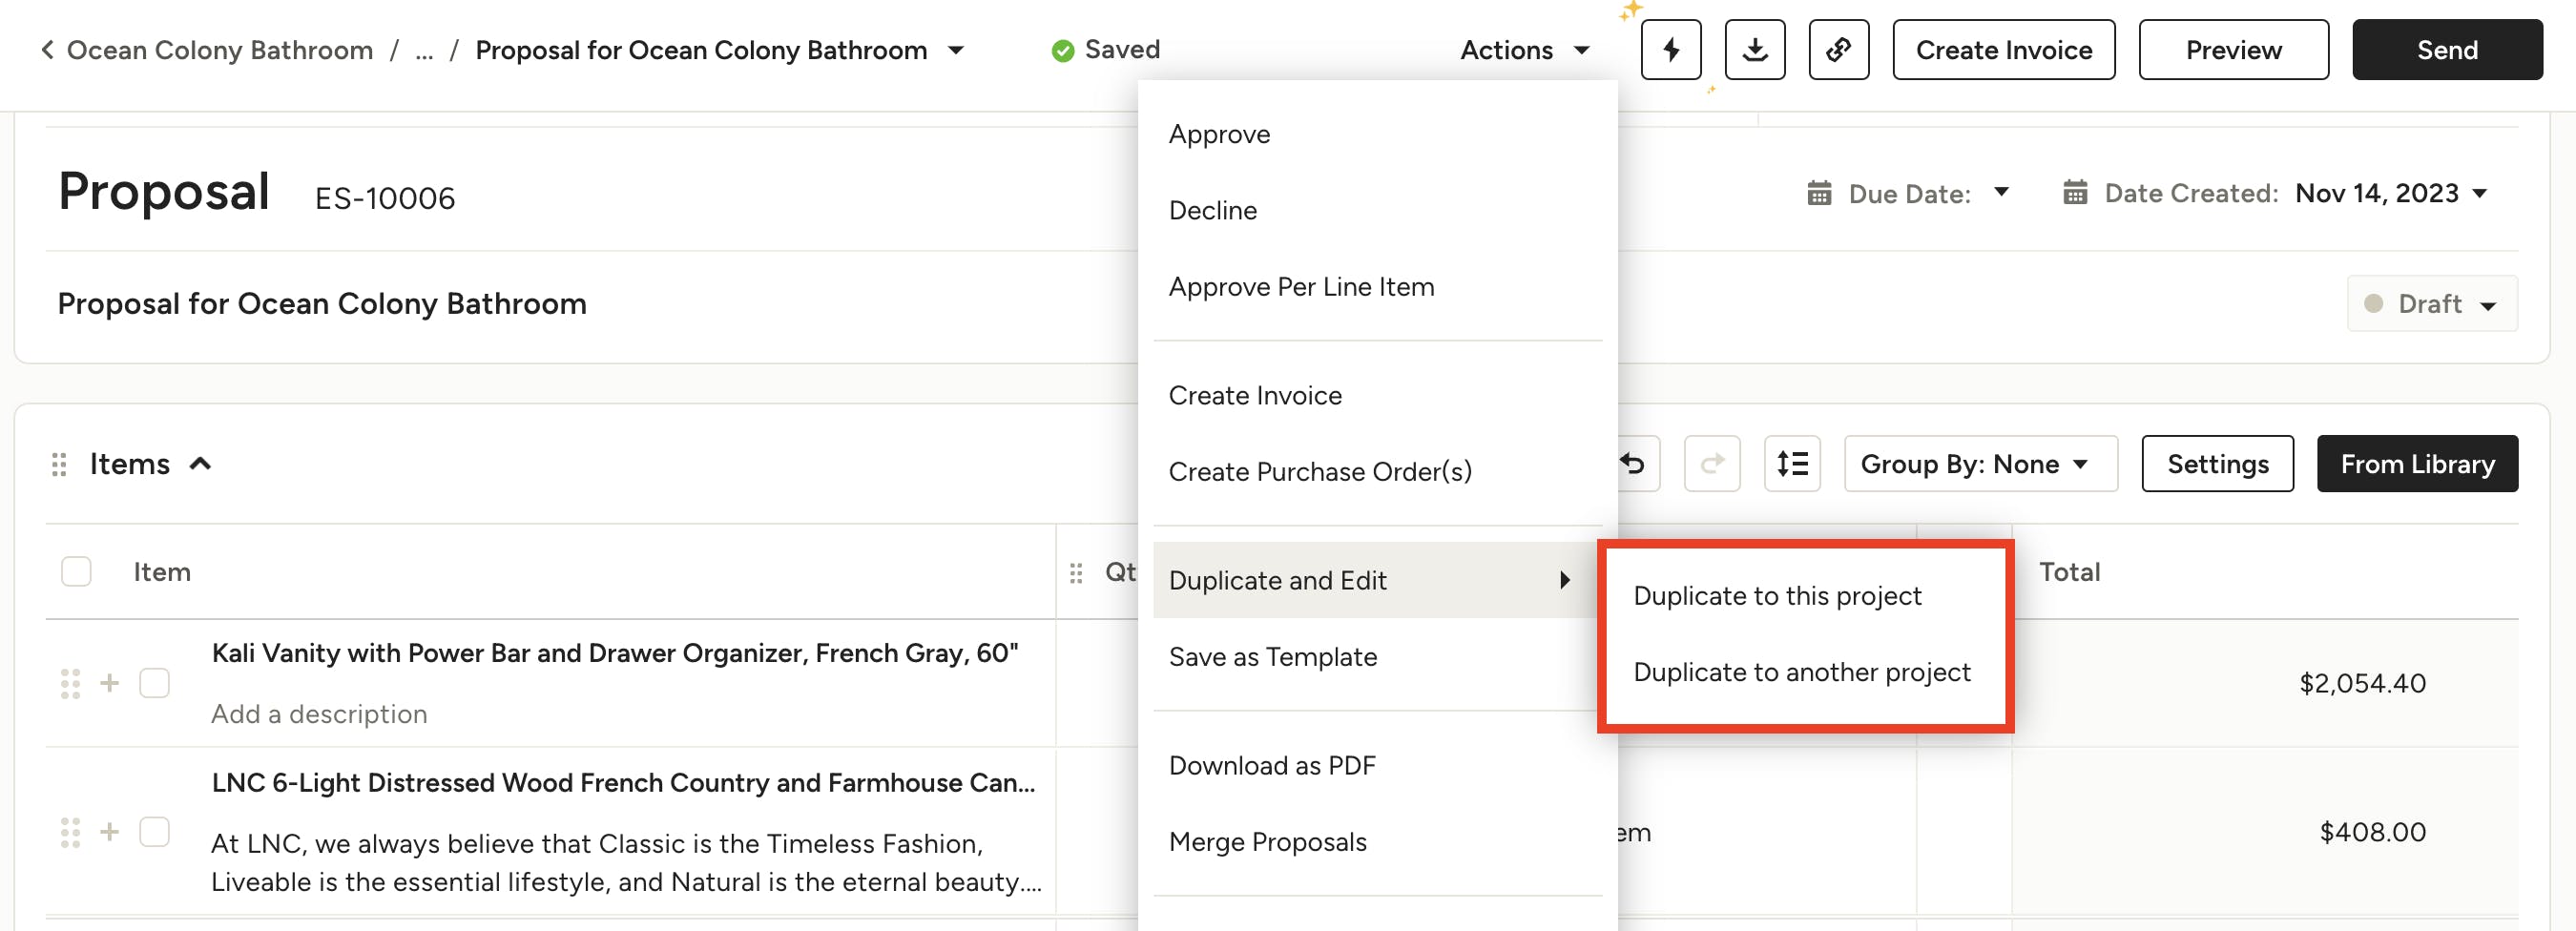
1. Open up the proposal you would like to duplicate. Select the Actions dropdown, and find Duplicate and Edit.
2. From there, you can choose to either duplicate the proposal to the existing project, or you can duplicate the proposal and move to another project.
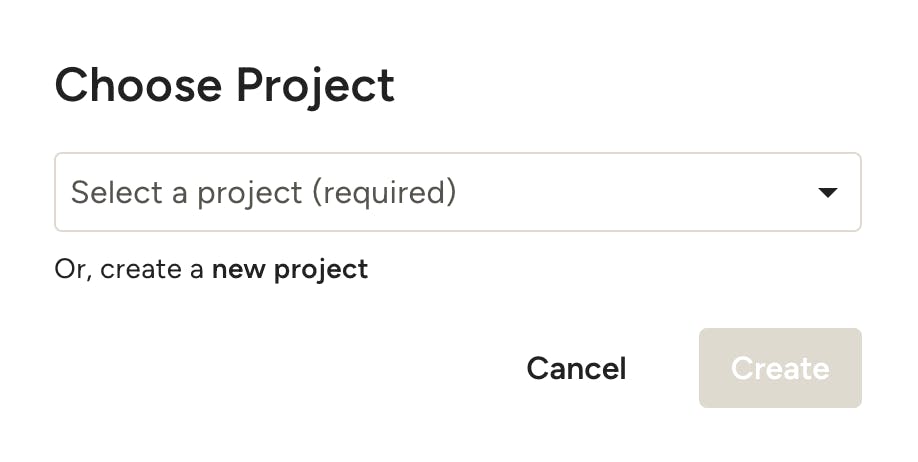
3. If you decide to use in another project, just select that Project from the dropdown menu that pops up, or you can choose to create a new project for this proposal.
4. The duplicate proposal will now be in the selected project so you can make changes as needed.

Preview and Share Proposal
Before sending your proposal, you can preview it and choose exactly how it will look to your clients. Select the Preview button in the top right of your screen. From there, review the Settings dropdown to turn on and off columns and customize what your client sees.
When your proposal is ready to go, click Send. You can either write a personalized email message or use your saved message templates. Once your client receives the email, they can view the proposal and approve or decline it directly from their computer, phone, or tablet device.
You can read more about preview and share options for proposals in this article: How to Customize What Your Client Sees on Your Proposal

Print and Download
Alternatively, you can opt to print your proposal to share a physical copy, or download and attach it to an email. To do so, open the Actions menu at the top of the page and select Download as PDF or Print, depending on your desired action. You can also download a PDF using the download icon at the top of the page.

Edit Approved Proposal
Once a proposal is approved, you will need to reopen the proposal if changes are needed. Your client won’t be notified that you’ve reopened the proposal for editing until you reshare it with them.
To start:
1. Open up the proposal you would like to edit. Select the Actions dropdown, and find Reopen for Editing.
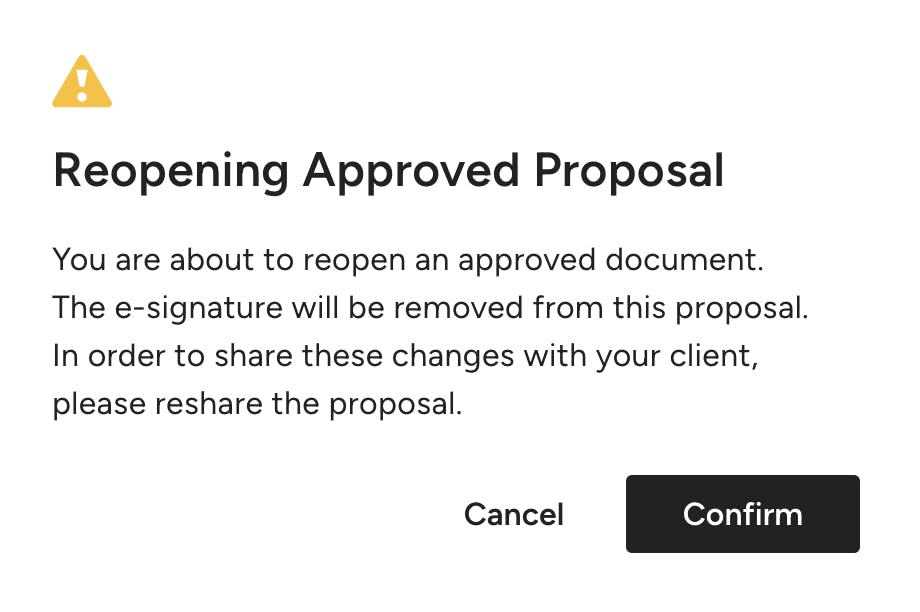
2. A popup will ask you to confirm you would like to reopen the proposal. Please note: When you do this, e-signatures will be removed, and you will need to reshare with your client.