How to Manage Your Leads
Within the Leads section of Houzz Pro, you can easily manage your lead information and communication to ensure your business stays on top of all potential clients. With messages, notes, files, estimates/proposals and more, you have the best possible tools available to convert leads to actual clients.
In this article, we will discuss how to view all your leads, edit and delete leads, create new leads, convert a lead to a project, and adjust key lead information like lead source and lead stages.

View All Leads
You can view and access all your existing leads using the Leads icon in your left navigation. If you hover over the icon, you will see a list of Unread and Read leads so you can quickly review and follow up with new leads as they come in.
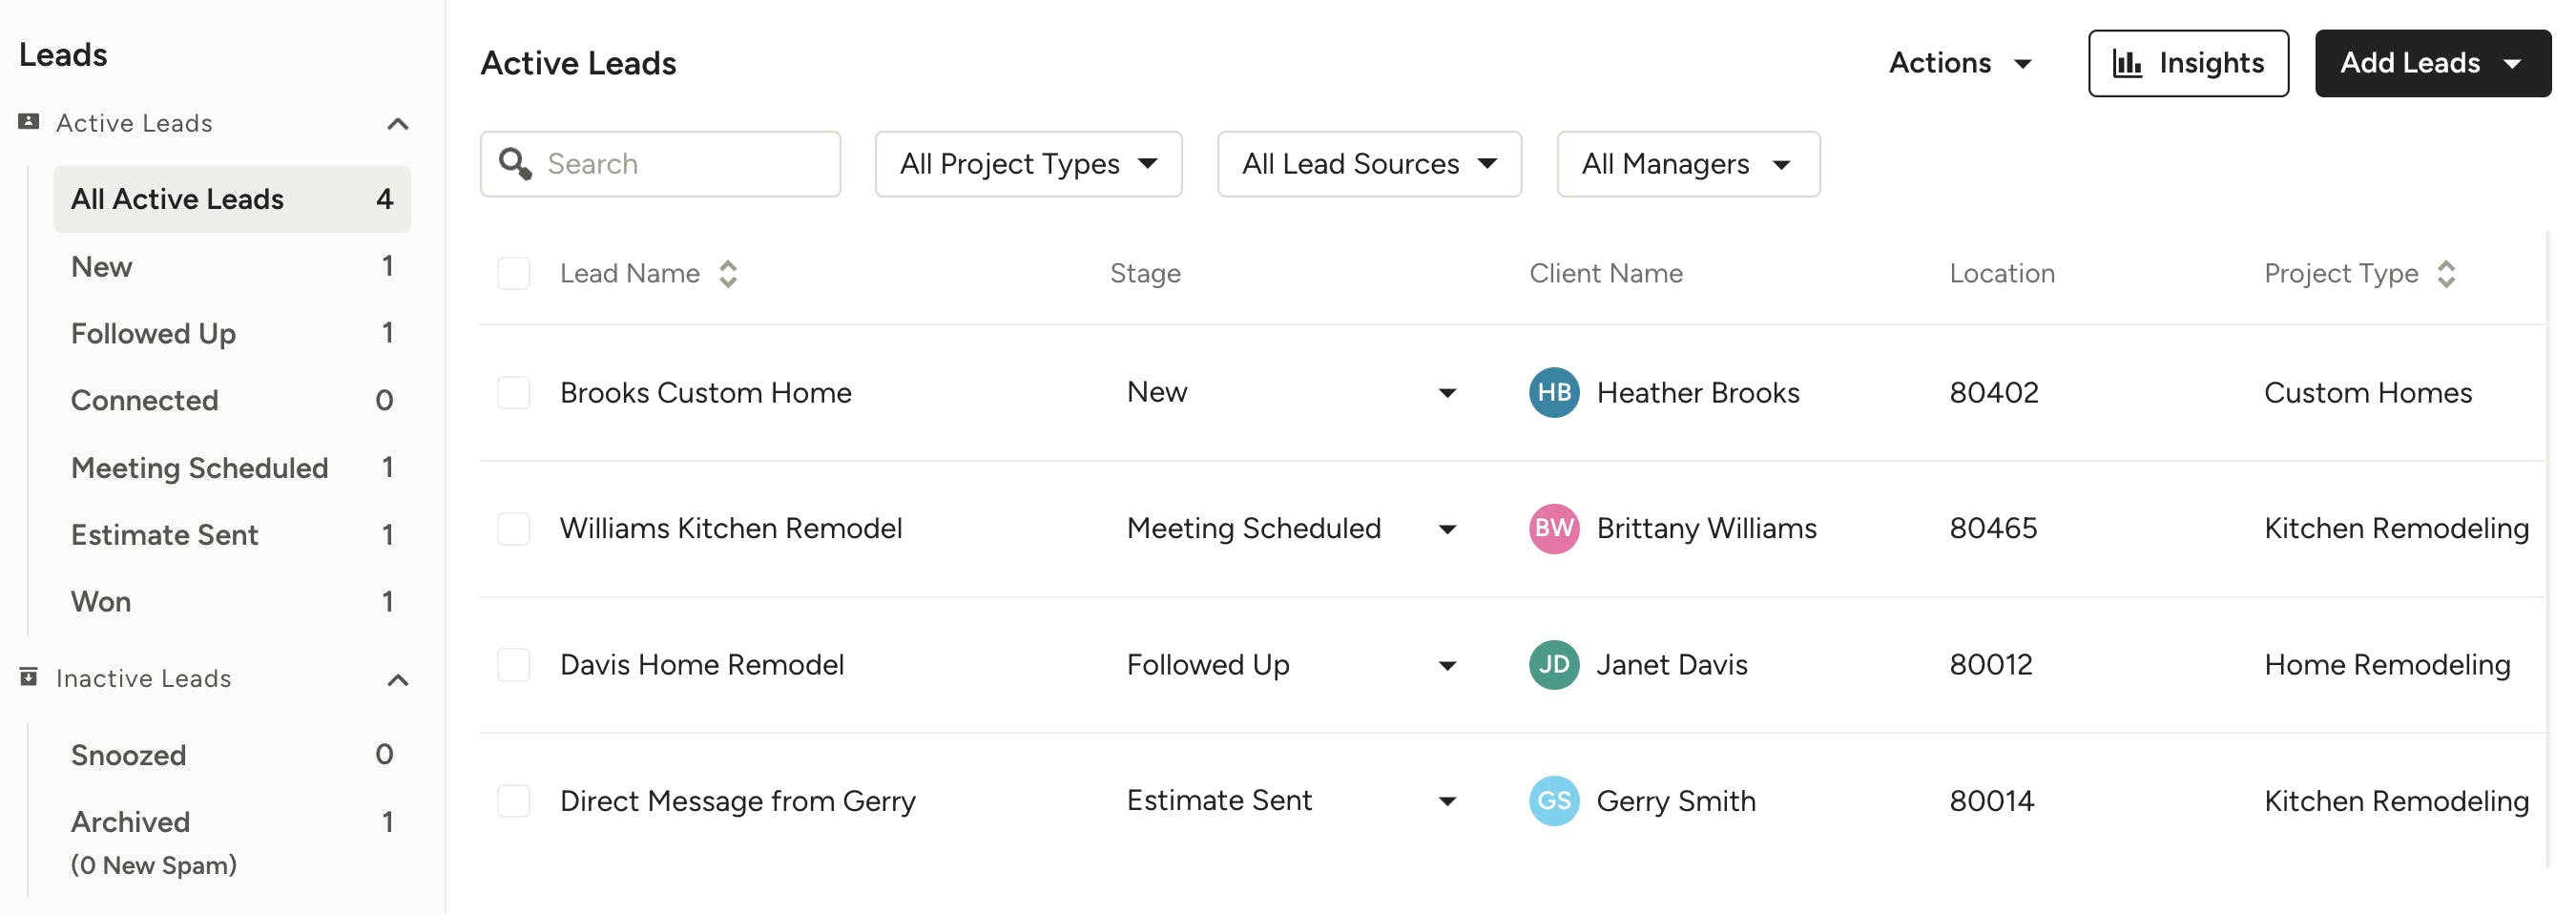
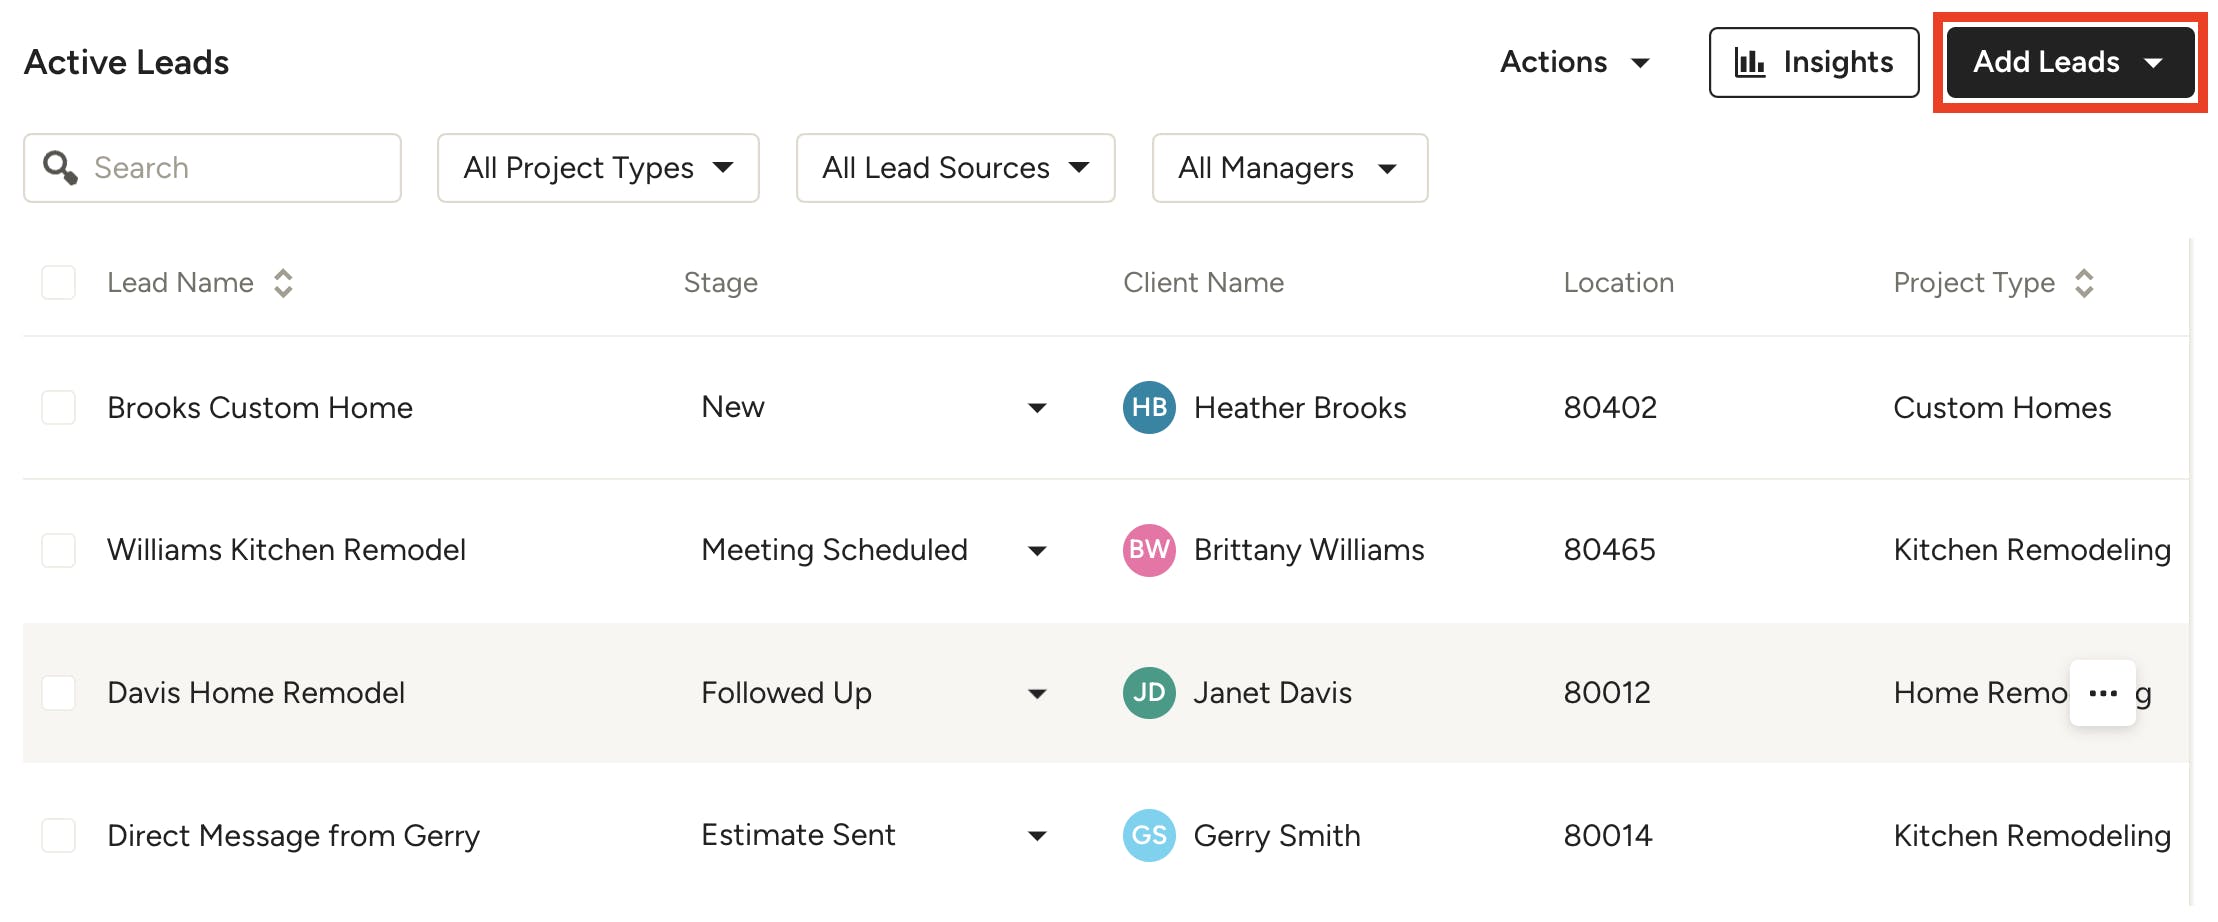
Click on the Leads icon to see a comprehensive leads list. On this page, your leads are neatly organized so it's easy for you to stay updated on the status of each lead at a glance. You can see information about the lead, and you can also search and filter to find the lead you need.
Within the leads list, you will find:
- Lead Name: You can choose a name based on the type of project or any other criteria.
- Stage: Labeling each lead by stage helps you quickly view its status and recognize the next steps needed to close the job (more about lead stages below).
- Client Name: Client names are color coded to make it easier for you to differentiate between them at a glance.
- Location: Clearly see where each lead is located.
- Project Type: Specify the type of project to better understand the scope.
- Lead Source: Specify how you received the lead (more about lead sources below).
- Estimated Revenue and Estimated Profit: If you add in financial details about the lead's project, you will be able to see potential revenue and profit numbers.
- Last Contact: Last day and time you interacted with your lead.
- Lead Managers: If you assign a team member as a manager for this lead, their name will appear.
- Calendar Icon: If a meeting has been set with the client through the calendar integration, you’ll see the calendar icon.
- Message Icon: If you have an unread message from the client, you’ll see the message icon.
Filter Leads and Lead Stages
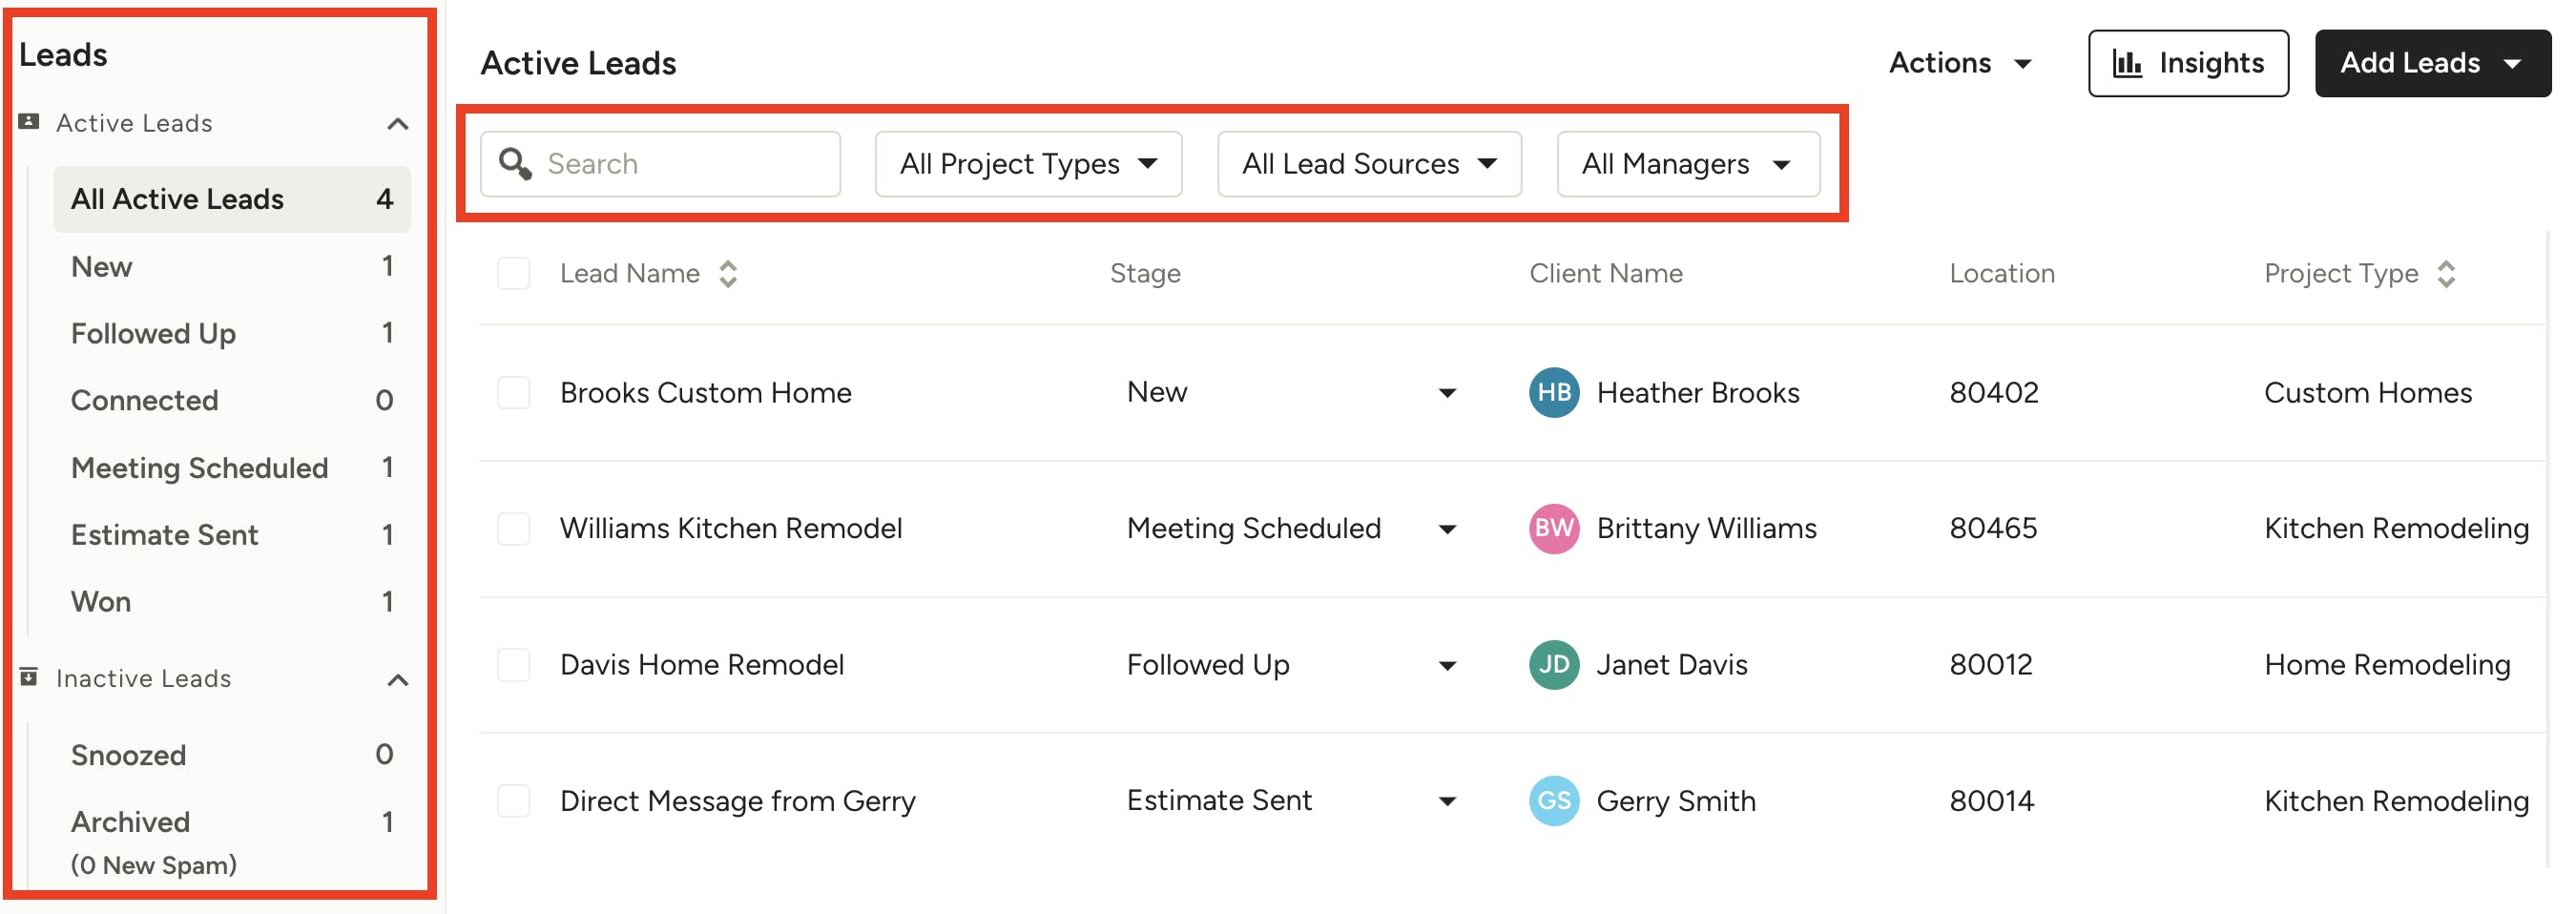
At the top of your leads list, you can search by keyword or filter by Project Type, Lead Source or Lead Managers.
To the left of your leads list, you'll see the various lead stages and how many leads you have in each stage.
The lead stage options include:
- New: Any lead that you have not yet responded to will fall under the New stage.
- Followed Up: Once you’ve responded to the original message, it will be moved to the Follow Up stage.
- Connected: Once the lead corresponds with you, it will be moved to this stage.
- Meeting Scheduled: If you’ve set up a meeting with your client, it will automatically be moved to the Meeting stage, and your meeting details will appear in the Upcoming Meetings section of the leads list.
- Proposal/Estimate Sent: Once you’ve shared a proposal/estimate with your client, it will be moved to this stage.
- Won: Leads that have been converted to projects will appear in this stage.
As you work, the stages will be automatically updated to reflect your progress. If you’ve made progress outside of the system, you can always update the stage manually in the lead list dropdown or from within the lead itself.
View Individual Leads
From the leads list, you can easily click on a specific lead to view more information.
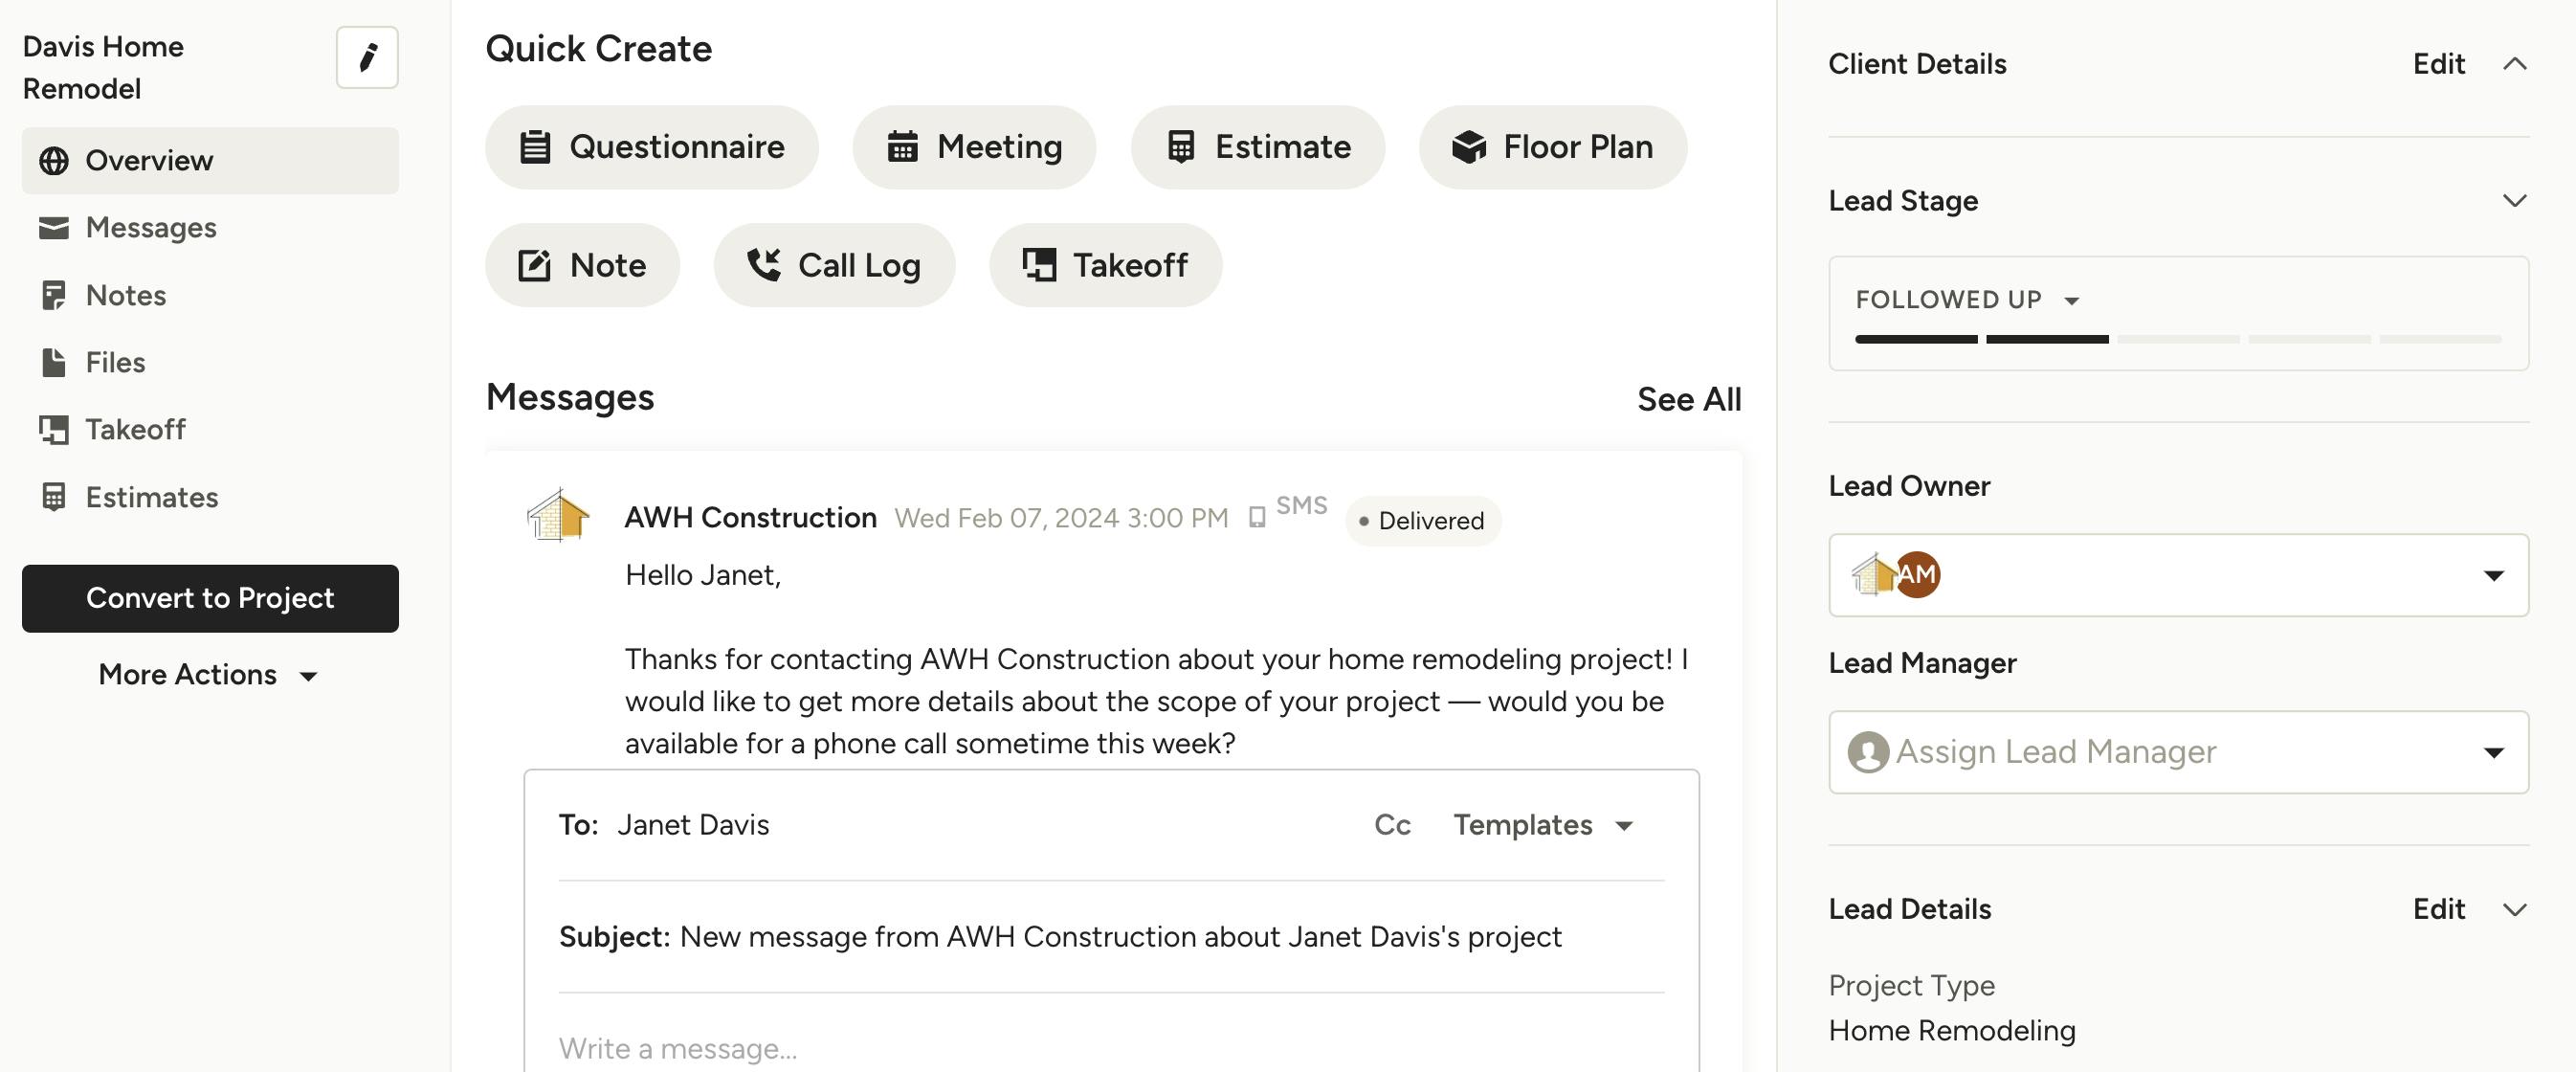
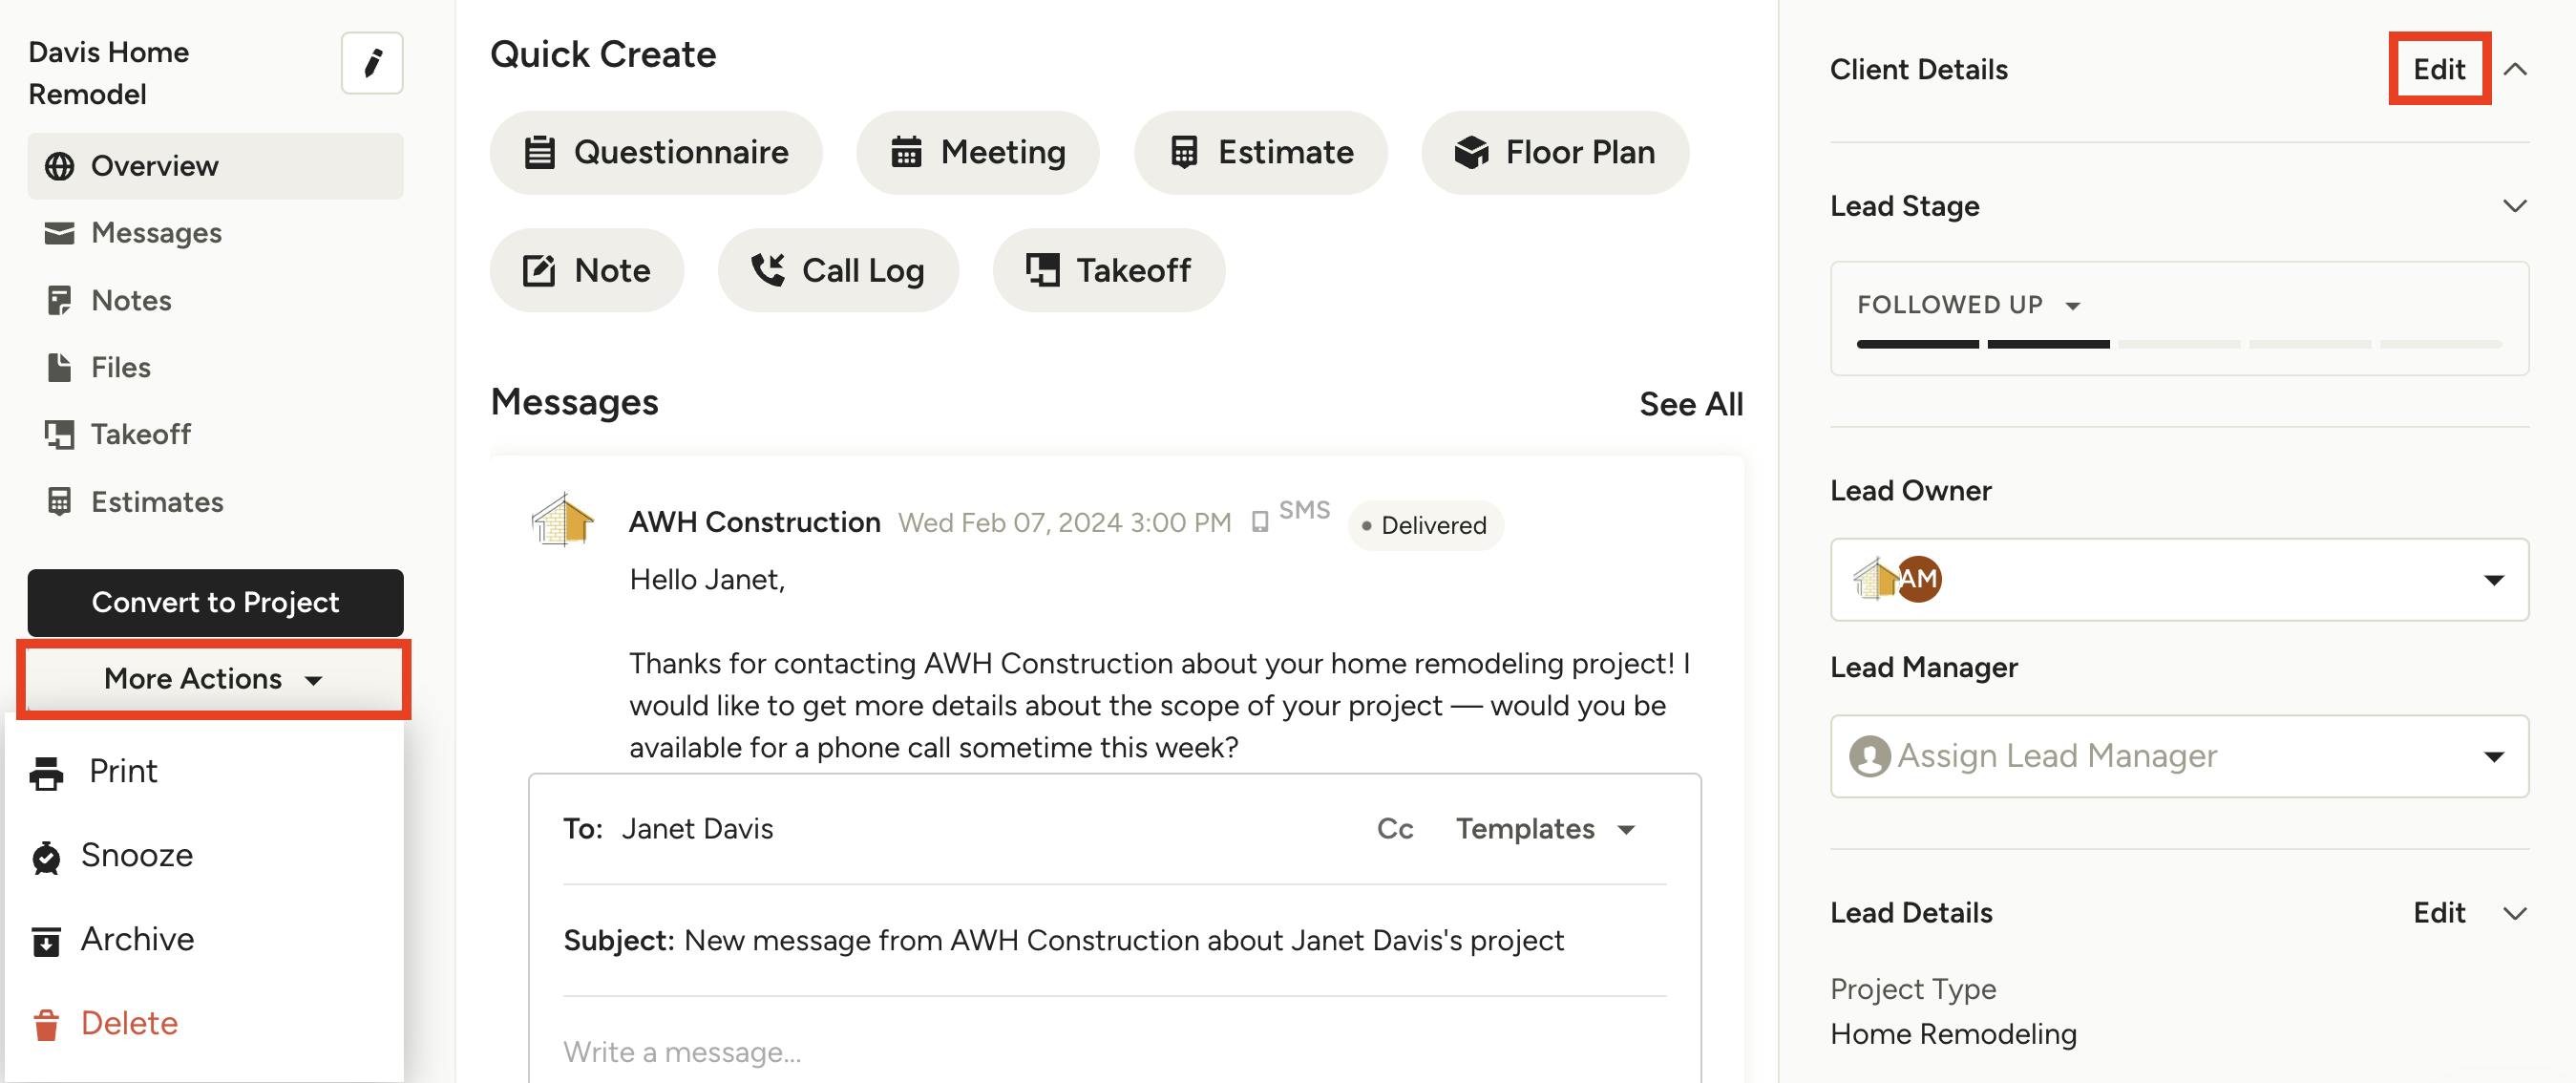
On the overview page, you can communicate with leads by sending them an email or text message. You can view the lead activity below and also quickly create a new lead questionnaire, meeting, floor plan and more.
On the left side of this page, you can view project overview details, messages, project notes, project files, takeoffs and estimates. You can convert to a project if the lead is won, and you can Delete, Archive, Print or Snooze under More Actions.
On the right side of this page, you can view client and lead details, lead stage, and more. From here, you can assign a team member to a lead — just select a team member's name in the Lead Manager dropdown, and they will be marked as the manager for this lead.
Edit or Delete a Lead
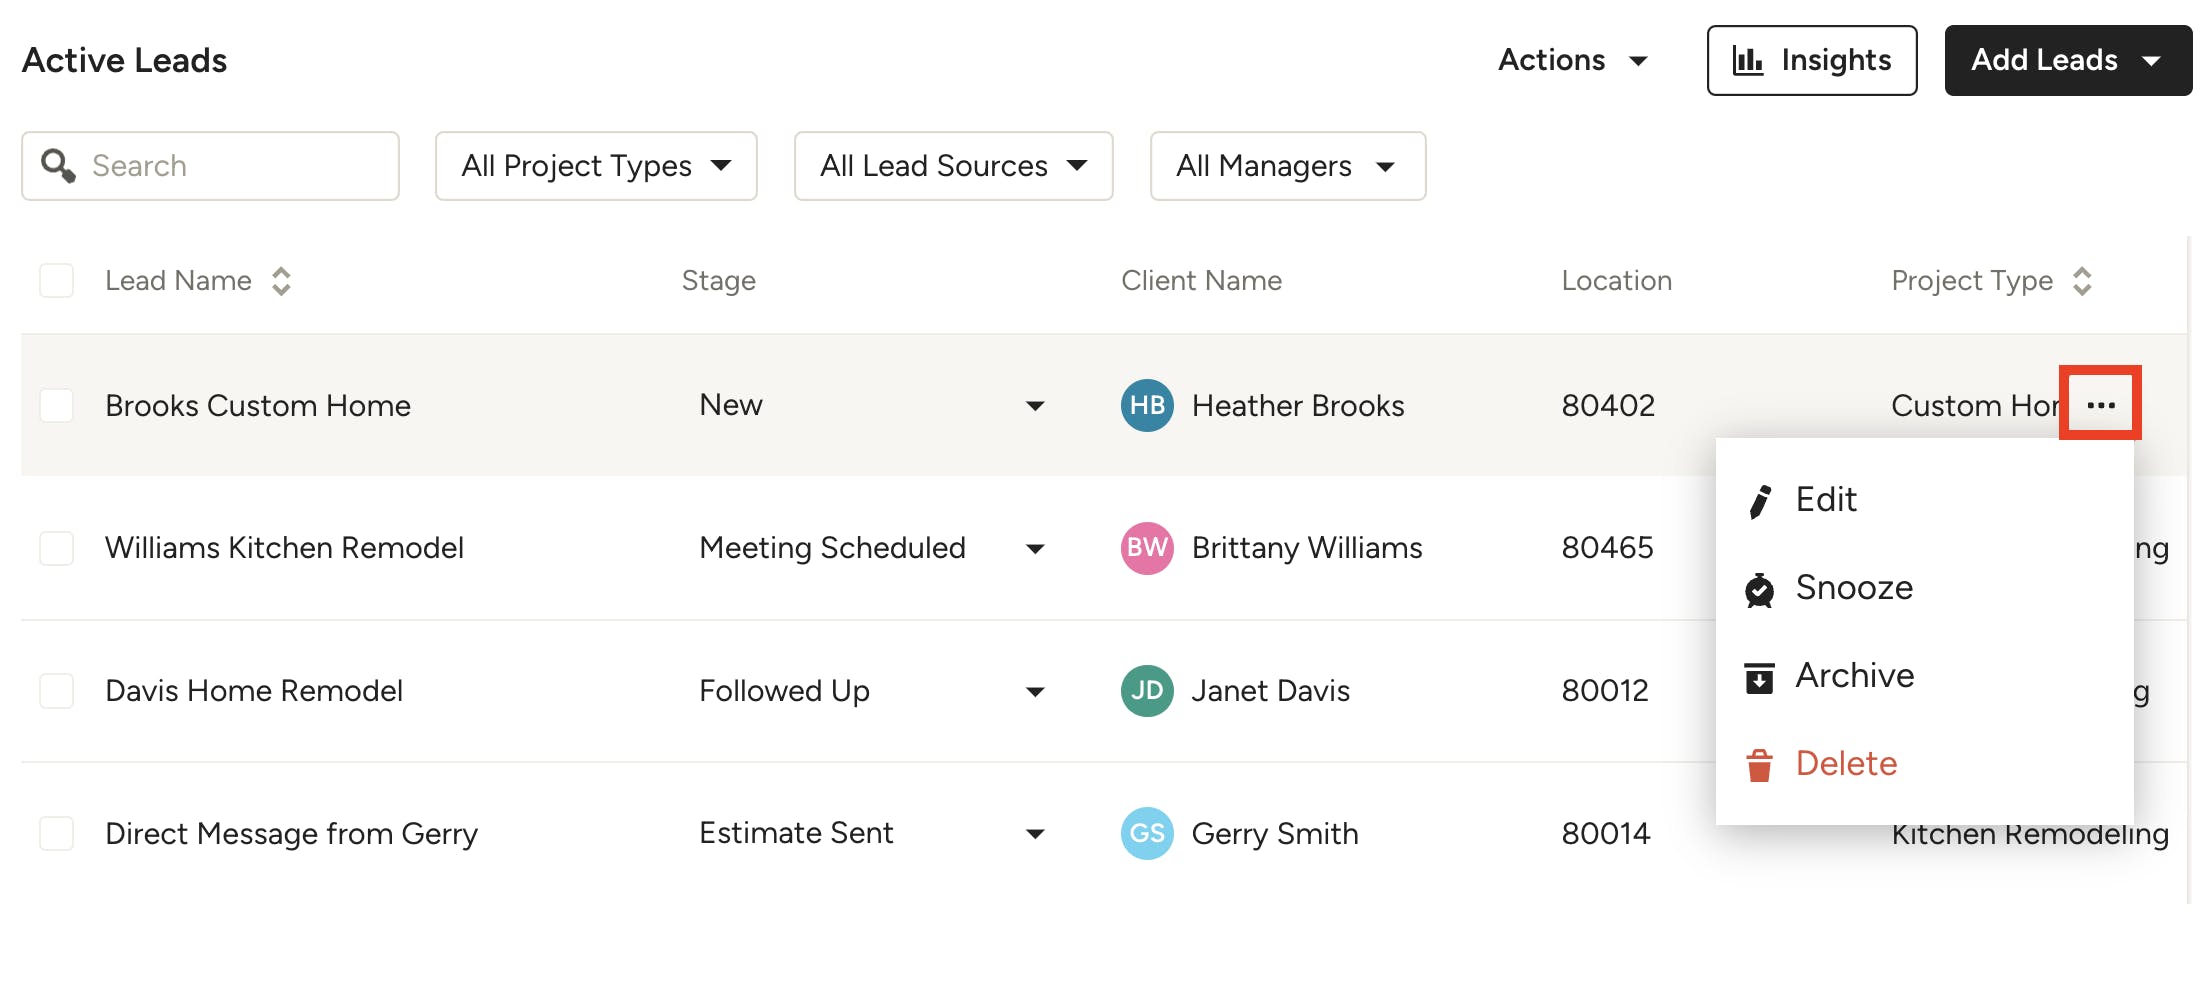
If you need to edit or delete a lead, you can easily do this from your leads list. Select the three dots icon to the right of your lead — from there, you can select Edit, Snooze, Archive or Delete.
If you select Edit, a new screen will appear to input more client or project details.
If you select Delete, you will be able to provide details on why this lead isn't moving forward. This is a great place to provide feedback on leads that aren't a fit or that are spam so we can improve connections moving forward.
If you prefer to edit or delete a lead from within the specific lead's page, you can do that as well.
To edit a lead, select Edit at the top right of your lead screen.
To delete a lead, select More Actions from the left menu, then click on Delete.
Create a New Lead
When you’re contacted through Houzz Pro about a potential project, a lead will automatically be added to your New leads stage.
If you have a lead from a different website, word of mouth, or any other source, you can manually add the details to the system.
To do this, simply click the Add Leads button at the top right of your leads list. You can either select to Create New Lead, Import from File, or Import from Email.
Once you create a new lead, it will then appear in your leads list.
Lead Sources
When you are creating a new lead, you have the ability to list the source of the lead to keep track of where your business receives the most traction.
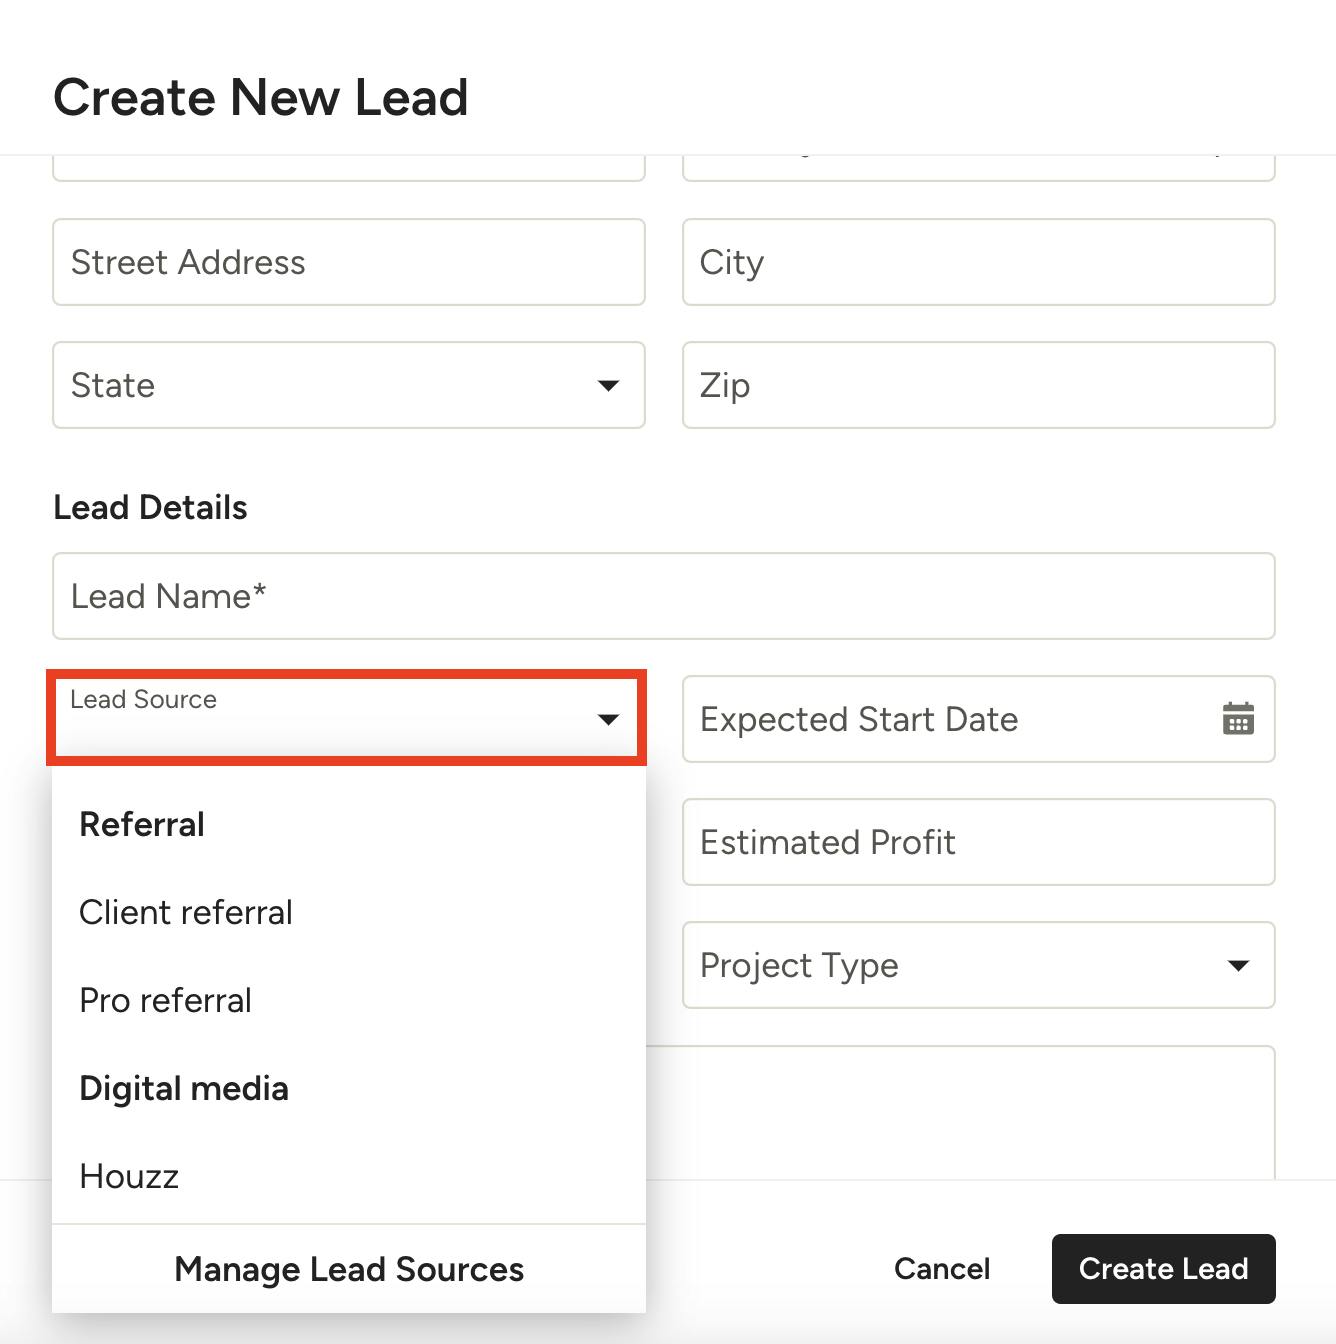
In the Create New Lead screen — or when editing an existing lead — you can select from an extended list of standard lead sources.
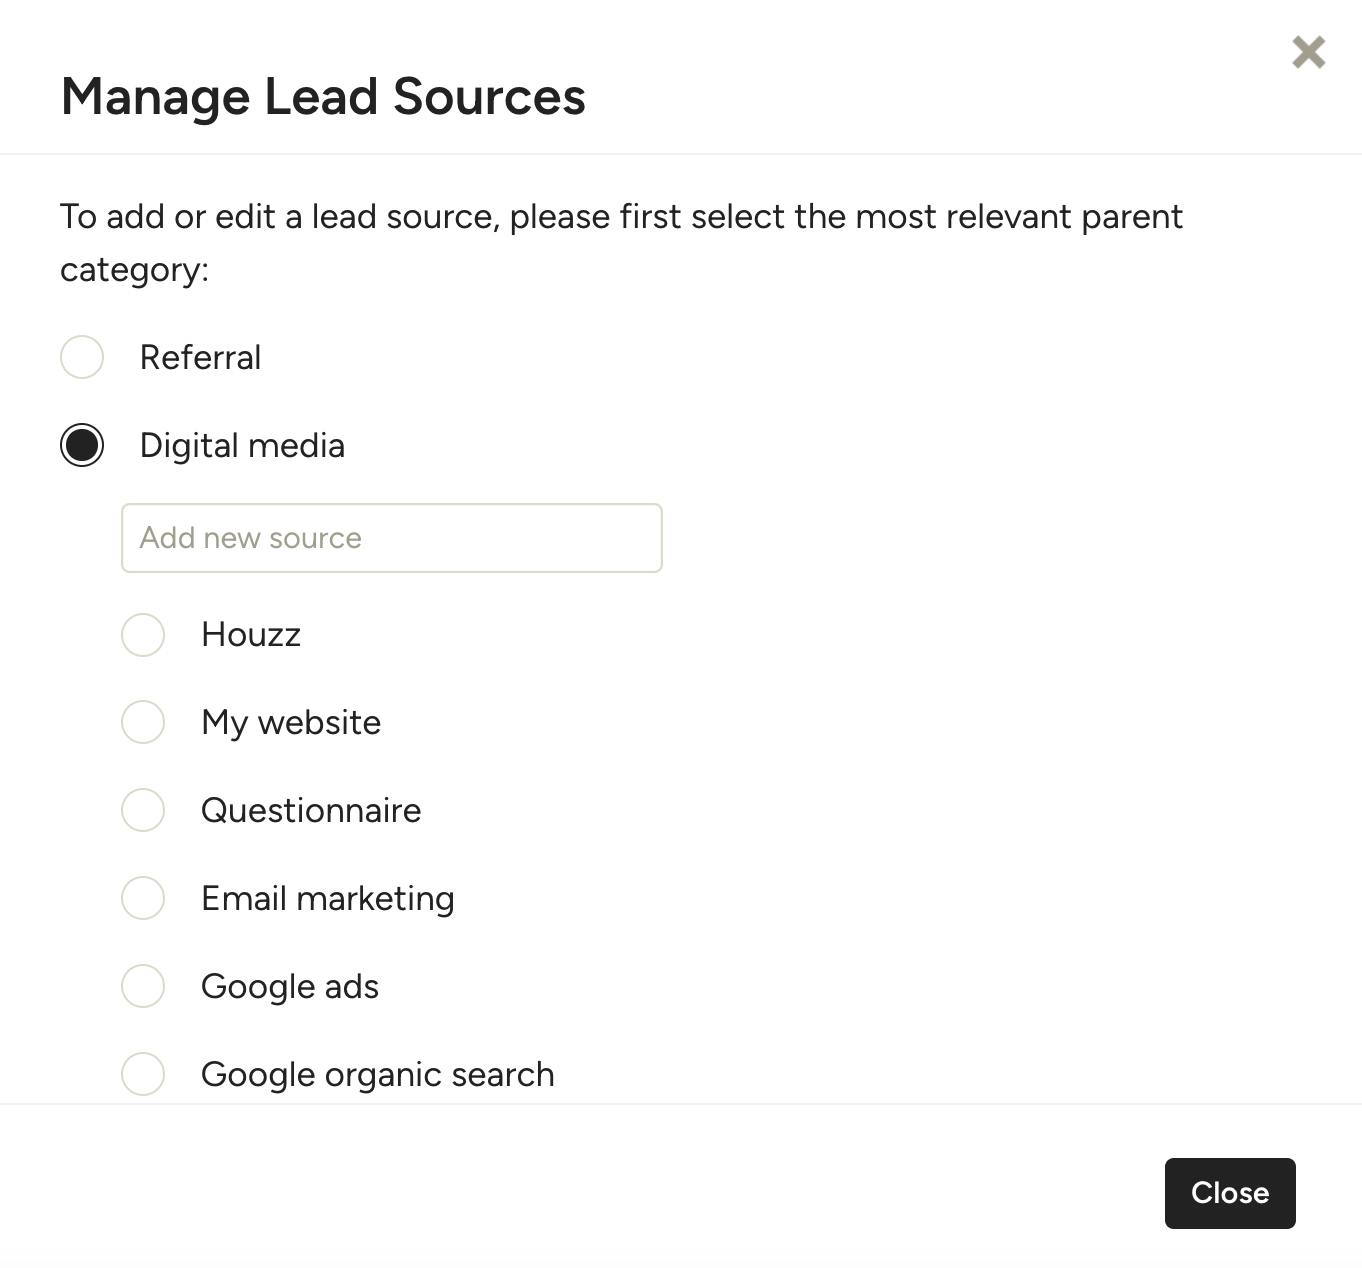
You can also add your own custom lead sources by clicking on Manage Lead Sources at the bottom of the dropdown menu.
From there, you can select the relevant category and manually type in the lead source information.

Convert Lead to Project
If a lead has been won and you would like to turn it into an official project, you can easily make the adjustment within the lead overview page.
To do this, click the Leads icon from your left navigation, then select the relevant lead from the menu. Within the lead overview page, select the Convert to Project button in the left menu.

A screen will appear where you can input details on the project, including lead source, estimated start date, estimated revenue and profit. All this information is optional and is used for your lead insights, so you can keep blank if you prefer. Be sure to click Convert to complete.
Your lead will now appear listed as a project. Please Note: At this time, you cannot convert a project back to a lead.
Leads on Houzz Pro Mobile App
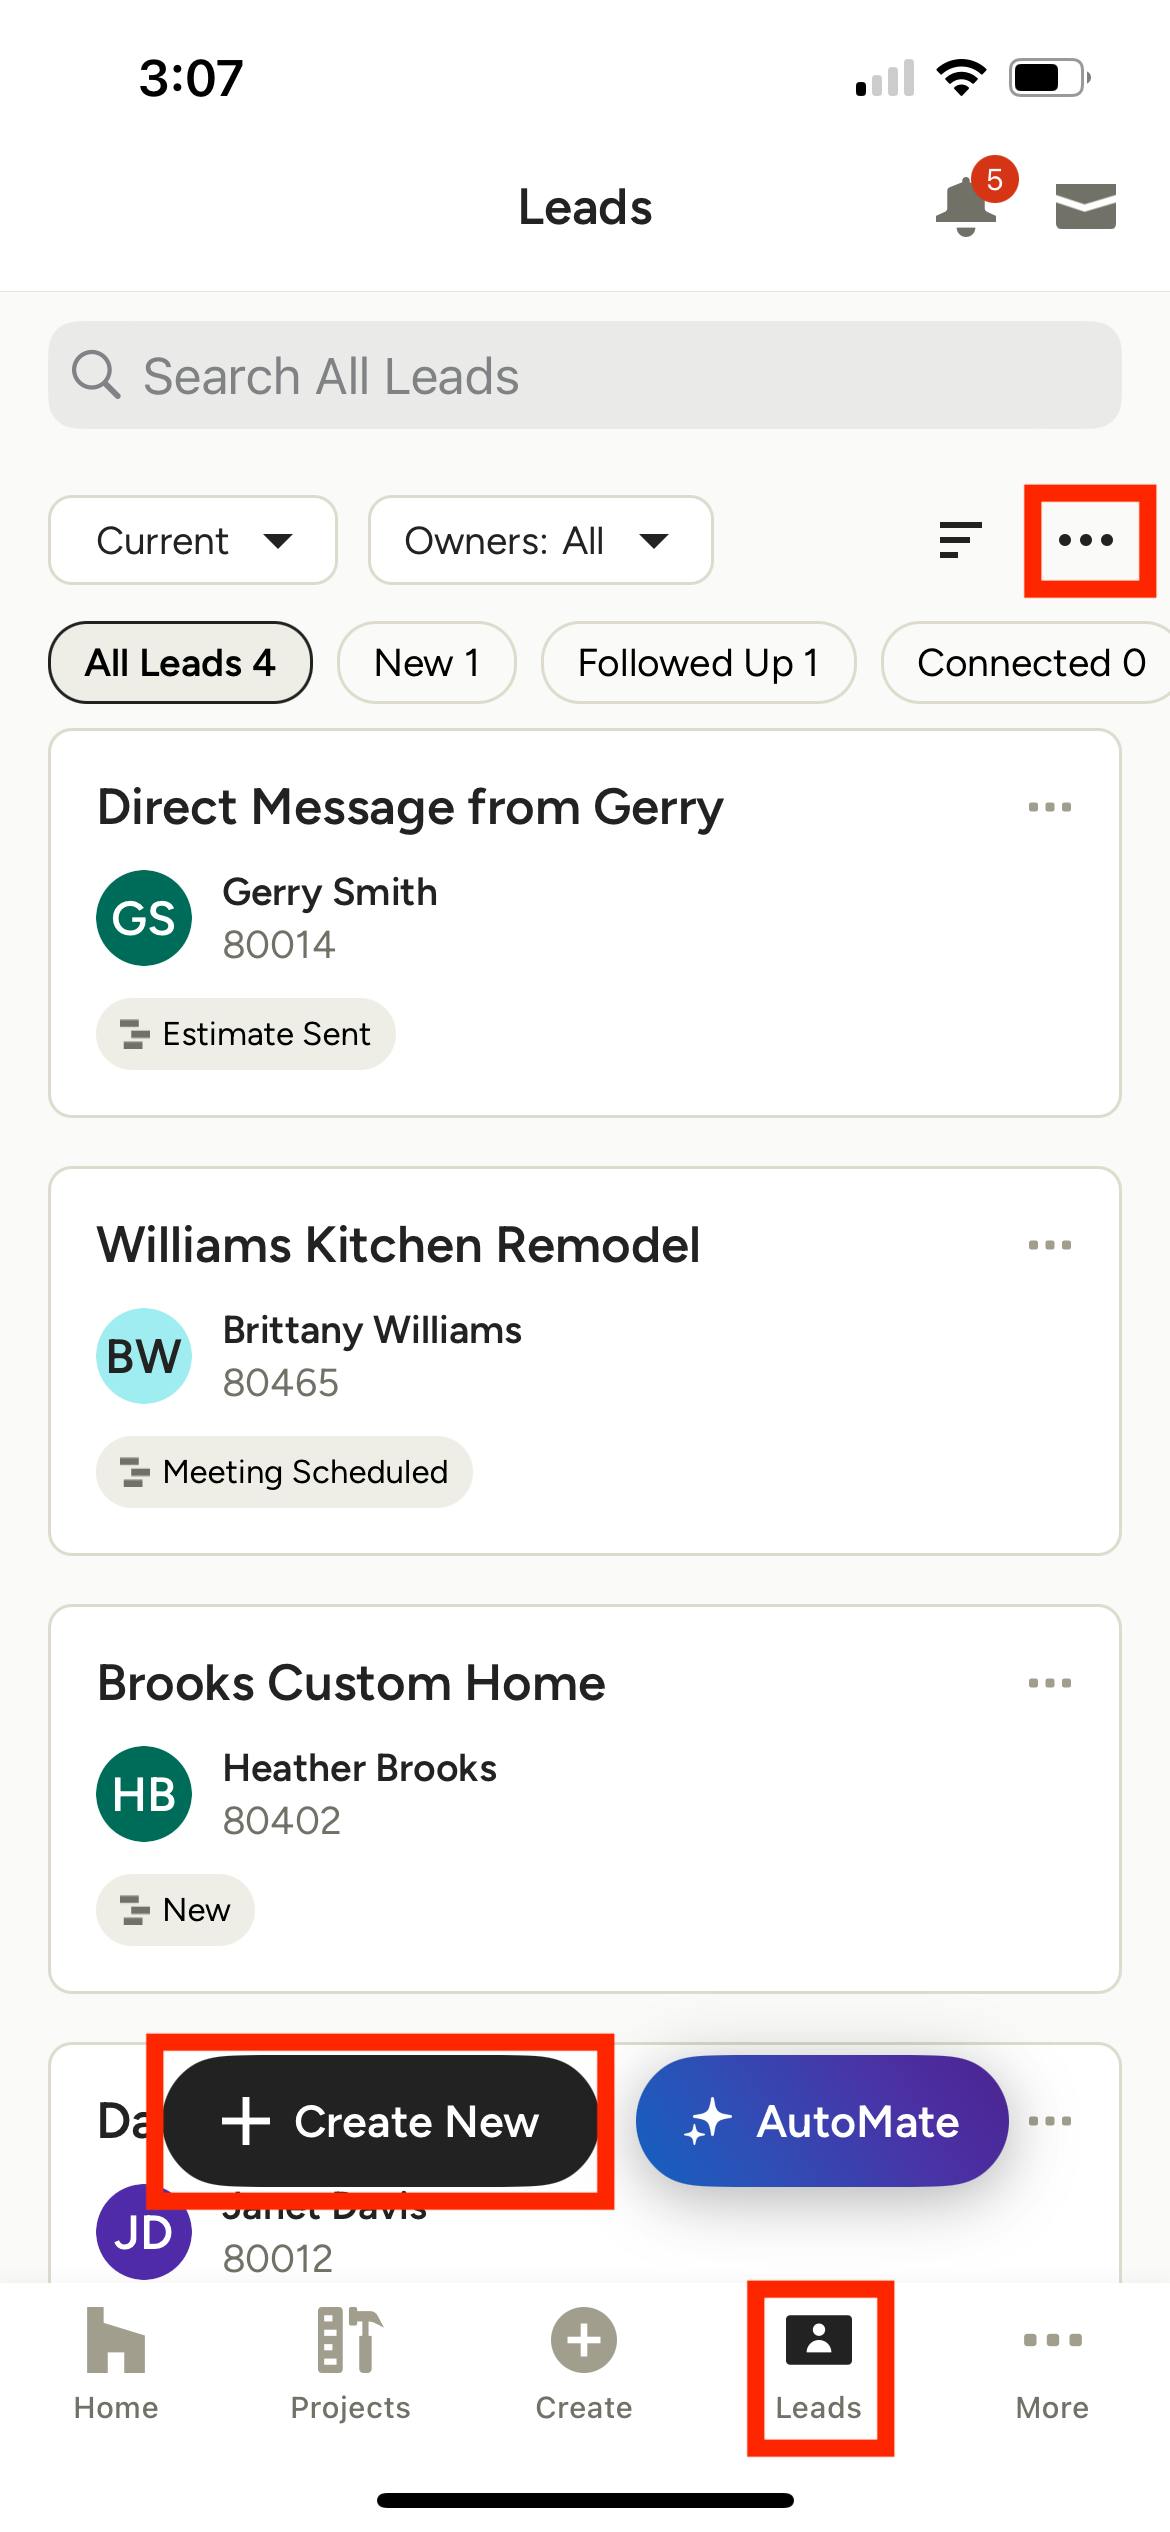
To access your leads list on the Houzz Pro mobile app, select the leads icon from the menu at the bottom of your screen.
In the leads list, you can search your leads and filter by lead status, owner and/or lead stage.
Select the three dots icon at the top right of your screen to Archive or Delete a lead. Click on the relevant lead to view client and project details.
If you would like to create a new lead, select the Create New button at the bottom of your screen.
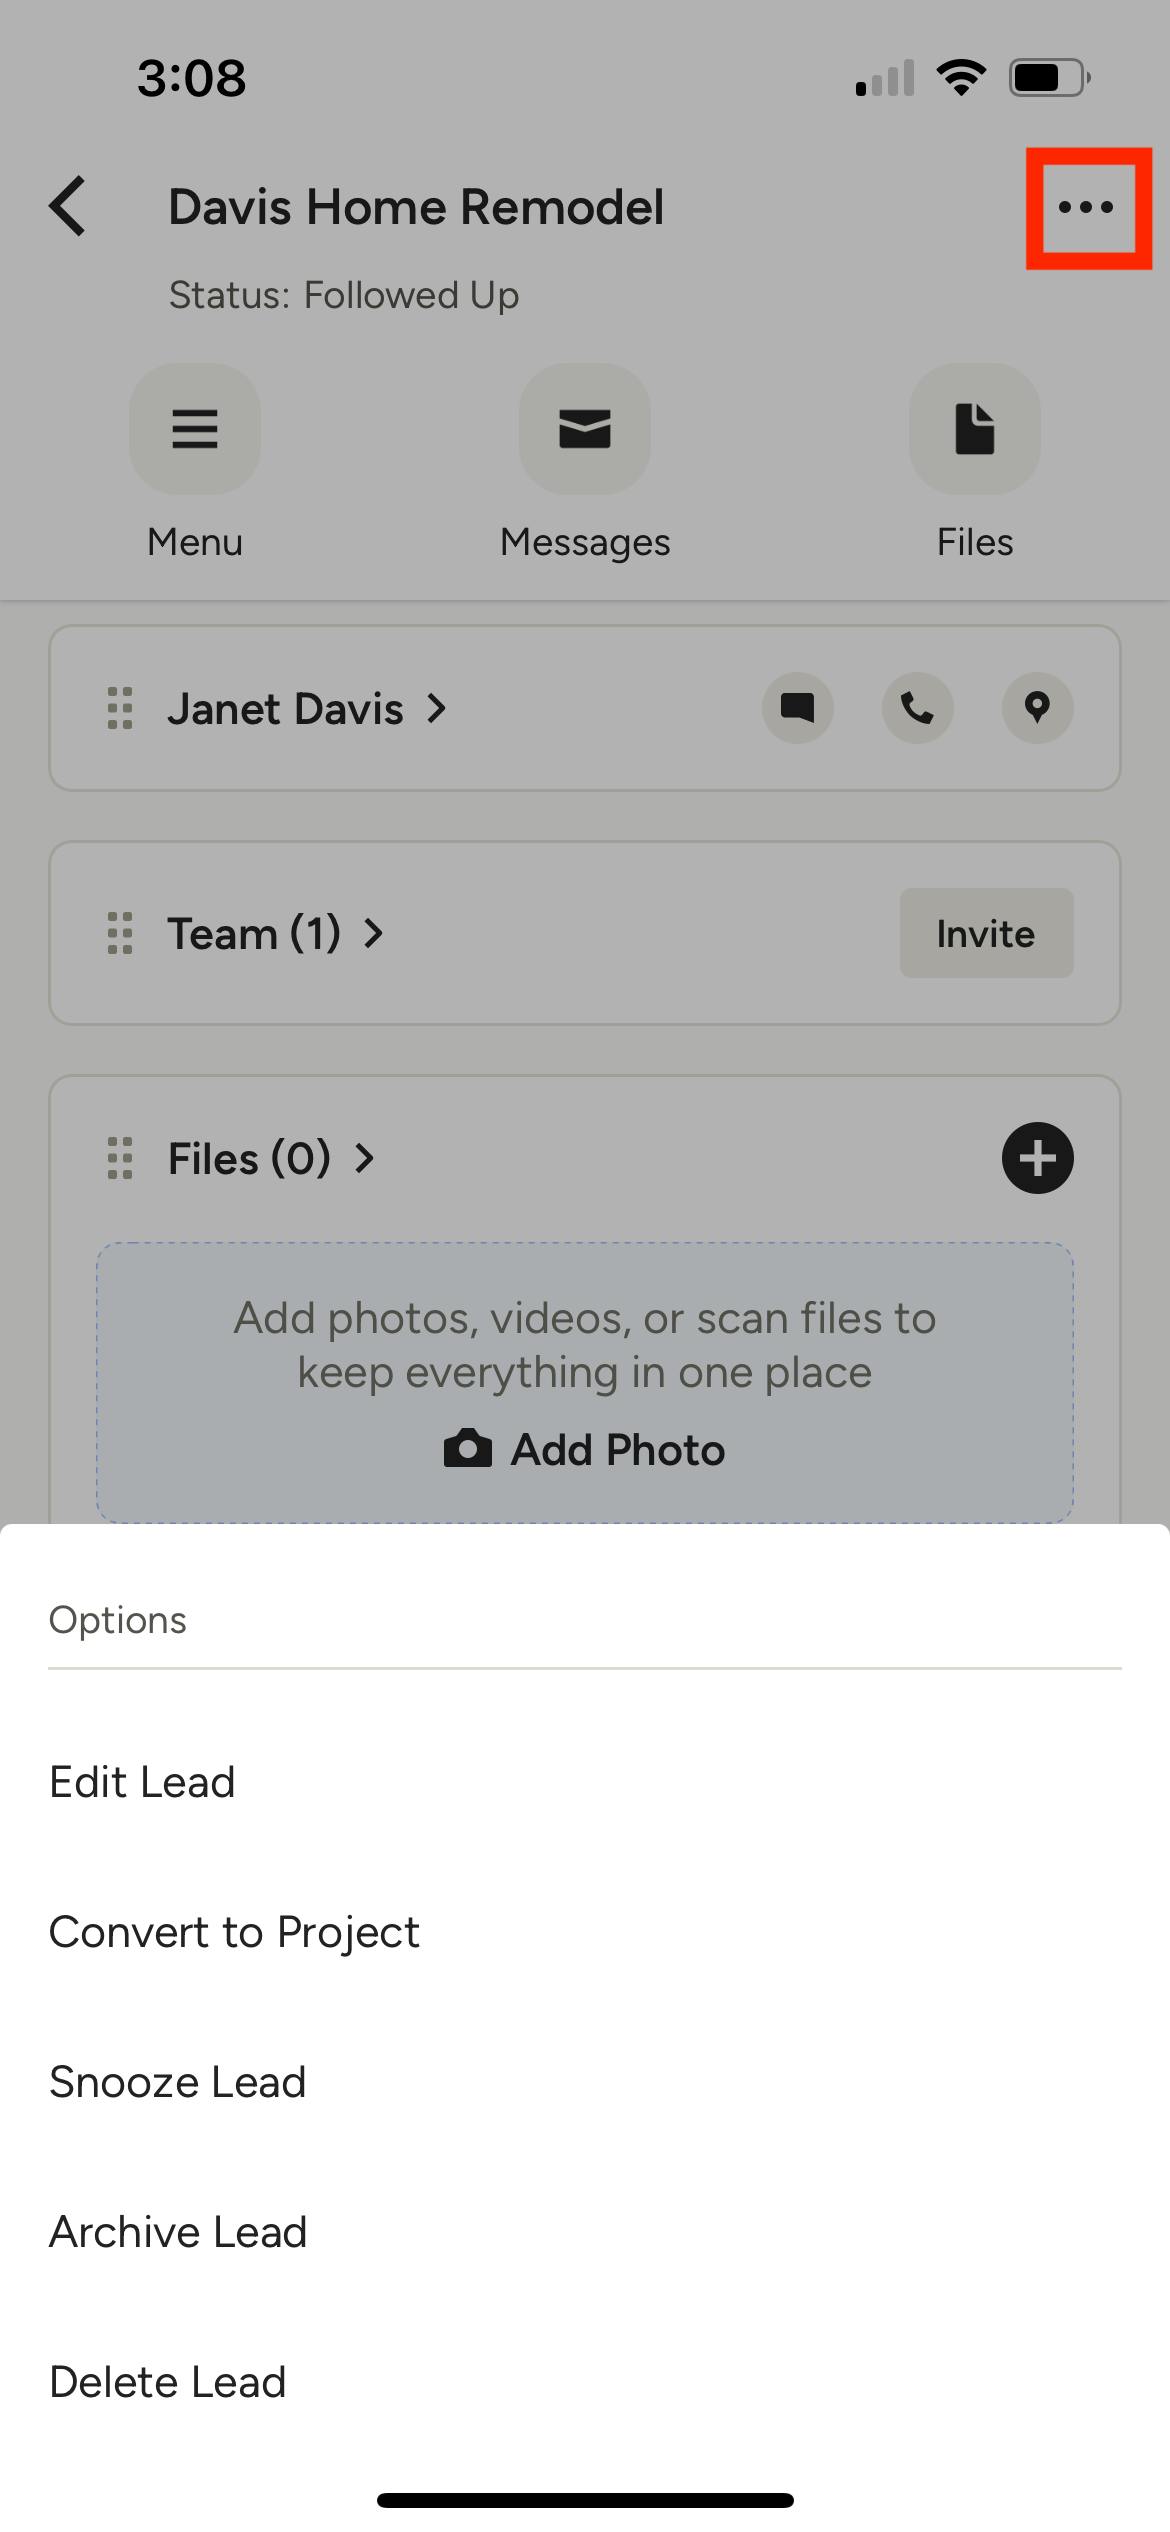
When you are viewing a specific lead, you can select the three dot icon at the top right of your screen to Edit, Convert to Project, Snooze, Archive or Delete.