Software
Houzz Logo Print
susanwrites_gw

what to do with leftover cobbles?

18 years ago

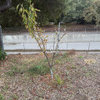
I wonder if anyone here has any ideas of what I could do with a bunch of leftover cobbles? We did a dry creek bed in the front yard and ordered too many. The back yard isn't really big enough for a creek bed. I used a lot of them to edge paths around the yard since right now it it mostly bark waiting for the plants to fill in. (We stripped the yard to bare bones and left just one tree.)

It's a small yard (50 by 25 deep) so there's not a lot of excess room but the darn rocks were so expensive that I hate to just give them away (they don't seem to sell too well around here on craigslist). Because they are the round river rock cobbles they don't look right placed around the plants in places where there should be boulders.

Anyway, I just wondered if anyone had some ideas? I have a large of piles of large cobbles and another pile of the medium ones. If anyone could point me to a picture of things they've seen done with them it would be great.

Thanks in advance.

Comments (24)

  • 18 years ago

    Craigslist might be seasonal - maybe they'd sell in spring.

    But if you want to use them, then using mortar might help, either to use them to decorate a vertical surface in a mosaic idea, or to build some sort of a structure or wall. I had some leftover square cobbles that I used to make a small raised bed, sort of a cairn idea (though I didn't mortar it). Some other ideas might also be generated if you think about combining them with other materials, maybe to put between paving slabs or with larger boulders in a rock wall.

    I'm not all that clear on what round cobbles would look like - a photo might help.

    KarinL

  • 18 years ago

    Thanks, KarinL. I like the idea of doing something vertical though would prefer to not use mortar....but I don't know that I could make that work with these.

    Here are a couple of pictures:

    I have more than is shown here. I also have a wheelbarrow full of rocks I've pulled from the yard as we've planted and haven't found a use for them yet either.
    {{gwi:53093}}

    {{gwi:53094}}

  • 18 years ago

    Rake the mulch/soil away from the base of your wood fence; fill with stones. Otherwise the fence will rot. Stones under the faucet = good idea!

  • 18 years ago

    Thanks, catkim. Against the fence is a good idea! For what it is worth, the bottom of the fence, under that narrow strip, is a 12" piece of pressure treated wood.

  • 18 years ago

    Stock pile them someplace out of site. You can never have too many stones or bricks.

  • 18 years ago

    Make a pondless water feature. Do a search for instructions on making a shallow basin filled with rocks with a pump underneath to bring the water back up through a small spray head or purchased fountain.

  • 18 years ago

    Build a dry well for drainage

    Cast them into pavers

    Build a mailbox monument

  • 18 years ago

    Beef up the cobblestone border with the remaining cobbles or perhaps trade them with someone for some larger stones so that you can create a path with more density and definition.

    To my minds eye the single row cobble stone path edging lacks strength in its definition.

  • 18 years ago

    Right, the single cobble edging is not a good look for any ultimate design of path or bed. But, I have done lots of "temporary" edging using too-small stones until the edge plants were matured, or keep down the newspaper edge while the lasagne layers established, or I had the right stones--not the cup of tea for someone who wants everything installed just so right away, but it's what I do with beds-in-progress, so maybe it is intended that way.

    I too think you may find that if you really look, you will find several areas where you could use massed cobbles (the fence and the spigot idea) and possibly that would use a lot of them all up. Another area might be a designated rock feature within one of the planting beds--might be more difficult with those rounded shapes and relatively small size, but some kind of grouping could potentially work. Then the trade idea is good too. At a minimum, the grouping in several relatively appropriate areas may help you feel you can re-claim your yard until you find someone who wants them--sort of put them in neutral or dead zones--hence the idea of a cobble mulch next to the fenceline, that will be hidden ultimately by plantings in front, since you usually would allow some breathing room between say, shrubs, and the fence-- that allow you to proceed with your other planned stuff.

    Next, although it's not your question--what's with the zigs and zags?

  • 18 years ago

    Thank you all for so many wonderful suggestions. I do like the idea of "storing some of them, the big ones" against the back fence. And yes, a double/triple/thicker edge for the path for the small ones sound good.

    I have plans for a pondless water feature, actually 2 of them, one in the front and one in the back. I have the rocks and they are drilled. I have the water basins. Next I need to order the solar pumps so you are right, they will take some up. I'm also looking for a birdbath that will work back here and then I can put some at the bottom.

    I feel better now about getting back out there. I think I just hit a temporary burnout from moving all the bark mulch thus far on my own.

    frankie_in_zone_7 The zig zags were just to get the basic outline of the path in place. Then I will go back and create the curves. When laying down the cardboard and stuff I got straight edges. I couldn't easily create the curves as I went so I just the rocks out there and then I'll go back and curve the edges. This at least shows me the corner spots I want to put plants at.

    The rock edge for the path was never meant to be long term. Eventually plants will edge the path but since I am doing this on my own and on a budget, it will be a while before I have plants lining both sides. The rock edge will help me remember.

    Thanks again everyone for the great ideas. You got my brain pumping again.

  • 18 years ago

    frankie_in_zone_7 I just went back and reread your note and then went outside. I wonder now if you were asking me why I had straight zig zag edges instead of curves or why the path had several zig zag jogs.

    I'm trying to join several areas - from both ends of the patio to the sideyard on the far side (dogwood alley) and then where the utilities box is in the back corner, there will be a swing so there will be a short jog to that.

    But now, even not knowing for sure what you were asking, I wonder if I have it curving the wrong direction? Ack!

    Here's a pic of more of the yard.

    {{gwi:53095}}

  • 18 years ago

    It doesn't look to me like there's anything wrong with the general direction of the path. I do think it will look better with the sharp corners rounded off and the borders beefed up.

    However, I'm confused because your original post said you had put in a dry creek bed. It appears that what you actually put in is a path, not a dry creek bed. If you did intend to put in a dry creek bed, that would use up a lot more cobbles. To make a natural-looking dry creek bed, you might also want to acquire a more varied assortment of cobble sizes.

    Here is a link that might be useful: dry creek beds

  • 18 years ago

    Sorry for the confusion. The creekbed we did was in the front yard. We have all the downspouts from the front of the house diverted to this creekbed. There's a column rock that will be a pondless water feature that will go in down the road.

    {{gwi:53096}}

  • 18 years ago

    I agree the single stone path edging lacks enough weight as a design element. Noting the grade difference between the fence and path, coupled with the warm climate, I would construct a short 8 to 12 inch concrete wall and stack the stone against the face with a bit of mortar at the rock/wall junction. Cap with concrete or flagstone. It might look something like this ...

    {{gwi:53097}}

  • 18 years ago

    Nice architectural addition Plx8xx.
    The short sitting wall really adds structural definition to the garden.
    An aesthetic bonus.

    Susan,
    Are you happy with the way your cobble stone dry creek bed came out ?
    If you are still looking at it and wondering why it misses the mark it is because it doesn't look like a dry creek bed at all.
    To be blunt and to the point- it looks like a pile of cobble stones in a ditch.
    If you are interested in learning how to correct it and sculpt it into an attractive looking landscape feature let us know.
    Many here have experience in land sculpting a dry creek bed and can give you some aesthetic and construction pointers. {{gwi:53098}}From portfolioMay08.jpg

  • 18 years ago

    pls8xx
    thanks for the visual on the wall. That's a lovely idea for consideration.

    deviant-duhziner
    I would love any additional tips you care to share about the creekbed. I know that what it needs still some big boulders which we haven't been able to get yet because we need help moving them. And there's no "start" yet which we will do with the water feature. While I have a redbud on either side of it I know it needs more plants closer to the edges. I just haven't decided what I want there yet.

    Not that it changes it much but here's the view from the bottom.
    {{gwi:53099}}

    To the right will be a Carex Pansa meadow. (The yard is all California Native plants.) The initial goal of it was to catch stormwater from the downspouts. We just had a weekend of rain recently and had water up to the edges at the bottom few feet.

    So please, yes, I would appreciate any advice from those with more experience.

  • 18 years ago

    Susan,
    Nice to know that you are open to suggestions.

    Here is my point of perspective and how you might integrate this naturalistic feature into an urban situation.

    1. - Size matters : Your cobbles appear to be mostly of the same size. In nature, a dry stream bed rarely has stones all of the same size. The lowest point in the dry stream bed usually has small gravel like pebbles that have washed their way to the surface.
    To remedy this top dress the middle low area with smaller sized gravel and pebbles and install some larger boulders at the stream edges and also within the stream itself.

    2.- Shape and Proportion - In a naturalistic stream bed the change in angle or the shape of the flow is impacted by the formation of the surrounding land. Rarely does a dry stream keep its same width and proportions as it undulates over the land mass.
    When making a man made dry stream bed try to emulate this by changing the widths of the stream so there is not a consistency but rather a definite irregularity of shape .
    Use larger sized boulders at the hips of the turns and or create a small bermmed build-up in the land where a jog in the stream occurs.

    3. The stepping stone along the path - I don't understand the functional or aesthetic purpose.
    I could see a path that leads to and over looks the dry stream bed from the driveway but a parallel path looks contrived and functionless.
    I'd use the stepping stones within the context of the drystream bed itself to add naturalist texture , shape and form to the rockscape.

    The Carex pansa meadow sound wonderful. Have you seen the work of John Greenlee ?
    He has a good website that depicts some beautiful carex meadows.

    The pondless water feature sounds nice .
    We just installed one last week. It too is surrounded by cobbles but the layout is a bit more minimalist and modern rather than naturalistic.

    BTW, they make some very realistic faux rocks that can be easily placed over the irrigation valves if you desire to have them screened / integrated into the 'scape.

  • 18 years ago

    I'll weigh in on the redbuds, though I may be overthinking it. You know redbuds drop seedpods and leaves. Maybe that won't a lot of trash for you, but it will drop between your rocks and sprout little redbuds, which are the devil to pull out (extremely deep tap root). Or maybe yours are sterile and pod-less?

    So this is not as much of a problem as having a large oak or maple drop all its stuff in the creek bed (but, what's that tree in the sky?) , but I would give some thought to how you will maintain your creek bed look when you plant stuff beside it. It's a balance of trying to naturalize the edges of the bed, while recognizing that ultimately you won't like it going completely natural (weeds and leaves), so you have to plan carefully and think what is your planned maintenance method (raking? leaf sucker? blower?)--I don't mean you can't allow some stray autumn leaves among the rocks--just that you won't likely tolerate major accumulations.

    It's one reason why dry creek beds may work best in prairie or meadow landscapes, or xeriscapes with occasional flood runoff, and not as well in the setting of lots of decidous trees.

  • 18 years ago

    deviant-duhziner

    Thank you so much for the feedback! It is very generous of those of you with experience (or who get paid for doing this sort of thing) to share with others.

    I KNEW when we started that it should be varied widths and it was when we dug it. Somehow as the rocks got put in, we lost the shape and I'm not sure what happened. Part of it might have been because it is very deep at the bottom. Part of it was because I couldn't figure out how to do the sides. I think they maybe should have been more tapered. But then it seemed that the more rocks that went at the sides, the more we lost the shape. Here are two more pictures, a bit more close one.

    One with no markings and one with markings of what I think I should do.

    {{gwi:53101}}

    Sorry this is a crude markup but it is the best I could figure out.

    Am I on the right track here? Where the Xs are, I need big boulders to ground the turns. Where the circle is will be built up with several large boulders and the water feature. Where the dots are, should be the small pebbles.

    Should another big boulder go where the question mark is?

    {{gwi:53103}}

    I have a couple bags still of the smaller rocks, about 2-2" long but I should get some gravel sizes too. And if I need to eventually take out more of the bigger cobbles I can use them in the backyard for the path to give it more weight and remove the smaller pieces of rock I was using in some places.

    Good thought on the faux rock to hide the sprinklers! I have a plant there but it might not give enough cover. Thanks. Any tips on how to hide the hose?

    I love John Greenlee's work, yes! I'm looking forward to the meadow.

    The path on the side of the driveway is not, I know, ideal. But it is functional. :-) Here's what happened. Before we put the paver driveway in the entire front cement from the driveway to the fence next door plus all the parking strips plus the courtyard. Here's what it looked like:

    {{gwi:53105}}

    So we had the new driveway installed and I had planting areas added to the side and to the front of the driveway (plus the parking strip.)

    {{gwi:53107}}

    But I goofed a bit. I was so excited to have dirt on either side of the driveway that I forgot to take into consideration that both our cars are in the driveway all the time. Due to the previous owner's remodeling, the two car garage only has room for one car and that space is filled with garage stuff. Anyway, here in CA it's fine for the car's outside but sometimes there isn't enough space for people to walk up the side or between them, hence the stepping stones. I'm hoping the Carex Pansa will help hide them most of the time.

    frankie - there will be maintenance with the redbuds and others in the yard. We're prepared to take care of it, but thank...

  • 18 years ago

    Super Nice transformation of the driveway.
    Ah, the old parking dilemma. Now the stepping stones along the driveway make sense .
    I have the same problem too. Unfortunately , just as the shoe makers' children have no shoes, I have no stone path. .. just dirt.

    I think you identified some excellent locations for the smaller and the larger rock placement.

    As with some artistic endeavors, it takes a bit of tweaking over a period of time to get the right emotion and form to shine through.

    Looks like you've got a good feel for it.

    Post photos as the composition blooms forth. would love to see more of its growth .

  • 18 years ago

    /just as the shoe makers' children have no shoes, I have no stone path. .. just dirt./
    I like that... and I wonder whether it's because your knowledge of different hardscape materials leads you to conclude that none is perfect for you?
    My paths are all dirt... I'm used to the visual "softness" but I curse them when the muddy season begins.
    Of cobbles: something I see in newly built landscapes here is rocks/cobbles packed in a metal mesh so they form box-shaped walls, This doesn't go with every style, of course, and I haven't seen if it ages gracefully - just another idea.

  • 17 years ago

    deviant-duhziner, thank you for the encouragement. It will be a lifetime of tweaking, I'm sure.

    I just want to say thank you to everyone for all the suggestions. I took some of the medium to small cobbles and widened and raised the edges of just part of the path. Already I can tell it is a big improvement.

  • 17 years ago

    I have to chuckle about the garage. I work with some foreign-born friends who think it is hysterical that Californians will park a $50,000+ automobile outside and keep the garage filled with odds and ends that often serve no use and have little value. I used to be able to laugh with them, but now my 2-car garage only has room for one car, with the other half storing inherited furniture and devoted to producing surfboards, so I am equally guilty. :P

    Your home is transforming nicely, good luck with your projects.

  • 17 years ago

    Here's a pic of the improved path. Thanks again, everyone.

    I will constantly have to pick up rocks because the dog forgets to lift up her feet but it's okay.

    {{gwi:53109}}