Software
Houzz Logo Print
dena6355

basalt rocks

20 years ago

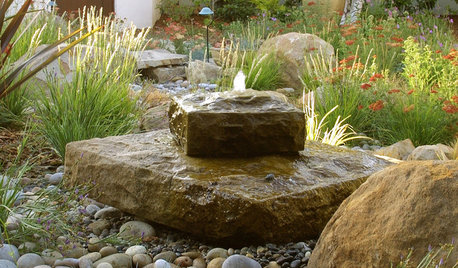
Sharing a grouping of 'basalt rocks'. They have yet to be formally placed in their home in the garden, and will likely not become a fountain, however there is an opening in the two taller ones for water, just in case.

I am happy with the results.

Rick I am not sure if you remember these or not, but were in only their wire stage when you were here. I know there was so many other things for your eyes to spy in the garage/workshop area........

choose the > arrow to see what they look like with color, go backward to see part of the in process work.

Dena

Here is a link that might be useful: making rocks

Comments (18)

  • 20 years ago

    Wow Dena. I can't thank you enough for the tutorial. I am one of those visual learners. I have been wanting to do something like this and now I feel that I can do it. Thanks again. Adele

  • 20 years ago

    Gorgeous rocks! I have been saving a photo of basalt rocks with the intent of making some fake ones someday. You have really captured their unique forms.
    Is there a special "top part" you use when outiftting a rock for possible fountain or water feature uses? I can imagine running the hose up the rock but can't quite picture what sort of hardware to cement in so that it can be hooked up to it and water ooze out.

    Laura

  • 20 years ago

    Great rocks Dena. I really liked looking at the step by steps also. I have used the patty method lots before, after looking at your pics I think I go over board with them. I have been overlapping the pattys so there was no space between, and then even doing a second layer of pattys.If I am right you are doing one layer of pattys, not worrying about the space inbetween , and then a slurry to smooth and cover it all? Are you ending up with around a two inch thickness overall? Using your little figurines was cute to show us size of the rocks.I wondered when I saw the goat how large your place was and how ambitious you were. lol.Thanks for the great pics again.
    Cindy

  • 20 years ago

    Laura,
    In the top place a reducing coupling so that later the tubing can be added and marine silicone can be placed around the tubing to prevent leakage.
    Cindy,
    I would say that the overall thickness is 1". The patties are thin, and the idea is to flatten them in your hand like dollar pancakes first to about 1/4" thick then squish them onto the mesh/ or lath just enough to 'grab' the mesh. I usually have to do a form in more than one step. (I can hear the quickwaller's now!:)), but once all the patties are in place I go over the whole piece usually in one setting with the slurry mix, and yes the slurry fills in the holes, and the new mix grabs to the already drying patties.
    I have two rocks like the one with the goat, one made with charcoal colorant and perlite in the mix, it sort of looks granite like, and the other is my favorite and the wood stain is still holding strong.
    Dena

  • 20 years ago

    you never cease to amaze me. well done

  • 20 years ago

    Thanks, Dena. Does the water eventually flow out of the top of the reducing coupler or does that end receive some sort of emitter or fountain head?
    Laura

  • 20 years ago

    Dena, the basalt rocks are great. What are the dimensions?
    They would look great,as sculpture or fountain in the landscape.
    Barbara

  • 20 years ago

    Thanks Dena, now I know I was overdoing it.I was making patties like big quarter pound hamburgers, way too big.Then I was adding a second layer yet.I will try your method,:)
    Cindy

  • 20 years ago

    The rocks are 44", 27" and 13". And they can be used as fountain or back drop. Will have to find a place for them this weekend.
    Cindy,After you have wetted the patties and brushed with bonding agent, the slurry will go over the patties and over the voids. Your hand will guide you to take extra off of the patties and less pressure over the void area will produce a smooth surface. If you are wanting crags in the rock, put a little extra slurry, wait for a little while and come at it with a straight edge, or crinkle up some harder/heavier plastic bag and sort of squish the crinkled bag into the area. You can smooth any sharp edges when it is a little drier.

    I NEED more MUD days!
    Dena

  • 20 years ago

    Dena, those are awesome! Some tall rock projects have been on my list of things to do since I saw a grouping of them standing in the middle of a field on the way home from the local airport. So now I have a question for you. Did you use any rebar for support in them?

    While I'm at it, I may as well ask how much perlite you used to make your lightweight rock. Was it only cement, sand and perlite with maybe fortifier and/or fibers?

    Thanks so much. You are truly a treasure to this forum.

  • 20 years ago

    Fleur,
    The rocks have no rebar and are about 3/4" to 1" thick. They are weighty, but hollow. I can lift them and carry individually even the tallest one. Next ones will have an X on the bottom, for even support in case of twisting or repositioning, and in the event that anyone would consider taking any of these out of the yard, I could make it more difficult by using the X to put a rebar hook over it and making it secured into the ground.
    Now about the mix for lightweight rocks, do you have a particular rock of mine you are looking at? I generally use the following as my lightweight mix: 1 part cement 2part sand and 2 partperlite or 2 vermiculite or a combination, I will often use fibers if attaching it to a wire or metal armature, and a little bonding agent is optional, but when adding a second layer, the fibers are out, the first layer has been brushed with watered bonding agent and the second (third, fourth) coats have bonding agent in them to insure a good stick to it.
    Dena

  • 20 years ago

    Ooh Dena, these are wonderful--you're having an amazingly productive year! Your list of accomplishments keeps increasing my list of things I want to try, LOL. You are so generous and explain things so well that it makes them seem do-able, even for novices. You're a treasure!

    We are putting in a windsor stone (groan) retaining wall in our backyard to cope with a bank. I made a niche for a fountain because we don't have room for a pond and feel safer with preschool-aged grandsons (3!) running around, anyway. We were thinking about a concrete pipe or column fountain but a rock fountain would fit the bill also and might help mitigate the windsor stone look.

    I know what you mean about time--I'm getting frustrated with working so much and too many summer activities keeping me out of the mud pit. I've got gunnera leaves 5' across and ripe for casting--I've got to get to them before the slugs do! Eek!

    Happy summer,

    Deb

  • 20 years ago

    Hi Dena,

    Those are very inspiring! Can you tell me a little bit about the stains you used?

    Thanks,
    Justin

  • 20 years ago

    Justin,
    Well I like the rocks, but being my own self imposed critic I will consider something else next time. These are too bland, and my fault for not adding some extra crags and lines! Next time the aluminum foil comes out to press against the wet surface, and some extra surface work, well before any stain goes on.
    The stains I used after a couple weeks:
    Concrete coatings inc. Bronze green,(creates the browns, greens and mid tones all in one application reacting with the different minerals and layers of the mix you put on),
    Then I used a Kemiko English Red in some places, same thing the color varies dependent on curing of the mix.
    A couple things. These are mild acid etches, I dilute 1:1 with water, brush on, and rag off. If the etch is new it will bubble on the surface. I then rinse the piece really well with water, you can also give it a baking soda bath to neutralize, but I haven't needed too. Rinse several times. Clean up your brushes and containers. Kemiko and Concrete Coatings both offer excellent how to information on their sites
    Let everything dry, I have sealed them with Tamms WB 150.
    Hope that helps,
    Dena

  • 20 years ago

    Thanks for the detailed description, Dena! I always see the worst in everything I do, but it only helps the next project that much more. I think the smooth look turned out fantastic, especially with your choice of stains. The grouping of three together really looks nice! I love it when I find new motivation here :)

    justin

  • 20 years ago

    Justin when the rocks have water on them I really like them. However it is highly unlikely that I will ever convince another at my house that a recirculating pond would be a good thing. So I will look at them come fall and winter when it is raining all the time. In the meantime after I watered plants here is what they look like wet.
    And to get to the next project is not going as quickly as I had hoped, other things keep getting in the way!
    The weather here is beautiful.
    Dena

    Here is a link that might be useful: basalt rocks July 2006

  • 20 years ago

    Oh, Dena... you really have to try the recirculating pond idea for these rocks! They are really beautiful when wet. Maybe someone else at your house would agree to the plan of trying it and - if it is a problem - getting rid of the pond. ???? The pump would cost under $20 and I know you have everything else there at your place already.
    Laura

  • 20 years ago

    Deb,
    Here is a pic of the gunnera in the front yard. It must really like the commentary of those turning around in the culdesac, cuz it is growing really well.
    Laura,
    If my hub would only go on a little adventure for a few days time, and I had that time off the pond event might just happen. I would also want to dig the cord into the ground so it did not show.
    Will keep you posted. My folks said they would set up a pond if I gave them the rocks.......
    Dena

    Here is a link that might be useful: Gunnera plant in front of the fence

Sponsored