Software
Houzz Logo Print
sereneseen

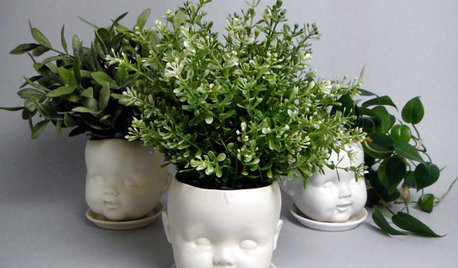
Face Planter

21 years ago

I recently completed my fourth tufa project. I just love working with this stuff! I can't thank you all enough for your talent, inspiration, and education.

I recently moved into a house that has three huge overgrown pine trees planted fairly close to each other. The lower branched were just laying on the ground, growing and taking over the lawn. I cut the lower four feet of limps and now I have tons of garden space--shade and partial shade. I been trying to fill up the area with perennials but I also want so planters with character underneath the pines.

So I came up with the face planter idea that I got off this site. The frame for the planter is an old plastic milk create. I used cement, peat, and sand. I can't tell you the ratio of each cuz I just threw it together and mixed it up. I kind of cook like that. I was so excited about working in the tufa at the time that I forgot to put a drainage hole in it. Silly me. Is it possible to get a hole in the planter after it has hardened? If so, how would I go about doing it?

Now I'm dreaming up my next tufa project. When my husband and son asked what the mixture was I was making these objects out of, I told them it was hypertufa. My husband said, "wow, I didn't know you could do that with tofu." We're vegetarians so I'm always experiementing with tofu.

SereneSeen

{{gwi:65968}}

Comments (18)

  • 21 years ago

    Looks great! I just use a drill bit (for concrete) to make the holes after it hardens. It's real easy to do :O).
    Anela

  • 21 years ago

    Seriously - a milk crate??? Now I'm starting to feel brave...I've been lurking here for a while, waiting for a project that sounded like something I could actually do. I like the proportions of the milk crate for a planter and I have a few of them lying around. Do I just mix up the tofu - I mean tufa - and slap it on the crate?

    I just read a post here that said there are no stupid questions so I decided to take a risk....

  • 21 years ago

    Anela: thanks for tip of the drill bit. I'll do that this fall when it's time to clean up before the first frost.

    hosta n hockey: All I did was grab two fist fulls of tufa and smashed them together so the crate was sandwiched between them. I did this all the way up the sides of the crate. The lower portion of the planter is a little thicker. After I covered the crate, I squashed the tufa in a plastic mask. Flipped the formed tofu out the mask onto one hand, flipped it into my other hand so facial features were lying in my palm. Then I placed the face on to the sides of the container. I supported the face with my hand while blending in the edges of the face on to the sides of the containers. It was pretty easy. hosta n hockey, give it a try and let us know how it goes.

    I have three more crates to use up. I think I am going to pick up one of those small crates and wire it to the bigger crate. With this I'm going to make a boulder looking planter with two cubbies for flowers. I haven't planned out the design for the last two crates.

  • 21 years ago

    When you use the masonry drill bit, you might want to use some graduated sizes, starting small and gradually enlarging the hole. I tried a large bit on concrete, and broke the whole thing. Nothing breeds caution like failure!

    Also, make sure everything is DRY before you start drilling. We don't like to hear about terminal accidents at this forum. (ZZZZZZZZZZZTTT!)

    Sue

  • 21 years ago

    Wow! If that's your first project, I can't wait for more!!!
    That really turned out great.
    Justin

  • 21 years ago

    Very nice. See it wasn't so hard! Try some Hosta's for your shade area. There are so many varieties.
    Paws

  • 21 years ago

    Serene,

    Nice planter. I need to get my hands on some milk crates. They aren't easy to come by here. Can't wait to see more of your work.

    Hostas,

    You're right, there are no stupid questions here. I'm glad to see so many new people participating.

    Amy

  • 21 years ago

    WOW SereneSeen... that is just WOW!!! I love the texture you came up with on that planter and think the faces are very awesome as well. Great first project. A+

    Marly

  • 21 years ago

    What a beautiful planter. The idea of using a milk crate had never occured to me. h-m-m-m-m-

    Thank you for sharing.

  • 21 years ago

    Thanks all for the complements. This forum has been a great resource.

    Just so you know, I used on of those cheap thinner milk crates I pick-up several years ago at Walmart. I believe they still sell them or possibly at one of those Dollar type stores. It wasn't one of those old thick plastic milk crates that were actually used to haul milk jugs around.

    happy 4th to all,
    Veronica

  • 21 years ago

    Veronica,
    How did you do the bottom of the crate? Did you complete the entire project in one day? I would think there would be a terrible problem with slumping.

  • 21 years ago

    I have seen collapsible milk crates at Wal Mart for kids at back to school time. They had them in the Clearance isle. I was looking for them to transport my concrete stuff around.
    Paws

  • 21 years ago

    ShirleyWNY5, I had planned to complete the project in one day but it ended up being a two day project. I'm new to this and mixed up the batch of tufa using the last of the portland in the process. I ran out of tufa a quarter of the way up the walls of the crate. Then parental duties came and I didn't get to work on the project until the next morning. The tufa I put on was already hard so I added a little on that layer and moved up the crate until it was covered. It probably took me all of two hours total to make the project.

    I'm nut sure what slumping is. I'm guessing it's tufa that just slides down the sides? If it's that, then no I didn't have that problem. Hope that answers you question. If not, will someone please tell me what slumping is. Thanks.

    Veronica

  • 21 years ago

    Veronica, I think you did an awesome job. I just LOVE your planter..... hmmmmmm I know I have some milk crates stashed around this place somewhere...........

    Jilly

  • 21 years ago

    I would also like to know how the bottom was done?

  • 21 years ago

    Is there any reason to do the bottom?

  • 21 years ago

    Serene, wonderful planter! What did you use to mold the faces?

    Deb

  • 21 years ago

    Planter bottom: I placed the crate on a plastic covered piece of plywood and just loaded tufa into the inside bottom of the crate so no plastic would show through when you look into the crate. The bottom is about 3 inches thick. That might be over kill but it was my first attempt at a planter. If you tip the planter over you can see a little bit of the plastic crate on the underside.

    For the faces I used a plastic mold of a face I picked up at Hobbie Lobbie.

    Serene

Sponsored