Software
Houzz Logo Print
paulette_wi

Composting Made Easy

23 years ago

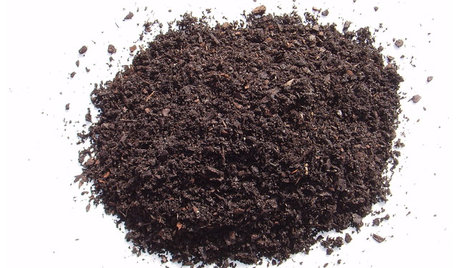
I made a compost bin of a 32 gal. Rubbermade garbage can, drilled holes all over it, kept the locking handles tight with a bungee strap. Put all the stuff in. Wheeled it around the yard to keep in sunshine, occasionally tipped over and rolled to aerate. Voila! Compost!

Read more here:

Simply Too Easy Composting

Comments (19)

  • 23 years ago

    Great idea. Sound cheaer than those barrels you buy to rol around the yard!

  • 23 years ago

    Wow Thank you what a wonderfull inexpensive way to make compost! My husband built me a compost bin this spring out of used wooden pallets. And I'm still waiting for it to turn into compost! It was impossible to turn the compost over I tried with a pitch fork. I was going to ask santa for one of those overpriced compost tumblers this Xmas. But I'm heading up to wal mart in the morning to buy a trash can instead! Thanks for the excellant idea! Just in time for fall leaves.

  • 23 years ago

    It is really not necessary to turn compost over. This is a myth that is perpetuated by "experts" who feel that it works when they do it, so it must be true. Although composting does require oxygen, unless you are running a large commercial facility, a pile will get more than enough just standing around. If you are paranoid, a few pipes thrust through the pile will add more than enough air.

  • 23 years ago

    You can also aerate it somewhat by stabbing it pretty deeply with a pitchfork and then rocking it back and forth.

  • 23 years ago

    Turning is not just for getting air into the compost. It also moves the outside materials to the interior of the pile where there is moisture and a microherd hard at work. If you go with the pipe aeration method, make sure it has holes. Sounds like a no-brainer, but the 'instructions' above don't mention it.

    I use 1/4 inch hardware cloth rolled into a 6" tube, and I stand this up in the middle. When I turn my pile, I pull it out, stand it in the new spot, and turn pile onto new area, around 'chimney'.

    Turning isn't necessary, every composting book I've read says so, but they also say it makes better compost, quicker.

    Try it and see. If you have enough material this fall, build 2 piles that are reasonably similar.
    Pile 1 - Turn every 1-3 weeks, moving exterior material to interior, then use it next spring.
    Pile 2 - Leave it set, and use the middle next fall or the following spring.

  • 23 years ago

    Great idea. You also don't need to keep it in the sun. The compost creates its own heat from the inside. Tom

  • 23 years ago

    I also saw the same idea with 1 bigger hole on each side and a big dowel rod, or broom handle through one side to the other. One on each side to support the handles were hefty poles with a little pocket like things so you can actually turn it completly upside down and back up as many times as your heart desires...
    A compost whirlEgig!! :)
    Going to make it soon. My "green thing" that we put our garbage in has seen it's better days! Hope I explained this so 'yall can understand...

  • 23 years ago

    Paulette-I did the same thing last fall. It's an easy way to compost!

  • 23 years ago

    Great idea!We recently moved and I was getting ready to have DH build me a new compost bin but I have trouble with wild stray cats coming out of the woods at night looking for food so I like this idea alot better. I think I'll get several cans and get busy.Thanks for the idea Paulette.

  • 23 years ago

    Does anyone know how this might work in winter? Does the compost freeze? Do you perhaps stop adding to it in winter? Can one just leave it out back and keeping adding? Thanks.

  • 23 years ago

    Yes, it will stop composting in very cold weather. BUT, keep adding goodies to the can. After compostable materials freeze and then thaw out the tissues break down much faster than if you put them into a warmer bin.

  • 23 years ago

    What's funny is that I was naive enough to think I'd come up with this method on my own. :)

    I tried this method, thinking it wouldn't work well but what the heck, because I had nowhere convenient to put a compost pile and my neighbor whines about anything in my yard that he finds unsightly so I didn't want to cause a commotion over compost.

    Well, a couple months ago I saw the compost heap I did have was about to become a problem with the neighbors, so I poked holes in one of my trash cans and threw everything in it--old sod that I needed to get rid of, leaves, old icky discarded pine mulch, etc. Covered it with grass clippings because I didn't have an extra lid. Forgot about it for a couple months.

    I went to check on it today and I was amazed. The level, which was once to the top, had lowered to about 3/4 full. I peeled back the top layer and what is there? All the stuff is actually composting very well, much more quickly than the small pile of stuff that wouldn't fit into the trash can. And there were worms! Yay! I added a few more for good measure. Added some coffee grounds as well. Other than that, I've done absolutely nothing to the trash can--no turning, nothing.

    I am pretty sure that by the time I need it (early fall) for the new bed, it will be ready.

    I'm glad to know I was not crazy to try it, and glad to know that others have had great luck with this method.

  • 23 years ago

    I tried this same thing after seeing how much all the mailorder companies wanted for compost bins. It seemed to be working at first, but last time I looked into the trash can it was full of creepy crawly bugs. Now I'm afraid to open it up again. What do you suppose I did wrong?

  • 23 years ago

    i thought bugs were good?

  • 23 years ago

    Gee, my way of composting really lacks in creativity. I put all of my waste on the ground in a big pile. Every month or so my husband takes the rototiller to it. Next spring we will till it a couple more times just to break it up, and viola, compost. It looks a little messy, but we have a couple of acres, so it's way in the back. The tiller really helps to chop up the bigger pieces.

  • 23 years ago

    I just started my first compost 1 week ago in a very similar manner! My only difference is I bought a larger rubbermaid clothes hamper so I didn't have to poke my own holes. I have to water quite a bit because it dries out quickly with all those holes, but we'll see. It's my first time...and even if the stuff doesn't break down in there, it will get buried in my beds somewhere no matter what condition it's in. There's some good stuff in there!

  • 20 years ago

    It's quite funny, but here in Japan they are selling electric composting machines for anywhere from $100-$1,000. Why buy one of these when you can do the same with an old trash can filled with scraps from your kitchen!

  • 20 years ago

    Here are my cheap compost bins also. I have had them since March. They are in fact sitting on my trench compost:

    {{gwi:438005}}

  • 19 years ago

    I made the same type of Rubbermaid garbage can composter for kitchen scraps a few years ago. The rest of my composting is done in a heap where I pile it on the back of our 1 1/4 acres. It consists mostly of horse manure and hay. I don't turn it, water it or look at it until it's needed. My neighbor comes over each spring to get what he wants for his garden and I've had other friends come by to fill up large garbage cans full for their gardens. Cheap and easy-can't beat that!!!

Sponsored