Software
Houzz Logo Print
ghwk

Underfloor heating systems

18 years ago

My wife and I are considering a suntouch warming system for underfloor heating in a bathroom remodel. In general are these systems very energy efficient or are they a real electricity hog? I realize how many sq. feet etc all play a role but I welcome any thoughts as we try to make our decision. Also, any other products that people would recommend in addition to Suntouch?

Thanks.

Comments (14)

  • 18 years ago

    For the most part, they're pretty energy efficient. Along with Suntouch, there are several others that are very similar, such as Warmly Yours, or Laticrete's FarenHeat. Another one that's slightly different is NuHeat. Also another good system, it's a bit pricey, although they're always right there with their customer support, both to the installer as well as the end user. I know of times up here in Maine when the NuHeat rep actually came out on site and helped an installer with his first NuHeat installation to make sure it went right. You don't see customer support like that too often. But it does cost.

  • 18 years ago

    We used Warming Systems for our master bath and kitchen. It's a different application in that instead of the wires woven in the mats, it's just the wire, and you tape it to the floor. It takes a bit more labor, but it's a lot cheaper for the materials ($3.69/sq ft) and it has worked great in both rooms.

    I can't tell you about the electricity hog part, because we have lived in the house less than a year, so don't have year-to-year comparative experience. But it doesn't seem to be a huge adder.

  • 18 years ago

    Okay. Before I say this, keep in mind this is personal, no professional opinion. The very first system I ever worked with was called Warm Tiles, and it was another one like you describe, where you get a spool of wire, and you just loop it back and forth across those little plastic pieces. I won't ever use one of those systems again. WHAT A PITA!! dditionally, it raised the floor alot more than the mat systems. The mat systems only raise the floor about a strong 1/8". The Warm Tiles, in order to make sure the wires were completely buried, as well as the plastic pieces, raised it about 3/8".

  • 18 years ago

    I have to agree a bit with Bill. I did a wire type and it was a PITA. My floor was actually 3/4 inch lower than they prior tiled floor without a heating system. So the height issue may or may not be a problem. I used Ditra and the prior floor was about 3/4 inch thick of mud/thinset/SLC?

    I would say that I did about 100 sq feet in 2-3 hours. So while it was a PITA, it wasn't a particularly time consuming one.

  • 18 years ago

    Hey, Bill, I'm in Southern Maine and am going to remodel a bathroom this spring. Old Farmhouse. I am thoroughly confused on what type of flooring to use. We stayed at the Wentworth by the Sea last year in N.H. and they had heated Marble floor, what a delight! I would love that, but don't know if it's very practical. The bathroom is not very big, medium, I'd say. What are you seeing that people mostly use in Maine? I don't want the cheapest (we have peel and stick now...), but not the most expensive either. I assume there is a switch on the wall to regulate a heated floor?? I'm hoping these things are energy efficient. What happens when something goes wrong...can't really fix it, can you?
    Thanks, Bill.

  • 18 years ago

    As for the ability to fix the heating system, yes, you can, and it's not as tough asyou may think. There's a member in here that goes by the name Flyleft who just went through this, and DIY'ed it.

    As for what alot of folks are doing up here, it's one of two things-- either as you said, using a heated tile floor, or, (and this I don't agree with, and not just because I'm a tile contractor) many people have gone to installing hardwood throughout, including the bathrooms. I don't agree with it because hardwood and water don't tend to get along together very well, but that's been the trend.

    As for energy efficiency of the heating systems, they really don't draw that much amperage, and therefore don't cost that much torun, especially if you get a programmable thermostat with the system. You can set it to turn on say, 15 minutes before you get up in the morning, and shut off say, 5 minutes after you normally leave for work, and then the same in the evening. That way, you don't even have to think about turning it on and off.

    These electrical radiant heat systems aren't something you want as a primary heat source in the bathroom. They're there only to warm the floor, so they don't have to run all the time.

  • 18 years ago

    Am going to use Warm tile cable system. I think Warm tiles have a problem with that plastic cable clip, it feels very rigid and seems will give trouble when tiles applied on top. I am not planning to use it. Due to our small bathroom configuration I believe cable will better fit with floor plan. Am going to tape over the cable and pour SLC over it.

  • 18 years ago

    Rather than tape, try hotglue. Using tape will create voids under the tape, which can, over time, be a cause for failure of the tile floor.

  • 18 years ago

    Just an FYI Linda, the heat "mats" come in various lengths and widths with the wires "woven" through them. The wires are evenly spaced out. It's rather easy to cut the mesh "mat" and not cut the wires (usually 4 to 6 inches between the wires or something like that).

    Once cut, you can turn the mats to fit small spaces. We've used it in our small master bath, in our very large den (26 x 26) and in our super small spare bath. In the small bath, I used one small mat and cut and turned it to fit myself and it was very easy.

    Using an electric staple gun made it very easy to stretch and put down the mat and hold it securely. Once it was down to my satisfaction (I put it where I thought my feet would be the most often -- front of the tub, front of the vanity, and front of the toilet), I poured some laticrete self-leveling cement over it. It really was not a requirement for SunTouch heating, but it did make it much easier to tile the floor over it, rather than troweling directly over the wires. Plus, it was cheap, it only takes about 4 hours for the self-leveling cement to dry, and it gives you a really good level surface for tiling. That was a plus for me since I'm an amateur at best.

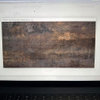
    I also have pictures I took of my heat mat installation for the den. Self-leveling cement was not used there.

    We have the programmable thermostat in all the rooms we used it in as well. That way, it comes on when we want it (shower time, etc). We keep ours set at about 90 degrees.

    The cost has been hardly noticeable. We've had ours installed for about 3 years now and everyone RAVES over it who visits. Bear in mind though, its not designed to heat your room -- just your feet. However, in a small bath, once my feet are warm, I find the rest of me does just fine. We have central heat in our den, but not the bathrooms. Suntouch also has a "cost calculator" on their site to help you determine how much it will cost you per month for heating your space. You just need the room dimensions and cost per kilowat hour for your area. I called our electric company to find out our cost. I think it was something like $2 per month for us.

    By the way, that's a phone cord stretched across the room during the remodel, and a piece of cardboard toward the bottom for walking on the mat.

  • 18 years ago

    Another fyi... in the pic above, notice that the mats are spread further apart. That is not what I wanted, but my contractor did it anyway to my objection. My husband overruled me, but now he's sorry that we didn't put them closer together. They still work great and do the job. But bear in mind that the heat DOES NOT spread more than a couple of inches beneath the tile. This is reiterated in the installation guide as well. DO NOT spread them further apart than your manufacturer suggests thinking you will save money. You won't save much at all, and the heat will not spread out.

    We have a couple of cold spots, but fortunately, furniture is there and it isn't a problem for us. In addition, I get to tell DH "told ya so" now and then. :)

    When we remodel our kitchen and dining room(hopefully this fall), we plan to use the heat mats again. They are fantastic for us.

    I also want to mention that we have 4 dogs in and out of the house. We also have a hottub and pool outside accessed from our den. The tile makes it wonderful for drying quickly and making easy cleanup with pets. Plus, they love the heated tiles in the winter. Each dog has their fave spot on the floor (if they're not on the couch or bed).

  • 18 years ago

    Warming Systems doesn't involve plastic pieces, and thus doesn't raise the floor up so much. You tape the wires to the subfloor with aluminum tape. Like so....


    Taping the wire down was the easy part (~3 hrs for 180 sq ft). The PITA was troweling the thinset carefully over the wires to lay the tile. :-(

  • 18 years ago

    I can answer the question about what happens when something goes wrong. Last June my husband installed an undertile heating system. He tested it and it worked. It had cork under it and thinset over it. We hired a company to come in and tile over it(they were also laying carpet and tile in other rooms).

    Anyway, come November we try to turn it on and no heat. He called the company and they set out a kit that allowed us to find where the broken wire was. He had to pull up that one tile and fix the wire and replace the tile.

    I think the tile installers must have known they broke the wire, it was very obvious when the tile was removed. It makes me made because we tipped them well.

  • 18 years ago

    My parents are going to install "Warmly Yours" under floor heating in their bathroom next week. Is it best to use self-leveling compound before installing the system? What is the best process?

  • 18 years ago

    rockrisley,
    I installed a "Warmly Yours" heat mat in my kitchen. The method I used was one as follows (note that I was using 12x12 tiles with a 1/4" groutline, if your size is much different these directions may not work)

    1) Ensure substructure and sub floor are up to spec for tile. Install 1/4" hardibacker according to directions.

    2) Layout mesh on floor, mesh side up, cutting and turning as specified in the diagram provided by Warmly yours. (making sure to cut only the mesh and not the wire.)

    3) affix mesh to floor using many small dots of hot melt glue.

    4) Carefully measure for layout, and mark 2x3 grid for 6 whole tiles in center of room onto mesh using large black sharpie.

    5) Install sensor wire also with small dots of hot menlt glue. (I made sure that the sensor end fell exactly where a grout line would be since the sensor is about 1.5 times as thick as the mesh wire, if your grout line will be 5) connect and turn on break detection device.

    6) Mix batch of thinset.

    7) moisten hardibacker with damp sponge. Spread thinset over wires over one half of the 2x3 layout using rubber grout float, so that thinset is level with the tops of the wire.

    8) cover back of tile with thinset, comb back of tile with 1/4"x1/4" notch trowel. Carefully press tile into place, aligned with the grid lines. Repeat for two adjacent tiles, using Tavy spacers to ensure an even spacing.

    9) repeat steps 7 and 8 for the other half of the 2x3 grid in the center of the room.

    1. Then continue working out from the center in this manner moisten, cover wires with thinset, back butter tile, and set tile using spacers, three of four tiles at a time, until all full tiles are placed.

    2. If you reach a section where there is no wire mesh, still moisten the hardibacker and spread the thinset onto it and comb it with the notched trowel, and also back butter the tiles.

    3. Let it set over night. and then start the cutting for around the edges, and lay them as outlined above.

    Disclaimer. I'm not a pro. I've done this exactly once. This is what worked for me.