Software
Houzz Logo Print
walkin_yesindeed

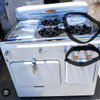
Maytag Gemini: heating element shorted out

17 years ago

And the range is only three years old!

Turned it on to make bread. Suddenly a very bright light shone out from the lower oven; the bottom heating element looked as though it had caught on fire. I immediately turned the oven off. Waited ten minutes. Turned it back on, praying it was just some kind of glitch. Nope, it was gone. Even after 30 minutes of heating up, the oven couldn't get to 300 degrees -- which meant the bottom element was gone and only the top one was doing anything, right?

It's out of warranty, of course. What are my options? An independent oven repairman? a licensed Maytag guy? What would you all do?

Thanks in advance to the hive mind for helping with this. So frustrating! It's the top-level model of the double electric Gemini, so it was a really expensive range by our standards, and it should NOT be breaking after three years.

Comments (10)

  • 17 years ago

    sorry, just to complete: we have model Maytag MER6875BK.

  • 17 years ago

    If you're confident it really is just the element and you have any mechanical ability at all, replacing the element should be a simple do-it-yourself job. Just buy a replacement at your local Maytag dealer or online - just search on something like "appliance repair parts" and you'll find lots of online dealers. If you're either not confident it's the element or don't have anybody handy available, call a repairman. Doesn't have to be a Maytag expert, this is a simple job.

  • 17 years ago

    Markw, thank you for the speedy response. I found these instructions online: is this what you mean by a simple DIY job? My skills have been up to simple woodworking and painting thus far: I am a little intimidated by anything that refers to high voltage being present while I complete the repair!

    This advice is on how to replace a bad element on kitchen ranges that utilize ELECTRIC heating elements for baking and broiling.
    1. UNPLUG the range and remove the rear panel. Dangerous voltages are still present with the range turned off. The rear panel is in close proximity to the input power terminal block & shock hazard and/or equipment hazard can exist. Remove the series of screws around the perimeter of the panel.
    2. Locate and disconnect the terminal lead wires from the element. Color coding may differ between manufacturers, so make sure you mark or label the wires as you remove them. If replacing both elements, do so one at a time to avoid confusion.
    3. Open the oven door and remove (if possible). Refer to your ownerÂs manual to see if there are instructions on how to remove the oven door. Some have spring-loaded locking hinges, while others just lift out. If you cannot remove the oven door, use care not to lean on the door or put too much weight on it. This can cause damage to the door hinges or cause the hinge springs to come loose.
    4. Remove the oven racks, and remove the oven pan (if required  some elements are fully exposed, some have pan covers). There are usually two screws either in the back or front of the oven holding the pan in place.
    5. The element will be mounted directly to the back of the oven wall, and/or to the bottom/top of the oven wall. Remove the mounting screws and remove old element from oven.
    6. Install new element by carefully feeding the terminal leads through the oven wall first. Reinsert all mounting screws.
    7. From the back of the range, reconnect the terminal wires.
    8. Plug range in, turn oven/boiler on, and perform a visual test of the heating element to ensure it is working properly. Turn oven/broiler off and allow sufficient time to cool. If the oven has only been on for a minute or so, the cool down period will be brief. NOTE: Stand clear of any exposed wiring with rear panel removed.
    9. UNPLUG range once again and re-install rear panel ensuring the terminal wires are NOT touching the panel.

    1. Reinstall the oven pan and racks. Reinstall door if necessary.
      NOTES: Prices vary between models and manufacturers, but most elements are in the $20-$40 range. There is a difference between the BROIL and BAKE elements in that they are usually different wattage ratings and are shaped differently. They should not be considered interchangeable. Good luck & I hope this information is helpful.
  • 17 years ago

    walkin, I have my doubts about there really being dangerous voltages present in a range - microwave oven, yes, but I don't know why a range would need high voltage. And if it were me, even if I believed it, I'd just not touch anything except what I needed to - or wear a pair of gloves. But that's me. What matters if *you* are comfortable. It sounds like you're not, so I think it's time for you to call the repairman. The good news is, this should be cheap as service calls go.

  • 17 years ago

    walkin, were these Maytag instructions or something general you found on the web. The website referenced below seems to suggest the entire operation can be done from the front of the oven, without even moving it from the wall.

    Here is a link that might be useful: MER6875 bake element replacement

  • 17 years ago

    turn the power off at the breaker panel.

    with many of these, and this looks like one, you remove a couple of screws inside the oven to release the element. Then you carefully pull it out a little bit, then remove the screws holding the wires. Replace with new element, push it back into place being carefule not to cut or scrape the wires. Screws back in place, turn the power back on, and off you go.

  • 17 years ago

    None of the usual parts sources I use find a match for specific model MER6875BK. Odd. A Google search does find it for sale or review.

    The element apparently is exposed, not hidden under the oven floor. There shouldn't be any need to pull the range out (EXCEPT perhaps to reach the cord to unplug it ... but you can also simply TURN OFF THE CIRCUIT BREAKER) or remove the back wall of the oven. Typically a couple screws inside the oven cavity anchor the element to the rear wall. Remove the screws, carefully pull the element forward to reveal the wires/connectors. Disconnect the wires (be careful that they don't slip back inside the oven wall!), remove the bad element, connect the new element, replace the screws, restore power. Shouldn't be difficult.

  • 17 years ago

    Thank you all so much for taking the time to chime in!

    I'm not sure where I found that model number. Maybe this one works better? MER6875BAB. And the instructions above come from a random "fix-it" website, not from an official Maytag site.

    I'm sorry to ask so many basic questions: but where would I go to order a replacement part?

    Is this kind of thing a relatively common problem, do you think? Or is this an announcement of bad oven karma, and a forecast of more problems down the line?

  • 17 years ago

    just a follow-up here: I contacted Maytag/Whirlpool about this, not expecting anything much by way of response. I was wrong. They sent out a repairman for free; he ordered the part that shorted out and is coming back this week, again at Whirlpool's expense, to fix it.

    Nice surprise!