Software
Houzz Logo Print
bestyears_gw

Latest project -padded headboard-

17 years ago

My girlfriend and I decided to make our daughters headboards. She'd been wanting one for a long time, and I'd been wanting to make one for a long time. Finally I decided, renofan style, lets just do it already! We got wood from HD, and foam from a great foamstore here in Houston. My daugters is covered with a beautiful 60 year old Martha Washington bedspread I inherited. Before you faint over the idea of my cutting it up, you should know that it had multiple holes in it. It was a challenge to find an entire 'centered' section intact. My friend chose adorable fabric for her daughter's pink and green room.

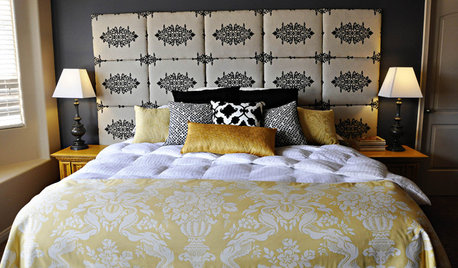
My friend and her headboard:

{{gwi:1611936}}

{{gwi:1611937}}

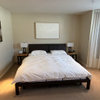
And my daughter's (doesn't photograph well, but very sweet IRL)

{{gwi:1611938}}

The neat thing is that we realized once they were made, that it would be as easy as making a pillowcase to make a slipcover. They can be 'changed out' amazingly quickly!

Comments (23)

  • 17 years ago
    last modified: 11 years ago

    Very impressive! I'm sure a lot of us would like to know the 'step-by-step' process if you are willing to share any tips.

  • 17 years ago
    last modified: 11 years ago

    Oh it's gorgeous, and I adore that you saved a beautiful piece of fabric from the garbage bin death. And that you did it so well :)

  • 17 years ago
    last modified: 11 years ago

    very pretty, great job. I too would be interested in hearing your hints on getting it done.

  • 17 years ago
    last modified: 11 years ago

    Wonderful!!!!!

  • 17 years ago
    last modified: 11 years ago

    Beatyears .. both of the headboards turned out fabulous! I bet your DD and your friend's DD are thrilled. Great job!

  • 17 years ago
    last modified: 11 years ago

    Thanks all... yes, the girls LOVE them, and they are so nice for leaning against.

    Here are instructions for those who requested:

    How We Made Our Queen Size Padded Headboards
    Cost: Wood $20, Hardware $7, Fabric $20, Foam $40, Batting $5. Total = $92

    Materials for 1 Headboard
    Wood: We purchased a 4ft x 8ft piece of ¾" plywood from Lowes. Had it cut into 1 piece 36 in. x 60 in. (in hindsight, should have had it cut 36 in x 61 in.) From remaining long piece of plywood, we had them cut 2 pieces, each 4 in. x 36 in. to use as the legs/supports.
    Fabric: 2 yards of any fabric you like! It needs to be just a bit wider than the foam. We also covered the back of our headboard in a plain white fabric, with all edges turned under, because my daughters is in front of a window, and I wanted it to look neat. We had two remnants, about 1 ½ each. The first piece we used was a very tight weave cotton and worked beautifully. The second piece was also a cotton, but not as tight a weave, and when we screwed the legs in on top of it the screw kept catching the fabric and pulling it. So we ended up having to cut out little sections of that fabric where the screw would be going in.
    Foam: 2" thick medium foam, 6 inches wider and 6 inches longer than your wood. It is a available on the internet if you cannot find it locally.
    Batting: Quilt batting, same measurements as foam (is okay if it comes wider)
    Hardware: Screws to attach legs/supports to headboard are ¼" x 1 3/4" long. You also need ¼" bolts, 2 inches long, and the washers and nuts for them, to attach the legs to the bed frame.
    Tools: Screwdriver and Staple Gun with 9/16th inch long staples.

    Process:
    (Note: We did not tuft our headboard, but if you want to, you should mark the back of the board off first in a grid, however far apart you want the buttons, and drill ¼" holes all the way through the board at the intersecting marks. You will use these holes to push a large needle and strong twine through and then grab the button from the other side. After the button is pulled into place and the twine is pulled tight and knotted, staple the ends taut to the board. You will do this sewing part once all the following is done.)

    Step 1: Lay your decorator fabric face down on table or floor. If it is wrinkled, iron it first. Otherwise just smooth it out. Lay you batting on top of the fabric, roughly lining it up together. Lay you foam on top of the batting. Lay the 36x61 piece of plywood on top of all this, centering it on the pile. You are going to staple the materials onto the back of the plywood in three stages. First the foam, then batting, then fabric. You NEED two sets of hands for this! Have one person pull the foam down over one long edge and the other person staple down about ever 2-3 inches. Stop stapling 5-6 inches from the corners. Repeat for the other long edge (you may want to lift the board and make sure the foam is snug to the board before you staple. Do the two short sides in the same manner. For the corners, work together with two sets of hands to try to get each corner as smooth as possible. We had to cut a chunk of foam out of each corner to get it smooth. Doesnt really matter what it looks like on the back. Just the front and sides of the corner need to be smooth. We essentially made "hospital" corners. When you have it the way you like it, have one person hold it in place and the other staple to hold. (We decided early on which long edge of the headboard would be the top, and thus exposed to the room, and which would be the lower edge, and thus hidden below the mattress. That way, if the lowest edge wasnt perfect, it didnt matter so much). Repeat for remaining 3 corners.

    Step 2: Repeat the process with the batting, again checking to make sure it is flush/snug against the foam.

    Step 3: Repeat the process with the decorator fabric. If you are using a fabric which takes some alignment, be sure to check for this before you staple in place.

    Step 4: Cut a piece of the white backing fabric, roughly the size of your board. Turn the edges under as you go, and staple it every inch or so, so that the white piece covers the entire back, within about ½ inch of the outside edges of your headboard.

    Step 5: Take the headboard to the bed and decide how high above the mattress you would like it. It should extend AT LEAST 8 inches above any pillows that will be leaning against it. Measure the distance from the bottom of the headboard to the floor and write this down.

    Step 6: Take the headboard back to the table and place it backside up. Place one of the leg/support pieces alongside the short side of the headboard, so that the board extends beyond the LOWER edge of the headboard, exactly the length of the measurement you wrote down in the above step. The leg should be as close to the edge of the headboard as possible, but be sure it is in a place where your screw will be going into wood and not just foam overhang.
    Step 7: While one person holds the leg firmly in place, the other person drills three ¼" holes through the leg and into the plywood. The holes should be evenly spaced up the length of the support where it is attached to the headboard. Do not drill into the plywood more than necessary (you dont want to damage the foam or fabric!). Screw the 1 ¾" x ¼" screws into the three holes.

    Step 8: Repeat for other leg.

    Step 9: Put the headboard in place and using the 2-inch bolts, hold it snugly against the bedframe while one person drills holes from the spaces provided on the frame into the wood leg. The hole should go all the way through the leg. Then push or screw the bolt placing the washer and nut on as you do.

    Step 10: Enjoy!

  • 17 years ago
    last modified: 11 years ago

    Thank you! This is just the push I needed to try this!

  • 17 years ago
    last modified: 11 years ago

    it's so good to se recycling that bedspread and not wasting anything..i love them..they are beautiful..

  • 17 years ago
    last modified: 11 years ago

    They turned out fabulous! I printed your directions for future reference. I forwarded your directions to a good friend of mine. She was trying to find a book or article on how make a padded headboard for her guest room. Great timing!

  • 17 years ago
    last modified: 11 years ago

    I will add this to my project list as if it wasnt already long enough. But your headboards turned out so great I think I may do it.

  • 17 years ago
    last modified: 11 years ago

    Honestly, this was project was so much easier than I thought it would be. Don't hesitate!

  • 17 years ago
    last modified: 11 years ago

    Bestyears, I just made a headboard too a couple of months ago and had a lot of fun with it! You did a beautiful job and I love the fact you used something meaningful to your family for your daughter's headboard---that is just precious.

    Thanks for posting.

  • 17 years ago
    last modified: 11 years ago

    Wow... the headboards turned out great!! I,too, am now inspired to make one for my daughter's bed.. just a question.. I am guessing you added an inch to the width to compensate for the bed railings???? The headboard I will be making will be for a full size bed.. a full size mattress is 54" so I guess I should have the plywood cut 55" wide?? Hope this isnt too silly of question! You did a great job, thanks for sharing.

  • 17 years ago
    last modified: 11 years ago

    Great job. Using the vintage spread is a really cool idea. Thanks for sharing!

  • 17 years ago
    last modified: 11 years ago

    mom2girls... the width of the board should match the width from 1 outside edge of the bedframe to the other, or even an inch wider. If you use the mattress measurements, you might end up not quite wide enough to screw the bedframe into the leg/support pieces. I did 60 inches based on some upholstered headboards that a fabric place here in town makes and sells. But it was a bit of a squeeze to screw the leg/support pieces into the frame. An extra inch would have been perfect. Hope that helps.

  • 17 years ago
    last modified: 11 years ago

    Yes... thanks so much for all the information...

  • 17 years ago
    last modified: 11 years ago

    Both are so awesome!! Your daughers room is so cute:)

    I so want an upholstered headboard in my bedroom...way too many wood pieces & just sick of the 4 poster bed. I am just gonna have to do it!! Thanks for the instructions.

    Smiles:)

  • 17 years ago
    last modified: 11 years ago

    My 17 yo daughter is drooling. Her new bedroom is almost done - we are priming right now. Your friend's headboard fabric would be perfect for all the bedding and accessories she bought so I am hoping, hoping, hoping that your friend can tell me where she bought the fabric. BTW the headboards are fabulous!!! Lynn

  • 17 years ago
    last modified: 11 years ago

    Hi Lynn,
    We purcased ours at Interior Fabrics, here in Houston. They do have a website, so you may be able to order it from there. We also got our batting from them. They make headboards there, so you could also ask them for the lining fabric they use on the back. Their prices are great -I think Susie paid $7/yard. I looked on their website, and I'm pretty sure the fabric called "Twister" is the one, but they only show it on a white background. I would just call the Houston store and see if they'll just cut it all up and bundle it together for you from there. If you have any trouble, email me. I can email you pictures which you can always send to Interior Fabs to have them match.

    INTERIOR FABRICS - Houston, TX
    3104 Fondren Rd.
    Houston, TX 77063-4904
    Tel: 713-782-3311 - 713-789-9259
    Fax: 713-789-3087
    Email: fabricsfondren@sbcglobal.net

    I think this place sells the same fabric, called Galaxy for $12.99/yard

    Here is a link that might be useful: Galaxy Fabric (same?)

  • 17 years ago
    last modified: 11 years ago

    Hi Bestyears!

    geez..been a long time! You and your friend did a beautiful job, I love them both. I am sure there are two very happy girls out there with great big smiles on their face. Tell them to enjoy their new beds!

    Ree

  • 17 years ago
    last modified: 11 years ago

    Wow - I love the web sites - think I will be up very late looking. Would you ask Susie if the pattern "Dalaxy" is the one she used. It looks like it would be but I was hoping you could just confirm it before I order the fabric. You were right about the second site being more expensive but I was pleased to look there because they had some neat fabric.

    Thanks again for all your help. She is really excited about this headboard. Lynn fr CT (too darn far away from Houston)!

  • 17 years ago
    last modified: 11 years ago

    Those both look wonderful. Congratulations on doing such a great job!

  • 17 years ago
    last modified: 11 years ago

    Thanks all! It was a very quick, fun, satisfying project!

    Lynn- Susie looked at the Galaxy and like me, she said, "Wow, it sure looks like it!" but it is hard to know for certain... Here is a closeup of the fabric, if you want to better compare. Or you could just email this photo to Interior and order it from them...

    {{gwi:1611939}}

    {{gwi:1611937}}