Software
Houzz Logo Print
staceyneil

Mostly-DIY renovation update (with pics)

17 years ago

Poor DH.... yesterday was his birthday and you know what we did? He took a half day (unpaid) off work, and we stripped 70-year-old plaster, drywall, and old wood out of our house. Until 7:30 when we took a break for Indian take-out, which we ate in the bedroom by candlelight (most of the electricity is off) in the cold (no boiler right now, we borrowed some wimpy space heaters) and dust (we put up plastic sheeting to keep most of it out of the bedrooms but it's only partially effective!)

We're mostly DIY-ing this project except for the framing and drywall. Our framers were supposed to start in a couple weeks, which would have given us time to do our demo in a more leisurely fashion, but they rescheduled for this week!

This reno includes a new kitchen, moved into a whole different room, which meant we needed to renovate the surrounding rooms at the same time.

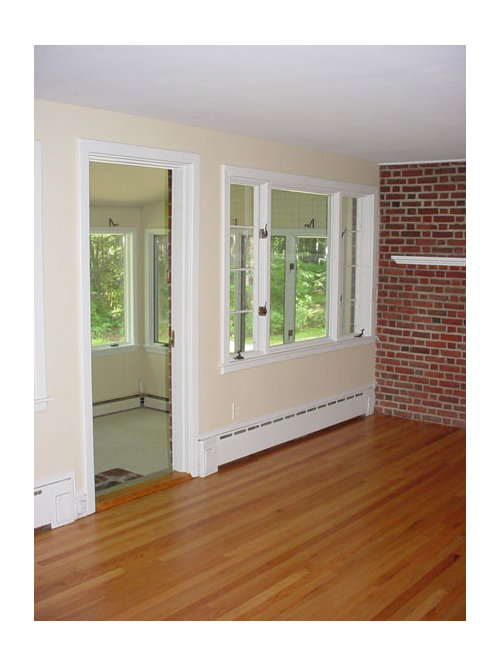
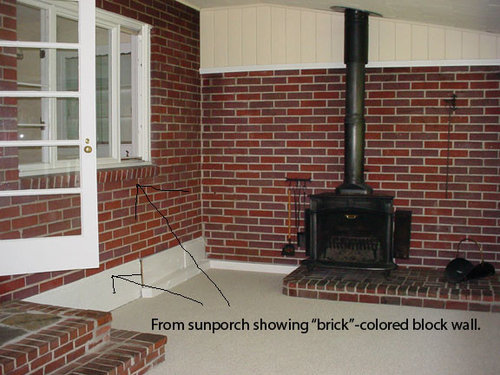
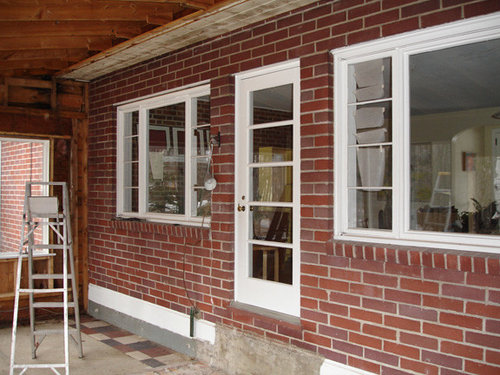
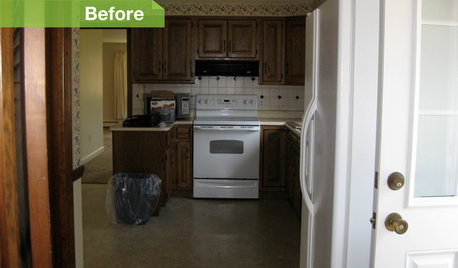
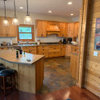
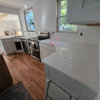
Before pics:


Ripping up the kitchen floor (was that last weekend? It's all a blur!!!)

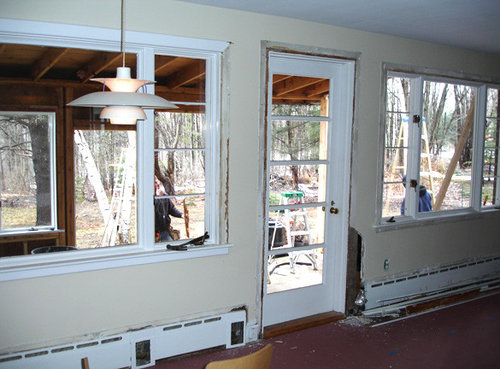
Removing all the sunporch wall paneling (knotty pine!) ceiling material (cardboard tiles and ancient insulation: a dead mouse fell on my head!) and flooring (carpet right on the slab, with old checkerboard tiles underneath). We also had to jackhammer out the brick and concrete steps. Those windows and door in the "brick" wall are coming out, and the whole thing will be part of the house instead of a seperate sunroom. It'll be the living room and dining room...


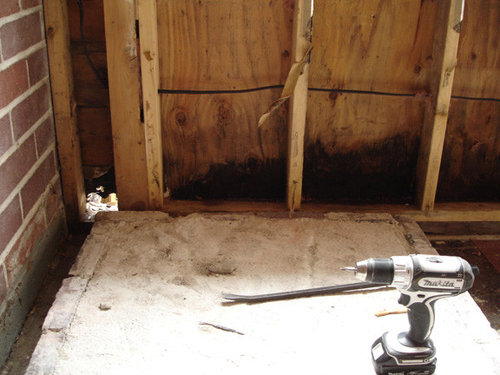
Notice the daylight you can see through holes in the rotted sheathing!!! Good thing we decided to rebuild these walls!


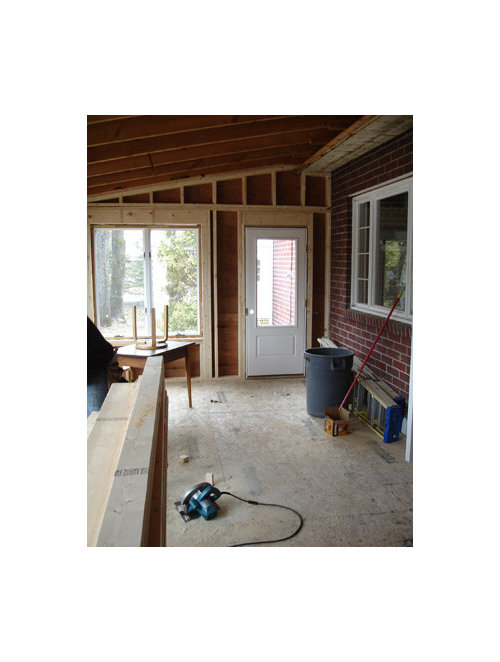
On Monday, the framers came in, took down the walls, and started rebuilding them:

They're now 2x6 and we have a framed & insulated floor....


Last night, DH and I demo'd the kitchen wall to studs, removed the cabinets that are in the way of the new walls, removed the DW and stripped plaster. We left the sink and a couple cabs to use in the next few weeks, and we HOPE we can temporarily hook the DW back up and use it after this weekend....


Other progress:

-Refrigerator is purchased and in the garage (CD FD JennAir Euro, floor model found on Craigslist $1800)

-Range purchased, sitting in a warehouse in Boston waiting for us (NXR 4x 15k BTU all-gas pro style $1900)

-DW purchased, same warehouse (Bosch, can't remember the model... the basic SS one costs about $550?)

-Hood purchased (Discontinued Thermador 600 CFM dual-blower. Bought the blower seperately and it just arrived. I plugged it in to see if it works and that sucker is LOUD!!!!! I hope, hope, hope that it's because it's not installed, isn't connected to the rheostat, etc. if it's that loud in real life I am doomed. Hood and blower were about $575.)

-Cabinets ordered, 5 weeks out. Glenwood shaker natural cherry. (About $7,000)

Comments (27)

  • 17 years ago
    last modified: 11 years ago

    Wow! What a job.

    Your house has great bones. (And hopefully you two do as well. Ouch!) I would like to move in when you're done.

    Now I know you're still in progress and all, but did you put in that flying saucer light fixture? If so, where did you get it? If not, can I have it? :)

  • 17 years ago
    last modified: 11 years ago

    What a great start! I'll be looking forward to the updates as progress continues. The DIY kitchens are always the thrilling ones.

  • 17 years ago
    last modified: 11 years ago

    Thanks!

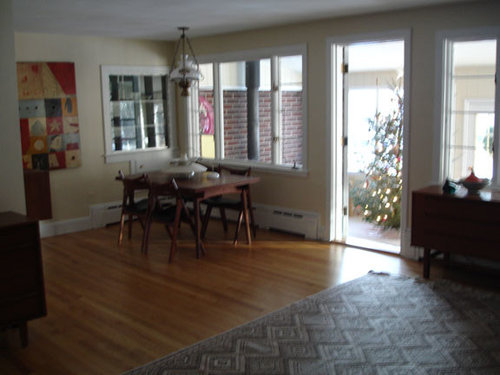
    The flying saucer light fixture is one of our really special things. It's a vintage Loius Poulsen designed by Poul Hennigsen "PH5" and made in Denmark in the 50's. We have a collection of mid-century (mostly Scandinavian) furniture, lights, and stuff. I am sure that has something to do with why we liked this house (1956 ranch). This light look like it was born here! (but replaced a pretty hideous hanging faux-colonial thing you can see in the 5th photo...)

    The old kitchen wall is now almost gone; it's pretty exciting!

    Here is a link that might be useful: Really cool Danish light

  • 17 years ago
    last modified: 11 years ago

    Congratulations! Sounds and looks like a great start. Can't wait to see things take shape.

  • 17 years ago
    last modified: 11 years ago

    You guys are amazing! Good luck! May the force be with you!

  • 17 years ago
    last modified: 11 years ago

    I guess I can't have it.

    You have lovely taste. :)

  • 17 years ago
    last modified: 11 years ago

    So exciting! I had the same issue with my sunroom walls and re-built everything.

    I added some flashing on top of the slab so it won't happen again. Hopefully your framing guys do the same thing. Looking great already. Love your dining table. (I put my xmas tree in the same spot as you last year. :) LOL)

  • 17 years ago
    last modified: 11 years ago

    Wow, smilingjudy, your photo sure looks familiar. Our guys did put "sill seal" down before the sill plate (PT). Is that what you meant? It's blue. They sheathed it and Tyvek'd it but we're siding it ourselves in late summer.

    I am not sure where the tree will go this year because now that space is the LR & DR! I drew it on the plan either between the two furniture groups, or up near the fireside seating in the kitchen. Either way, it will have to be a smaller tree than we are used to!

  • 17 years ago
    last modified: 11 years ago

    Glad to hear; that's good. Before you do the siding, add a piece of flashing under the bottom course. Then run Tyvec tape along the top of the flashing.

    I may be assuming too much....mine had a bit of slab sticking out past the wall. So in the old setup, when it rained the water just sat there right up against the wall and the siding/sheathing would suck it up the wall ==> rot. In my case, the flashing is covering that bit of slab that sticks out and is angled to shed water. HTH!

    I can't wait to see more!

  • 17 years ago
    last modified: 11 years ago

    That helps a LOT, actually! Ours has the same situation: the slab sticks out maybe 4" past the siding.... What type flashing did you use? Do you have a photo of how it looks with the siding on it? We'll be using Maibec Cedar shingles, probably...

  • 17 years ago
    last modified: 11 years ago

    Wow your house looks familiar. We are 2 weeks past an 8-ton plaster removal. Electrical, framing, insulation are done, now we get a break while the dry-wall crew comes in, phew. 10 weeks till the due date, we're racing against the clock. Good luck on yours!

    Oh yeah, here's why i posted... Our house is a 1951 MCM, crazy 4 degree roof and all. Do you have any other links like the one to that lamp? We need all the inspiration we can get.

    {{gwi:1785834}}

  • 17 years ago
    last modified: 11 years ago

    Oh, bwaibel, we are soooo jealous of your house!!! Here in Maine there are VERY few of the iconic 50's-looking ones. Look at all those windows and that high ceiling!!! Ours is a pretty standard ranch (although it does have an eave overhang, thank goodness) that the P.O. did a faux-colonial thing to. It unfortunately doesn't have the great bones to restore to mid-century elegance... we're taking the cottage/slightly craftsman approach.

    I assume you've already checked out the renovations in Dwell magazine?

    What sort of links are you looking for? I'm happy to help if I can. Are you guys DIY-ing it? And by due date does that mean baby? You must be going nuts!

  • 17 years ago
    last modified: 11 years ago

    I just used some plain old aluminum flashing that I got at the big box improvement store. Don't have a pic; I would go out and take one but it is a miserable cold and rainy day here. I have vowed to not leave the house. :) I'll post one for you in a couple days.

  • 17 years ago
    last modified: 11 years ago

    Thanks, Smilingjudy.. I am picturing it wrapped all the way out and down a bit , but would love to see how you did it. Anytime.... that project's not till August or so!

  • 17 years ago
    last modified: 11 years ago

    Found one! This is pre-siding, but that probably helps you more. I flashed it the same way you would flash the top of a window or door. It looks like it's sticking out really far, but that's just the angle I think. It fits fairly snug over the edge. Or maybe I took this pic before I fixed that wacky corner. :)

    Anyway.... flashing detail

  • 17 years ago
    last modified: 11 years ago

    Dwell magazine... I have seen it but the idea of actually buying a magazine hadn't really crossed my mind. I'll pick one up on the way home. We purchased the house 6 years ago because we loved it. I'm not really a "designy" kind of guy so I didn't know what we had until I did a little research prior to the re-model. So now, I'm seeing little bits of modern here and there and I love it. The thing is, I need more to sort through or else this place is going to be a hodge podge. I still haven't found the right images to pull together and make the whole thing cohesive. My wife and I have to figure out wall treatments, lamps, sconces, a fixture for the dining room, paint colors, etc...

    Anyway, yes, I did mean baby, and yes, I am going crazy, but trying not to show it. If you ask my wife, she'll say we're going to get it done, no problem, my husband said so :) It's a partial DIY, my uncle is a GC, but lives a couple hours away and comes by on the weekends and 1-2 days a week with a helper. I work on it 7 days a week and we find subs for bigger jobs when we can.

  • 17 years ago
    last modified: 11 years ago

    Smilingjudy: Thank you so much!!! Perfect solution.

    You're very ambitious, bwaibel!! Dwell has a web site you can check out, too. There are some pretty interesting blogs and groups out there for people restoring houses of your vintage and style. Google "Eichler home restoration" for LOADS of great networks and forums!

    What is your budget range for lighting and stuff? A new PH5 lamp (which of course would be perfectly, wonderfully appropriate in your house!) is like $900 or more. A vintage one (which IMHO are way nicer because they have different colored baffles) might be $350-$500. But there are lighting companies that make similar styled stuff. Ikea used to have a PH-lamp knock-off for example. A place that has REAL design, both mid-century and newer, is Design Within Reach www.dwr.com.
    Interesting knock-offs and "inspired-by" are:
    http://www.umodern.com/
    www.eurolighting.com
    or places like that. Google "modern lighting" "mid-century lighting" etc.

    have fun!!!!!

  • 17 years ago
    last modified: 11 years ago

    Thanks, I really appreciate it!

  • 17 years ago
    last modified: 11 years ago

    stacyneil and bwaibel - looks like you both have an awesome view! (Can't tell about yours, smilingjudy) All your projects are going to be fun to watch! Keep posting progress pics (please)!

  • 17 years ago
    last modified: 11 years ago

    I love seeing "in progress" DIY projects!
    We have been working on our kitchen for way too long, but luckily we are a bit farther long, since my due date is 7 weeks away.;-)
    Our old kitchen is still partially functioning, so I won't be too upset if the new kitchen isn't done before baby arrives, but we better get at least one of our "in progress" bathrooms done by then!
    I am amazed at how quickly you came up with a plan and got right to work on it, stacyneil! Keep the pictures coming!

  • 17 years ago
    last modified: 11 years ago

    Well, here are some updated pics/narrative of our progress...

    BAD NEWS UPDATE...VERY BAD MOLD:
    We had a bummer of a weekend. The master bathroom (right next to my bed) started filling up with a horrendous mold smell when it got warm last week and the snow started melting. I am massively allergic to mold. I broke out in hives and my throat closed up so I could barely swallow. The contractor was demolishing the masonry wall so we had plastic sheeting up and I basically could not leave my mold-filled bedroom (where I am working.) The contractor was pushing us to do our demo part every day so he could finish up and move on to the next job, so DH and I were frantic and exhausted. And could not even begin to address the mold! So now that bathroom is sealed off with tape. Thank goodness we have another bathroom! We were worried it was the crawl space, which is only about 8-10 inches to the dirt, so any changes or waterproofing in there would entail removing ALL THE FLOORING to joists in the MBR wing, and excavating the dirt. Major, major, major $$$$$.

    BUT then last night DH made a discovery that someone had put insulation on the OUTSIDE of the sheathing, under the vinyl siding. Perhaps in an attempt to stop the pipes from freezing (which they still do, we discovered in January...) and that insulation is filled with mold. So- we are HOPING that is the only problem. He is planning to investigate it this week.

    THE HAPPIER PROGRESS UPDATE:
    The framers are finished, just some minor framing left for DH and I to do: for instance, I could not decide how wide to make the doorway between the new mudroom and the kitchen/pantry area, so I had them frame it to 5 feet. Then we stapled up rosin paper (that pink stuff) on the framed walls to get a feel for the space. I think we're settled on the 36" opening in the pics... it makes the mudroom more a seperate space which I think it wants to be. Blocks a little more light, though. Also when you come in the door, the first thing you see is the pantry area, and narrowing the opening a bit helps direct your view into the house instead... (no door is planned for that opening.)

    This weekend we finished pulling down the plaster in areas we needed to add blocking for cabinets. DH continued removing old ceiling tiles and knotty pine from the basement, since we had room for it in the dumpster and he's going to tackle the basement next winter.

    We set up a little temporary kitchen in the pantry area. I know... we won't use the right-hand burners!

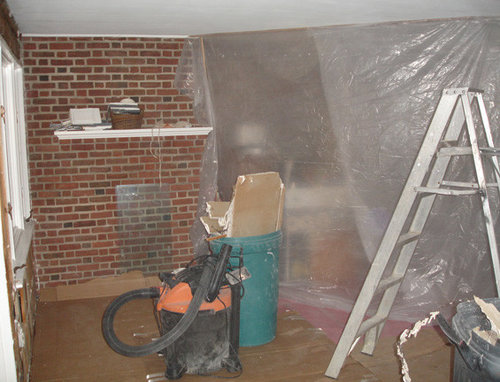
    Here are two shots of the kitchen space. That piece of cardboard on the shopvac represents the island. The 2x4s next to it are the post we can't decide how to detail. The two left-hand openings out to the sunroom (what used to be window and door) will be filled in up to 42" with kitchen counter and backsplash. the right-hand opening is two steps down to DR and LR.

    We're also going to add a header over the opening into the patry area.

    {{gwi:1773958}}

    This week:
    1) investigate Bad Mold.
    2) finish designing electrical and run new electrical circuits
    3) (hopefully) patch in oak hardwood flooring in the area we ripped up the old kitchen floor. We'll cover it with rosin paper and cardboard and sand/finish it after the drywallers are done.

  • 17 years ago
    last modified: 11 years ago

    i.e. your mold problem. I moved into my new home last November and almost immediately ran into mold problems in the bathroom. Long story short, two problems causing the mold. Stack pipe flashing was bad and had to be repaired. That fixed one problem. Second was the crawl space. Altho, there's no sign of standing water in this space, I did have a moisture problem which was causing mold and rot on the west end of my house. I contacted a local HVAC place that specializes in crawl space barriers. Best money I ever spent. They encapsulated the crawlspace, put a ground sleeve and sump pump in the lowest area down there to pump out the ground water seeping in. My humidity down there in December was 76%. In February, they remeasured it and it was down to 49%. Needless to say, my house no longer feels like a sauna! The wood moisture content went from 19.2% (extreme) down to 12.3%. The mold smell has left the house now and everything is so much more pleasant. Like I said, best money I ever spent.

    Teresa

  • 17 years ago
    last modified: 11 years ago

    Ugh, sorry to hear about the mold. We hit some pretty bad mold in our's as well. There was apparently a minor renovation done in 1995. They filled the ceilings and vents above the bathroom with insulation and newspaper (that's how we know the date). My uncle/GC says he sees it all the time, idiots filling ceiling vents as if they're not there for a reason. Luckily we were stripping it all anyway so it's gone now.

    BTW, thanks for the eurostylelighting.com link. Inexpensive and filled with good ideas.

  • 17 years ago
    last modified: 11 years ago

    Unfirtunately, the crawl space is filled with dirt (I mean FILLED... to within a couple of inches of the floor joists under the bathroom.

    I just had three mold experts over here today. IF the mold is in the crawl space, we are going to have to EXCAVATE ALL THE DIRT!!!!! (sorry to yell but O.M.G!) This will entail gutting the bathroom to floor joists, cutting a big hole in the wall, and removing the dirt by hand through the 16" OC joists. Can you imagine?????????

    We are so overwhelmed by the renovation project going on in the rest of the house, I cannot even wrap my mind around how enormous this problem is right now.

  • 17 years ago
    last modified: 11 years ago

    So sorry about the mold problem--that really stinks! (no pun intended)

    But, I'm thrilled to see your progress! After looking at your plans so much until you finalized them, I feel like I really "know" your house now. I'm so looking forward to seeing it come together!

  • 17 years ago
    last modified: 11 years ago

    Oh I am so very sorry for you,
    wishing you better days ahead.
    ~Boxerpups

  • 17 years ago
    last modified: 11 years ago

    Thanks, you guys... :)

    It is so nice to be able to come here for advice and support. It really makes all this easier!