Software
Houzz Logo Print
toddimt

Counter height window - Framing

15 years ago

I am trying to do as much of my remodel I can DIY. I plan on incorporating a counter height widow behind the sink. I was wondering if anyone had photo's of what the window looked like in the framing stage. I am trying to wrap my head around how to frame and support the 6-8" for the window bump out.

Comments (10)

  • 15 years ago
    last modified: 11 years ago

    You want to frame it so it bumps out beyond the existing wall towards the outside? I'm not sure, but I assume framing out a box using 2x10's or 2x12's and installing flush with interior studs. Between the studs I'd frame out like a header to support the added weight. How will you side / trim out the exterior bump-out? Will the top be sloped to shed water?

  • 15 years ago
    last modified: 11 years ago

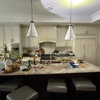
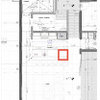
    We have bumped counter height windows. The center window is 4' wide with a 2' wide swing out window on each side. Here are some pictures showing the framing and finished product. GC and I spent a lot of time going over the specifics. I originally didn't want the framing to be so wide between the center and side windows but I liked the way it turned out once the trim was installed. Good luck!

    {{gwi:1827467}}


  • 15 years ago
    last modified: 11 years ago

    graciemay,

    Yours is a whole different animal since the whole wall and foundation bumps out. This one would be easy for me to frame out.

    I am trying to figure out how the framing and support is done where the framing for the window would come down to just below the counter height. Ironically there was an article in the current issue of fine homebuilding about bumpouts. One of then was a 12" bumpout that would be similar. However, the diagram is a rough sketch and I can figure out how they tied the framing together.

    Figure some had to have taken some construction pics along the way who has one.

  • 15 years ago
    last modified: 11 years ago

    So, only your window is bumped out, not your floor? Is that what you mean?

    Ours is bumped out from the floor to the top of the window, so it probably won't help either, plus, you can't see the internal framing, just the framing for the counter to sit on so you can't see how it's tied into the house frame above the window. Here's a pic anyway in case it offers some little bit of help to you (or future viewers)...

  • 15 years ago
    last modified: 11 years ago

    Oh, forgot to mention that our foundation is not bumped out.

    Old pic from before the remodel...when the window was only 22" or so off the kitchen floor.

  • 15 years ago
    last modified: 11 years ago

    Hey Buehl,

    When I saw graciemay's window I immediately thought of yours since the framing, etc is the same.

    I did some more searching and came across an old posting about counter height windows and saw the one ericanh put in. mamadadapaige's window also is the same style I am referring to. When I clicked on ericanh's photo's I went through her photobucket and saw a pic during the framing stage.

    Its from a distance but can see that they lined the inside of the usual framing with 1x10's or 1x12's on the flat. That is all I can tell from this pic. I wish there was an outside pic to show the framing from that side I can see the after but the extra 6-8" of the 1x10 or 1x12 hanging outside of the house has to be supported in some way. Figure there is additional framing for insulation etc. I did shoot Erica an email via the gardenweb page to see if she had any additional info. I know her kitchen was done back in 09 so the contractor is long gone now to ask questions.

  • 15 years ago
    last modified: 11 years ago

    Just watch out for the rules on counter receptacles.

    While the sink itself does not count as wall space needing receptacles, you need a place within 24 inches of the sink edge to put a receptacle (at least on of the pictures above does not appear to comply).
    Only the actual sink width is not included.

    There is NO allowance for windows themselves int the spacing rules.

    No place on a kitchen counter can be more than 24 inches from a receptacle. This is measured parallel to the counter.

    Receptacles CAN be below the counter if the overhang is not large, but then it interferes with drawers and base cabinet doors (even sideways an electrical box is about 2 inches wide).
    Receptacles can be mounted ON the counter, often called 'tombstone' style but they cannot be face up in the counter.

  • 15 years ago
    last modified: 11 years ago

    Receptacles can't necessarily be below the counter on perimeter counters- according to the NEC, apparently that rule is for islands and peninsulas only. I spent DAYS trying to get that issue resolved my electrician and he with the inspector because I have a run of cabinets along a perimeter wall where it makes no sense to have an above-counter outlet. Apparently, neither my electrician nor the inspector saw things my way and I was told I HAD to have the outlets above the counter despite my intense dislike of this idea. Not sure if this is regional or I have a difficult inspector or what b/c I've seen plenty of other people do below-counter ones. :(

  • 15 years ago
    last modified: 11 years ago

    If it's a squared-off cantilever box-bay window, I like to use a "fin" of plywood sheathing that is screwed into the side of each stud of the wall opening (double them) and projects outward the distance of the bay. This ensures that the whole assembly is very tight and never sags. But you have to be dead-on with the measurement from the get go, because the fin _is_ the sheathing of the sides of the box, and not adjustable.
    Casey

  • 15 years ago
    last modified: 11 years ago

    Todds,

    Did you find that issue of Fine Homebuilding in the store? Because it is the March issue.

    Casey,

    You screw the plywood sheathing into the existing 2x4's, correct? (2x4's are doubled, not sheathing, right?) And THEN put the 2x12 box inside the sheathing? This is so the sheathing seam is more water-tight?

    As for supporting the weight of the window? This was my question too. Because the weight will be cantelivered on the outside edge of the 2x12's. Just a normal 2x12 "box" won't be strong enough. But, cantilevered brackets aren't needed for such a short projection either.

    My thought was this:

    Create a header using double 2x12's with plywood between, spanning the length you need between the existing sistered-up studs. Then cut a 2x12 into mini "joists" 11.5" long (width of 2x12) and install these above header, flush with inside of studs, cantilevered out. You can attach a plywood bottom in advance. Then screw end joists to studs, use hurricane straps to connect joists to header below. Block out between joist bays at cantilevered end to keep them from wracking and collapsing in from the weight of the window. Insulate between the bays (spray foam is probably best for such a short, tight space).

    Then install the 2x12 "box" for the window - flat 2x12's on top and bottom, vertical 2x12's on sides. Of course there is a 2x12 header at the ceiling beneath the top-plate - your window will start below this.

    Personally, I'd make the frame a minimum 12" wider than your window(s) so that you have a minimum 6" from the window to each corner so you can wrap it, flash it and cover it with trim to keep the water out. 6" will not be enough if you use wide window trim - do a sketch to scale with your window trim and whatever you plan to wrap around the corner. So, if you want to use siding it will look ridiculous to only have 1-2" on the window side of the bump out - better to use flat stock trim wrapped around the corner with a mitre (or you can buy pre-made corners). Note that if your bump-out siding IS made of flat stock, either 3/4" or 5/4 (1" thick), you must install this first and then build-out your window trim so it sits over it. I had to do this around my windows to go over the board-and-batt siding.

    Now for the top: How to shed water?

    If you do not have a deep eave directly over the window this is very important.

    Lets say your wall is just siding from the first floor to the second floor roof. You will have to cut mini rafters that are attached at the header below the top-plate with rafter hangers. Cut them so they extend beyond the bump-out (INCLUDING trim / siding), like a soffit. So, lets say they extend 12" beyond the bump-out (insulate between and cap ends and soffit with plywood). You will flash where the top of the rafters meet the house and your siding will go over this. But then, what to cover the mini-roof in? Is roofing the only option?

    I'm trying to picture this on my own house, and while I like the bump-out all trim painted dark green to match my house trim, my siding (on the sides of the house) is pale green cedar shakes. But my roof is Colonial Slate - gray and red. I think this would stand out too much next to, jetting out from, the light green cedar.

    I wonder, for such a short run, if clapboard siding primed and painted in oil could be used instead of roofing? Especially if it's cut to a 12/12 pitch? The thin edge is beveled to almost nothing. Of course the flashing would lap over the top course.

    Will this framing work? (sounds strong enough to me). But what about the top - does it HAVE to be roofing?

    I'm seriously re-considering doing this in my kitchen. I thought I couldn't because my range is on the wall between two windows, but I can cantilever out a full 10 feet, and inside keep the lower portion of wall normal behind the range the create a niche/ ledge above the range between the windows (would appear like a bump-IN behind the range). The hood would start in front of the normal wall and I'd put in a soffit with lights flush with the bottom of the hood in the bump-out. I always wanted a niche, but it's an exterior wall. Plus, I was planning on really deep sills for herbs, and this eliminates that.

Sponsored
CHC & Family Developments
Average rating: 5 out of 5 stars6 Reviews
Industry Leading General Contractors in Franklin County, Ohio