Software
Houzz Logo Print
christina222_gw

Replacing The Hideous Blue Bathroom

11 years ago
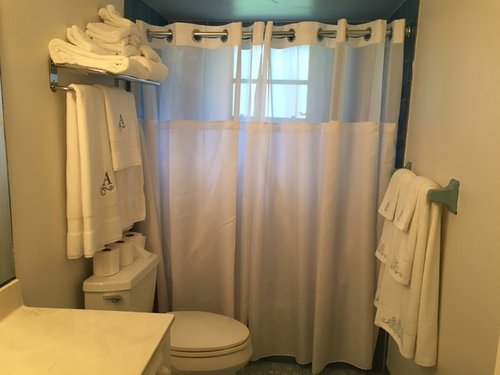
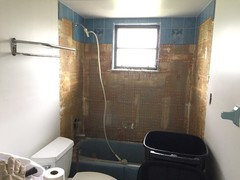
I started removing the tile from the tub surround. Wish me luck, I'm very new at this sort of thing! I do have more experienced helpers on call as needed though. I'm going to use Hardi backer for this. The Kerdi system looked fantastic and easy but so expensive! So Hardi backer it is and I think Laticrete for the waterproofing membrane. Unless one of you has better advice?

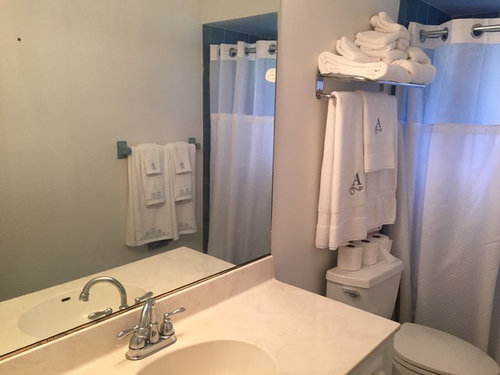
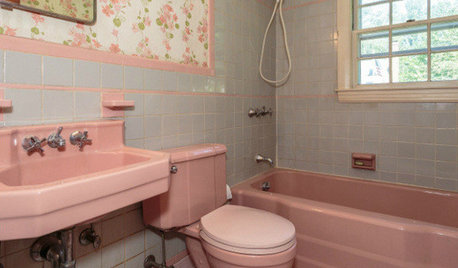
As you can see in the before pictures I tried to hide as much of this room as possible behind acres of white towels and shower curtains. In the fifteen years I've lived here I've never even taken a photo of this room before now as I hated it so much. The builder mirror and the blue tile floor are both going too. The vanity is staying as replacing it is not in the budget it's very low though and I'm thinking of putting feet on it.


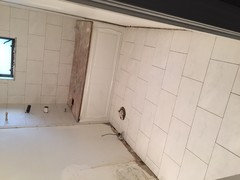
I've got most of the tile off the right side wall.


Comments (48)

  • 11 years ago

    Good luck! It's actually not as bad as I was expecting, but I too, would be glad to see it go.

    I've got three similar bathrooms I will need to redo at some point, so I will be following along :)

  • 11 years ago
    last modified: 11 years ago

    Logically I know it could be far, far worse. The second that shower curtain (which used to be a disgusting sliding door BTW) goes away that end of the room looks like a cave. I can't wait to see it brightened up with white tile. That tub is super shallow and only 29" wide. Can't wait to be rid of that too!

  • 11 years ago

    Done for the day. I need to research how to get that valve thing off the wall the plate has two screws but the clear plastic faucet bit is eluding me.


  • 11 years ago

    That may be the answer. I can't see or feel a seam but there is a tear dropped metallic center on the knob. Thanks, I'll see if I can pry it out.

  • 11 years ago

    Success! I was able to pry off the center of the knob and unscrew it. Thanks very much.

  • 11 years ago
    last modified: 11 years ago

    Yes Laticrete for the membrane. I used that and I loved it. Mongo had been very helpful to me in the process of doing my 2 bathrooms. I hope he is available for your questions. He is so knowledgeable.

    Are you taking the tub out?

    christina222_gw thanked enduring
  • 11 years ago

    Yes, the tub is coming out and being replaced with a Kohler Devonshire. It's a bit wider and much deeper. I'll have a plumber do the plumbing rough in and install the tub but I'm hoping I'll be able to do the rest myself.

  • 11 years ago

    You can do this :)

  • 11 years ago

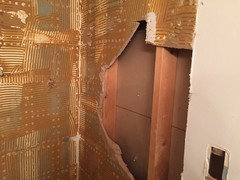
    I watched a lot of videos about how to do this before I started so I was expecting a seam between the drywall and the backer board. I couldn't find a seam. A closer look reveals that I apparently don't have drywall either. It's blueboard with what appears to be a hand coat of plaster over it. This house continues to surprise me. It's in FL and built in 1985. I never paid much attention to the walls (even though I painted them) and never noticed they aren't drywall. Probably because I grew up in New England where drywall is not common and I saw what I was used to seeing and just assumed it was drywall.

    Now I'm not sure what to do. It looks like the tile was put right on top of the plaster. I guess I'm going to have to make a vertical cut through the plaster walls on each side at the width of the new tub to remove it.

  • PRO
    11 years ago

    christina222_gw:

    They make a special tub removal tool that will save your plaster.

  • 11 years ago

    Lol, I have one of those! But don't I need to remove the plaster to put in backer board for new tile?

  • PRO
    11 years ago
    last modified: 11 years ago

    You can put the Kerdi over the plaster. Fifth question down.

  • 11 years ago

    I wasn't actually going to use Kerdi as its so expensive, but if I do go with that and put it over the plaster it will be 1/2 out from the rest of the walls. What do I do about that transition?

  • 11 years ago

    I think you could put hydroban over the plaster. Look at the specs and call latacrete. Have you checked the John bridge tile forum? Worth a look, they at very helpful. Some of the folks here are there too providing advice. It's all tile.

  • PRO
    11 years ago

    "What do I do about that transition?"

    Schluter again.

    As a relatively inexperienced DIYer, you should be buying on value, not price. Get the Schluter, follow the instructions to the letter, and all will be well.

  • 11 years ago
    last modified: 11 years ago

    I've reached the studs. I couldn't find the screws holding the blueboard to the studs because, it turns out, they used roofing nails to attach it to the studs and then covered it all with a layer of plaster. Didn't get much done this week but now the weekend is here I'm hoping to finish getting the walls demolished by Sunday night.


  • 11 years ago

    Yay! You are making good progress :)

  • 11 years ago

    It's really coming along Christina! Good work!

  • 11 years ago

    Slow progress as we had a St. Patrick's/Pi Day celebration today. I did start on the exterior wall. No studs. Just furring strips attached to the block with cellulose in between. What a mess. I need to figure out how to add blocking for a grab bar with no studs.

  • PRO
    11 years ago

    " I need to figure out how to add blocking for a grab bar with no studs."

    Tapcons and plywood, but you don't seem to want to follow the advice you're given here.

  • 11 years ago
    last modified: 11 years ago

    Not sure what you mean Joseph. The only advice I was given was to put Kerdi or hydroban on top of the old plaster. I tried that. I couldn't get the adhesive off of the plaster. Any attempt to do so just ripped the blue board to shreds. The adhesive brought the board with it. The walls are covered with thick ridges of adhesive. How should I have removed that to get smooth walls?

    Beyond that I still had to remove at least some of that board to add the blocking for the three grab bars and to allow for a niche in the end wall.

    What other advice have I not followed?

  • PRO
    11 years ago

    I suggested you use Kerdi and you said it was too expensive. I assessed that at your level of experience it would be money well spent and another poster with extensive experience agreed with me. If you're not going to follow the professional advice you're given, it makes us hesitant to give any more. An aggressive scraper would have removed that brittle adhesive in 5 minutes. You've just made a boatload of unnecessary work for yourself by destroying an excellent Kerdi substrate.

    There is a local guy that does nothing but install grab bars. I'm not sure how he does it, but I'm sure he doesn't remove the wall to install blocking. You could have cut just enough plaster to install plywood spanning the studs and applied the Kerdi over it.

  • 11 years ago
    last modified: 11 years ago

    The only Kerdi I have seen is a board. I haven't ruled out using it if I can find it and afford to buy it. Does it not have to be screwed to the studs? The videos that I've watched show it being done that way. How has what I'm doing precluded me now using it?

    I agree that the Kerdi system is ideal. However the prices I am seeing for it seem insanely high, over $80 a board. I haven't actually found a place to buy it though, just seen suggested pricing. What should I expect to pay for a standard tub alcove? Is there something I should be aware of regarding the Laticrete membrane I was planning to use?

    Oh, and what do you mean by an aggressive scraper? Should I have rented a machine? I used what seemed to be to be a good scraper in conjunction with a hammer but while the adhesive came off it took half the board with it.

    I'm not trying to be argumentative just to understand.

  • 11 years ago

    Further research done. I think I misunderstood the advice given. As mentioned above the only Kerdi I'd seen was Kerdi Board and Ditra. Now I see there is a soft membrane. Was this what you were suggesting I use? I kept picturing a half inch thick board over my current board and didn't see any way to make that work.

  • PRO
    11 years ago

    Perhaps I share the blame for not making myself clear. I was referring to the membrane.

  • 11 years ago

    *Insert facepalm*

    Well it's not a total loss. I do actually know how to hang wall board and I have a friend on call to help me.

  • 11 years ago

    How are things progressing, Christina?

  • 11 years ago

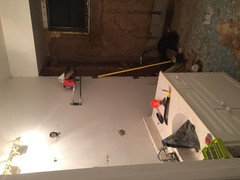
    Funny you should ask! It turns out the hideous blue bathtub was cast iron, which explains why I couldn't budge it. I had a couple of friends come over tonight and they just left after getting it out of there. They also got the toilet out for me. Vanity has to stay until the plumber cuts and caps the pipes. Speaking of the plumber, he will be here Friday to do the rough in. In the meantime I will get everything as cleaned up as I can.

    After trying to remove the floor myself with little luck and adding up what it would actually cost me to do the tile job myself I called the company that did the rest of the tile in the house for a quote. They gave me a good price so I'm going to have them do it. It'll cost me, but not much more than if I'd had to go out and buy or rent all the tools and materials to do it myself and I'll get a professional job. Right now I'm a bit discouraged because it's such a mess. I'll get it cleaned up though.

    On the plus side there is plenty of room in the hole in the slab to move the plumbing over the two inches I need for the new tub.


  • PRO
    11 years ago
    last modified: 11 years ago

    There is Kerdi fabric (the orange stuff) Laticrete fabric (grey) Nobleseal (Blue I think) Dalseal (orange but thicker) USG (grey ) and more I am forgetting. You can research your local and online suppliers then compare against the liquid applied membranes such as Hydroban (olive drab) HydroBarrier (baby blue) AquaDefense (dark green) Red Guard (red, go figure)

    Since they are all in competition with each other, they are all fairly equally priced. If I had to pick one, I'd go with any of the sheet / fabric membranes for the DIYer. Its much more user friendly than a liquid membrane which has to be applied to the correct thickness without globbing it on. Globs = cracks = leaks. Also the sheet membranes can be applied over regular drywall. The Liquid membranes require ceement board, which is heavier, more work, and costlier.

    One option is hiring out just the waterproofing part of this exercise to get the skilled hand. The manufacturer of the waterproofing product you choose will be able to help you locate a trusted contractor in your area.

  • 11 years ago

    Got an update. They were supposed to start tiling today but I had some concerns about the substrate. It's denshield, which is fine but I felt it wasn't well done. The boss came out today and called me at work to tell me he'd had it all ripped out and redone.

    Due to an honest misunderstanding the vanity I had intended to keep was removed and destroyed. New one should arrive next week. Probably for the best in the end. So progress is slowly being made. i know these things take time and delays happen but I am so over this project! There will still be quite a few things to do when the contractor is done but at least the room will be usable at that point.

    No pictures because Houzz insists on posting them sideways or upside down.


  • 11 years ago

    Thanks for the update. Good luck with finishing and can't wait to see your final pictures.

  • 11 years ago

    Tile started going in today! I'm thrilled with how it looks. They had to shim one wall at the dry end of the tub so the tile is out from the wall a bit. No where near as much as this picture makes it look though. I'm not concerned as I'm planning on a wainscoting on the wall and between that and the caulk that's yet to be done it's going to be fine. Such a difference from the blue! I love blue, don't get me wrong, just not that blue in that room.


  • 11 years ago
    last modified: 11 years ago

    I've reached the "I've made a mistake!" stage of the project. I debated a lot of different tiles for the floor but found nothing I liked. I love the look of small tiles on the floor but hate cleaning them. I just got rid of small tile. None of the really big ones appealed to me. Love marble but couldn't afford it. I ended up using the same tile on the floor as I did on the walls. It's all looking very uniform and doubts have crept in. I'm reminding myself that I wanted a simple, white bath that I could add color and style to with linens and accessories. I do love it, I'm so pleased that it's white and clean!

    I'll also be adding a wainscoting with paint above in a soft neutral but not white, so that will help. The vanity top is marble as well so a bit of color difference there.

  • 11 years ago

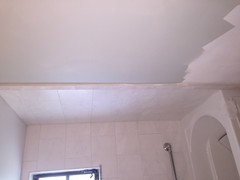
    I started painting today and I'm hoping to have the wainscoting done this weekend. The guy who patched the plaster got some on the tile, that's the white spots you can see in the photos. I need to scrub that off. I didn't notice it until I was already painting. The paint color is BM Gray Owl. It's nearly a perfect match for the grout. I'm hoping to get the toilet in this week and schedule the plumber to hook up the sink and install the tub and shower trim.


  • 11 years ago

    Really coming along- it's looking great!

    Lisa

  • 11 years ago

    It looks great! Do you feel better about the tile on the floor now that you are painting?

  • 11 years ago

    I feel much better about the floor now Errant. Now that some new color and texture is going in it looks good.

  • 11 years ago

    Oh, good! I was thinking the same thing, but it's going to be lovely! I can see how you were second guessing all of the white at first, but think it was just because you had been living with the blue for so long :)

  • 11 years ago

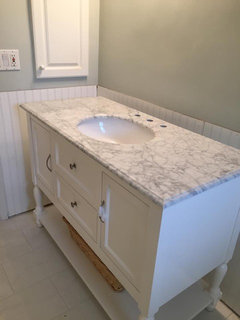
    Today was tough. I decided to replace the light fixture. Ultimately I want sconces but I couldn't stand the idea of that awful fixture in my nice new room. Went to Lowes and picked up a nice but inexpensive fixture and it was downhill from there. I won't go into the full story but I finally got it up there after hours of struggling with it. Should have taken 15 minutes! I have wall repairs and painting to do but that I know how to do. On a happier note my nephews stopped by a few minutes ago and muscled the vanity into place and I love it! I have work to do on the wainscoting but it slides easily on the tile floor so I can do that before attaching it to the wall. Should I leave it loose for the plumber and then screw it in when he's done or screw it in before he comes?


  • 11 years ago

    So pretty. I love that you are semi-DIY. I wish that I had the confidence to do that.

    christina222_gw thanked Micki-Micki
  • 11 years ago

    It's coming along nicely! The vanity is amazing! Do you love it?!

    christina222_gw thanked mgmum
  • 11 years ago

    I do love it mgmum! It looks really nice in the room and I'm already thinking about how to store and display things in/on it.

  • 11 years ago

    Don't you just hate it when something that should be simple turns into a royal pain?

    Cute vanity! Where did you find it?

  • 11 years ago

    I got the vanity on Amazon! There's a thread a bit down about finding vanities online. It came from Kitchen Bath Collection in California. Very easy process and good prices. It came with a faucet and a 4" backsplash as well.

  • 11 years ago
    last modified: 11 years ago

    Just got off the phone with the plumber. He is coming out a week from Thursday and connecting up the sink and installing the bath and shower trim. I'm so close to having a fully functional bathroom again. I'll still have some decorative stuff to do at that point but at least all the big (and expensive) stuff will be done.

  • 11 years ago

    It's coming along great! I love that vanity!

    christina222_gw thanked User
  • 11 years ago

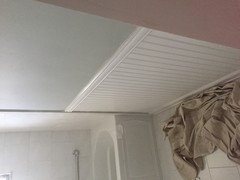
    I've been working on getting the walls done in preparation for the plumber this week. Just finished caulking the wainscoting. It's all been primed so I just need to paint it and do a second coat on the upper walls. You can see where I got primer on the upper wall. I wasn't careful as I knew I was going to paint it anyway. I chose BM White Heron for the wainscoting.