Software
Houzz Logo Print
fernando9510

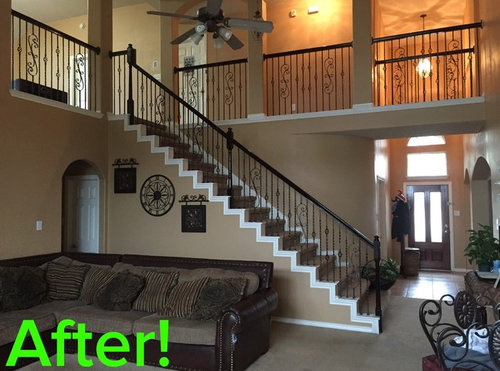
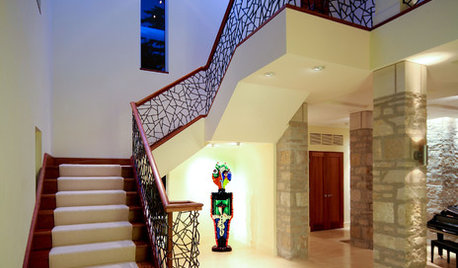
Our new stairs!!!

11 years ago
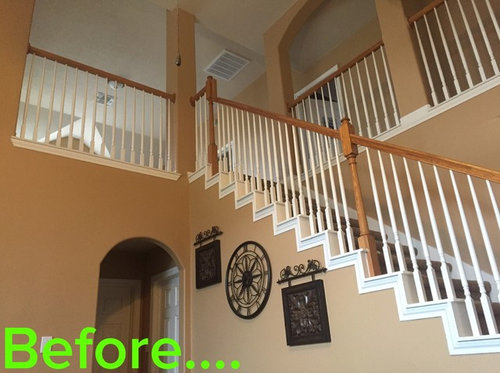
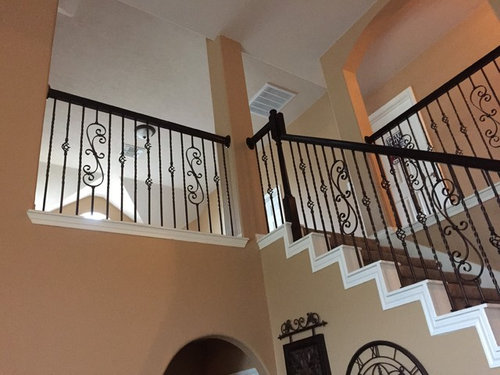
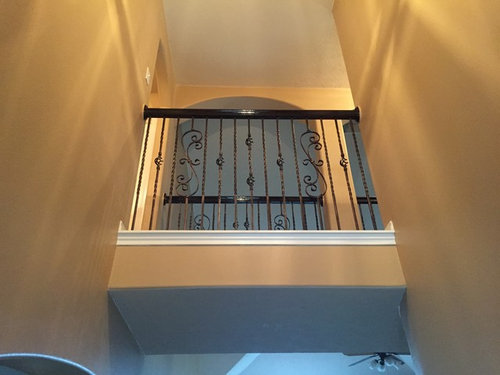
Just finished up my stair baluster remodeling!

Comments (12)

  • 11 years ago
    We are considering this project. Can you give details on how it was done please?
    Fernando Gonzalez thanked sscovanner
  • 11 years ago

    HI -- Very elegant looking now but .... I don't care for the white zig zag trim .

    Fernando Gonzalez thanked lefty47
  • 11 years ago

    I agree with you, lefty47. My next project will be to replace the carpet on my stairs with wood so I plan to address the trim at that time. Strangely, it didn't bother me too much with the old balusters, but with the new ones it really stands out a little too much.

  • 11 years ago
    last modified: 11 years ago

    the balustrade is absolutely beautiful and really sets the tone for the foyer.

    if your carpet replacement isnt happening for a while you could always paint the bottom portions of the zig-zag the wall color and it will disappear. leave the 'lip' white.

    Fernando Gonzalez thanked Judy Mishkin
  • 11 years ago

    ssconaver - First and foremost plan it all out so you know what design you need for each set of balusters, what type, and what color. For example, one area had 15 when another had 14, so you have to get creative with the design and make sure it still has the same look you want. With 15 there is a center, where with 14 there is not. So you have to figure out a design that will still go with the other areas without looking weird. I'm a Photoshop expert so I grabbed pics of the balusters I wanted and put the designs together to show my wife how it's going to look before it was even done, since she's more visual.


    Again, planning is very important. This also helps you figure out how many of each type of baluster you need. You also have to decide if you want shoes at the bottom and top or just bottom. Next take the time to watch as many videos about how others did it. They're all over YouTube but the ones on the CSP were also really good. After doing that, I ordered and picked them up to get started.


    When I got started, I started on one section at a time to make sure I didn't leave open areas for my kids to fall through. I used a jigsaw because I didn't have a sawzall and cut each one at the skinniest part of the baluster (typically the bottom part where the square part meets the round part). Next step was to remove the old baluster by twisting, turning, and pulling until they came out. Then, remove any nails holding them in place with a pair of pliers or vice grips and clean up the work to paint the bottom area since some of the paint peeled up when I pulled the old balusters. Next, I labeled each new baluster so I knew where each one went, since they are different sizes after you cut them. Then, I jammed the new baluster up at an angle on the outside of the stairs into the hole under the hand rail and leaned up against the bottom part to mark where my cut will be. I personally found it easier this way, but some people like to measure. Then, I cut the baluster with a cutting wheel tool on my compressor. You can use a jigsaw with a metal cutting blade but that was taking too long for me so I started using my air tools. Finally, slide the shoe up from the bottom and jam the baluster up in the bottom of the hand rail to dry fit and see how it's going to fit. A few I had to grind a bit more for it to slide in without too much damage to the bottom part.


    The last part is to glue it all down. I used LocTite Heavy Duty PowerGrab glue instead of baluster epoxy. The LocTite was a LOT cheaper and easier to use. I tried the caulking gun with it but it was a mess as I couldn't stop the flow from the pressure. What I did was used a razor blade to cut along the bottom of the tube in order to stick a putty or spackle knife in there to grab a little at a time. You will have to cut more of the tubing as you get further down. Then, I smeared the glue underneath the outside edge of the shoe with the putty knife so the when I put the shoe all the way down the glue would connect it to the wood. Then screw the shoe in to tighten it. The excess was then wiped into the edges to smooth it out and no need to caulk it. I only did 3 sides since I couldn't get my hand in to do the back part of the shoe, but the glue I used still worked great even though it's only on 3 sides. After the glue fully dried, about 30 mins to an hour, I went baluster by baluster to check if they were tight enough on top. If any were loose, I used clear caulking to fill in the gaps and make a good, sturdy fit. There were a few I cut too short, but I simply loosened the shoe, moved the baluster all the way up into the upper hole, and tightened the shoe. After that, the fit was fine. The next day I checked to make sure the glue worked well and it's on there REALLY good, so I'm glad the glue I used worked and it was a LOT cheaper. No rattles and I seriously doubt it will come off without really putting force to it.


    I forgot to mention, I still needed to restain the hand rails, so after the dry fit I removed them one last time and restained the rail. Once it was dry, I installed the balusters for the last time and touched up paint on the walls, too.


    It's actually pretty easy, but you will have to see what works best for you, your tools, and your budget. The above is what worked best for me. I do strongly recommend, though, plan, take your time, and don't cut corners (figuratively). It will take some time, but the end result is worth it.


    I hope this helps you! Good luck!

  • 11 years ago

    Good point nnigrt! I'd actually like to remove the trim and put a different kind, but that's another project for another time! Hopefully wood plank tile goes in in the next few weeks and the carpet shortly after that!

  • 11 years ago

    yes the trim should be removed the next time you are doing something big, this is just a stopgap.

    actually, paint the vertical lip as well, just the horizontal should be white.

  • 11 years ago
    Thank you so much for your detailed explanation! We have thought about many of the issues you addressed! Couple other questions. When you removed the wood balusters were the holes that remained bigger than the metal ones? If so, did you just fill with glue? Did you choose hollow balusters or solid? Why. Where did you source the new balusters? Thank you so much for your time!!
    Fernando Gonzalez thanked sscovanner
  • 11 years ago
    Looking for ideas on how to update the exterior of our house.
  • 11 years ago
    last modified: 11 years ago

    sscovanner - The bottom holes were a bit bigger but those holes are not even seen because of the shoe. As long as the shoe is glued down and you tighten it, the bottom portion won't move or rattle. The top holes were actually a little bit smaller on some and little bigger on others. The ones with the angled hand rail, on the stairs themselves, were a tiny bit larger but when you jam the top of the balusters all the way up it tightens up. I only had one that was a bit more loose than the others so I simply squeezed some clear caulking in there to fill the gap and stop it from rattling or moving. The areas with the flat rail were a bit smaller so I actually had to use a bigger drill bit to make them a bit bigger. I don't recall the size though.

    I purchased all my balusters and shoes from CheapStairParts. They really were the cheapest place I found in Houston and also online. I purchased the hollow ones and they are way thicker than I thought they would be. I would personally stick with the hollow ones. Cheaper, look just the same, and really good quality.

    In regards to the trim, I really don't understand why the trim should be removed when just doing balusters, but ok....personal preference, I guess. I don't mind them like this for now. I would rather use the trim budget for other things for now. But I will be changing it somehow when the time comes to address trim.

    mkv0804 - I would add color to the house and yard. Too much green and not enough color in the yard. The color of the house looks a bit too dark for my taste, but everyone has their own opinions. Since you really can't see the front door too much, it's mainly the yard you can do something with. It's a beautiful house, just would seem a little more vibrant with a different layout in your landscaping. But again, that's just my own personal opinion.

  • PRO
    10 years ago

    Great work!