Software
Houzz Logo Print
caityross

Timing on air-layering

10 years ago


About a week ago I picked up a rather lovely Ficus Benjamina from freecycle. The previous owner had summered the plant outside, and elected to pass it on rather than let it die in the cold. Fortunately Boston has been unseasonably warm, so it didn't suffer any cold damage.

I've brought it inside and added a wick to the pot to increase drainage from what looks like a standard potting soil. I plan to repot it mid-June or so when I think it can handle root-pruning.

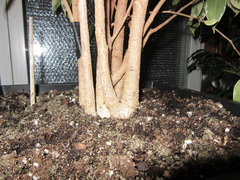
Right now there is a cluster of about 8 trunks that are vertical in a nice little grove system. But in the center, one of the trunks has a large branch a couple inches off the ground that weaves through the other trunks, disrupting the overall image. The branch is about 1/2 in thick and has fortunately not fused to any of the trunks it touches. I'd like to air layer it off rather than just prune it because I'm not that confident in rooting a cutting that large, but I'm not sure on the timing.

Do I start a tourniquet now? Do I give the plant a few weeks more to adjust to living inside? Do I wait until this summer?

On a related note, I have some branches on this plant that are about 18" long extending from the center with only one or two leaves at the end. Aesthetically, I'm going to need to prune them out; is it possible to root such cuttings?

Comments (35)

  • 10 years ago
    last modified: 10 years ago

    You can layer any time, but they strike fastest when the tree has lots of energy and is at/near the peak of its food-making ability, so in Jun or Jul. If you're going to wait, you can start a tourniquet now. If you're going to layer now, use the ring method, which is to remove all bark immediately below where you want roots to form (all the way down to sapwood) for a distance of at least 1-1/2 times the diameter of the branch. You might have questions, so I'll wait on sharing more about that.

    You can prepare your layer ahead of time so it's predisposed to rooting by using this method:

    Needed: Powdered IBA rooting hormone and electrical tape

    Directions: Sprinkle some IBA powder on a sheet of paper. Dust the end of a strip of electrical tape equal to the circumference of the branch you're layering with the hormone, then wrap the tape around the branch where you want roots to grow with the dusted part against the bark and secure 4 weeks before starting the layer. The blanching (exclusion of light) caused by the banding with the tape works together with the hormone to get root initials started before you even prepare the cutting. This works very well for a large number of genera of woody plants, and works very well for Ficus. The bottom of the tape will serve as a template for your top girdling cut a month after you apply the tape with hormone. If you use a tourniquet (apply now), wrap the tape with hormone on it a month before you start the layer next summer.

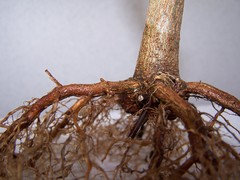
    This is a tree that wants to be a bonsai start in 4-5 years after it grows up, but it's ugly roots disqualified it. SO, I'm layering the whole top of the tree off of those ugly, one-sided roots.

    The new roots will be like these:


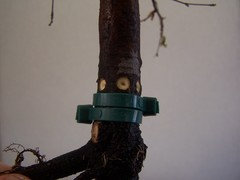
    Note the wire tourniquet, still on the tree.

    ..... I have some branches on this plant that are about 18" long extending from the center with only one or two leaves at the end ............. is it possible to root such cuttings? It's possible, but not too probable they'll strike. For cuttings, you want branches with a lot of stored energy. Weak cuttings rarely fare well. You can use the blanching/hormone technique though, which would really increase your odds - as would tenting the cuttings & giving supplemental light. I just started some F benjamina cuttings about 3 weeks ago to be used in a future grafting project, and I just noticed earlier tonight while watering that they all struck, so no harm in trying.

    Al

  • 10 years ago

    Thank you so much Al! I will put a tourniquet on this afternoon and just keep an eye on it for the season. I assume I should only start blanching later so the roots are primed to grow, but don't dry out?


    Do you use zip ties out of convenience, or is there another reason to prefer it over wire?


    I think I'll go ahead and do the blanching/root hormone combo on the branches I was going to prune and wait a month; I'm trying to work on learning to operate on tree time instead of people time, so the wait will be a good thing.


    Again, thank you- you're always so helpful at passing along your hard won knowledge.

  • 10 years ago

    Al

    I am not sure I understand the sequence correctly:

    "If you use a tourniquet (apply now), wrap the tape with hormone on it a month before you start the layer next summer."

    Does it mean:

    1: apply tourniquet now (Nov, Dec? - wire or zip-ties, nothing covering it?)

    2: wrap the electrical tape with hormone on the branch (blanching), just above the tourniquet (?), month before start of layer (that would be approx. May - if starting layer end of June - beg. of July?)

    3: "The bottom of the tape will serve as a template for your top girdling cut a month after you apply the tape with hormone."

    I am not quite sure what do you do with the electrical tape (do you take it off? do you strip/remove band of bleached bark? - this is where the roots start growing from, right? ) and where exactly do you cut?

    Sorry for being so 'dense'...and caityross, hope you don't mind me asking on your thread...TIA.

    Rina

  • 10 years ago

    I don't mind at all. My read was: tourniquet now, tape+hormone in May. If I elect not to use a tourniquet, I can still benefit from the tape+ hormone pretreatment and cut right under lower edge of tape when I ring the bark.


    It if I'm misunderstanding any part, I'd certainly welcome a correction.

  • 10 years ago

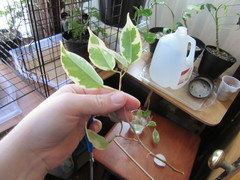
    I will try to get a couple pictures when I get home. The branches are 1/8" to 1/4" in diameter. They have the long arching form I've seen in other weeping figs, but the branches start among the interior of the trunk grouping and thus have leaves only at the very end.


    The wire vs zip tie makes sense, thank you for answering my curiosity.

  • 10 years ago

    My pleasure, Caity.

    Al

  • 10 years ago

    Al

    Thank you, and yes - it is very helpful to me.

    (I ask too many questions sometimes and get into trouble-I just did on succulents forum...:( - about leaves to be removed in order not to interfere with growing and strengthening of jades trunk - at least that's what I understood...)

    Caity

    Thank you for letting me 'in'. (I air layered ficus before and quite succesfully, next time I did thinner branches - it was ok but not as good...I'll follow this thread.)

    Rina

  • 10 years ago


    Ficus Benjamina · More Info
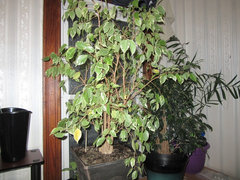
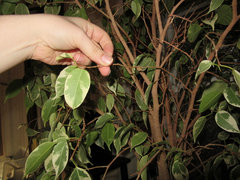
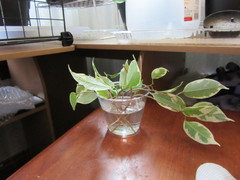
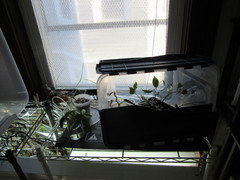
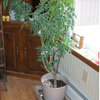
    It's dropping a few leaves, but I'd be sulking too if I was taken from outdoor light levels to a window w/fluorescent supplement


    Ficus Benjamina · More Info
    Not the best angle, but it's harder than I thought to actually see it in 2d vs tracing it out in 3d. The branch that is basically framed in the middle of the picture is the one I'm going to air layer.


    Ficus Benjamina · More Info

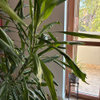
    This is the kind of branch I'm looking to prune out.

  • 10 years ago

    Al

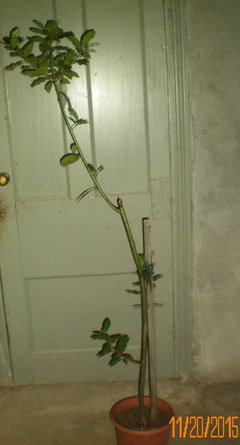
    Would this exact process of layering work for a Bay leaf? It is a 'tree' - circumference of the trunk is about 1.5-1.75".

    TIA. Rina

  • 10 years ago

    Hi, Caity. If you buy an inexpensive brooding light from a big box or farm supply store and prepare the cuttings properly, you should be able to get those little branches to come from cuttings. If you like, you can even use the tape trick to help ensure success. I wouldn't bother with the effort of layering those ..... unless you just want to get a successful layering project under your belt, I'd tape several potential cuttings & put the brood light on them for a month (150 watt [or greater] equivalent) before sticking them. They'll come easily for you.

    Rina - it will work, but I think I'd rather do a ground layer. Best results would be to apply a tourniquet now, wait until a month or so before you do the layer to apply the tape, then girdle below the tourniquet and prepare the layer.

    Al

  • 10 years ago

    Caity

    Thank you again for letting me to intrude on your thread.

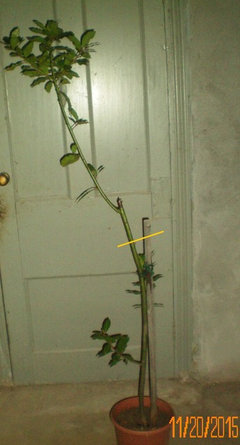
    Al, thank you. Not sure how I would do a ground layer, this is the plant (not-so-good photo in front of old shed...)

  • 10 years ago

    Where do you want to layer it, Rina?

    Al

  • 10 years ago
    last modified: 10 years ago

    Al, the purpose of the brooding light is to allow those branches to store enough energy for them to make it as cuttings, right?

    Should I shorten the branch when rooting- by that I mean try to root it just below where it now has leaves rather than keep the length of branch intact?

  • 10 years ago

    Yes, the added light will help strengthen the weak, thin branches, so they'll be more enthusiastic about rooting. Yes - shorten the branch. Put the light on a timer so it's on for 8-16 hours centering on the hours of daylight (like from 6AM to 10PM. I'd start supplementing the light and apply the tape/hormone at the same time (same day).

    If I was looking at your tree for potential cuttings, I'd look for branches that have at least 4-5 leaves. I'd remove the most proximal leaf (the one closest to the roots), just in case the plant is "thinking" about shedding the oldest leaf on the branch. Then, I would cut the next 2 leaves in half across venation (the veins). After that, I'd cut the tip of the branch off just below the next distal (above the 2 cut leaves) leav. This will leave a long internode that will die back. The reason for leaving it long is to prevent the node below it from drying out. Finally, separate the new cutting 1 node below the lowest leaf you removed - so when you stick it, there will be at least 2 nodes buried in the soil. 3 would be fine, too - if your container is deep enough. If you want to, and it would be helpful, you can make a little propagation chamber.


    To prepare the cuttings with only 3 leaves, I would remove the apical meristem and top leaf, then cut the next 2 leaves in half across venation (the veins). Then, take the cutting with a very sharp tool 2 or 3 nodes below the lowest leaf.

    If you decide to make the ultra-fancy heavy duty deluxe propagation chamber, ask about it & I'll give you a couple of tips.

    Al

  • 10 years ago

    Probably just above the second clump/branch? (below the split) - unless you have better suggestion? I can cut it even few times...and have 3 plants instead of 1...Rina

  • 10 years ago

    So just below the brown stub?

  • 10 years ago

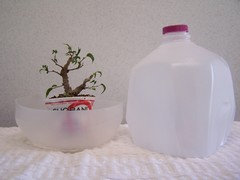
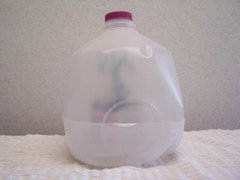
    Thank you for the follow-up. I actually have a propagation chamber I use for my pepper plant cuttings- a slightly opaque rubbermade tub that fits over my seedling heating mat. I've been using a 1:1 mix of granite grit and coarse diatomaceous earth, but I'm thinking about trying coarse perlite just to see how it works for me.


    I'll probably come back to update this thread once I have results to share, but for now I cede the floor to Rina.

  • 10 years ago

    Good deal, Caity - anxious to hear how you progress. If anything else comes up you think I might be able to help with, don't be shy about asking. It's nice of you to share your thread, too. Good luck!

    Al

  • 10 years ago

    Caity

    Yes, Al is right. I should have started new one - I took advantage of similar questions on my mind, and your willingness to share :). So many thanks again.

    Al

    Somewhere here? Or anywhere else if you think it's better:

  • 10 years ago

    You can use the stake as a way to support a plastic pot that you've split and relieved (the bottom) of so you can slide it over the trunk where you wish to perform the layer. You can melt a hole through the pot and put a screw through the hole & fasten it to the stake, or wire it to the stake, or put a heavy wire through the stake so the pot rests on top of the wire. After you've checked to see how everything lines up, prepare the layer by girdling the tree so the top part of the cut is at least a couple of inches above the bottom of the pot (so it's well above any perched water the soil might hold). Tape the pot together & fill it with soil, water and wait. After you're sure the layer has taken, you can simply sever the trunk below the pot. Then, the first time you repot, cut the dead stub off the bottom right below the top of the girdle where the roots formed.

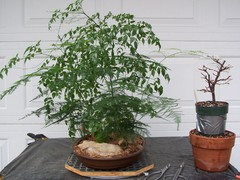
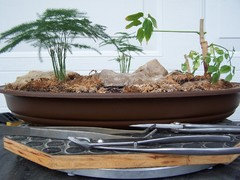
    BTW - here's the 'after pruning' picture of the China Doll & asparagus fern.

    Al

  • 10 years ago

    I have a few questions about above steps.

    1. How tight are you making the tourniquet? As tight as possible, or just to create gentle pressure?

    2. When stripping bark, do you start right above the tourniquet and strip to include the blanched portion?

    3. How deep do you go when stripping? I would love to see a picture of this if you happen to have one, Al. I'm afraid to do this part!

    Amy

  • 10 years ago

    Al

    Thank you for the answer.

    Amy - don't be afraid...I was too, but after you do it once it's not scary anymore :)

  • 10 years ago

    1) Tight as possible - you wand constriction ASAP. Don't worry, it won't "choke off" water movement to the top of the plant because that occurs in the xylem - the living wood inside of the bark.

    2) The tape goes above the tourniquet and the stripping of bark right below the tourniquet.

    3) Strip all the way to sapwood. You'll see a very thin bright white sort of fuzzy material just before you see sapwood. This gets removed, too. I'll try to remember to get a picture today.

    Al

  • 10 years ago

    Whew. I've been hard at work bringing bondsai trees in under cover all afternoon. We're going to get a cold night here - down to 20*, and that's too cold for the root systems of most temperate plants to tolerate. Nothing like waiting until the last minute, eh? ;-)

    I took a branch from a zelcova (tree) and prepared it like I would if I was going to layer it.


    The narrow greenish vertical stripe is part of the vascular cambium, which produces phloem and xylem tissues. I left it so I could show you it needs to be removed all the way down to sapwood.

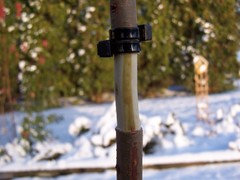
    If you were using zip ties applied several months earlier in anticipation of layering, there would be a large bulge above the ties; so if I was actually layering today, I wouldn't use the zip ties.

    After you ring the branch/trunk, you can remove the bark with your fingernail, then use the blade of a sharp tool held 90* to the branch axis to scrape off all the cambial tissue until you hit bare wood. The little dark spot in the middle toward the left of the layer is where there was a node/bud. Because leaf arrangement on this tree is opposite (alternate on your ficus), there's another just like it on the hidden side.

    This layer allows water & nutrients to move upward, but stops the flow of photosynthate (food) and auxin moving toward the roots, enhancing the probability of rooting significantly.

    Al

  • 10 years ago

    So after preparing the tape/hormone wrap for the small branches I'm going to prune/root next month, I realized I had yet another question.

    Is there any value to adding a tourniquet right below the tape for that month? Will it give the future cuttings any benefit at all? At the cost of a pair of zipties, it would seem worthwhile even for minor gain.

  • 10 years ago

    No - the tourniquet method depends on the additive growth (thickening) of the branch to cause the constriction, so the tourniquet is used for applications where the layer will take place in the distant future (4 months to a year). The reason I use that technique very often is because I'll construct the layer w/o girdling and simply plant the whole plant in a deep pot or use a second pot, depending on the constriction to force roots (see last Sat's post at 4:16). I use it regularly when trees have ugly roots, because a good root structure is as important to the appearance of a quality bonsai as good root health is to the o/a health and appearance of a plant.

    Al

  • 10 years ago

    That makes sense, I'm still getting used to thinking in terms of seasons rather than more immediately.

  • 10 years ago

    One more question: if you were to do this on a trunk rather than a branch, are you sacrificing the lower portion of the tree? I'm specifically thinking about a clearance braided tree that I unbraided, that I would like to shorten as they are all unstable. I bought it specifically so that I could experiment with this.

    Amy

  • 10 years ago
    last modified: 10 years ago

    If you do a regular air layer, the bottom of the plant retains it's viability - especially if you layer the top off above a lower branch. Also, because the downward flow of auxin (remember, auxin helps to inhibit lateral breaks/side branches) is eliminated by ringing and partially eliminated by constriction, your tree will often back-bud from a bare trunk while a layer is under way.

    Caity - those small side branches can be layered like this:

    Start with a small plastic pot (a pint or half pint black poly nursery can is ideal,

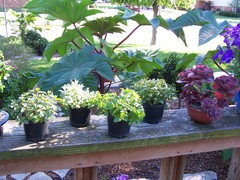
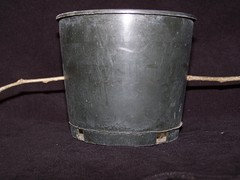
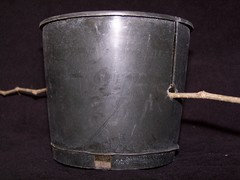
    like the ones providing a home for 4 different kinds of mint in the pic above (I even pinch & prune my mint plants). Melt two 1/4" holes (or whatever is appropriate) through the sides exactly opposite each other halfway between the bottom of the pot and the rim. Then, use tin snips or equal to cut a slit from the rim directly above the hole to the hole. The idea is to have a living branch pass through the soil that will eventually fill the pot - in one hole and out the other. You might need to make the vertical cut from the rim to the hole a little wider than a slit by making 2 cuts and removing a little material.

    OK - I just made a mock-up so you can see what I mean:


    Before you get this far, you should have figured out how you're going to situate the layering container so it doesn't get knocked around. You can often tie it to the trunk or hang it from another branch. If you're using water-retentive soil, make sure you use a wick because 'cuttings' & 'soggy' don't go well together. After you get this far, you simply fill the pot with soil and keep it moist. Cutting some flaps of bark all the way down to sapwood


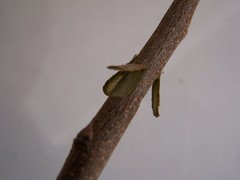
    helps to hasten rooting - especially if you apply an appropriate rooting hormone to the wounds. Wedge a small pebble or toothpick under the flaps of bark to hold them open. When layering smaller twigs, just scrape the bark off by holding a sharp knife 90* to the twig and scraping it. Before you add soil to the pot, wrap some tape around it (the pot) to keep the soil from leaking out of the vertical slits you made from rim to the hole you drilled or melted in the pot.

    Al

  • 10 years ago

    Al, thank you so much for giving us so much info! I don't know what I'd do without this forum.

  • 10 years ago

    Al- do you typically use gritty mix in the pot you pass the branch through?

  • 10 years ago

    You're welcome, Amy. ...... my pleasure.

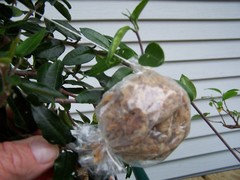
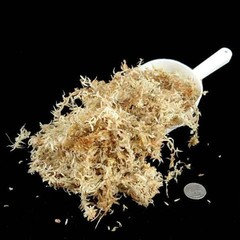
    Yes - I use the gritty mix for all layers that utilize a pot. Occasionally I use the more traditional method of wrapping the branch with white sphagnum moss (not peat moss).

    Sphagnum moss:


    Al


  • 10 years ago

    An update:

    As I mentioned above, there were several spindly branches that needed to be pruned that I wanted to try and salvage as cuttings. Following Al's advice, I dusted the nodes just above where I planned to cut with rooting hormone and then wrapped tape around them. (In the interest of full documentation, I used black splicing tape instead of electrical tape which is what I usually use with my plants).

    I provided extra light for the month in between the taping and today to give them an extra energy boost.


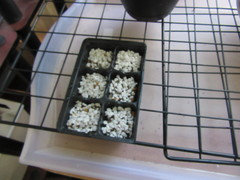
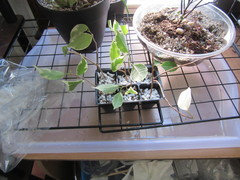
    Today I prepared a plug tray with a mixture of granite-grit, coarse perlite and floor-dry (diatomaceous earth).

    huh- that picture was much blurrier than I expected.


    I sterilized my snippers with rubbing alcohol and cut each piece free.


    They all were set in a cup of water while I made the cuts and then pruned the bare branches back to stubs.

    I've been told that rooting hormone isn't really necessary with ficus benjamina cuttings, but given the time of year, the fact that I've not worked with ficus cuttings before, and I had rooting hormone on hand, I elected to use it anyway.

    Each little branch was cut to just below the node that had been blanched then dusted with rooting powder and set into the propagation mix. Some of them had excess leaves removed or cut in half to limit water loss.

    I then used a chopstick to carefully firm the mixture around the cutting while I made sure none of the leafs touched each other.

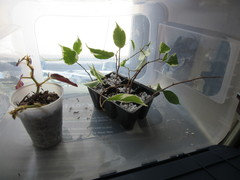
    The tray was then moved to my super fancy propagation chamber to join a begonia withlacoochee cutting I got from a neighbor. It currently sits on a seedling heating mat.

    Now that hardest part for me begins- leaving the cuttings alone so they can do their thing.


    I've flipped the other part of the lid closed, which leave small vertical slits on the sides for a bit of airflow and I'm going to resist poking them.


    I've not seen any swelling on the branch that I tourniqueted to air layer this summer. I didn't expect to see anything yet, just thought I'd note that as long as I was documenting my work with the plant.

  • 10 years ago

    You took a lot of care, Caity. Let's hope you see some activity by the first week in January. I know I'll keep my fingers crossed for you. Looks good. Strong work!

    Al