

How to move or repot crowded veggies.
Howdy Friends, I sprouted some veggies in some large containers and now they are all large enough to feel the presence of their neighbors. There are a couple of questions here for anyone inclined.
I've already thinned from what sprouted from seeds, and in fact you'll see my older kale are now down to only two plants. But I'm hoping to save as many as I can and not have to thin any more. But honestly, I don't even know whether I should: Thin more? Leave 'em be and let 'em fight it out? Or move some? But if the latter, how many should I leave in a container this size? Perhaps one type of vegetable does fine when things are tight, but another requires much more space.
Finally, any info on how-to or how-not-to move is appreciated. I have a hand trowel and figured I'd just scoop down, hopefully enough to get all the roots, and then move 'em to the newly potted container. I certainly don't want to harm or kill them.
Below are the pics and descriptions. Thanks ahead of time.
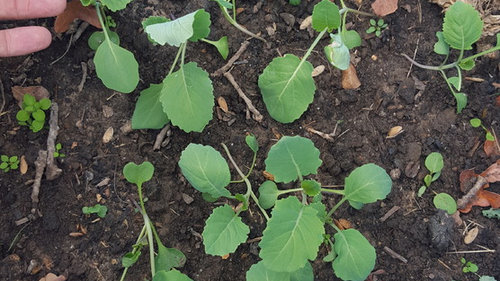
Georgia Collards
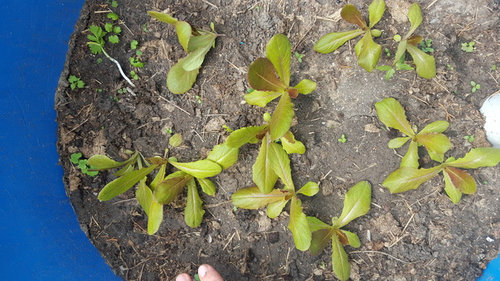
Romaine Lettuce
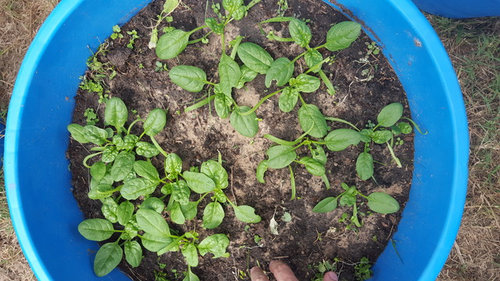
Spinach
Bull's Blood Beets
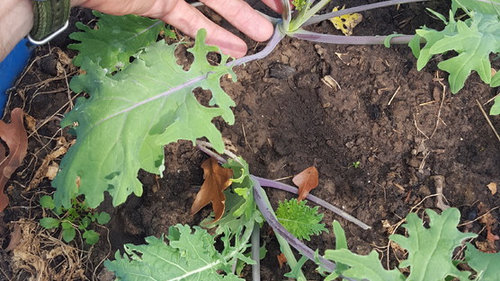
Kale (is it too late for Kale this big, or is there plenty of room?)
Comments (9)

OkieTexan (7b)
Original Author9 years agoThanks Dawn. Just what I needed. No, I've never grown Collards before.
Yes, I am only growing in these containers right now, although I just bought some 12 inch pots to do smaller things in.
Can I periodically cut greens from the Spinach, Collards and Beets too, like the Kale? Or do I simply pull the plant and eat? Sure would be great if I can get multiple snacks out of these plants the way I can the Kale.
Related Professionals
Asheville Landscape Architects & Landscape Designers · Vineland Landscape Architects & Landscape Designers · Knoxville Landscape Architects & Landscape Designers · Auburn Landscape Architects & Landscape Designers · Muncie Landscape Architects & Landscape Designers · Omaha Landscape Architects & Landscape Designers · Hempstead Landscape Architects & Landscape Designers · Athens Landscape Contractors · Glenwood Springs Landscape Contractors · Middletown Accessory Dwelling Units · Taunton Accessory Dwelling Units · Minneapolis Accessory Dwelling Units · Manhattan Accessory Dwelling Units · Colorado Springs Accessory Dwelling Units · Reno Accessory Dwelling Units- 9 years ago
You're welcome. Yes, you can use the cut-and-come-again harvesting method for virtually all greens. I've found it preferable to harvesting entire plants, especially in fall and winter. This sort of harvesting allows you to harvest from a relatively small number of plants over a prolonged period. The same cut-and-come-again harvesting method also works well in Spring in terms of harvesting, but because many of the plants we grow/harvest as greens are biennials, they are going to bolt based on certain triggers---usually either when daylength (i.e. number of hours of daylight in a given day) or air temperatures reach a certain point. This is especially true of plants that were planted in late summer/autumn and grown throughout the autumn and winter. Remember that you'll need to start new plants in mid-winter to use as replacements for the fall plants when they begin bolting. There's nothing worse than having a garden full of beautiful overwintered greens start bolting when you were hoping to continue harvesting from them for months yet.
I always have new greens to plant in late winter because it is just a matter of time before the overwintered ones bolt. Some types of greens bolt earlier than others, but they're all going to bolt eventually because that is their nature.
OkieTexan (7b)
Original Author9 years agoGee whiz I had no idea about the bolting. That would definitely be a bummer.
Starting new ones in winter though means grow lights, right? Or else a greenhouse? I'm not yet prepared to do either. Guess Id better get after it.
Did you ever consider publishing something? Or else doing some YouTube segments? I've read a lot of gardening stuff in the last 3 years and even have the Sam Cotner book you recommended. But can't remember anyone warning about fall-planted greens bolting.
 9 years ago
Bolting is part of the life cycle. Spinach does better in fall/early spring because it is day length sensitive, as Dawn said. I believe turnips are, too. Somewhere I found an article that said what the day length for spinach was, but I couldn't find it. I believe it fell in mid May in Tulsa for spinach. I, personally, look forward to bolting collards. The little buds are like mild broccoli, good enough to eat raw. I had a 4' tall fall planted Georgia collard plant last spring that kept making buds as I cut them off. I got a double crop from it, greens and then buds. I planted a variety called Yellow Cabbage Collard last spring that I expected would bolt in summer, but it hasn't. It has survived chickens, being overrun by a tomato plant and summer heat. It may bolt if we ever actually get cold weather.
You are not the first to suggest Dawn write a book. Some day I am going to write a book called "Things Dawn said on Gardenweb".
Look up Winter Sowing. There is a forum here on garden web, a website and a facebook group. It would be an easy way to start greens for spring without lights or greenhouse. However, greens started early indoors would be bigger when ready to plant out.
OkieTexan (7b) thanked AmyinOwasso/zone 6b- 9 years ago
I'll never publish anything, trust me. No time and no desire. Anyhow, anything that needs to be said about growing edible crops has been written by more knowledgeable people than I----including the amazing (may he rest in peace) Dr. Cotner, and.....if you don't have Greg Grant's book, which I'll link below, you're missing out on a modern-day version of Dr. Cotner's book, with info on growing fruit added. Now, Greg Grant's book doesn't go in-depth like Dr. Cotner's book does---it never was intended to be a replacement for Dr. Cotner's book, but it is a more modern book intended to provide info quickly, sort of at-a-glance, which is more in keeping with life in the 20-teens, compared to Dr. Cotner's book from the 1980s.
Greens bolt because they are biennial and must produce seed in their second 'year' in order to assure the survival of their species. However plants don't experience years in a human calendar way. Their growing seasons are influenced by natural cycles that include daylength (number of hours of sunlight per day, which we all know cycles from its low point at the winter solstice and reaches its high point at the summer solstice) and temperatures. Greens planted in late summer or autumn are in their first year, or first season, and grow well in the conditions we experience in this region in autumn and winter. However, after the winter solstice (easy for me to remember its date because it also is my DH's birthday), daylength begins lengthening again and the temperatures gradually begin to increase as well. Once you have the lengthening daylength and the warming temperatures, the plants are triggered at a particular point (not necessarily the same point for each type of green) to begin the cycle that will lead to seed formation.
A less experienced gardener who hasn't been through a cycle or two of bolting greens may not recognize the signs, but once you've seen it happen, you'll always know when the bolting is coming. In general, the plants begin to enlarge more vertically, and many also began to spread a bit more horizontally. Eventually the emerging topgrowth gives way to a stem or stalk that will flower (though, often, the flowers of leafy greens are relatively inconspicuous) and then set seed. As a part of the bolting process, the leaves can begin to take on a more extreme bitterness. This is very obvious with some greens, and not so much with others. So, bolting is just a natural process and one we cannot override. Well, not completely.
Sometimes, when you see the early signs that bolting has been triggered and is going to occur, you can intervene, especially if you don't mind taking a risk. If you can do something to interfere with the bolting process, you might get to harvest greens a bit longer. There are various ways to interrupt the bolting process, and not all of them will work with every green vegetable. However, it is fun to try them, and you don't have much to lose since the plants are going to bolt anyway.
Here's a few things to try:
1) Cut the plants back hard to within about one inch of the top of the ground or the growing medium in which they are being grown. Then, immediately feed them with a nitrogen-heavy water-soluble fertilizer. Miracle Grow General Purpose is fine, or any of the liquid organic fertilizers is fine. You just want it to have more nitrogen than anything else so it promotes leafy growth. Often, this combination of cutting back and feeding kicks off a new round of leafy growth that has interrupted the plant's urge to form seed stalks. The plant still is going to bolt, but by forcing it back into a new round of vegetative growth, you likely will get 2 to 4 more weeks of leafy harvest before it tries again to make a seed stalk. Sometimes I can do this 3 or 4 times with the same plant over the spring and keep a plant producing new leaves until May or June, even though it initially tried to bolt in March. Sometimes it works, sometimes it doesn't.
2) A different way to accomplish the same thing is to kinda, sorta pull the plant out of its growing medium. You don't want to completely uproot it. You want to sort of halfway pull it out, twist it around halfway and then pack it back down into the growing medium. Pack down the growing medium firmly, water and/or fertilize the plant. Cut it back some, but not as hard as you did with the method described in item 1 above. You've done the same thing here---you've interrupted a plant's regular growth cycle and, with any luck at all, it will be scrambling to recover from the root disturbance by putting out lots of leafy new growth before it begins to form a seed stalk.
3) Lettuce is tougher than it looks. One way to interrupt its biennial cycle of going to seed is to cut it back hard, dig it up and transplant it. This is just a more drastic move than either 1) or 2) above. The process of being transplanted and cut back kicks it back into a vegetative growth cycle.
I've used all three of the above to keep greens producing seemingly endlessly. Some years it works really well, other years it does not. It could be that in milder weather the plants seem to be in less of a hurry to go to seed, whereas in hotter weather they feel more pressed to hurry up and make seeds. Regardless, since the greens are going to bolt anyway, I like to mess around with them and see how long I can keep them going.
You can do something different to cabbage to get a bigger harvest from it. After you harvest your main cabbage head by cutting it off the plant several inches above the ground, carefully cut an X in the remaining stalk. You cut the X into the top of the stalk, and I usually slash the X into the stalk about 1/2-3/4" of an inch deep. Then I water the plant and maybe give it a little bit of a gentle fertilizer like compost tea or liquid fish emulsion. Guess what happens? Most of the time, since you have essentially cut the end of the main stalk or stem into 4 pieces still attached to the plant, each cut section of the stem will form a tiny head of cabbage. The heads will enlarge and eventually reach a harvestable size. They won't get huge. I usually harvest them when they are begin baseball size to softball size, but how cool is it to get 4 little heads of cabbage off a plant that already has produced its big, main head?
You can start seeds of winter greens in different ways. I start them indoors because I have a light shelf. A light shelf doesn't have to be fancy. My first one was a $10 plastic shelf from Wal-Mart that was about 24" long and 3' tall. It had three shelves. I hung a $10 shop light from the top shelf and the middle shelf to shine light down on the shelves beneath them and started peppers, tomatoes and petunias indoors. It worked great, took up very little space and was not a huge investment. Over time, I moved up to a bigger shelf because I have a huge garden and wanted to start lots of plants, but even that little shelf paid for itself the very first year because I saved so much money raising plants from seed instead of buying them.
You can start seeds of winter greens in a south-facing window in a year when we have a warm, fairly sunny winter. It is harder to do this if every day seems to be a cloudy, snowy or rainy day just because there's less light.
You can start seeds of winter greens using the wintersowing method outdoors, utilizing plastic containers like milk jugs and muffin, berry or salad containers from the grocery store. Go to wintersown.org to read all about how to do it, and check out their free seeds offer while you're there.
You can start seeds of winter greens in your growing containers if you cover the container with some form of plastic to hold in the heat. However, you need to vent the plastic during the day so the greenhouse effect doesn't roast your tiny seedlings.
You can start seeds of winter greens in a raised bed just by sowing the seeds in the prepared seedbed and then by putting a low tunnel over the bed to hold in the heat. You can use PVC or EMT hoops, made a home for next to nothing cost-wise, and then cover your hoops with clear 4 or 6 mm plastic or with a heavy-duty row cover. You'd be surprised how much heat you get inside a low tunnel in winter here---not enough to grow tomatoes or peppers in the ground, but enough to germinate and grow greens.
One quick way to grow winter greens is to put the seeds you want to germinate inside a wet paper towel or coffee filter (they are less prone to stick to the coffee filter) and then put the paper towel or coffee filter into a ziplock bag. Label the bag with a Sharpie, noting the type of seed and the date. Keep the paper towel or filter moist but not dripping wet. Check daily to see if the seeds have germinated. Once you have sprouts appearing, carefully transfer the young sprouts to paper cups filled with soil and grow them on, indoors or out, using any of the methods detailed above. All this does is get you off to a quicker start by germinating the seed indoors in a more controlled environment. I've even taken freshly germinated kale seeds directly out of the baggie/paper towel and gently planted them directly beneath existing kale plants growing in my garden in a very large container. The older plants sheltered the smaller ones from the weather a bit. By the time the older plants were bolting and were on their last legs, the younger plants were a few inches tall and ready to take over. They looked sort of like a ground cover growing beneath the existing kale plants. I removed the older kale plants by slicing them off at ground level with a sharp paring knife. (You have to do this carefully to avoid also slicing off your new plants.) Sometimes the old plants resprout, which is okay. They won't last long and I think trying to pull them out by the root would disturb the younger plants too much, so I just leave them. If they continue trying to resprout, I continue cutting them back until they give up. By then, the replacement plants already are providing a harvest.
The weather here in this part of the country can make it hard to successfully grow greens. By using all these little tricks to prolong our harvest, we can get a harvest of greens for a fairly long time.
Oh, and you mentioned being new to growing collards. Understand this. They grow like mad when they are happy, and they absolutely are pest magnets. Every insect that eats greens will migrate directly to your collards. The collards won't care. They can outgrow everything except a herd of voracious caterpillars. You can use this knowledge to your advantage because the collards will 'warn' you that your cabbage, broccoli, brussels sprouts, cauliflower and kale are about to be hit by those same pests. By spotting the pests early on the collards, you can hopefully kill them off there first, but if you can't, at least you know it is time to protect your other greens.
These are the kinds of gardening how-to conversations we have here on this forum all autumn and winter long. Talking about gardening in the 'off' season helps keep all of us sane and helps us prepare for the next planting period.
Dawn
OkieTexan (7b)
Original Author9 years agoCool. All that bolting and cutting back stuff (to trick it) makes sense. Greg Grant's book was already on the Wish List by the way. Dr. Cotner's is by my bed. :)
I found the Winter Sown site. This is super interesting.
Charles
- 9 years ago
I'm on my third copy of Dr. Cotner's book. I used the first two until they fell apart. I'm hoping the third one lasts forever, or until the end of my days on this earth at least. It stays on my nightstand or in a nightstand drawer throughout the growing season. I find myself referring back to it constantly. I read an interview with him once, probably from the early to mid-2000s where the book had gone out of print and, if you could find a copy at all, it was selling online for hundreds of dollars. Because printing costs and all had gone up so much since the book was published, he said that he knew that if he were writing the book at that time that it wouldn't be as long as it was or with as many photos or drawings because nowadays you cannot make money on a book that costs that much to produce. That just made me appreciate his book all the more. And, he was right. You just don't find a regionally-oriented vegetable gardening book of the size and depth and as well-illustrated as his nowadays. They could do it but it would cost so much to produce that not many folks could afford it. We are so fortunate that it came back into print and I hope it stays in print forever. There's not a better book about growing vegetables in Texas, and the info applies just as much to us Okies as to Texans since our growing conditions are much the same.
I admit to being skeptical when Greg Grant's book came out. I remember thinking to myself that as much as I enjoy his writing in magazines, there couldn't be anything to say about veggies that Dr. Cotner hadn't already said. However, I saw the book one day in CostCo or Sam's, picked it up and flipped through it, and decided I had to have it. I'm not sorry I bought it. It is a great book. Of course, I love everything he writes so now I am bemused by how I originally thought I didn't "need" his book. Of course I needed it. I just didn't realize that I needed it. When I get each issue of Texas Gardener magazine, his column is always the first thing I read. He has such an appreciation for heirlooms and, yet, he also has introduced lots of new varieties to the trade. To find both qualities in someone is more and more rare. Most folks who favor the old don't want the new or vice versa.
OkieTexan (7b)
Original Author9 years agoIs he young(ish) still? Hopefully we'll have him around for a long time.
Yeah, I bought my copy of Dr. Cotner's book a couple of years back because of your recommendation. Prices were in the stratosphere. I decided to call Half-Price books and try to get lucky and sure enough one of their stores had one, for $13. I drove down and got it asap. Didn't realize though that it is now back in print.
Remember my big blue tubs, the dirt in which was settling a lot? Well, from advice here and a local farmer and one of my godsons (who does market-gardening outside of Nashville) I realized I had too much native soil in them. I now have a enough vermiculite, compost and peat moss to make 16 tubs out of the 8 I have now. I'm going to move a lot of these plants that are getting crowded into new tubs with lighter soil.
Al Tapla's posts on containers and water and his 5-1-1 mix were informative too, but I'm not going to try to find/buy a bunch of pine bark fines right now. I did however discover an ATTRA publication on Potting Mixes for Certified Organic Production. One of the best features was the appendix with a large variety of "recipes" for DIY potting soil.





Okiedawn OK Zone 7