Software
Houzz Logo Print
orneryponystudio

More Seedling Torture

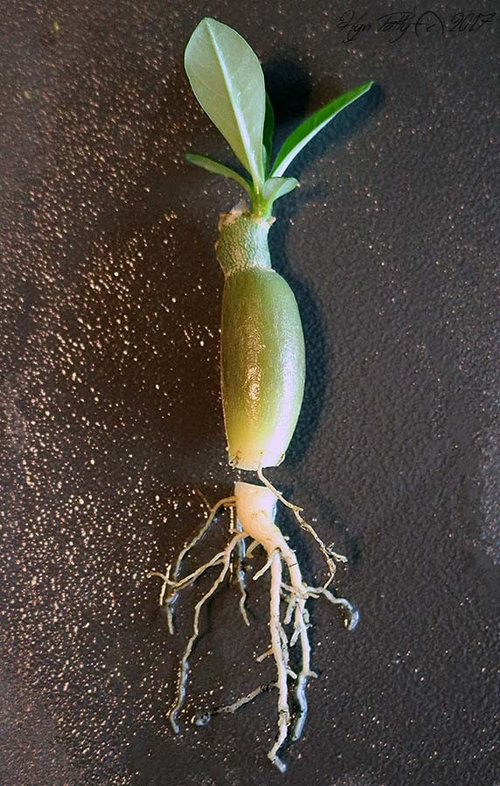
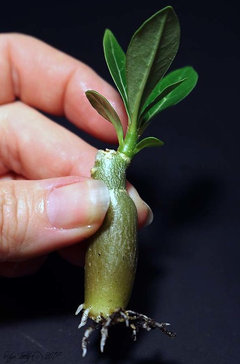
Here I want to experiment with root training. Usually this is done with a significantly larger plant but I have a lot of seedlings. After spraying everything down with 70% alcohol, I have cut the tap roots off.


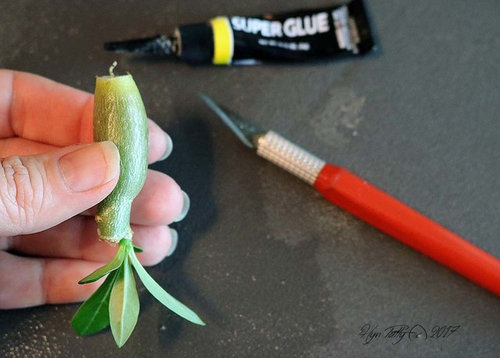
The cut is then sealed with super glue so that I may replant it right away without needing to let it dry for long. There were some tiny roots right above where I made the cut so I shortened them but left them. The tips were also sealed with super glue so they wouldn't rot either, hopefully.


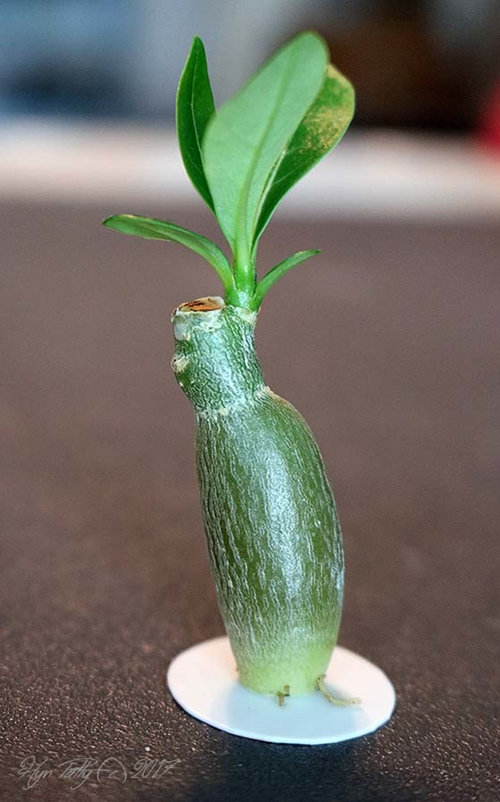
Here I have glued the cut base to a plastic disc to encourage the rootlets to grow outwards rather than down. It also keeps the cutting from falling over in the pot. The disc is easily removed later. In fact, it will pop right off if you wiggle the cutting in the pot afterwards so some care should be taken.

The plant was then replanted in faintly damp soil until new roots are growing. Eventually I will move it back out into full sun with its siblings. For now I wait and see if it survives and how the roots grow. This is usually done to larger plants to get a whole lot more fine roots than can fit here and now but I was eager to mess around and try it. Larger plants are ideal if you were going to leave the plant out to dry for an extended period before potting it up again.

Comments (23)

  • PRO
    9 years ago

    I love seeing your experiments and look forward to hearing how this goes. I bought some super glue the other day and have been testing it out on some of my seedlings too. I need to learn a bit more control with the glue I got if all over myself. Please keep posting your experiments this has lots of possibilities if it works. John

    Hyn Patty, Western NC Mountains (USA) thanked John
  • 9 years ago
    last modified: 9 years ago

    You can pour a bit into a plastic cap or something and use a brush to apply it. It does not dry as fast on things that do not have moisture, like your skin does. Then I clean my brush with a little nail polish remover (acetone) as needed. Applying something to your hands like lotion or 'gloves in a bottle' also help a lot so it doesn't stick to your fingers as much.

  • 9 years ago

    I just checked the date and I did this nearly two weeks ago. So far so good. Not uncovering the roots for a while yet but the plant looks fine. Lost a little moisture in the caudex but not wrinkly or anything. We'll see where it is in another couple of weeks when I'll dare to take a peek at the roots.

  • 9 years ago

    Hyn, have you ever think of using a hair dryer to dry the cut. We can put dryer to good garden use. :)

  • 9 years ago

    No, though that is an idea. I don't happen to have one though! The super glue is more or less an instant callus though and very easy, quick to do without needing electricity or generating heat on an already super hot summer day. So I'll probably stick to using the super glue. It's worked really well over many years for me with various kinds of plants.

  • 9 years ago

    Every single one I have done I have done at about 2-3 months. I planted immediately and none failed.

    This will succeed, I can almost guarantee.

  • 9 years ago

    Wow, that is very encouraging, Jedoba. Thank you. Did you find that you get fewer new roots with a small plant or are you pleased with the ratio and later their size?

  • 9 years ago

    I can show you one done like yours from that young age (glued disk) and several just cut and replanted.

    It created two totally different looks.

    The disk one's roots remind me of a cartoon octopus. (6-10 main roots about the same size)

    The cut and replant ones just grow multiple large roots, but can look very different.

    I will unpot a couple and attach pictures for you soon.

  • 9 years ago

    That be fantastic, Jedoba. Thank you. There's a lot on the internet and I love doing research, saving tons of photos, making notes. And hearing from those who have more experience in these areas I'm delving into. Adeniums grow so much faster and react differently than more standard bonsai I've worked with so it's really kind of fun.

  • 9 years ago

    Interesting. Neither of these are what I'm aiming for though I suspect mine will look something similar to your lower plant. If I wait and cut others when they are older and larger, I should be able to get the finer roots I'm aiming for. I like them more in proportion to the 'tree' look rather than very big and fat, swollen. So we'll see in time where I can encourage mine to go! Thank you yet again for your input. It's some effort you went to in order to get those photos to share with us!

  • 9 years ago

    You're welcome. I enjoy sharing.

    I hope you get what you're looking for!

    Hyn Patty, Western NC Mountains (USA) thanked jedobaTX9b
  • 9 years ago

    Hyn, I have seen they edged the side of the plant a little bit. According to the Siam page, he suggested that the plant has to be repot every month.

    Hyn Patty, Western NC Mountains (USA) thanked Shang FL09
  • 9 years ago

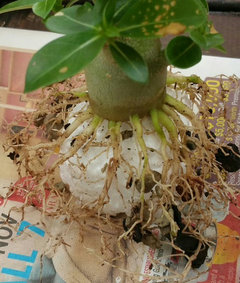
    Hi Hyn, I dont use glue but rooting powder, dry for 1 week and then pot in gritty mix. An old photo of an arabicum seedling waiting for roots selection :)


  • 9 years ago

    Tan, Nice Centipede root training/growing.

    Rick

  • 9 years ago

    Exactly, Tan. But drying a week isn't as ideal for a little tiny one. It makes it riskier to keep it alive as it looses so much moisture, or can. So this method I'm using is considerably less risky in that respect but otherwise is the same.

    The roots on yours look great and yes, that's more what I am aiming for - the centipede roots. I think I'll get fewer simply because my test subject is pretty small and has limited space to produce roots. A little larger plant like yours is more ideal to work with - mine will get there in time. Meanwhile I'm fool'n around to see what I can get away with and who knows, I might like the results. ;)

    I hugely appreciate everyone's input. Great photos! I'll be pruning the roots once formed to make some of them branch early and often, and training them to wiggle here and there, some to cross over gnarly, etc so they aren't /too/ straight, uniform and static. One of my seedlings I only trimmed the tap root on has a beautiful start on a lovely spread of roots. I should get a photo of that one later once it gets a little bigger. I am very pleased with it already.

  • 9 years ago

    Thanks Rick and Hyn. Agree, one week drying for baby ade would be too long. I normally dry the babies (with rooting hormone too) for only few hours to 1 day before potting. Not because of root training but had to chop due to rots.

    Looking forwards to see your photos and updates :)

  • 9 years ago
    last modified: 9 years ago

    One month update! Here it is making roots like crazy! The little seedling got rather withered even with the cut sealed with super glue, presumably due to the heat of being outside with no roots to draw up moisture. But I upped the watering a little and it slowly fattened back up and now look! I am repotting it this evening with a larger disc beneath to keep spreading the roots outwards. There was one section with no roots yet so I applied a bit more rooting hormone right along that edge. So far, very encouraging start. I think I am emboldened to now try it on a few more. I have several fat arabicums in need of repotting and I'm look'n at you, boys!

  • 9 years ago

    Looking good!

  • 9 years ago

    Congrats Hyn, nice centipede roots growing.

    Hyn Patty, Western NC Mountains (USA) thanked tan808
  • 9 years ago

    Hyn,

    I didn't see mention of age. I also cut the roots off some young 3-4 months old seedlings last year. They were so small, I only glued a button to the bottom. I repotted them right away but made the mistake of placing right back in direct Caribbean sunlight and watering as usual ... What did I know? I was a newbie. I believe I did 7 and lost 3. Here is the link:

    http://forums.gardenweb.com/discussions/4120042/question-seedling-roots?n=37

    Pay close attention to the original cut pictured on August 30, 2016. The end result is pictured on March 12, 2017.

    Maria Elena


  • 9 years ago
    last modified: 9 years ago

    Very nice. This one had been germinated in late August of 2016 and then over wintered pretty dry. So they didn't grow much, but on the other hand I didn't really suffer any losses for the most part so it was a trade off, perhaps. I'll know to water more next winter.

    Needless to say by May the seedling was already eight+ months old even though it's quite small. Tough little buggers. Those that had been tip nipped or grafted have also lagged behind on growth, like this one. Most of it's siblings are growing very fast now, loving the heat and moisture and many branched.

  • 9 years ago

    LOL Nutty professors it is cool