Software
Houzz Logo Print
zachsgirl91809

Can I refinish this table?

8 years ago
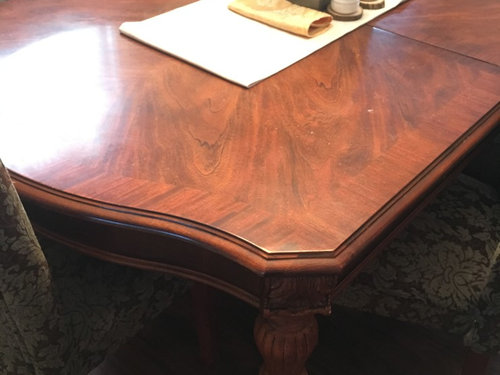
I was given this table and while it's not my favorite I don't think I could get any (or much) money selling to put towards a new one. I have done minor furniture refinishes such as cabinets, desks and dressers, but this seems more complicated.

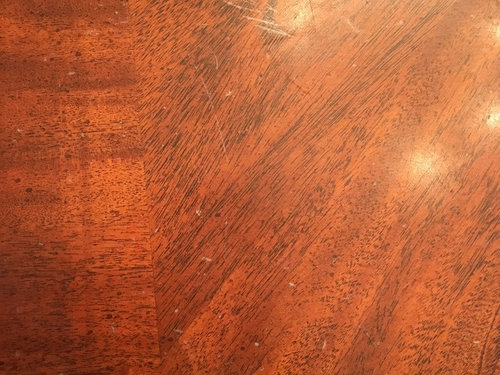
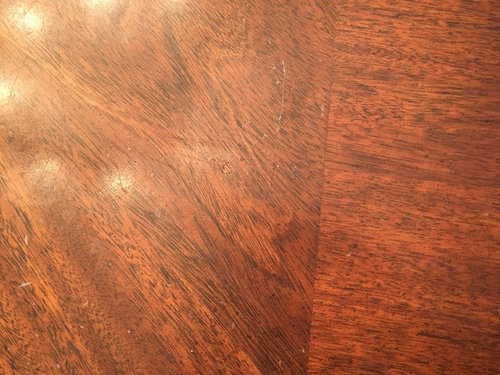
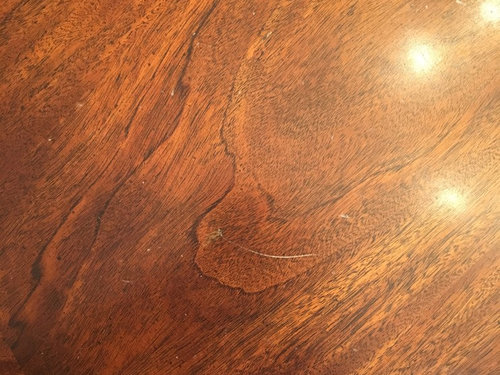
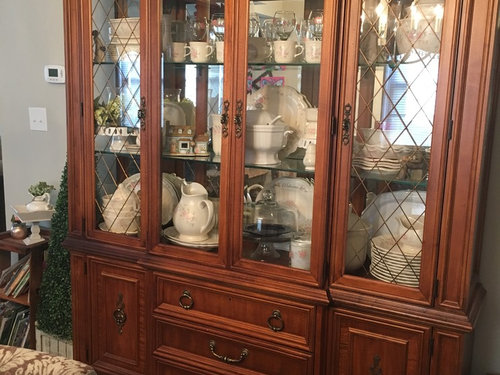
It has a high gloss finish that seems thick, but several places it has actually chipped and there are a lot of scratches. Is there a way to refinish this? Where would I start? As you can see the legs have a lot of detail and I was thinking of leaving them the way they are and then maybe just painting the top. I have a matching hutch that is fine, so the legs would match that. Or I could just re-stain the whole top. But would it be hard to match the existing stain on the hutch and legs?

Thanks for your help.

Comments (14)

  • 8 years ago

    Without knowing what is on there now,the risk of failure is high. The problem is getting new finish to adheare to old. If reverse side of top look's to have same finish,I suggest chemically cleaning a place underneath and appling one or more primers. If the primer can't be scratched of with a coin or fingernail,clean and prime top.

  • 8 years ago
    So try a primer right over the existing finish? Its super smooth and glossy. I think the underside is more raw looking, not the same as the top. Someone suggested just using sandpaper to rough it up and then using chalk paint on top. Ive never used chalk paint so I am not sure about this.
  • 8 years ago

    Yes, sanding might help adhesion,you need to sand out chips and scratches anyhow. Painting over unknown finish is risky at best.

  • 8 years ago

    Paint is not usually designed for horizontal use wear. So, there will be scratches with use. Dining tables are a bit different from dressers/etc. because of that difference in use. What you can do is paint and then add three or so coats of water borne polyurethane that will adhere to the paint.

    Sand the top to a final sanding with 180 to 220 grit sandpaper. Prime with BIN shellac based primer. That is designed to adhere to almost any surface and is thin enough to not clump/build a rough surface like other thicker primers. It will streak when applied, just make sure all the surface has some primer. Then use the paint of your choice.

    The next step is critical---the paint must be fully cured---not just dry. Most water based paints need 30 days to cure, oil based types may cure in 7-14 days.

    Once the paint is fully cured, apply three coats of water based polyurethane according to the manufacturers direction. The water based poly does not yellow like oil based, so the paint color should not change. You can buy poly in spray cans, which is an easier DIY way to a good finish than rolling or brushing. Let the poly cure and enjoy.

  • 8 years ago
    Wow thanks so much!! I did not know about the curing.
  • PRO
    8 years ago

    could refinish with a clear if you wanted to keep the look without painting and keep the colour the same. Spraying a conversion varnish would be fine. A real good sanding with 100 grit and then 150 once scratches and dings have been sanded out. Then top coat with conversion varnish. But no matter what finish you are wanting they all should be sprayed as if done properly they will all look very smooth, slick, and glass like.

  • 8 years ago
    Great thats helpful. Thanks!
  • 8 years ago

    It looks good from here but if you just want to be rid of the scratches, do what was recommended above: sand just enough to remove them and top coat with a clear finish. No need to go all the way to the wood and restain.

    You will have to be very careful to get ALL dust off after sanding and before varnishing. Wet wipe and use a tack cloth too. Then do it again. :-D

  • 8 years ago

    Some of the chips go clear through and you can see the raw wood underneath.

  • 8 years ago

    I'm not sure if or how you can fill those in without it showing. Someone smarter than me might know. Generally with scratched surfaces you sand down to the bottom of the scratch, which in this case is the wood itself. If the finish is very thick that's a long way down and recoating with varnish will leave a visible dip. It may be possible to sand over a larger area (a few inches) to make more of a shallow dish that blends into the rest of the table. Then begin building back up starting in the center and adding coats in a larger radius each time, to fill in that dish, then sand that area smooth with the surroundings, and finally recoat the whole table. I'm just spitballing. Someone may have a better idea that doesn't require stripping the entire finish.

  • 8 years ago

    The magazine This Old House ran an article covering your table. Clean table, wipe with a restorer, use nail polish for chips.

    Do you know how to use google?

  • 8 years ago
    @Jim Mat. Sarcastic? I have googled plenty of times. I haven’t found much other bloggers who have completely redone it differently than I want and wordy, lengthy articles.
  • 8 years ago

    That's more helpful. Thanks. I'll look it up. I've been getting that magazine for about a year now. I will have to see if I can find it.