Software
Houzz Logo Print
rosiewells7b

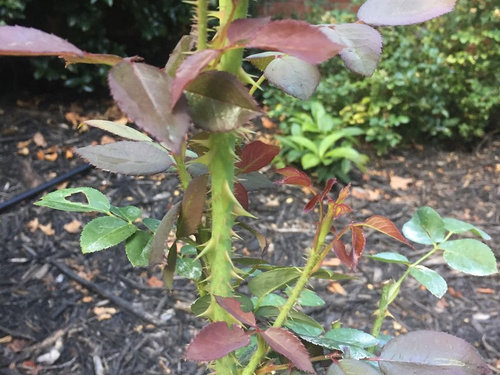
Normal or RRD for Tamora?

8 years ago
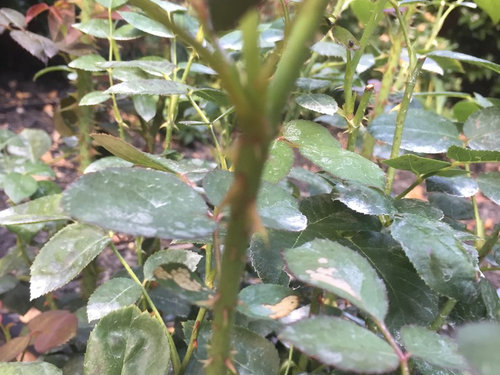
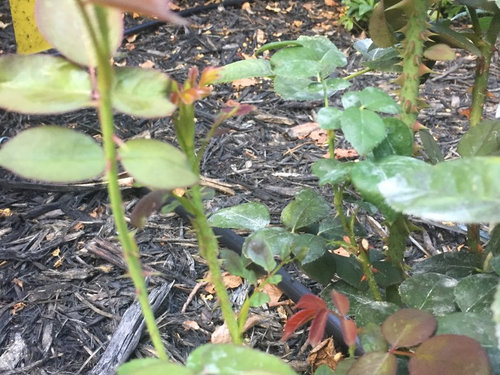
I wanted to check with you all on my Tamora. Is this normal growth for this rose? It just seems extra thorny to me.....


A more normal looking part:


Comments (6)

  • 8 years ago

    Thank you Patty! I was hoping that was the case.

  • 8 years ago

    I agree with Patty W.

    Kate

  • 8 years ago

    I have 7 own-rootTamoras that I stuck last November and they all have thorns like yours. This variety roots very, very easily and looks great in a mass planting.

  • 8 years ago

    John - good to know. What is your rooting technique if you don’t mind sharing?

  • 8 years ago

    Hi rosiewells,

    I have tried many different ways of rooting roses beginning at least 25 years ago. I used to use a rooting mix of 1 part perlite to 3 parts potting soil; add water to this mixture to keep the dust down so that it is wet but not overly soggy. I packed this mixture into 'rose bands' which I accumulated from rose plants that I had purchased online from various e-tailers. But you can also use other containers such as yoghurt containers with perforated bottoms or anything similar that you can access.

    I would take rose cuttings around 6 to 8 inches long and around the diameter of a standard pencil, but have been successful with larger and smaller sizes. The tissue that roots the fastest it the stem tissue just below a faded bloom. I used to use #3 rooting hormone powder but now use Dip 'n Grow. Cuttings are trimmed with a 45 degree cut on the bottom with an axillary bud at the lowest point. Using a knife or razor blade, lightly scrape 1/2 inch of the outer skin of the stem at the bottom end of the stem; undifferentiated tissue (callus) will form on the scraped area which will later become root tissue. I like to have 2 or 3 leaves at the top of the cutting. Using a pencil or pen as a dibble, make wholes in the soil of your container. I usually make 5 holes in a rose band around 2-3 inches deep, which one in each of the 4 corners and one in the center. Carefully place the cuttings in each of the holes and firm the soil mix as firmly as you can against the stem tissue beneath the soil. I like to place the rose bands or containers with the prepared cuttings, into one of those translucent storage bins that you can find at Home Depot, Wal-Mart, or Target. They are roughly 2 feet long, 16 inches high and wide. Place the lid on the ground top side down and position the rose bands or containers with the cuttings onto the lid; place the translucent bin onto the lid, and you have a mini-greenhouse. A quarter inch or so of water in the lid will keep the humidity up, which is desirable. In winter I would place this loaded container in nearly full sun. In summer, I would place this in dappled sunlight or even full shade if the temperatures are really high. Check the cuttings daily and water lightly as needed. Overwatering will kill the cuttings. Too much heat will kill the cuttings; if you think it is getting too hot, then put a small block of wood to create a crack between the lid and the bin. Watch for signs of leaf growth. If the stem tissue turns brown the cutting is dead and should be removed. Look for signs of roots at the bottom of the pot. If the stem forms a shoot that is more than an inch or 2 long, it is probably rooted. When a cutting is strongly rooted, remove and transplant it to a one gallon pot. After 3 or 4 months, it may be large enough to transplant to the garden.

    My new method is much simpler and works well in late fall/winter. I prep the stem cuttings in the same way. I dip the cuttings in the Dip n Grow solution and simply stick them in an area of our property that is slightly inclined and the soil is a sandy silt. The area tends to be in the shade more than half of the time. I selected this area, so that when it rains, it moistens the ground, but excess water runs off instead of pooling, which would kill the cuttings. Also, the silty/sandy soil drains well. When I stick the cuttings, make sure that you have 2-3 inches of stem below the soil. Firm the soil around the stems, to ensure that you have good contact between the soil and the stem. I like to stick the cuttings around 4 inches apart. Visit the site daily and water as needed. After the cuttings have rooted, transplant them either into a pot or into the ground. I tilled up and area and am growing the cuttings into good sized plants before I put them into the garden. They are around 18 inches apart and are on drip irrigation. Some are growing much faster than others. The Tamora plants are around 15 inches high when flowering, but when I cut away the stems on the fading flowers, they are 8 to 9 inches high. I have some that are already 2.5 feet high already. Some varieties are very difficult to root (O rooted out of 10 stems stuck for Valencia) and others easy (7 rooted out of 7 stuck for Tamora; 6 rooted out of 7 stuck for English Garden). The spectacular modern tea rose bred by Paul Barden, Won Fang Yon, was intermediate (3 rooted out of 6 stuck). I may try a higher concentration of rooting hormone for Valencia and others this fall.

0