Software
Houzz Logo Print
michael_brockway22

White farmhouse sink, kitchen colors look off now

5 years ago
last modified: 5 years ago
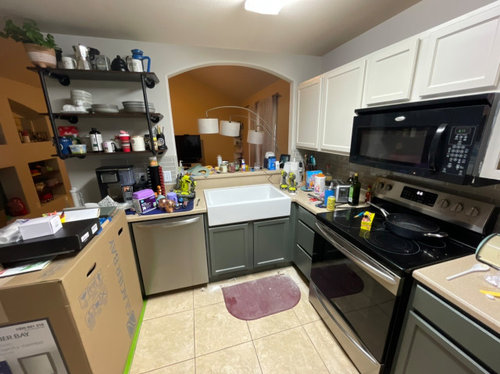


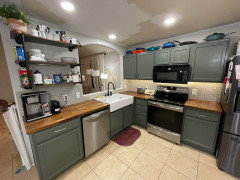
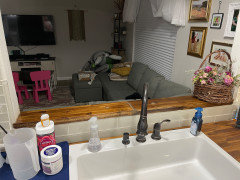
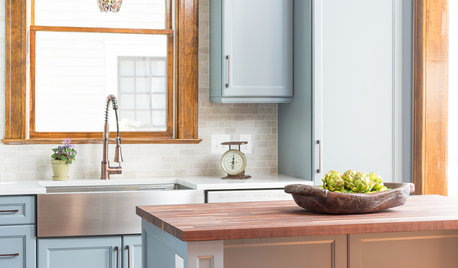
So I finally put in the farmhouse sink of my dreams, a giant white Sinkology Josephine drop in with a 3 hole bronze pull down faucet. The rest of the kitchen is agreeable gray walls, gray glass subway tile backsplash, pewter green lower cabinets and uppers color matched to the house trim. No clue what it's called, it's a warm yellow brown tinted white. The sink is so white it dominates the space and my wife hates it. Would painting the uppers Dove White fix the color tone in my kitchen? I've also got spice colored acacia butcher lock coming in for the countertops. Suggestions?

Comments (124)

  • 5 years ago

    You’re really talented. Amazing!!

  • 5 years ago

    Love! I'm usually an advocate of two tone (top and bottom) kitchens, but in your case, it was just too much. This looks great. Amazing how the floor now looks just fine (but I understand if you have to replace due to failure of the tiles).

    You may have already done this, but even if you are using mineral oil and beeswax everywhere else, make sure you seal the cut edges around the sink with something really waterproof. We did wood counters at our lake house last summer. The guy that installed them got sick and rushed the final install of the sink. I was doing the sealing of the tops myself and wasn't there when he put the sink in. I thought I'd get to sealing those edges, but put it off for a couple of weeks. That's how long it took for those edges to absorb water and start to darken.

    Michael Brockway thanked daisychain Zn3b
  • 5 years ago

    Mines actually a top mount Josephine farm sink so I don't have the usual undermount edges that are directly exposed to water. I will have to remove the sink again to shift the counters back to do the backsplash tile behind it so I'll polyurethane that edge while it's out just to be safe.


  • 5 years ago

    Looking really good Michael and I've been amazed how you've moved this project right along and still took the time to keep us in the loop. Job well done.

  • 5 years ago

    Mines actually a top mount Josephine farm sink so I don't have the usual undermount edges that are directly exposed to water.

    Ours is topmount, too. That's partly why I thought it would be okay if I left it for a bit. So, yeah, good idea to do it if you have to pull the sink anyways.

  • 5 years ago

    following along......Can't wait to see it finished!

  • 5 years ago
    last modified: 5 years ago
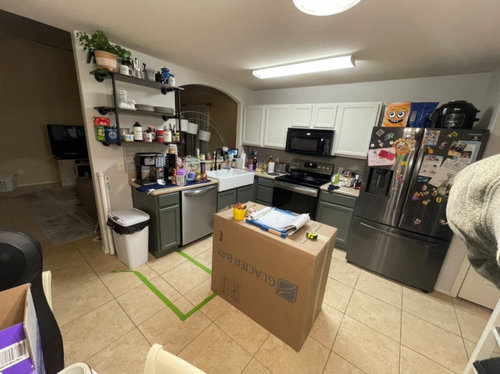
    Anyone have opinions on what sealer to use on painted cabinets? Cabinet doors are painted and back on, waiting for them to cure. Googling is steering me towards semi gloss polyurethane varnish for durability but polycrylic is also on there. Should I go oil or water based?


    Got a simultaneous bathroom shiplap and board batten reno going on too so been jumping back and forth with the weather.


    Also, I will need to eventually tackle the backsplash so I can fully mount the countertops. Everyone OK with me just filling in the rest of the tile with the same one down to just below the butcher block? Or any other opinions on the color or style? Same as with butcher block, I prefer glass tiles cause I can work with them without paying someone else.

  • 5 years ago

    Tiles you have now are fine.

  • 5 years ago
    last modified: 5 years ago

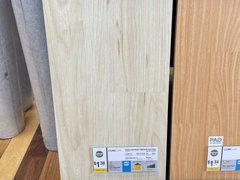
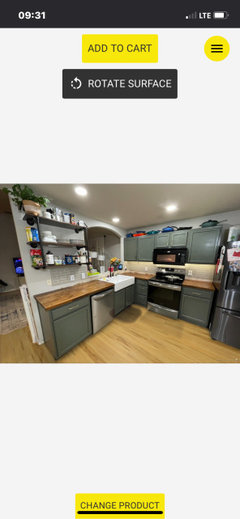
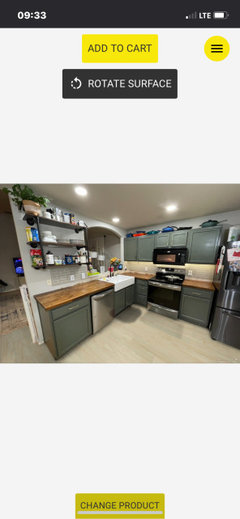
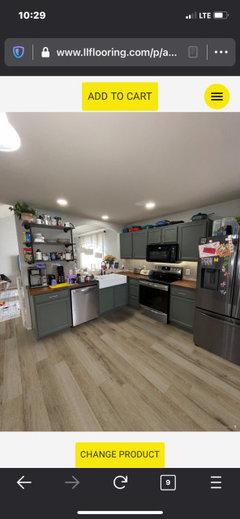
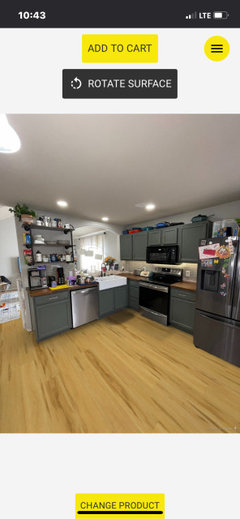
    Floor samples. We were leaning towards the left one, buttercream maple I think, but it looks a little light. Also finally painted the cabinet doors and some of the door handles. They're a very faint champagne brass.


  • 5 years ago
    last modified: 5 years ago

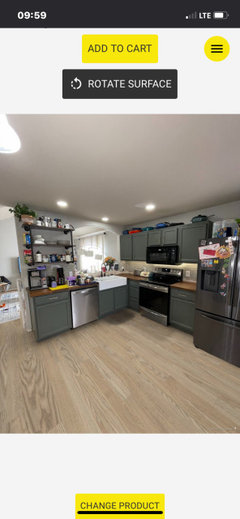
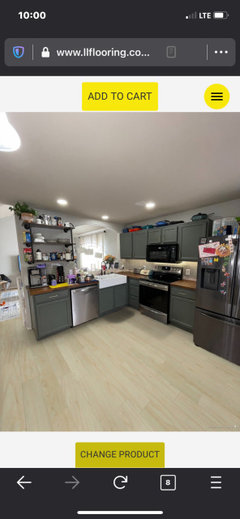
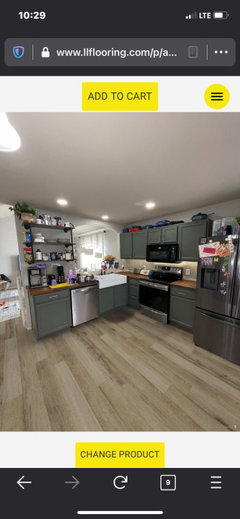
    I added to it instead of a new post. Any opinions on the floors? Turns out Lumber liquidators had an app lol. I kind of like the last one, is it too orange? We also painted the living rooms walls the same agreeable gray and have some people coming next week to paint the too high for us to reach vaulted ceiling white.

  • 5 years ago

    I like the one marked 9:59 timestamp and also 9:39 and 10:29.

  • 5 years ago

    9:39? I don't see that one.

  • 5 years ago
    last modified: 5 years ago

    Match your countertop if you're going with wood. That's how you harmonize a space just as you did when you painted all the cabinets. If you're up for it, change out the wood shelving to coordinate with the countertops.

  • 5 years ago

    The fifth photo of flooring options I think is best. But how does this work with the rest of the house? The really light ones are okay, but seem too pale to me. In person, they could be wonderful, but you asked us to give opinions. It’s the time stamped 10:29.

  • 5 years ago
    last modified: 5 years ago

    That ones country bluff oak. We like that one too. We were worried it may be too gray, glad others like it too. The entryway to living room to the kitchen is all agreeable gray so colors stay the same. We are gonna match the shelf stain with the counters, gonna do a 2nd layer of edge glued board and veneer the edges so it looks like a ~2"

    thick plank. For a follow up, should the planks go this way or long ways?


  • 5 years ago

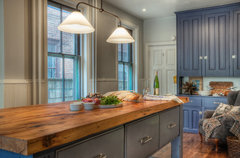
    Dark gray cabinets, wood countertops, matching wood floor:

  • 5 years ago

    In the grouping of 6 floor pictures, I like the 3rd from the top tagged 9:59.

  • 5 years ago

    Of your 2 most recent pics, I like the direction of the second one (10:29)

  • 5 years ago

    Have you checked out this Brazilian Cherry from Lumber Liquidators. It's a good match for your countertops and would look great in the rest of the house, too. Match your floor to your fixed features like the countertops, not to paint color, which is changeable. You've just pulled together all the different unrelated finishes. It would be a shame, in such a small space, to add flooring that doesn't echo the beautiful countertops.


    https://www.llflooring.com/p/builder-foots-pride-3-4-in-x-3.09-in-brazilian-cherry-solid-hardwood-flooring-10050432.html


  • 5 years ago

    I also like the 9:59 best. And going in the second direction.
    I would love to see a little bit of a darker option. And maybe a bit less grain. Just to see ....

  • 5 years ago

    I like 9:59 best. Looks great with the cabinet color as well as the countertops.

  • 5 years ago

    I ordered 9:59. Should come in in about a week.

  • 5 years ago

    Lay them the long way, like the second idea.

  • 5 years ago
    last modified: 5 years ago

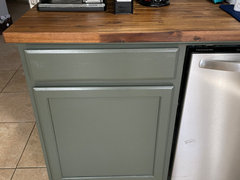
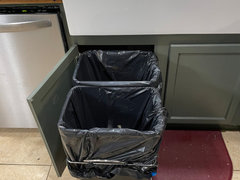
    Rev a shelf double 35qt trash cans installed under the sink. It's a very close fit with the hinges. We are still waiting on the rest of the cabinet handles to come in. Where should they go on the lower cabinet doors? I imagine the upper corners but wanted to ask.


  • 5 years ago

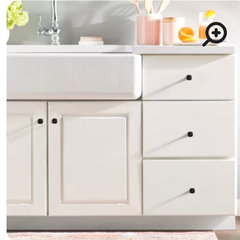
    Looking so good! Yes, upper corners. But usually not equal distance away from the top and sides. They usually are offset down from the top, like this.

  • 5 years ago

    Awesome kitchen makeover!

  • 5 years ago

    Are they pulls or knobs?

  • 5 years ago

    Assuming they are knobs, my preference is to place them in the corner of cabinet fronts when you have a farm sink, so they are in the middle point of both the upper and side stile. I do think they look good in the placement in Amy Lynn’s photo, but in my experience that’s not as functional when under a farm sink. My sister has that lower placement under her farm sink, and when I use her sink it’s awkward to open the sink cabinet - I have to bend over farther than normal or drop my shoulder in an awkward way because the knob is too far below my hand height. So in my kitchen I placed all the knobs on the corner and find it much more functional. You wouldn’t think that inch or two would matter, but IMO it does. My suggestion is to decide by having one of you hold the knob against the cabinet at both heights, and the other one mimic what it will be like for you to stand at the cabinet and use the knob. If either feels ok to you than just pick what you like better visually.

  • 5 years ago
    last modified: 5 years ago

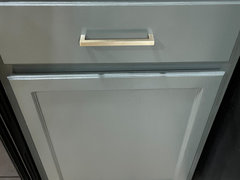
    They are all handles like the other picture.


  • 5 years ago
    last modified: 5 years ago

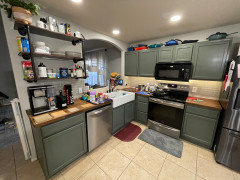
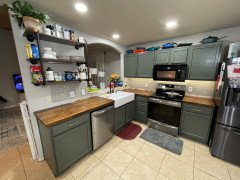
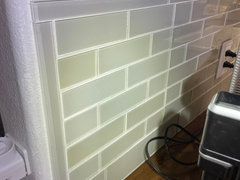
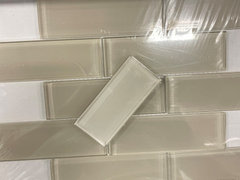
    Extended the backsplash. Super bummed though, my tile color apparently changed. The new tone for the small ones is beigier. I didn't have enough old ones so I had to fill in some spots with them and fill the bottom row with 3x12s that did match.


  • 5 years ago

    Not a pro but I have to say that I’ve watched this transformation with as rapt attention as I used to watch Guiding Light in the late 80s in college. Well done! Your space looks beautiful.

  • 5 years ago

    Hey, I think you may have started a new trend with larger tile on the bottom row. Looks fine. I have enjoyed watching your journey of transformation. Job well done!

  • 5 years ago
    last modified: 5 years ago

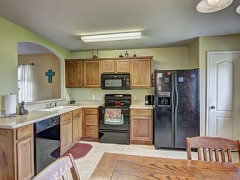
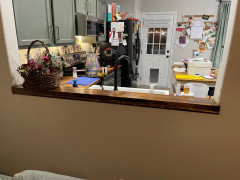
    Realized I never did the before and after picture. That's the original kitchen when we bought the house. Still need to install cabinet handles and finish the ceiling paint. I'm now considering leaving the window ledge as is instead of butcher blocking it too. I like how much more open it feels without a lower frame in my eye line.


  • 5 years ago

    following

  • 5 years ago
    last modified: 5 years ago

    I'm with Jessica. I've watched this transformation and run over here to view each update. Nicely done - all of it. I can't wait to see the new floors, too.

  • 5 years ago
    last modified: 5 years ago

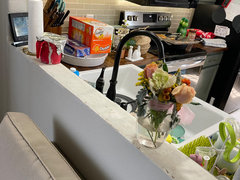
    That's the current window sill. It was exposed drywall edges after knocking out the bar so I ended up using the (tons of) extra grout to seal the edge. May do the butcher block sill, but I kind of like it just being an opening and not a fixture. Maybe just a thin trim colored wood window sill type thing. For now I'm fine with it.


  • 5 years ago

    Following...

  • 5 years ago

    We have a pass thru window like that, and put a stained and epoxied board on it-it’s really pretty.

  • 5 years ago

    Your really very talented. So fun to watch this come together

  • 5 years ago
    last modified: 5 years ago

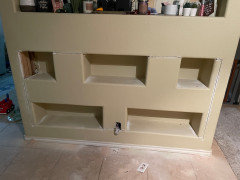
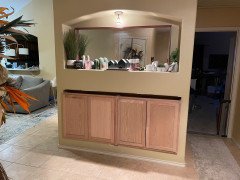
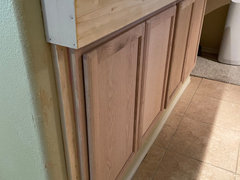
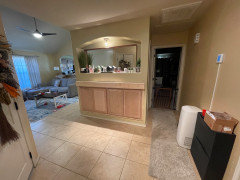
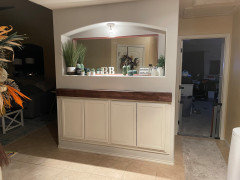
    Just to put in some other stuff we've been doing. Took out some useless built ins and installed cabinets.


  • 5 years ago

    Really good idea! Form + function is always a winner

  • 5 years ago

    Love this thread, need more DIY threads like this!!!

  • 5 years ago
    last modified: 5 years ago

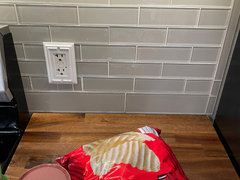
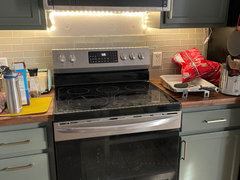
    Finally managed to snag an open box Whirlpool low profile microwave to replace the black one for half off from Lowes. Always felt claustrophobic under the old black one. Have to do more backsplash tiling now though.


  • 5 years ago

    following

  • 5 years ago


  • 5 years ago

    Good score! It looks nice and slim up there.

  • 4 years ago
    last modified: 4 years ago
    Hadn't done an update in forever, but pretty much done. Still have to do the bit of wall where the old microwave covered and the window sill but


    thats it. Father in law did all our floors for us along with the baseboards. Looks way better than the tile.

  • 4 years ago
    This looks awesome! The floors make a huge difference, too. Thanks for sharing the final result- it’s been fun to watch.

  • 4 years ago
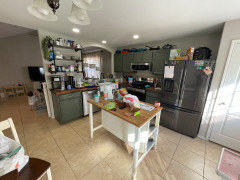
    last modified: 4 years ago
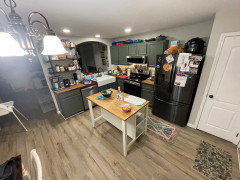
    Finished the backsplash below the microwave and added the butcher block piece in the window. I'm annoyed the wood filler didnt absorb the stain very well, will have to sand it and try again at some point.


  • 4 years ago
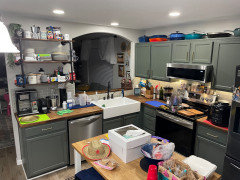
    Looks good! That microwave was worth any price. The other one was too much in the way for sure. I like the painted doors on the new cabinets outside the kitchen. More subtle. I imagine your family feels a real sense of accomplishment in this remodel. Anything left to do?

    Look into the idea of mixing the stain into the wood filler before applying it. I have a vague memory of this being an option, but you will have to research to see if it is really “a thing.”