Software
Houzz Logo Print
nickkyrki

bathroom wall and shower tile

5 years ago
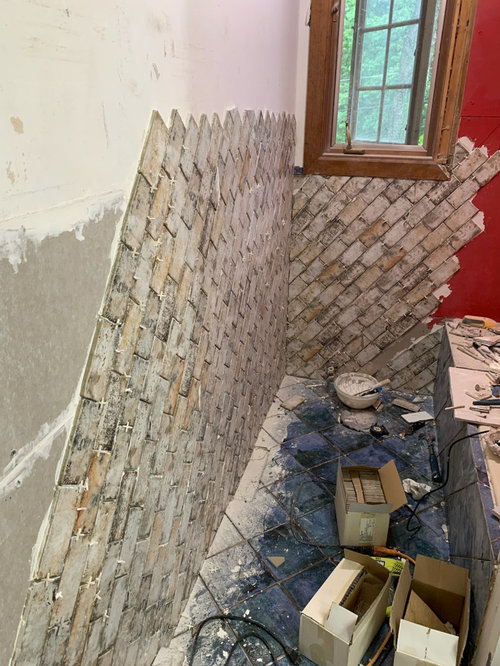


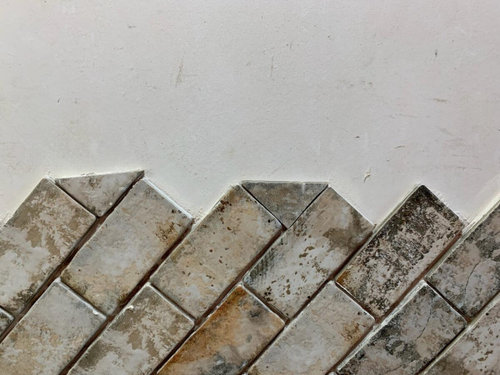
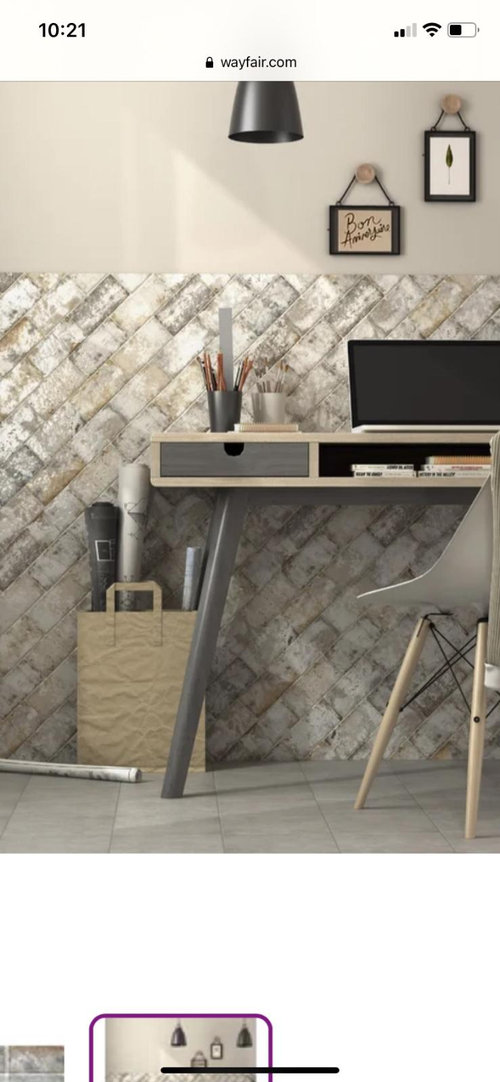
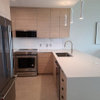
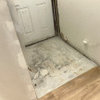
Needing some ideas for finishing tile (trim) on bathroom wall. Here's the kicker...I tried following a design I found on-line (pic also included), and the angles of the tiles ended up being 46 degrees. Odd, yes, I know, however in the picture of what I've done so far - each and every tile has been measured at 46 degrees to maintain uniformity - which screwed up the width of my grout lines. I was hoping to copy the upside down triangle as shown in the close up picture, but with blue tile left over from the floor. However, I am hoping to get suggestions, ideas, comments, critiques so that I can finish the job off well and minimize any errors. Oh, and these tiles? Not exactly perfectly rectangle. Some are a little wavy, some are slightly wider at the bottom, etc.


Thanks!

Nicky

Comments (14)

  • PRO
    5 years ago

    IMO wrong tile and wrong install so now I am not sure what you want from us you will need no to get a trim tile the best would have been a schluter trim but that needed palnning ans install before tile .

  • 5 years ago

    Thank you. So my best bet would be to tear it down. Why the wrong tile and why the wrong install (obviously I realize the 46 degrees is out)? What I was LOOKING for was some creative suggestions on how to salvage and "pretty" up the tile job. Yeah I get it. My plan didn't work out. But thank you for the encouraging and inspirational words!

  • 5 years ago
    last modified: 5 years ago

    Yeah, sure the best way would be to do it over. BUT, maybe you can put those triangle pieces in, to make it straight on the top, then add a pencil trim on top of that. Then make the rest of the decor for the room rustic intentionally so that the uneven-ness looks intentional.

    Suncadia Custom Home · More Info


    Suncadia · More Info


    24 - Woodland, UT Residence · More Info


    nickkyrki thanked Tara
  • 5 years ago

    If I were tackling this project I would lay out the tiles for the top partial triangular pieces with the appropriate spacers as though I were adding another whole row, then I would use a level straight edge to mark the cut lines. There is no reason that the grout lines need to be different for the top row.


    The bigger problem that I see is that this may not be a proper install - not waterproof.

  • 5 years ago

    Always take strongly- expressed opinions on a free online forum with a grain of salt :)


    In your shoes I would probably just cut the finishing rectangles at the same off angle (46 x 44 degrees or so?) in order to maintain the groutlines and correct level horizontal line along top. How does that look if you try it? Feel free to do a few then post a photo here.


    You are right though that this probably precludes using the blue as contrast, because that would highlight the uneven triangles — but it might work just fine with the same color field tile.


    Alternately, yes, you could rip it out now while it’s fresh, since you’ll only lose those offcuts from the very bottom. Was it a miscalibration of the tile saw, do you think?

    nickkyrki thanked Circus Peanut
  • 5 years ago

    Whatever you do, don't add the blue tiles as trim.

  • 5 years ago

    So helpful yet again, Patricia. I hope the OP is able to find a good solution suggested by the nicer people.

    nickkyrki thanked lkloes
  • 5 years ago

    Oh, PS! With brick-style tile like that, make sure to seal it with grout release sealer before you grout, or the grout will stick in all those rough spots and be a major pain to clean up.

    nickkyrki thanked Circus Peanut
  • 5 years ago

    I agree with Jennifer Hogan’s triangle cut solution: line full tiles up in place with spacers, then use a straight edge to find the cut line, mark it, then cut along the line. These look like porcelain tiles to me, not brick. Unsure about the waterproof capabilities. I’ve always installed shower tile over waterproof wall board. Unfortunately, it looks like installation over drywall so you may have issues later. However, I do find your design beautiful, creative and fun. Put up the border tiles that bring you visual joy. Don’t let the negative design comments stifle your creativity.

    nickkyrki thanked victoria1945
  • 5 years ago

    Are the tiles smooth, or rough surfaced? If rough, it’ll be a real chore to clean. I see your inspiration picture is NOT a bathroom. Baths have many cleaning and safety considerations when it comes to tile. Normally, small or textured tile on the shower floor, smooth tile on the shower walls. With the right tiles, your concept, properly installed, will be awesome!

    nickkyrki thanked teamaltese
  • 5 years ago

    The slanted install is a bit ... much.

  • 5 years ago
    last modified: 5 years ago

    Thank you for all of your input and feedback!! Actually, the tiles are not brick - they are ceramic. I DID put them on cement board in the shower area and the lower part of the wall seen in the picture (and yes, they DO end on top of drywall -although NOT in the shower area). On top of the cement board (in the bathtub/shower area), I DID use 2 coats of the RedGuard. In either of these pictures, the only wall I presented was the wall OUTSIDE of the bathtub shower area.

    I apologize for not having been more specific and clear as to the location/material/background in my original statement. You've given me some exceptionally helpful ideas and thoughts and I truly appreciate it! Thank you again!!


    P.S. I DID check with the manufacturer to triple check - and these ARE rated for wet areas. ;)

  • 5 years ago

    Sounds like you are golden on the water sealant and did everything right, just need to get the top row cut and placed. I would use the same tile for that as the rest of the diagonal wall tile.


    If I wanted to introduce more blue I might try a bullnose edge that matches the blue floor tile or just paint the drywall walls blue.