Software
Houzz Logo Print
coastal_vibe

Replacing shower valve thru exterior wall

9 days ago
last modified: 9 days ago
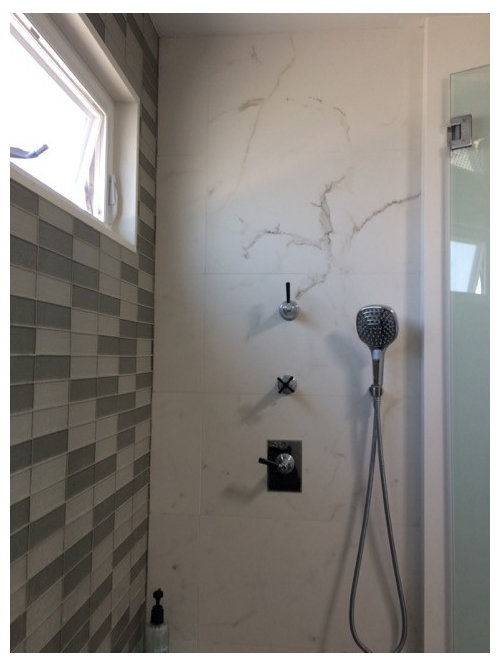
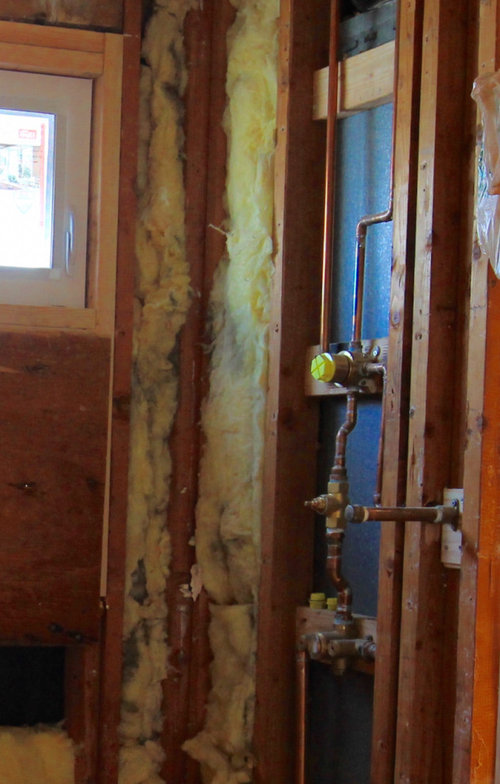
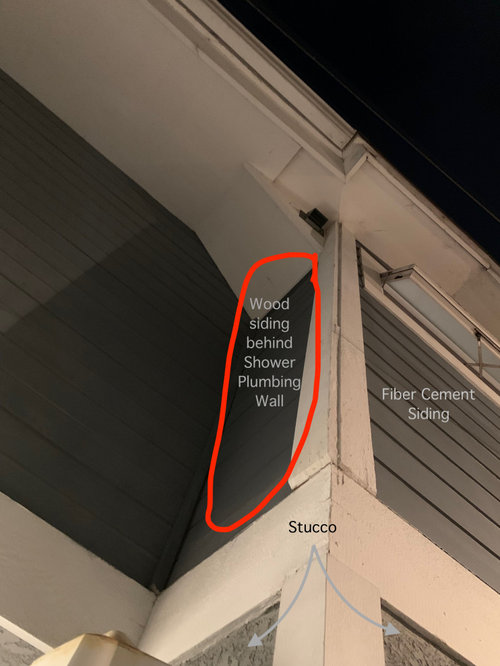
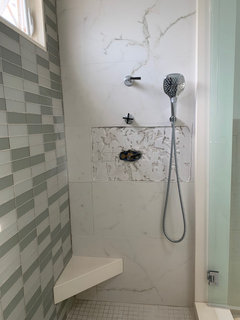
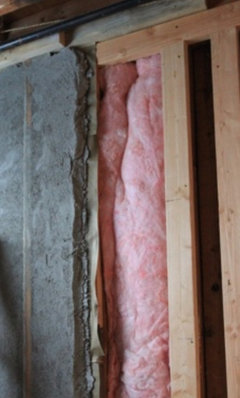
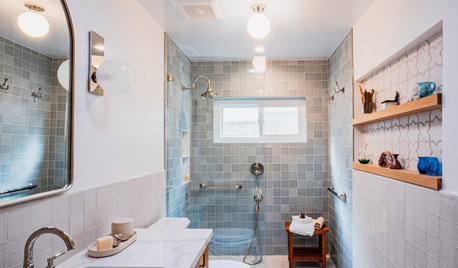
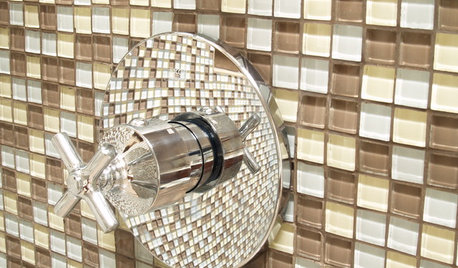
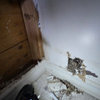
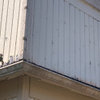
The thermostatic shower valve in my primary en suite needs replacing -- the bottom valve in the attached photos ("after" and "in-progress"). The valve backs up to an exterior wall clad with wood siding (last photo attached). There are 3 shower heads -- fixed showerhead on the opposite wall.

Any thoughts on how to best approach this and what to avoid?

At the start of the remodel, I followed my designer's advice to swap the shower and tub locations (no freezing of pipes, I'm in a warm climate), and neither the architect nor GC alerted me to this being a potential problem for access to plumbing.

The "plumber" (he was working under the GC's license) installed the rough-in valve incorrectly and broke it during installation. The water has never heated to more than tepid and is not adjustable. It has taken years to get another plumber to diagnose the problems and to propose replacing the service cartridges, which are no longer available for this model. It looks like I will need to switch to a similar, but newer thermostatic valve, from the same manufacturer. (Can keep the same volume control valve and 3-way diverter valve.)

I am thinking that I will have a siding ktr remove the wood siding for this section, have the plumber make repairs from behind the shower (standing on a scaffold?), then have the siding ktr cover this section of the wall with stucco, and paint. Most of the wood siding on the house has been replaced with Hardie Board fiber-cement siding. The lower level is clad with textured stucco. (It will be easier to cut through stucco for any future repair work to the plumbing in the shower.)

I have been told that this will be less expensive than ripping out most of the tile and waterproofing on the interior plumbing wall. I am open to suggestions ...


Comments (17)

  • 9 days ago
    1. What is the brand and model of the valve that needs replacement?
    2. Do you have a spare tile that could be used to replace the tile that surrounds the valve should it be broken during removal?
    coastal_vibe thanked wdccruise
  • 9 days ago

    @wdccruise,

    1. Samuel Heath V133-AIS-XX (plumbing fittings were selected by my designer)
    2. I have several spares of the Ann Sacks porcelain 15"x30" tile (designer-selected) and I think they still carry this tile in stock

    The Samuel Heath customer rep is checking one more time to see if the factory can find the parts that I need without replacing the whole valve.


    If I need to replace the valve from the exterior, should I consider adding an exterior weather-resistant access panel? what about shutoff valves dedicated to the shower? Not required by code, but maybe more convenient? The installation instructions actually refer to dedicated shutoff valves -- as in "turn off the water if shower will not be used for two months or longer"


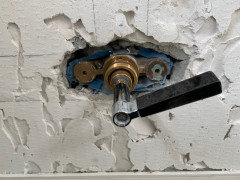
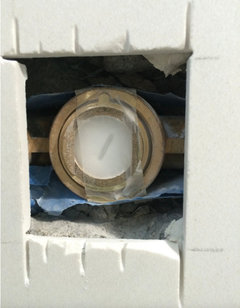
    One tile was already removed to gain access to the thermostatic valve (attached photo). Installation instructions clearly say to install the valve vertically, with the hot inlet on top and cold inlet on the bottom. Instead, the plumber (who had a suspended license), installed it horizontally, with the hot inlet on the left. He complained about my purchasing plumbing fittings from "across the pond."


    There are screws on the service cartridges. The installation instructions clearly say that these are not shutoff valves and not to mess with them. Apparently, the suspended plumber thought that they were shutoff valves and tried to adjust the temperature by turning them.


    My designer was horrified that I lined up the tiles to match (like a jigsaw puzzle). She said that the intention was to lay them out randomly. The removed tile will need to be replaced by a different tile from the same lot, but not an exact duplicate.


  • 8 days ago
    last modified: 8 days ago
    1. I would remove the handle and then carefully remove the cartridge from the valve (see Step 7 of the Installation Instructions).
    2. Clean the cartridge as described in How to Clean a Shower Cartridge for Better Flow.
    3. Reinstall the cartridge as described in Step 7.
    4. If the flow is still unacceptable:
    5. Steps 5 and 6 of the installation instructions mention filters (part B) for both the hot and cold supplies. I don't know whether these filters can become clogged but you could follow the instructions in Step 5 and 6 to remove the service nuts, check valves, and filters, clean the filters if necessary if necessary, and reinstall them.


    If you need a new cartridge and can't find one through Samuel Heath, you might contact Edwins Plumbing and Heating Supplies. Yeah, it's in London but if you need the cartridge it might still be able to send it to you which would be far better than tearing up the wall.


    If you have to replace the valve, I would think it would be FAR better to replace it from the inside as you have an extra piece of tile and should be able to can remove the old piece of tile -- at the grout lines -- and install the new tile.


    I am not an expert.

  • PRO
    8 days ago

    Coastal:

    Forget the exterior please. Too much risk and work. You'll make a small tradeoff by replacing the valve while standing in the shower; it's coming out the front. You'll cover the enlarged access hole with a larger escutcheon plate. Production plates are less than a hundred bucks, but if you're fussy, here you go: https://designerdrains.com/product-category/escutcheon-plate/oversized-escutcheon-plates/

  • 8 days ago
    last modified: 8 days ago

    Joseph Corlett, LLC: "You'll cover the enlarged access hole with a larger escutcheon plate"

    I don't understand this. If he needs to replace the valve, won't he need to:

    1. Enlarge the hole to access the valve and pipes
    2. Remove and replace the valve
    3. Patch the wall
    4. Cut out the old tile to the grout lines
    5. Install and grout a new tile
    6. Reattach the escutcheon (trim)
    7. Reattach the handle


    I don't see why he can't reattach the old escutcheon rather than replacing it with a new, larger one.

  • 8 days ago

    @Joseph Corlett, LLC, @wdccruise,


    Thank you for trying! I have already explored some of the remedies you proposed ...


    The solution for the trim plate is to re-install the same plate, horizontally, and have the replacement tile cut to match that orientation. The only drawback is that the company name (in small font) will be sideways.


    The thermostatic cartridge (in the center, under the handle) has always been accessible and has been replaced multiple times.


    I wasted two years going down the rabbit hole of having a larger trim plate custom-made to fit a larger opening, to gain access to the hot/cold service cartridges. This path was recommended by two tile guys who wanted to make a small hole in one tile instead of removing one whole tile.


    Three years ago, I was told that maybe the manufacturer had a larger trim plate in stock. They do not. Then I was told that the manufacturer would custom make a larger plate for me. They would not. I located a local metal maker to cut the metal part for me but I would need to find someone else to plate it. I needed precise details to make this work -- so that the escutcheon and handle would fit neatly into the circle cut in the plate and the plating would match the other polished chrome pieces. I asked the manufacturer for more details on the plate; understandably, none received (proprietary information?).


    A year ago, I hired a tile guy for a different project and he said he would just remove the whole tile, which he did in March of this year, while he was here working on the other project.


    Since March, the manufacturer has sent six different shipments of parts for the service cartridges, but none have fit. More on that in a separate post, later ...


  • 8 days ago
    last modified: 8 days ago

    I'm totally confused by the mention of "hot/cold service cartridges", "parts for the service cartridges", turning the escutcheon sideways, and the fact that the thermostatic cartridge " has been replaced multiple times". I guess I'd just follow Step 5 and 6 to check the filters and check valves.

    Good luck.

  • 8 days ago
    last modified: 8 days ago

    FYI - the way you had the tile installed like a "jigsaw puzzle" in order to line up veining (= make it look more like a slab instead of individual tiles) is the best way to install faux marble tile! I think your designer is wrong - when it's installed randomly, it looks more fake + it makes my eyes hurt!

    There have been MANY examples of faux marble tile installed in bathrooms over the past several years - the ones that look the best are the ones where the installer (or homeowner) intentionally placed each tile in order to achieve a "slab" type look. That is actually a sign of a professional tile installer vs. a non-pro/inexperienced installer.


    Also - I know that plumbing should not be installed on exterior walls in order to be able to access the plumbing from behind the wall when there is an issue - and I'm just a homeowner who has had three bathrooms renovated in the last few years. If you are in warm weather, a niche may be installed on an exterior wall - however, plumbing should be avoided. While you don't have to worry about pipes freezing/bursting, access through interior drywall is the best way to plan for future repairs/replacements.


    All of my showers have rough-in valves with I"stops" on them that can be used to turn off the water (they are accessed by removing the escutcheon plate).

    coastal_vibe thanked dani_m08
  • 7 days ago

    @wdccruise,


    "Steps 5 and 6 of the installation instructions mention filters (part B) for both the hot and cold supplies. I don't know whether these filters can become clogged but you could follow the instructions in Step 5 and 6 to remove the service nuts, check valves, and filters, clean the filters if necessary if necessary, and reinstall them."


    Yes, in March, after the tile guy removed the tile that covered the thermostatic valve, I had a plumber on site. He was able to remove and clean the service nut, check valve, and filter on the hot side, but the cold side was trashed and needed new parts.


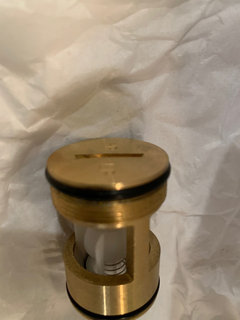
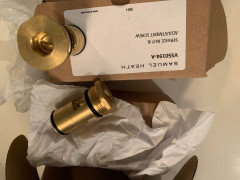
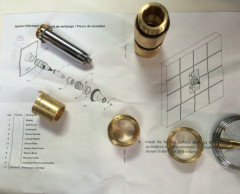
    Subsequently, the manufacturer sent replacements with the service nut, check valve, and filter all housed within a metal cylinder (together, this is called the "hot/cold service cartridge"), with the filter at one end of the cylinder. They sent two different versions -- a total of six different shipments (see attached photos) over the next three months. The plumber says he needs to have these items as separate parts to install them.


    I have had two plumbers, independently, tell me that the cylinders that were sent cannot be installed into my rough-in valve.


    The customer rep is checking one more time to see if it is possible to get these items as separate parts from the factory.


  • 6 days ago

    @dani_m08,


    Thank you for reassuring me that my tile layout does not look like a 1st-year art project (which is how my designer described it).


    You have hit the proverbial nail on the head with this comment:

    "All of my showers have rough-in valves with I"stops" on them that can be used to turn off the water (they are accessed by removing the escutcheon plate)."


    No integral stops are provided on the Samuel Heath thermostatic valve. Instead, the instructions say to shut off the water to the valve, during installation, by using individual local / isolation hot and cold shutoff valves, not provided with the thermostatic valve. There is no requirement for dedicated shutoff valves for tubs or showers in the US or in England, other than the requirement for check valves to prevent back-flow.


    The plumber who was at my house earlier this week recommended replacing the troublesome valve with Kohler. The salesperson/plumber at my local showroom has advised me to replace it with one of the following: Graff, Newport Beach, or Cal Faucets. (He stopped carrying S. Heath in the showroom years ago because of poor customer service.) It is a bottleneck to have to order parts through the one nice gentleman in NYC, who is the single link to the factory in Birmingham.


    Is it better to replace the valve from the interior than from the exterior (less expensive? easier access for the plumber?) How much of the waterproofing (brown coat and scratch coat) needs to be removed for the plumber to be able to swap out and reconnect the two inlets and one outlet? Who opens up the space (tile guy?)


  • 6 days ago

    @wdccruise, @Joseph Corlett, LLC


    I am adding photos to try to explain the issue that arose, early on, with the trim plate.


    The tile-setter cut the tile to allow the rectangular trim plate to be installed in the correct orientation, vertically, with the brand name on the bottom of the plate. But the valve was installed horizontally, such that only the thermostatic cartridge was exposed when the face plate was removed.


    Thus, the filters for the hot and cold inlets were hidden behind the tile, until this year, when I was finally able to a get a tile guy to remove the tile. (The trim plate is shown in the very first photo, above.)


  • 6 days ago

    Your old GC should be paying for this repair and you should do it the right way from the inside. The old GC should have malpractice insurance to cover his plumber’s bad work.

  • PRO
    6 days ago

    Coastal:


    You're not fixing this from outside.


    I don't care how much access is needed and what needs replacing inside.


    You could cut a 1' x 3' access if necessary, replace everything, and have a solid surface fabricator make a color coordinating giant escutcheon plate that covers the new stuff perfectly.


    Life is full of tradeoffs. Start picking some, please.

    coastal_vibe thanked Joseph Corlett, LLC
  • 6 days ago

    @Joseph Corlett, LLC,

    Two plumbers, including the one who was here last week, for a consultation only, advocated for replacing or servicing the thermostatic valve through the exterior wall without disturbing the tilework; otherwise, I would not have considered it.


    Are you saying that I need a 1 x 3 - foot access panel on the front of the plumbing wall? The trim plate is about 4 x 6 inches. Why would I need anything larger than that?


  • 6 days ago

    @Val B, the GC on the project has since returned to the spirit world. He did not carry insurance for "errors and ommissions."

  • yesterday

    Crisis averted? The Samuel Heath (SH) factory has sent one more shipment of parts. I think these are finally the correct parts -- plumber is scheduled to make the repairs.


    After my combing through the SH website, I discovered that they were sending me service cartridges for the V-135-AIS mixing valve, instead of the V-133-AIS, and they were incorrectly claiming that the parts should fit.


    As an aside, SH plans to announce new mixing valves with integral stops in January 2027. Almost as remarkable as their decision, some years ago, to provide NPT fittings for items sold in the US.


    In the off-chance that the parts do not fit, I will still need to replace the valve. It is easier for a plumber to cut through wood siding on the exterior of the house than to break up the concrete waterproofing on the shower. (See attached photo.)


    My siding contractor is giving me an estimate of the cost to replace the wood siding with Hardie Board installed around a metal access panel on the exterior. He said stucco would be more expensive to install because it takes several layers.