Software
Houzz Logo Print
joannapoli

Removing popcorn ceiling.

12 years ago
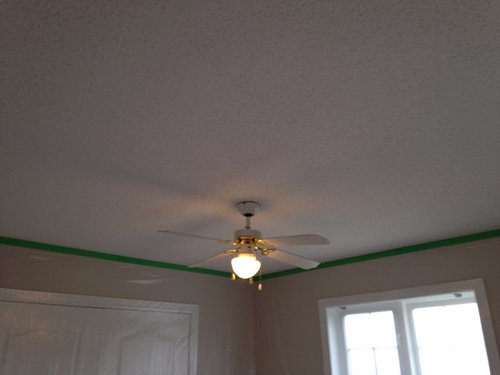
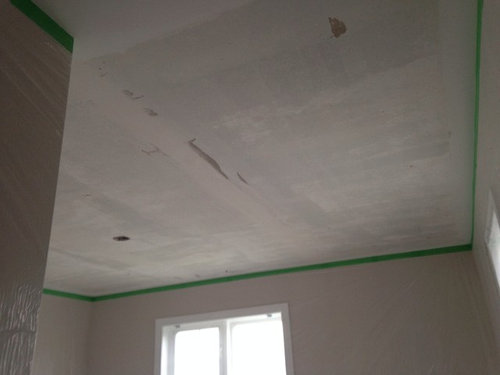
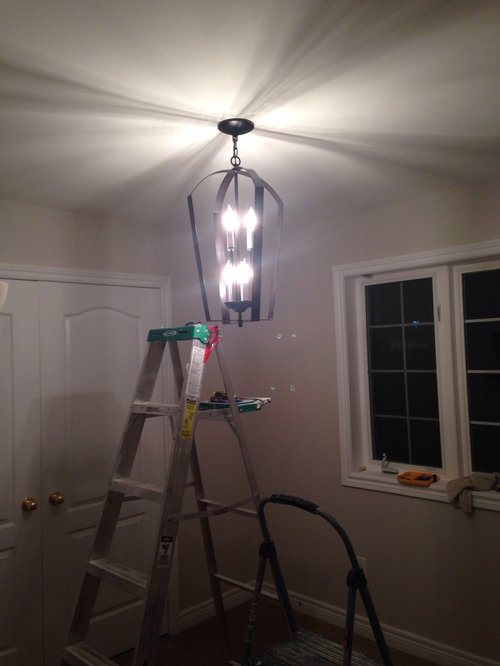
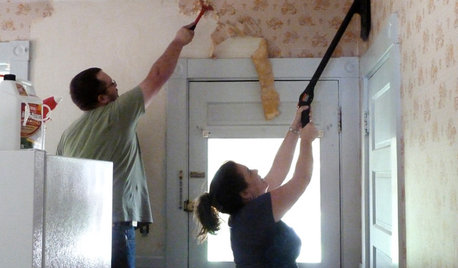
Before we purchased our 9 year old home we knew the popcorn ceiling had to go. After getting a quote for $10,000 to do the whole house (2,300 square feet) we were only left with one option, do it ourselves. Well, I am happy to confirm that so far we have done all three bedrooms, dining room, and downstairs hallways and we are very happy with the results! Here are a few before during and afters of our guest room! All we have left is the upstairs hallway and family room!

Comments (43)

  • PRO
    12 years ago
    The result is well worth the hard work.
    joannapoli thanked Dytecture
  • PRO
    12 years ago
    I, too, have undertaken the removal of that awful stuff. It's a drag, but the finished product is well worth the effort. I can imagine how glad you must be to see a big chunk of the work in the "rearview mirror".

    There is nothing I'd rather do that turn it over to a contractor, but I'd rather suck it up, do it myself, and keep the money in my pocket. I tip my hat to you!
    joannapoli thanked Daybreak Workroom LLC
  • 12 years ago
    Good job, looks great!!

    I removed the popcorn from our ceilings years ago. I would send my children off to school and do a room. The cathedral ceiling was a challenge; but so worth it.

    Doesn't it make your ceilings feel so much taller?!
    joannapoli thanked mkritt
  • 12 years ago
    Nice job. I have popcorn ceilings right now. They have been painted a couple times so they are a bit less popcorny than they were. Do you think having them will impact the sale of my house next year?
    joannapoli thanked User
  • PRO
    12 years ago
    Looks good! Did you use an oil primer after you removed the popcorn?
    joannapoli thanked Sullivan's Painting Service
  • 12 years ago
    Can I ask for the best way to do it?
    joannapoli thanked Teresa S-j
  • 12 years ago
    Mkritt, It makes the rooms seem sooooo much taller and CLEANER! Popcorn ceiling makes rooms seem so dirty! I hate them!
  • 12 years ago
    Jn3344, I feel like it does impact the sale of your home. Flat ceilings give a more updated and cleaner look to the home. If you have the patience and or money to have someone else do it I say go for it and reap the benefits. Im no real estate agent but I know when I was shopping for our home popcorn ceiling in every house drove me nuts and the ones without popcorn were always significantly higher priced.
  • 12 years ago
    Sullivan painting, we did not use an oil based primer... We used drywall primer after cleaning the ceiling several times with warm water to get rid of all the of the popcorn ceiling before painting. We also sanded the whole ceiling down after patchwork and then wiped again and then paintied.
  • 12 years ago
    Teresa S-J, in short, cover walls and floors in plastic taping all seams, roll warm water onto the ceiling let soak for 2-3 minutes and roll again and let soak for a minute or so. If the ceiling it painted you may need to do this step a few times so that the water soaks through the paint into the popcorn ceiling. Take a drywall trawl (the longer ones, it can be plastic for a cheaper solution that doesnt rust) and carefully scrap the ceilings keeping the trawl at a 30 degree or less angle. Work in 3' x 3' sections at first until you get the hang of it. If the popcorn hits to the wall make sure you address those edges while the popcorn ceiling is wet. Roll, wet, scrap, remove until the whole room is done. Go over the whole room with a wet rag in hand and scrapper to get any areas you missed. Wipe the whole ceiling down. I can guarantee you have. Let the room dry for 3-4 hours. The spring -summer time is the best time to do this so you can open all the windows in that room to let things dry faster and let the dust out from sanding. After the room has dried go back with some plaster 95 worked best for us and patch up any dents, scraps from scrapping the ceiling(they happen but try your best to avoid them) and the all important seams from the adjoining sheetrock on the ceiling. Those were our biggest challenge! Let the plaster /spakle dry for at least 24 hours,. Sand, go back and fix what needs to be fixed wait 24 hours and sand again. At this point you can sand the whole ceiling lightyto be sure its a good surface to start priming. Let the dust settle and start priming. Use drywall primer. Follow drying instructions and then prime again and then ceiling paint. One room was a weekend job. Lots of drying and preparing before paint! I hope this helps! Any more tips and tricks are always welcome!
  • 12 years ago
    We also used a homedepot bucket to catch the droppings and a big garbage bag to empty the bucket in. Daybreak workroom has some great tips in patching up the ceiling!
  • PRO
    12 years ago
    last modified: 12 years ago
    The pressure sprayer is EASY and you can control how much "juice" to add to the popcorn. But the drywall trawl for scraping seems a WAY better solution, a lot faster, I'd imagine. Excellent tip on addressing the junction of ceiling and wall immediately and thoroughly!

    Also, wear safety glasses (and expect to clean them every so often) and cover your hair. Moisturize your hands after you've "cleaned up"... drywall mud is brutal on your hands and nails. Wear a mask when you sand... sheetrock dust and boogers? best to avoid altogether IMO. Besides, you don't you'll have to snort the stuff for hours afterwards. A lot of people overlook "safety gear", but using it helps more than it hinders. Trust me on this.

    I'm glad I wasn't the only person who had to "prime again". Dry wall soaks up primer and since primer is cheaper than the pigmented paint it makes more sense to slake the dry wall's thirst with the "cheap stuff". Yeah, you have to paint again, but remember that each successive coat becomes easier to apply!
  • 12 years ago
    It looks beautiful! Great work!! Now you will always have a success story to tell about the ceilings =)
  • 12 years ago
    AGREE with safety gear! Totally forgot to add that! We used goggles that looked like you could snowboard in them and masks at all times! Seal the rooms when sanding always as well! The dust gets everywhere int he house if you don't do so! Dust travels!
  • 12 years ago
    Daybreak Workroom LLC We got the idea of using more primer than ceiling paint from our wonderful contractor! He always gives us the best tips and tricks! Great neighbor!
  • 12 years ago
    Thank you Marika Fedalen! :) We sure do!
  • PRO
    12 years ago
    Cleaning the surface of dust is number one of course. Using oil primer is important because a lot of times there will be some amount of dust or debris. What I really like to do is use Gardz problem surface primer before doing any of the patch work that is often necessary after removing a popcorn ceiling or wall paper. This product will seal the wall properly and prepare it for spackle and paint. After patching sanding and dusting I do a coat of oil primer. This will ensure moisture from the latex paint doesn't active any dust or debris you may have missed. Too coating with two coats of quality flat finish paint is the final step.
    Skipping the oil primer may not yield bad results this time around, but in the future when you paint again you may see bubbles form in the old paint and cause a failure when the dust beneath comes in contact with moisture.
  • PRO
    12 years ago
    Sullivan, I love oil paint! (guilty pleasure). My guiltiest of pleasures? HIGH GLOSS alkyd enamel. I love it... and I applied 3 loving coats of it for the final "sparkle" on our woodwork. (after shellac and 2x primer). It wears like iron and looks fabulous nearly 20 yrs. on. (But it's a major "time hog")
  • 12 years ago
    Thank you all! I think I know what I'm doing this summer!!!! (and probably the next and the next…)
  • PRO
    12 years ago
    Lol, Teresa. I do this sort of thing in the winter. Snowy outdoors and the wood stove keeps the house warm and bone dry... perfect conditions for the work to be done.

    My biggest tip? even if you don't "feel like it", clean up the day's mess before you call it quits for the day! Nothing is more conducive to procrastination than having to clean up BEFORE you begin working! (ask me how I know)
  • PRO
    12 years ago
    Good job ;)
  • 12 years ago
    Daybreak Workroom LLC I have to disagree with doing it in the winter. We did part of it in the summer and part in the winter and I have to say, the dust step is better done on a warm day so you can have all the windows open to let the dust out and not travel in the house so much!
  • 12 years ago
    Thanks Davee Renovations & Desigins!
  • PRO
    12 years ago
    I live in a maritime climate. Summer is humid. With the stove cookin' along I can keep the windows open and nice dry air circulating all day long.
  • PRO
    12 years ago
    Total mess but well worth the end result
  • 12 years ago
    What about the sound absorbing qualities of popcorn ceilings? I live in a condo complex with minimal insulation between units.
  • 12 years ago
    Wonderful improvement. When we built our house popcorn ceilings were the norm. I wanted flat ceilings and the drywall guy tried to talk me out of it saying it was much more expensive. Well it was few hundred more, thank goodness I splurged. hard and messy work but really updates the look.
  • 12 years ago
    saratogaswizzlestick Thank you. My father absolutely loves the look of popcorn ceiling. I just can't take it! I am so happy we did it! Good on you on standing your ground!
  • 12 years ago
    joanbllt I am not sure but we live in a detached home and we don't have any issues....
  • 12 years ago
    Joanna and Daybreak Workroom, thank you both for your detailed tips. Teresa, I too know what I am doing this summer. Only one bedroom has the stuff, though.

    Joanna, did you uncover any surprises (e.g., poor handiwork in the original drywall)? All the drywall in our house is DIY from previous owner(s) -- and now us! -- and of variable quality. Most of the ceilings joints aren't as smooth as they could have been. I worry that the one popcorn room is a warning sign that this was the "practice" room, and the worst of them all. The failing mesh tape inside corners of that same room suggests as much...

    Sullivan's Painting Service, thank you for your explanation of how debris can swell up under later applications of latex paint. I finally understand the bubbles that seemed to pop up out of nowhere when we painted some rooms. We couldn't understand how latex over latex could do this in spite of our prep work...
  • 12 years ago
    As a real estate agent I can tell you popcorn ceilings are not a feature buyers want to see. If you can get rid of it, do it. It will make your house so much easier to sell.
  • 12 years ago
    automatikj We didn't uncover anything that wasn't something we were expecting such as joints not fully filled in properly, spackle not sanded down smooth enough, tape showing through.... In some cases it may be best to start from scratch maybe? Can you take some pictures of the ceiling at night time with a floor lamp on? That usually shows all the flaws of a ceiling. The best advice I can give you is when you are speckling and sanding make sure you are blending blending blending...
  • PRO
    12 years ago
    If you are not as ambitious as joanna and her husband, try ceiling tiles. There are some great ones.
  • 12 years ago
    This is very informative, thanks all for sharing these tips. I have a contractor removing popcorn from my ceiling. He has already removed the popcorn and said now he will patch some of the drywall before applying the Primer and Paint. He just want to patch the drywall at local areas where it need repairs, does not want to apply Mud all over it or doing a skim coat. All other contractors which gave me quotes mentioned they will be applying Mud after removal of popcorn but this guy is saying he does not do that. He said he can do that if I want it but then he does not guarantee his paint work. I am confused...what are the exact steps need to be taken for popcorn removal...isn't it is 1) remove popcorn 2) fix patch and apply skim coat of mud 3) make ceiling sooth, 4) apply 1 coat of primer 5) apply 2 coat of paint....please help !!!
  • 12 years ago
    @sub2014 How did it turn out?!? I am curious!
  • 12 years ago
    I am hiring a contractor to remove the popcorn ceilings of my home before moving in. The question is, do I pay the extra $800 to have them take it out of the closets and garage?
  • PRO
    12 years ago
    No, you can live with those; just paint them a true white in a flat finish.
  • PRO
    12 years ago
    Great work. Looks beautiful now. We too have popcorn ceiling in our home and want to remove them because the room looks very unattractive.
  • 12 years ago
    Very surprised that no one (especially the Pros) discussed the dangers of removing popcorn ceilings without first testing for the presence of Asbestos.
  • 12 years ago
    Hi all, thank you for all of the tips. I just purchased a 1994 home and have removed all of the popcorn as mentioned above. My issue is that the popcorn ceilings were painted and popcorn sprayed all the way to the wall. With all of the coats of ceiling and wall paint the corners are still holding the popcorn. I am looking for suggestions to get a finished corner. I tried sanding, but that damaged the tape too easily.
  • PRO
    11 years ago
    last modified: 11 years ago
    Removing popcorn is not just very messy, but in older homes there is also a danger of exposing yourself to asbestos.. Anything oil based also carries the danger of exposure to VOCs, and oil-based finishes also harm the environment more than water based ones.

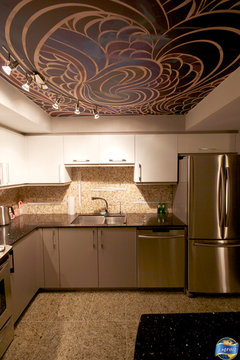
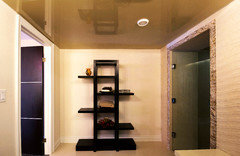
    There is a better solution. We're talking no mess, no dust, no toxic vapours (in fact, no vapours at all), with a finish as smooth as a mirror and unlimited design options. It's called stretch ceiling. A fully recyclable membrane is stretched across the ceiling, either over an existing ceiling, or in a new build, instead of installing drywall and covering it with popcorn. Tracks, or profiles, screwed into the walls or existing ceiling around the edges hold the membrane in place. These profiles and the membrane take up less than one inch of room height.

    If you later desire a change, a new membrane can be inserted into the same tracks, or the tracks can be unscrewed and the screw holes easily filled with a little bit of filler. You will not need to do this as maintenance, however. The system lasts a lifetime.

    We take care of installation for you, and installation is included in the price that we quote.

    We carry over 280 colours, in high gloss, matte, satin, and fine canvas-textured finishes.

    Here are a few examples, please feel free to visit our profile for more, and add them to your ideabooks!

    Call us for a quote, we do not charge for a site measure/quote in areas that are near our offices. If you are further away, you can still get a free quote by supplying us with your measurement information. We have a network of authorized dealers across North America and beyond.
  • PRO
    10 years ago

    Nicely done!