




DIY: Bold 3D Dining Room Wall
Mid-century diamond pattern inspires dining room's new look

There are many ways to dress up a blank wall — wallpaper, stencils and paint are just options. But for some rooms, that look just isn't right. Blogger Dana Frieling of Make Them Wonder wanted something with a more custom built-in look for her bare dining room wall. She decided to think outside the box and add some 3D texture in a mid-century style to match her home's decor. Using custom cut pieces of pine and a carefully planned out pattern, she created a unique raised effect that brought a retro touch to her home.
More of this house | More DIYs
More of this house | More DIYs
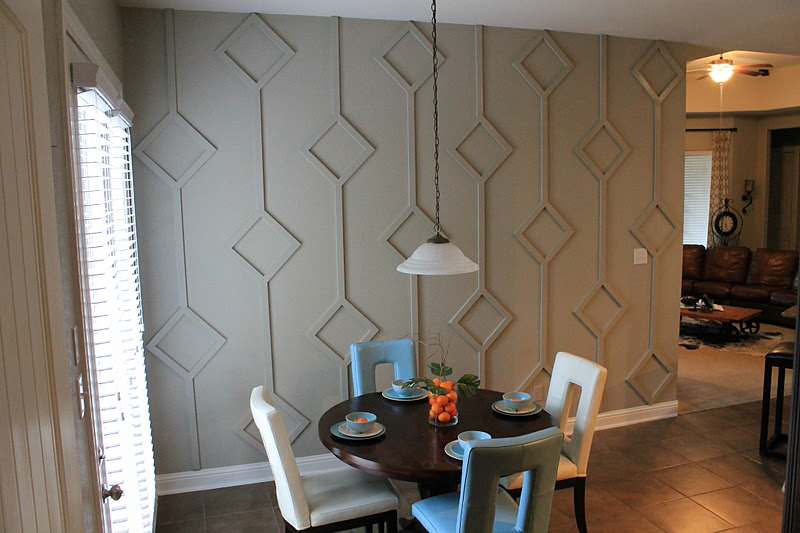

First, decide how big you want your diamonds to be. Frieling used a mirror as a stencil, but you can choose a size that works best for your wall.
After choosing a size of diamond, set out part of your pattern on your wall with masking or painter's tape. This is a great way to get a visual of how this pattern is going to look and how many columns/pieces of wood you'll need.
After choosing a size of diamond, set out part of your pattern on your wall with masking or painter's tape. This is a great way to get a visual of how this pattern is going to look and how many columns/pieces of wood you'll need.
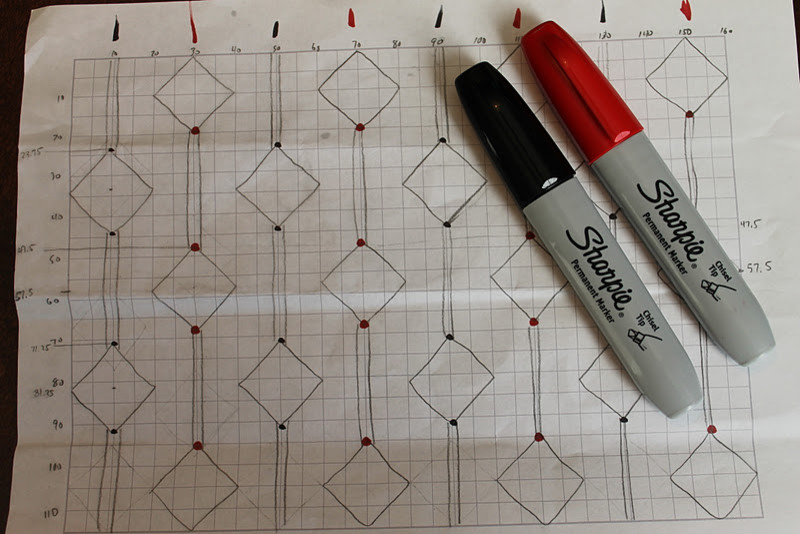
Measure your wall's height and width and write it down. Find a piece of graph paper to plot out your pattern. This technique is a lot like what Shoshana used in her Pizza Box Stencil Wall DIY.
To determine how many columns you need, take the length of your wall and divide it by the size of the diamond. For example, Frieling's wall was 160 inches wide, and her diamond measured 20 inches from point to point. Since 160/20 = 8, she needed 8 columns to fill up her wall.
Play around on your wall with painter's tape or with a new sheet of graph paper to figure out how many diamonds you want in each column. Frieling decided to do 2 diamonds in the first column, 3 in the second column, and repeat on through. Once you've decided, draw the completed pattern, measured to scale, onto your graph paper.
To determine how many columns you need, take the length of your wall and divide it by the size of the diamond. For example, Frieling's wall was 160 inches wide, and her diamond measured 20 inches from point to point. Since 160/20 = 8, she needed 8 columns to fill up her wall.
Play around on your wall with painter's tape or with a new sheet of graph paper to figure out how many diamonds you want in each column. Frieling decided to do 2 diamonds in the first column, 3 in the second column, and repeat on through. Once you've decided, draw the completed pattern, measured to scale, onto your graph paper.
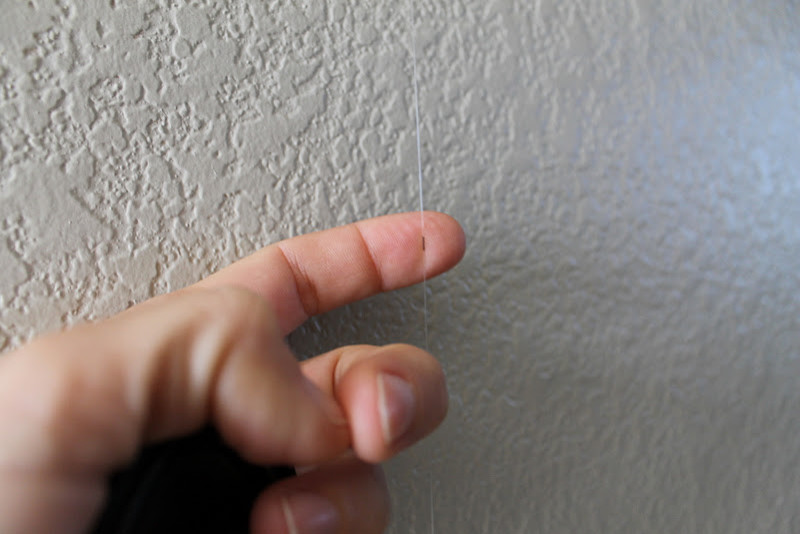
Now it's time to transfer your grid to the wall. Instead of trying to deal with masking tape again, Frieling and her husband used fishing line (you can also use string) and thumbtacks to create a plumb line, which marks the center of each column.
The fishing line was marked with sharpie where the top and the bottom points of each diamond should be. Since Frieling only used single piece of fishing line, she marked the marks for even columns with a red sharpie and odd columns with a black sharpie. Moving the fishing line across the wall at the correct intervals, she marked out the correct dots for each column onto the wall. (For more clarification on this process, check out Frieling's post here).
After you've marked your wall, it's time to make your diamonds.
The fishing line was marked with sharpie where the top and the bottom points of each diamond should be. Since Frieling only used single piece of fishing line, she marked the marks for even columns with a red sharpie and odd columns with a black sharpie. Moving the fishing line across the wall at the correct intervals, she marked out the correct dots for each column onto the wall. (For more clarification on this process, check out Frieling's post here).
After you've marked your wall, it's time to make your diamonds.
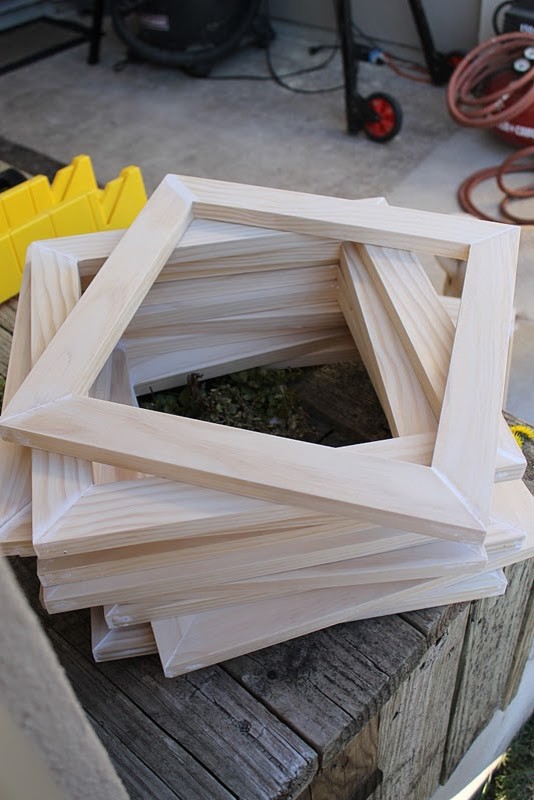
Cut the correct number of pieces for your diamonds using a miter saw. Put four of the pieces together and attach each corner with finishing nails. Fill in the nail holes and corners with dap wood filler. After each piece is dry, rub everything down with sandpaper to get rid of extra wood filler and create a good surface for painting.
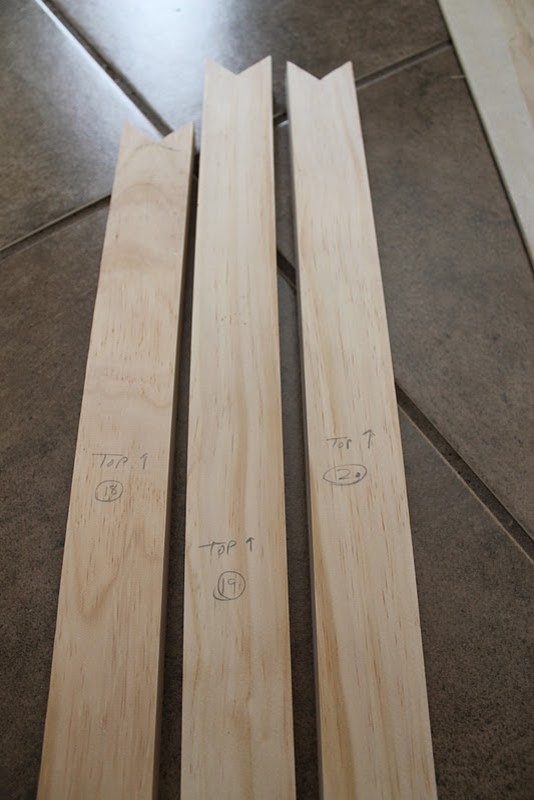
Use the band saw to cut your straight pieces. Since these won't all be the same length, make sure to measure them carefully. Frieling marked each piece with a number on the back, so she knew exactly where it would go when it was time to assemble.
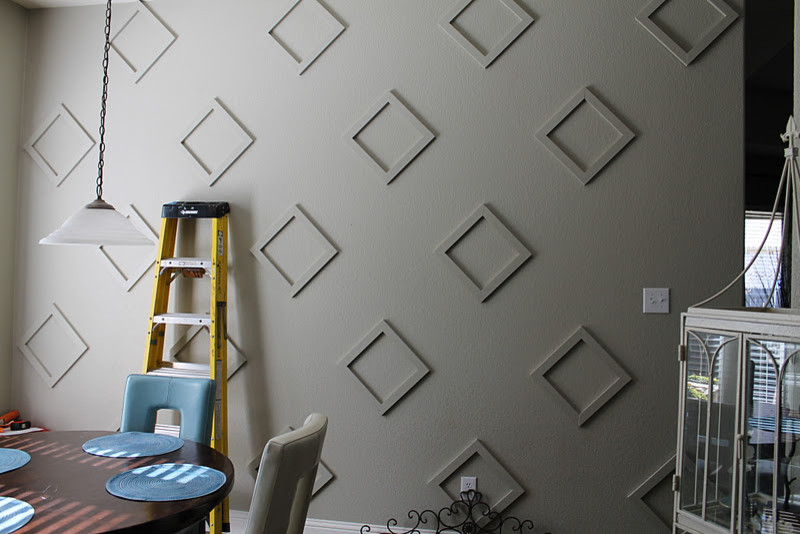
After painting each piece, she used liquid nails to attach each diamond to the wall where the dots were marked on the wall, and put in finishing nails with the nail gun for extra stability.
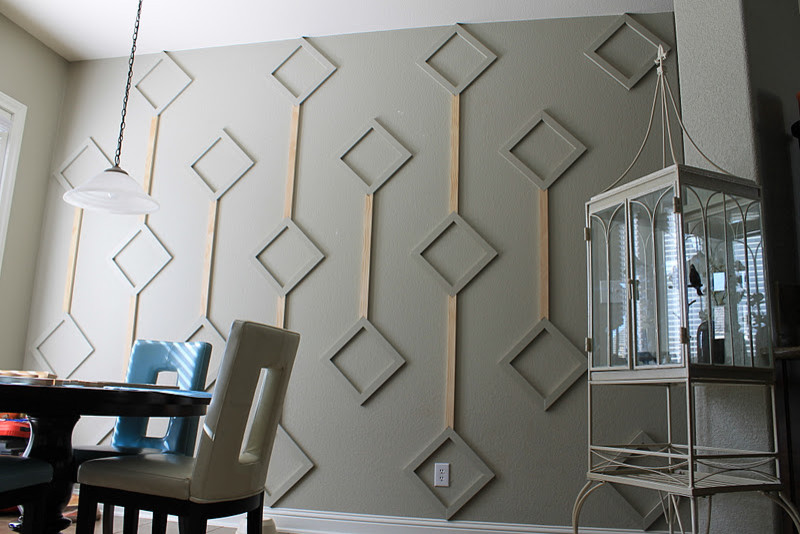
The straight pieces were added afterwards in the same manner — after double checking that they fit correctly. The corners between the straight pieces and the diamonds were a little rough, so Frieling sanded them down, added more dap, and then touched up the paint.
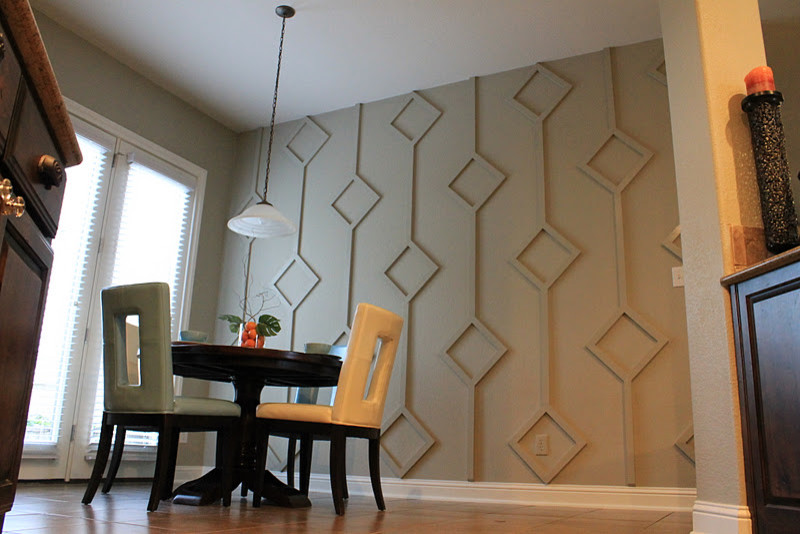
See more of this house. For more details on this DIY, check Make Them Wonder.
More DIYs:
Pizza Box Stencil Wall
How to Paint a Sisal Rug
PVC Pipe Wine Holder
More DIYs:
Pizza Box Stencil Wall
How to Paint a Sisal Rug
PVC Pipe Wine Holder
Sponsored

Customized Award-Winning Interior Design Solutions in Franklin Cnty OH

- (5) 10-foot 1x4 pieces of pine
- (4) 8-foot 1x4 pieces of pine (she used a table saw to cut these pieces lengthwise)
- Liquid nails
- Dap wood filler
- 1 quart of paint
- Paint brush
- Brads for nail gun
- Fine grit sand paper
Tools used: Miter saw, band saw, table saw, nail gun