
Search results for "Matching deposits" in Home Design Ideas

 Alair Homes Plano
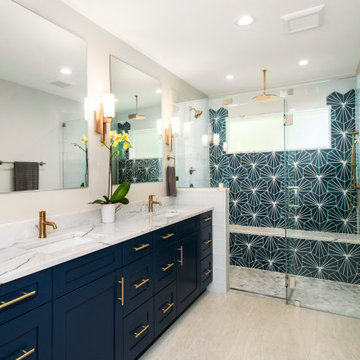
 Our clients came to us because they were tired of looking at the side of their neighbor’s house from their master bedroom window! Their 1959 Dallas home had worked great for them for years, but it was time for an update and reconfiguration to make it more functional for their family.
They were looking to open up their dark and choppy space to bring in as much natural light as possible in both the bedroom and bathroom. They knew they would need to reconfigure the master bathroom and bedroom to make this happen. They were thinking the current bedroom would become the bathroom, but they weren’t sure where everything else would go.
This is where we came in! Our designers were able to create their new floorplan and show them a 3D rendering of exactly what the new spaces would look like.
The space that used to be the master bedroom now consists of the hallway into their new master suite, which includes a new large walk-in closet where the washer and dryer are now located.
From there, the space flows into their new beautiful, contemporary bathroom. They decided that a bathtub wasn’t important to them but a large double shower was! So, the new shower became the focal point of the bathroom. The new shower has contemporary Marine Bone Electra cement hexagon tiles and brushed bronze hardware. A large bench, hidden storage, and a rain shower head were must-have features. Pure Snow glass tile was installed on the two side walls while Carrara Marble Bianco hexagon mosaic tile was installed for the shower floor.
For the main bathroom floor, we installed a simple Yosemite tile in matte silver. The new Bellmont cabinets, painted naval, are complemented by the Greylac marble countertop and the Brainerd champagne bronze arched cabinet pulls. The rest of the hardware, including the faucet, towel rods, towel rings, and robe hooks, are Delta Faucet Trinsic, in a classic champagne bronze finish. To finish it off, three 14” Classic Possini Euro Ludlow wall sconces in burnished brass were installed between each sheet mirror above the vanity.
In the space that used to be the master bathroom, all of the furr downs were removed. We replaced the existing window with three large windows, opening up the view to the backyard. We also added a new door opening up into the main living room, which was totally closed off before.
Our clients absolutely love their cool, bright, contemporary bathroom, as well as the new wall of windows in their master bedroom, where they are now able to enjoy their beautiful backyard!
 Sunday Home Interiors
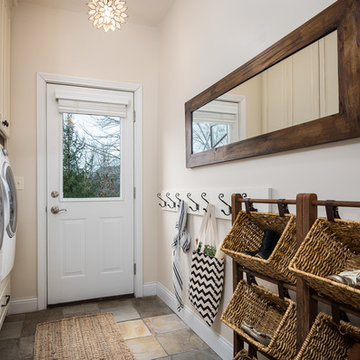
This light and airy laundry room/mudroom beckons you with beautiful white capiz seashell pendant lights, custom floor to ceiling cabinetry with crown molding, raised washer and dryer with storage underneath, coat, backpack and shoe storage.
Find the right local pro for your project
 Tracey Stephens Design, LLC
Wing Wong, Memories TTL
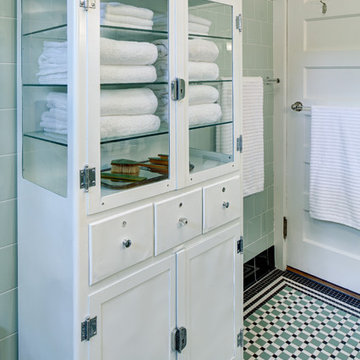
Example of an arts and crafts green tile and ceramic tile porcelain tile bathroom design in New York with green walls
Example of an arts and crafts green tile and ceramic tile porcelain tile bathroom design in New York with green walls

 Zogheib, Necessary Luxury
Michael Hunter
Mid-sized trendy master carpeted bedroom photo in Other with blue walls and no fireplace
Mid-sized trendy master carpeted bedroom photo in Other with blue walls and no fireplace

 American Deck Builders LLC
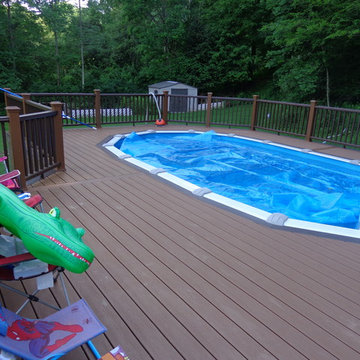
Trex deck in Deposit, NY using Trex Transcend Tree House and Vintage Lantern decking with color matched Trex Transcend railings. www.americandeckbuilder.com

 American Deck Builders LLC
Trex deck in Deposit, NY using Trex Transcend Tree House and Vintage Lantern decking with color matched Trex Transcend railings. www.americandeckbuilder.com
 American Deck Builders LLC
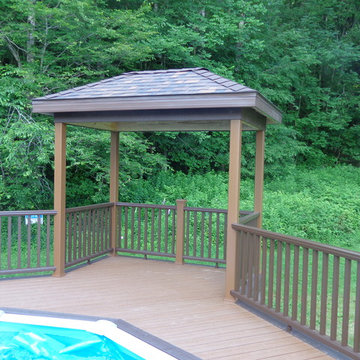
Trex deck in Deposit, NY using Trex Transcend Tree House and Vintage Lantern decking with color matched Trex Transcend railings. www.americandeckbuilder.com
 Nanette Wong
Photo: Nanette Wong © 2014 Houzz
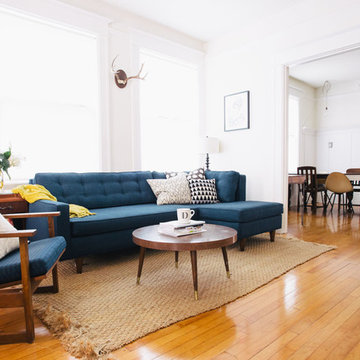
Living room - eclectic living room idea in San Francisco
Living room - eclectic living room idea in San Francisco
 American Deck Builders LLC
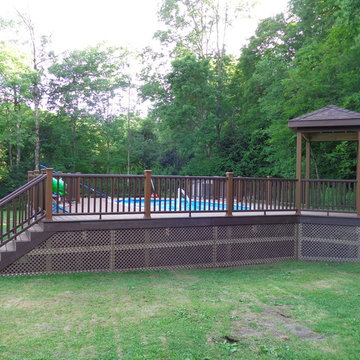
Trex deck in Deposit, NY using Trex Transcend Tree House and Vintage Lantern decking with color matched Trex Transcend railings. www.americandeckbuilder.com
 American Deck Builders LLC
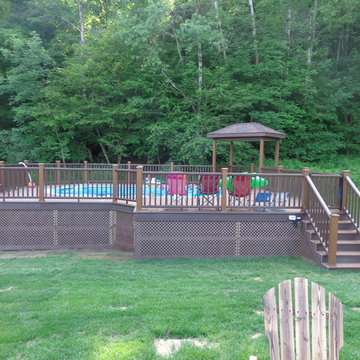
Trex deck in Deposit, NY using Trex Transcend Tree House and Vintage Lantern decking with color matched Trex Transcend railings. www.americandeckbuilder.com
 American Deck Builders LLC
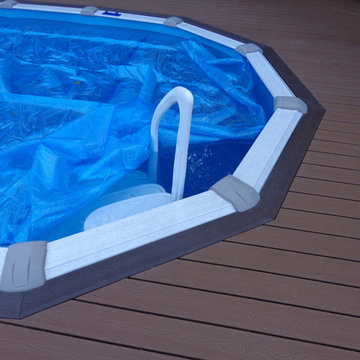
Trex deck in Deposit, NY using Trex Transcend Tree House and Vintage Lantern decking with color matched Trex Transcend railings. www.americandeckbuilder.com

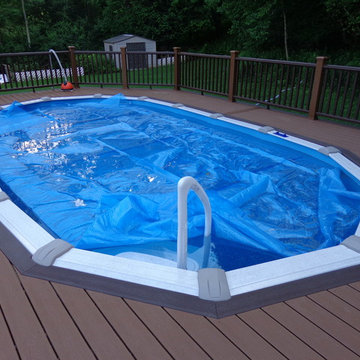 American Deck Builders LLC
Trex deck in Deposit, NY using Trex Transcend Tree House and Vintage Lantern decking with color matched Trex Transcend railings. www.americandeckbuilder.com
 Focal Point Hardware
This Brizo Kitchen Faucet Features:
Finish: Stainless
Length: 11.5
Height: 15.91
Width: 6.53
SmartTouch Technology with TempID – tap on/off functionality with temperature indicating LED light
MagneDock Technology – magnetic docking system
Diamond Seal Technology
Euro-motion Diamond Valve with InnoFlex waterways
Touch-Clean nozzles – swipe away mineral deposits
Two-button, four-function wand: spray, stream, volume control and pause
1-hole installation
Spout swivels 360°
Accommodates up to 3" deck thickness
Comes with standard fittings
Optional A/C adapter EP73954
Maximum 1.8 gpm @ 60 PSI, 6.8 L/Min @ 414 kPa
One, two, three, or four hole mount(escutcheon optional)
Control mechanism shall be full-motion valve cartridge
Rotating spout
Red/blue indicator markings
Four-function wand; Aerated stream, full spray, volume control, and pause (64003LF)
Two-function wand; Aerated stream and full spray(64903LF)
Dual integral check valves in sprayer
LED indicator light signals on-off, water temperature and when batteries run low
Uses 6 AA (included) or 6 C (optional) batteries
Optional (EP73954) 120V AC adapter available(3 prong grounded outlet required)
Quick connect hoses
Note: See 63903LF-* for matching bar/prep
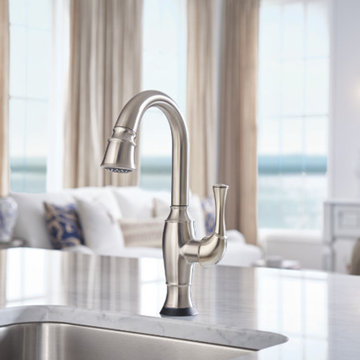 Focal Point Hardware
This Brizo Kitchen Faucet Features:
Finish: Stainless
Length: 11.06
Height: 14.88
Width: 6.53
SmartTouch Technology with TempID – tap on/off functionality with temperature indicating LED light
MagneDock Technology – magnetic docking system
Diamond Seal Technology
Euro-motion Diamond Valve with InnoFlex waterways
Touch-Clean nozzles – swipe away mineral deposits
Two-function pull-down wand: spray and stream
1-hole installation
Spout swivels 360°
Accommodates up to 3" deck thickness
Comes with standard fittings
Optional A/C adapter EP73954
Maximum 1.8 gpm @ 60 PSI, 6.8 L/Min @ 414 kPa
One, two, three, or four hole mount (escutcheon optional)
Control mechanism shall be full-motion valve cartridge
Rotating spout
Red/blue indicator markings
Four-function wand; Aerated stream, full spray, volume control, and pause (64003LF)
Two-function wand; Aerated stream and full spray (64903LF)
Dual integral check valves in sprayer
LED indicator light signals on-off, water temperature and when batteries run low
Uses 6 AA (included) or 6 C (optional) batteries
Optional (EP73954) 120V AC adapter available (3 prong grounded outlet required)
Quick connect hoses
Note: See 63903LF-* for matching bar/prep
 Tile Doctor Ltd
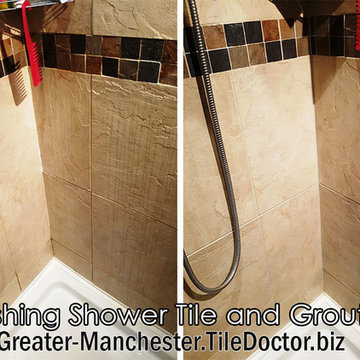
Shower and bathroom mould and soap scum growth are probably the most common, annoying and frustrating tile-related problems. Wet and high humidity areas with poor ventilation provide the perfect breeding ground for mould and stains. Soap residue and body oils also create a food source for soap scum, mould to grow.
My customer in Dane Bank had the exact problem with dirty and mouldy grout lines in her shower cubicle. She had tried scrubbing the grout lines herself with a toothbrush and standard supermarket cleaners but never got the result she wanted.
Fortunately she was lucky to find Tile Doctor from the internet and I was asked to pop over and take a look to see what could be done. I was confident we could make a big difference so I went through the options with her and give her price for the job. She was happy with the price and we agreed a date for me to return and complete the work.
For grout lines cleaning I used Tile Doctor Grout Colorant Pre-Treat Cleaner, which successfully removes dirt, soil, soap scum and hard water deposits from grout joints. The product was sprayed on to the grout and left to dwell and seep into the pores for approximately five minutes to break down the soap scum and dirt before being scrubbed in using a stiff grout brush. The cleaning was successful but there were still few mouldy spots left. On these spots I used Tile Doctor Mould Away Spray that is meant for quick removal of mould from grout and silicone. One again product got sprayed on grout lines and left to dwell for five minutes and then scrubbed with stiff grout brush and then rinsed with clean water. After I had finished cleaning I express dried the tile and grout using high power heat gun.
With the area nice and dry, I had to choose the matching colour for the existing grout. There are ten colours to choose from the Tile Doctor range of Grout Colourant and on this occasion we chose Limestone as the best colour to match the tile.
The colourant is easily applied directly to the grout and in this case I applied two coats. The product is epoxy based and completely seals and rejuvenates the appearance of the grout, which not only drastically improves appearance it also makes it much easier to clean in the future. After applying the re-colourant I buffed all grout colorant excess off the tiles and the shower cubicle was ready.
My customer was very satisfied with the work and left the following comment on the Tile Doctor Feedback system
“Really, really happy with the service Tony provided and the recommendations he suggested. The work was carried out in a highly professional manner, to a high standard. I have already recommended him to friends. Thank you”
Tony Olmet
Greater Manchester Tile Doctor


 Tile Doctor Ltd
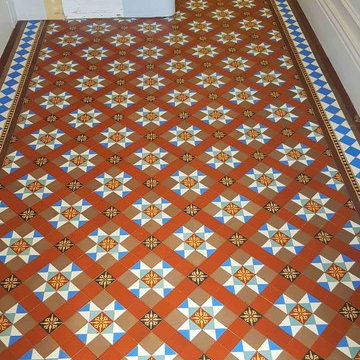
This beautiful Victorian tiled hallway was in desperate need of some TLC. The house had recently changed hands and the new owners of the house were having the entire property renovated. The last part of the renovation plan was to have the Victorian hallway tiles restoring back to their former glory. Floors are always best left until last, especially hallways as last as workmen don’t usually take a lot of care in my experience.
The house was built in the early 1900’s and was situated close to Doncaster town centre a couple of streets away in fact from the famous Doncaster Racecourse which dates to the late 1500’s.
There were a few areas of damage to the floor that would need dealing with first. This is not surprising given the age of the floor which must have seen a lot of comings and goings over the years. Our first task therefore was to repair the damage using replica tiles sourced to be as close a match to the originals as possible. We usually find any slight differences disappear once the floor has been deep cleaned and sealed. Once removing the damaged tile and cleaning the base we use a fast setting adhesive to fix the replacement tiles in place so we can get on with the cleaning as soon as possible.
Once the replacement tiles had set, we unloaded our slow speed rotary floor machine and large wet vacuum which would be used during the cleaning. To start the cleaning the floor was sprayed with Tile Doctor Remove & Go and this was left to dwell on the tiles for twenty minutes. This gives time for the product to break down old floor coatings and grime, this was followed by scrubbing the tiles with a 200-grit diamond pad fitted to the floor machine and assisted with the addition of more water to help lubricate the process. This process generates a lot of slurry as the dirt and old sealers etc are released from the tiles and this is extracted from the surface of the floor using the wet vacuum.
The next step was to give the floor an acid wash using Tile Doctor Acid Gel which is applied to the tiles and left to dwell for fifteen minutes and scrubbed in again with the floor buffer and 200-grit diamond pad. Once done the floor was rinsed with water and then dried using the wet vacuum to extract as much moisture as possible. This last process is designed to counter any alkaline salts that may be present in the floor which may cause efflorescence to appear later. It also removes old mineral deposits and generally get the tiles looking much brighter. Once complete the floor was left to dry off naturally overnight.
I came back the next day to seal the tiles first checking the floor was dry using a moisture meter. Satisfied that the floor was ready for sealing I started to seal the tiles using multiple coats of Tile Doctor Seal and Go Extra which is a fully breathable sealer which is important for old floors like this. Seal and Go Extra also leaves a lovely satin finish which works well on Victorian tiles and brings the floor alive.
This was the last step in this properties renovation, and I think you will agree that the floor responded really well to the restoration process and the colours in the tiles are now very vibrant.
Matthew Lovett
South Yorkshire Tile Doctor
 July Bamboo & Wood products Co.Ltd
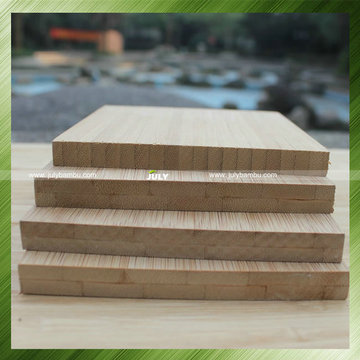
July Bamboo®, is a professional manufacturer and export of Bamboo plywood Sheets and 18mm plywood.
Bamboo panel is one of the most popular materials for customized furniture, cabinet, worktops, Skateboard,staircase, decoration etc. As a bamboo veneer and panel manufacture, we can produce different kind of size and structure according to customers’ requirements.Our bamboo panels has long been received a high reputation of high stability, color match, flatness, moisture control, style collections and providing formaldehyde free panels.
Size: Can be customized according to customer requirements
Standard size: 4'x8' x(3-40mm)
Color: Carbonized / Natural /Zebra /Strand/Mosic
Construction: Vertical/Horizontal
Material: 100% solid bamboo
Moisture: 10% +/-2%
Density: 1.05-1.15 g/cm3
Packaging: Bamboo pallets,100pcs/package or According to your requirements
Glue: Melamine,WBP,MR
Glue grade: E0,E1,E2
Certification: ISO9001,CE
Payment: T/T or L/C at sight
Delivery time: 20 days after receive the deposit
Other specifications can be customized
Email:sales@julybambu.com
web: http://www.julybambu.com/
Bamboo Plywood door skin High Quality Cheap plywood 18mm
 Tile Doctor Ltd
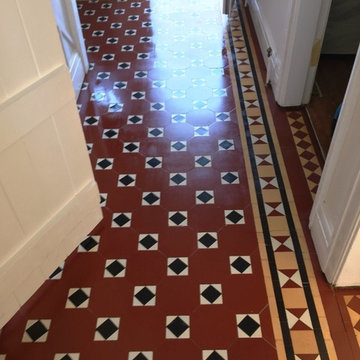
This Victorian tiled hallway was one of the most beautiful Victorian floors I have ever had the pleasure to work on. With the wide range of patterns and colours they are available in, it seems no two Victorian tiled floors are exactly the same, and this uniqueness is part of what makes them so appealing to property owners.
Unfortunately, this floor had been poorly maintained over the years, even suffering from a few loose and missing tiles. There was a thick coating of dust and dirt soiling its appearance, and the property owner was understandably keen to remedy the situation. Having realised that everyday household cleaners are not likely to achieve great results, she asked me to carry out a full professional restoration, including making some repairs where necessary. I was pleasantly surprised to find out that this property was situated in the town of Wyken, which is a few miles outside of Coventry city centre and in fact just down the road from where I live myself!
Before making a start on the cleaning process, it was first necessary to re-fix the small number of loose tiles and replace a single missing tile by the radiator. Fortunately, I’ve been working on these types of floors for some time and have built up a good collection of replacement Victorian tiles so I was able to find one that matched in nicely with the rest of the floor without too much problem.
To clean the tiles, I began by applying a layer of Tile Doctor Oxy-Gel directly into the floor with a small brush. This product is very similar to the popular Tile Doctor Pro Clean: both are strong alkaline cleaners, strippers and degreasers, with the main difference being that Oxy-Clean comes in a gel form, making it easier to control and therefore ideal for precise cleaning, or for application to vertical surfaces. Like Pro Clean and being an alkaline base it is suitable for use on all types of natural stone and tile. The Oxy-Gel was left to soak into the tiles for around ten minutes before being scrubbed in and then rinsed off carefully with water, I then used a wet vacuum to extract the now soiled cleaning solution off the floor.
The next step was to acid wash the floor using Tile Doctor Acid Gel; this served to break down alkaline mineral deposits inherent in the grout along with some excess grout that had been left on the untidily left on tile from installation. It is recommended not to use this product on acid-sensitive soon such as Marble and Limestone as it can cause irreparable etching but its fine on Victorian tiles as long as you don’t leave it on too long.
Finally, the floor was given a rinse with clean water to remove any trace of chemicals from the cleaning and to neutralise the area in preparation for sealing.
I left the floor for 48 hours to dry before returning to the property to seal the tiles. This allowed plenty of time for the floor to dry completely, which is important as any excess moisture can damage the ability of the sealer to protect against dirt and stains.
My choice of sealer for this floor was Tile Doctor High Shine; three coats in total were applied, providing – as the product name suggests – the high shine finish that the customer had requested. The sealer will provide durable surface protection going forward preventing dirt from becoming ingrained into the pores of the tile and ensuring it remains easy to clean and keeping its appearance for some time to come.
As a big fan of Victorian tiles, it was a great pleasure to restore this floor, and my customer was certainly pleased too. It’s amazing how far a little professional maintenance can go to improving the appearance of these fantastic types of floor.
Mick Gayton
Warwickshire Tile Doctor
1