
Search results for "Additional costs" in Home Design Ideas
 French Creek Designs Kitchen & Bath Design Center
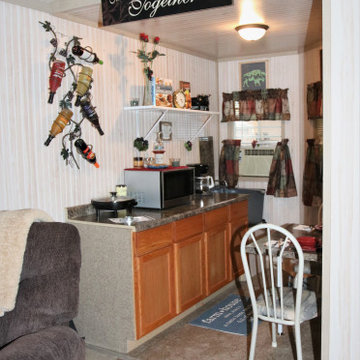
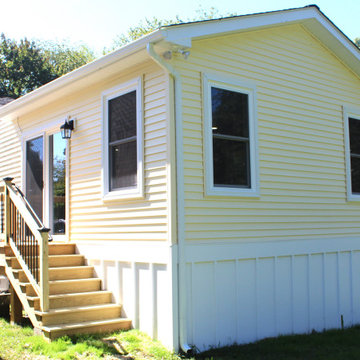
Ken & Calla Hayden purchased this unfinished deluxe playhouse from our lot in May of this year. They opted to do the handyman work themselves in creating their own ideas and fun. They have purchased many homes in Casper and remodeled and sold them since 1996. This is one of their last but funnest projects they have completed.
Stop by to choose your Shed Package with Options – Order Today!
Start with a Shed Package and design it your way. Implement your passions and innovative ideas into successful business opportunities, creative storage solutions, or a quiet retreat. We can give you that jump start with a cost-effective space and multiple package options available!
These units are priced right. Starting with an 8×8 all the way up to 16×40, easily customizable with options! Add benches and shelves for all your supplies. Choose a lofted barn for up to 16′ feet of free loft space for extra storage or creative finishes.
 Woodland Construction Group LLC
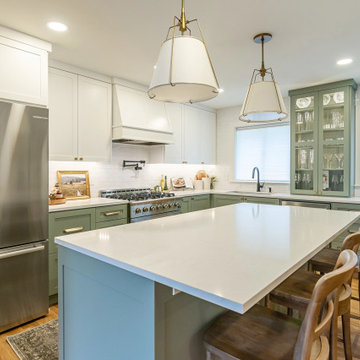
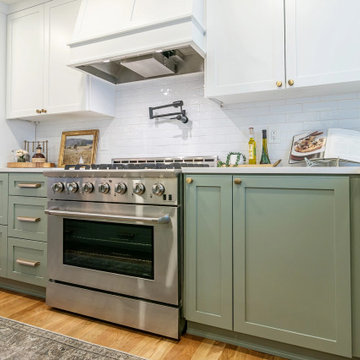
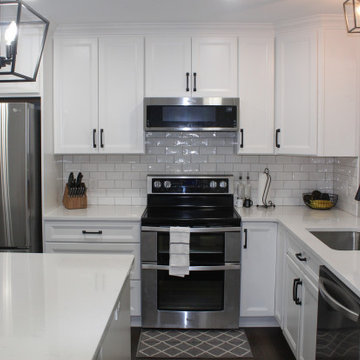
The Murray small kitchen remodel demonstrated the immense potential of a small kitchen makeover. We started by stripping everything to the studs, enabling us to redesign the layout and make adjustments to the kitchen's overall flow.
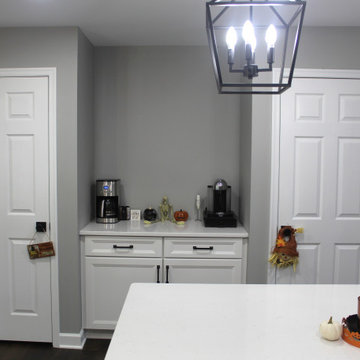
In the design layout, we closed off a doorway to allow more wall space for additional full custom cabinetry and appliances, enhancing the kitchen's functionality. We extended the counters and repositioned the refrigerator to improve the workspace and flow.
The new island, highlighted with pendant lighting and set on stylish hardwood flooring, became the focal point, providing extra counter space and a gathering spot. Additional features like under-cabinet lighting, a touch-activated faucet, and a custom hood boosted the kitchen's overall appeal and practicality.
Modern elements like the integrated speed oven in the island cabinetry, and the new hardwood flooring throughout, completed the transformation. The Murray kitchen remodel project successfully combined style and function, transforming a modest kitchen into a warm, inviting, and efficient space.

 Florida Green Construction Inc.
Certified Green Home!
Save Money approx. $150+ monthly savings on utility bills, approx. $20,000 in savings for 10 years and thousands in continued savings over the lifetime of the home, Certified Energy Star and FPL Build Smart Home.
Stay Healthy Attention people with allergies and breathing problems. This home is virtually allergen, dust, mold free. EPA certified indoor AirPLUS. You will be excited after reading our customer testimonials about how great they are feeling, living in a green home.
Be Wise by purchasing this certified Green home. Comparable cost to traditionally built homes. The home of the future at today’s price!
Your major benefits of investing in Green home: in addition to being healthy and economical, the Denise is built with sustainable construction technologies, that will keep your home competitive in the future housing market with newly built homes even in the next 10 – 15 years. Buying a Green home, you are making the best investment for your family.
Stay Safe the Denise with ICF walls is hurricane, tornado, fire resistant & sound suppressant. Substantially lower insurance premiums.
The split floor plan of this elegant & cozy home features an open living area with large great room that flows into the dining room & spacious gourmet kitchen with granite counter tops. This exquisite yet modest home is truly luxurious with ceramic tile & laminate floors throughout, large master suite, plus 2 additional bedrooms.
Find the right local pro for your project
 Woodland Construction Group LLC
The Murray small kitchen remodel demonstrated the immense potential of a small kitchen makeover. We started by stripping everything to the studs, enabling us to redesign the layout and make adjustments to the kitchen's overall flow.
In the design layout, we closed off a doorway to allow more wall space for additional full custom cabinetry and appliances, enhancing the kitchen's functionality. We extended the counters and repositioned the refrigerator to improve the workspace and flow.
The new island, highlighted with pendant lighting and set on stylish hardwood flooring, became the focal point, providing extra counter space and a gathering spot. Additional features like under-cabinet lighting, a touch-activated faucet, and a custom hood boosted the kitchen's overall appeal and practicality.
Modern elements like the integrated speed oven in the island cabinetry, and the new hardwood flooring throughout, completed the transformation. The Murray kitchen remodel project successfully combined style and function, transforming a modest kitchen into a warm, inviting, and efficient space.
 Talon Construction Inc.
Designing and building a kitchen addition is a complex process that involves multiple steps and considerations. Here is a general outline to help you get started on your kitchen addition project:
Define Your Goals and Budget:
• Determine the purpose of the kitchen addition. Is it for more cooking space, a dining area, or a combination of both?
• Establish a realistic budget for your project. Consider all costs, including construction, permits, materials, and furnishings.
Hire a Design Professional:
• Seek the services of a design build company who specializes in kitchen additions.
• Discuss your vision, needs, and budget with the design professional to create a design concept.
Site Evaluation:
• Assess the existing space and structural condition of your home to ensure it can support the addition.
• Consider factors like zoning regulations, setbacks, and building codes.
Design Development:
• Collaborate with your design professional to refine the concept, including the layout, size, and architectural style.
• Choose materials, finishes, and fixtures that fit your design and budget.
Obtain Permits:
• Consult with your local design build contractor to determine the necessary permits and approvals.
• Prepare and submit all required documents, including architectural drawings and engineering plans.
Create Construction Documents:
• Work with your design build professional to develop detailed construction drawings and specifications.
• These documents will serve as a guide for contractors during construction.
Hire a design build contractor:
• Check references, credentials, and licenses before selecting a contractor.
• Sign a detailed contract that outlines the scope of work, timeline, and payment schedule.
Construction Phase:
• Demolition: If needed, remove any existing structures or walls.
• Foundation: Construct the foundation for the addition.
• Framing: Build the structural framework of the addition.
• Plumbing, Electrical, and HVAC: Install or update utilities as required.
• Insulation: Ensure proper insulation for energy efficiency.
• Drywall and Finish Work: Complete the walls and ceilings.
• Flooring and Cabinetry: Install flooring and kitchen cabinets.
• Appliances and Fixtures: Add appliances, plumbing fixtures, and lighting.
• Paint and Finish: Apply paint and finishes to achieve the desired look.
• Final Inspection: Schedule inspections to ensure compliance with building codes.
Final Inspections and Approvals:
• Arrange for final inspections to ensure the addition meets all safety and code requirements.
• Obtain any necessary certificates of occupancy or compliance.
Move In and Enjoy:
• Once all inspections and approvals are received, you can move into your new kitchen addition and start enjoying it.
Remember that every kitchen addition project is unique, so adapt this outline to your specific needs and circumstances. Consulting with professionals and obtaining the required permits and inspections is crucial to a successful and safe project.
 Talon Construction Inc.
Designing and building a kitchen addition is a complex process that involves multiple steps and considerations. Here is a general outline to help you get started on your kitchen addition project:
Define Your Goals and Budget:
• Determine the purpose of the kitchen addition. Is it for more cooking space, a dining area, or a combination of both?
• Establish a realistic budget for your project. Consider all costs, including construction, permits, materials, and furnishings.
Hire a Design Professional:
• Seek the services of a design build company who specializes in kitchen additions.
• Discuss your vision, needs, and budget with the design professional to create a design concept.
Site Evaluation:
• Assess the existing space and structural condition of your home to ensure it can support the addition.
• Consider factors like zoning regulations, setbacks, and building codes.
Design Development:
• Collaborate with your design professional to refine the concept, including the layout, size, and architectural style.
• Choose materials, finishes, and fixtures that fit your design and budget.
Obtain Permits:
• Consult with your local design build contractor to determine the necessary permits and approvals.
• Prepare and submit all required documents, including architectural drawings and engineering plans.
Create Construction Documents:
• Work with your design build professional to develop detailed construction drawings and specifications.
• These documents will serve as a guide for contractors during construction.
Hire a design build contractor:
• Check references, credentials, and licenses before selecting a contractor.
• Sign a detailed contract that outlines the scope of work, timeline, and payment schedule.
Construction Phase:
• Demolition: If needed, remove any existing structures or walls.
• Foundation: Construct the foundation for the addition.
• Framing: Build the structural framework of the addition.
• Plumbing, Electrical, and HVAC: Install or update utilities as required.
• Insulation: Ensure proper insulation for energy efficiency.
• Drywall and Finish Work: Complete the walls and ceilings.
• Flooring and Cabinetry: Install flooring and kitchen cabinets.
• Appliances and Fixtures: Add appliances, plumbing fixtures, and lighting.
• Paint and Finish: Apply paint and finishes to achieve the desired look.
• Final Inspection: Schedule inspections to ensure compliance with building codes.
Final Inspections and Approvals:
• Arrange for final inspections to ensure the addition meets all safety and code requirements.
• Obtain any necessary certificates of occupancy or compliance.
Move In and Enjoy:
• Once all inspections and approvals are received, you can move into your new kitchen addition and start enjoying it.
Remember that every kitchen addition project is unique, so adapt this outline to your specific needs and circumstances. Consulting with professionals and obtaining the required permits and inspections is crucial to a successful and safe project.
 Talon Construction Inc.
Designing and building a kitchen addition is a complex process that involves multiple steps and considerations. Here is a general outline to help you get started on your kitchen addition project:
Define Your Goals and Budget:
• Determine the purpose of the kitchen addition. Is it for more cooking space, a dining area, or a combination of both?
• Establish a realistic budget for your project. Consider all costs, including construction, permits, materials, and furnishings.
Hire a Design Professional:
• Seek the services of a design build company who specializes in kitchen additions.
• Discuss your vision, needs, and budget with the design professional to create a design concept.
Site Evaluation:
• Assess the existing space and structural condition of your home to ensure it can support the addition.
• Consider factors like zoning regulations, setbacks, and building codes.
Design Development:
• Collaborate with your design professional to refine the concept, including the layout, size, and architectural style.
• Choose materials, finishes, and fixtures that fit your design and budget.
Obtain Permits:
• Consult with your local design build contractor to determine the necessary permits and approvals.
• Prepare and submit all required documents, including architectural drawings and engineering plans.
Create Construction Documents:
• Work with your design build professional to develop detailed construction drawings and specifications.
• These documents will serve as a guide for contractors during construction.
Hire a design build contractor:
• Check references, credentials, and licenses before selecting a contractor.
• Sign a detailed contract that outlines the scope of work, timeline, and payment schedule.
Construction Phase:
• Demolition: If needed, remove any existing structures or walls.
• Foundation: Construct the foundation for the addition.
• Framing: Build the structural framework of the addition.
• Plumbing, Electrical, and HVAC: Install or update utilities as required.
• Insulation: Ensure proper insulation for energy efficiency.
• Drywall and Finish Work: Complete the walls and ceilings.
• Flooring and Cabinetry: Install flooring and kitchen cabinets.
• Appliances and Fixtures: Add appliances, plumbing fixtures, and lighting.
• Paint and Finish: Apply paint and finishes to achieve the desired look.
• Final Inspection: Schedule inspections to ensure compliance with building codes.
Final Inspections and Approvals:
• Arrange for final inspections to ensure the addition meets all safety and code requirements.
• Obtain any necessary certificates of occupancy or compliance.
Move In and Enjoy:
• Once all inspections and approvals are received, you can move into your new kitchen addition and start enjoying it.
Remember that every kitchen addition project is unique, so adapt this outline to your specific needs and circumstances. Consulting with professionals and obtaining the required permits and inspections is crucial to a successful and safe project.
Sponsored
Columbus, OH

Structural Remodeling
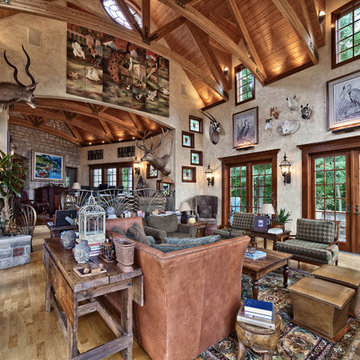
Franklin County's Heavy Timber Specialists | Best of Houzz 2020!
 Talon Construction Inc.
Designing and building a kitchen addition is a complex process that involves multiple steps and considerations. Here is a general outline to help you get started on your kitchen addition project:
Define Your Goals and Budget:
• Determine the purpose of the kitchen addition. Is it for more cooking space, a dining area, or a combination of both?
• Establish a realistic budget for your project. Consider all costs, including construction, permits, materials, and furnishings.
Hire a Design Professional:
• Seek the services of a design build company who specializes in kitchen additions.
• Discuss your vision, needs, and budget with the design professional to create a design concept.
Site Evaluation:
• Assess the existing space and structural condition of your home to ensure it can support the addition.
• Consider factors like zoning regulations, setbacks, and building codes.
Design Development:
• Collaborate with your design professional to refine the concept, including the layout, size, and architectural style.
• Choose materials, finishes, and fixtures that fit your design and budget.
Obtain Permits:
• Consult with your local design build contractor to determine the necessary permits and approvals.
• Prepare and submit all required documents, including architectural drawings and engineering plans.
Create Construction Documents:
• Work with your design build professional to develop detailed construction drawings and specifications.
• These documents will serve as a guide for contractors during construction.
Hire a design build contractor:
• Check references, credentials, and licenses before selecting a contractor.
• Sign a detailed contract that outlines the scope of work, timeline, and payment schedule.
Construction Phase:
• Demolition: If needed, remove any existing structures or walls.
• Foundation: Construct the foundation for the addition.
• Framing: Build the structural framework of the addition.
• Plumbing, Electrical, and HVAC: Install or update utilities as required.
• Insulation: Ensure proper insulation for energy efficiency.
• Drywall and Finish Work: Complete the walls and ceilings.
• Flooring and Cabinetry: Install flooring and kitchen cabinets.
• Appliances and Fixtures: Add appliances, plumbing fixtures, and lighting.
• Paint and Finish: Apply paint and finishes to achieve the desired look.
• Final Inspection: Schedule inspections to ensure compliance with building codes.
Final Inspections and Approvals:
• Arrange for final inspections to ensure the addition meets all safety and code requirements.
• Obtain any necessary certificates of occupancy or compliance.
Move In and Enjoy:
• Once all inspections and approvals are received, you can move into your new kitchen addition and start enjoying it.
Remember that every kitchen addition project is unique, so adapt this outline to your specific needs and circumstances. Consulting with professionals and obtaining the required permits and inspections is crucial to a successful and safe project.
 Talon Construction Inc.
Designing and building a kitchen addition is a complex process that involves multiple steps and considerations. Here is a general outline to help you get started on your kitchen addition project:
Define Your Goals and Budget:
• Determine the purpose of the kitchen addition. Is it for more cooking space, a dining area, or a combination of both?
• Establish a realistic budget for your project. Consider all costs, including construction, permits, materials, and furnishings.
Hire a Design Professional:
• Seek the services of a design build company who specializes in kitchen additions.
• Discuss your vision, needs, and budget with the design professional to create a design concept.
Site Evaluation:
• Assess the existing space and structural condition of your home to ensure it can support the addition.
• Consider factors like zoning regulations, setbacks, and building codes.
Design Development:
• Collaborate with your design professional to refine the concept, including the layout, size, and architectural style.
• Choose materials, finishes, and fixtures that fit your design and budget.
Obtain Permits:
• Consult with your local design build contractor to determine the necessary permits and approvals.
• Prepare and submit all required documents, including architectural drawings and engineering plans.
Create Construction Documents:
• Work with your design build professional to develop detailed construction drawings and specifications.
• These documents will serve as a guide for contractors during construction.
Hire a design build contractor:
• Check references, credentials, and licenses before selecting a contractor.
• Sign a detailed contract that outlines the scope of work, timeline, and payment schedule.
Construction Phase:
• Demolition: If needed, remove any existing structures or walls.
• Foundation: Construct the foundation for the addition.
• Framing: Build the structural framework of the addition.
• Plumbing, Electrical, and HVAC: Install or update utilities as required.
• Insulation: Ensure proper insulation for energy efficiency.
• Drywall and Finish Work: Complete the walls and ceilings.
• Flooring and Cabinetry: Install flooring and kitchen cabinets.
• Appliances and Fixtures: Add appliances, plumbing fixtures, and lighting.
• Paint and Finish: Apply paint and finishes to achieve the desired look.
• Final Inspection: Schedule inspections to ensure compliance with building codes.
Final Inspections and Approvals:
• Arrange for final inspections to ensure the addition meets all safety and code requirements.
• Obtain any necessary certificates of occupancy or compliance.
Move In and Enjoy:
• Once all inspections and approvals are received, you can move into your new kitchen addition and start enjoying it.
Remember that every kitchen addition project is unique, so adapt this outline to your specific needs and circumstances. Consulting with professionals and obtaining the required permits and inspections is crucial to a successful and safe project.
 Prima Construction
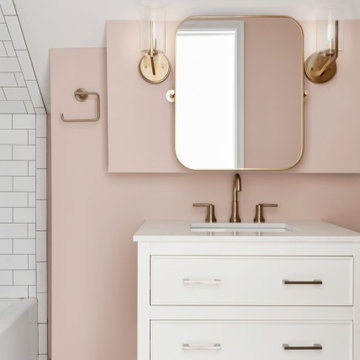
Project Goal: Utilize an unfinished story and a half-space to give each daughter a bedroom on the second floor along with a new full bath.
Challenge 1: The sloped ceilings in the area presented a challenge to how we could most cost-effectively add a bathroom within building code limits.
Solution 1: We’ve come across this challenge often when trying to fit a bathroom in sloped ceiling spaces and the budget or roof doesn't support adding a dormer. In these cases, we built out what we call a "vanity soffit", a tall soffit spanning from higher on the angled portion down to a comfortable height above the faucet bringing the upper portion of the flat wall forward. Its width typically depends on lighting needs and other considerations in the space. The vanity soffit allows the vanity to drop back to the original wall maintaining floor space and clearances while also providing just enough additional height for a practical mirror. For further flexibility, we typically recommend a pivoting mirror.
Challenge 2: Homeowners were told the floor structure was sound to finish for living space. Due to the spans, the first-floor ceiling joists did not meet the requirements to be second-floor floor joists.
Solution 2: In order to provide a solid base for the new living space, we consulted our engineer. The existing 2x6 members spanned beyond the distance they could while still structurally supporting the new living space floor. We determined throughout most of the space we needed to add in (“sister”) 2 additional 2x6 joists between the existing joists.
This additional work also took place during an unseasonably warm spell in June yet we persevered. So proud of our hard-working team.
 French Creek Designs Kitchen & Bath Design Center
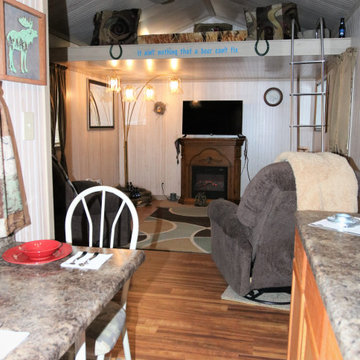
Ken & Calla Hayden purchased this unfinished deluxe playhouse from our lot in May of this year. They opted to do the handyman work themselves in creating their own ideas and fun. They have purchased many homes in Casper and remodeled and sold them since 1996. This is one of their last but funnest projects they have completed.
Stop by to choose your Shed Package with Options – Order Today!
Start with a Shed Package and design it your way. Implement your passions and innovative ideas into successful business opportunities, creative storage solutions, or a quiet retreat. We can give you that jump start with a cost-effective space and multiple package options available!
These units are priced right. Starting with an 8×8 all the way up to 16×40, easily customizable with options! Add benches and shelves for all your supplies. Choose a lofted barn for up to 16′ feet of free loft space for extra storage or creative finishes.

 Rolf Schroeder General Contractors, Inc.
The exterior of the house was refreshed by removal of all the overgrown trees and shrubs which hide the beauty of this large brick farm house. We replaced all the rotted windows and doore with new modern wood windows and doors finished with custom Boral Millwork. To add some additional sun protection we incorporated a sun trellis over the rear wall of doors. A new Front Entry Porch was designed on the front of the home to create some dimension to the home as well as add sun and rain protection to the front entry of the home. The porch was finished in custom Boral Millwork, custom standing seam metal roof, and beautiful bluestone walkway.
 Talon Construction Inc.
Designing and building a kitchen addition is a complex process that involves multiple steps and considerations. Here is a general outline to help you get started on your kitchen addition project:
Define Your Goals and Budget:
• Determine the purpose of the kitchen addition. Is it for more cooking space, a dining area, or a combination of both?
• Establish a realistic budget for your project. Consider all costs, including construction, permits, materials, and furnishings.
Hire a Design Professional:
• Seek the services of a design build company who specializes in kitchen additions.
• Discuss your vision, needs, and budget with the design professional to create a design concept.
Site Evaluation:
• Assess the existing space and structural condition of your home to ensure it can support the addition.
• Consider factors like zoning regulations, setbacks, and building codes.
Design Development:
• Collaborate with your design professional to refine the concept, including the layout, size, and architectural style.
• Choose materials, finishes, and fixtures that fit your design and budget.
Obtain Permits:
• Consult with your local design build contractor to determine the necessary permits and approvals.
• Prepare and submit all required documents, including architectural drawings and engineering plans.
Create Construction Documents:
• Work with your design build professional to develop detailed construction drawings and specifications.
• These documents will serve as a guide for contractors during construction.
Hire a design build contractor:
• Check references, credentials, and licenses before selecting a contractor.
• Sign a detailed contract that outlines the scope of work, timeline, and payment schedule.
Construction Phase:
• Demolition: If needed, remove any existing structures or walls.
• Foundation: Construct the foundation for the addition.
• Framing: Build the structural framework of the addition.
• Plumbing, Electrical, and HVAC: Install or update utilities as required.
• Insulation: Ensure proper insulation for energy efficiency.
• Drywall and Finish Work: Complete the walls and ceilings.
• Flooring and Cabinetry: Install flooring and kitchen cabinets.
• Appliances and Fixtures: Add appliances, plumbing fixtures, and lighting.
• Paint and Finish: Apply paint and finishes to achieve the desired look.
• Final Inspection: Schedule inspections to ensure compliance with building codes.
Final Inspections and Approvals:
• Arrange for final inspections to ensure the addition meets all safety and code requirements.
• Obtain any necessary certificates of occupancy or compliance.
Move In and Enjoy:
• Once all inspections and approvals are received, you can move into your new kitchen addition and start enjoying it.
Remember that every kitchen addition project is unique, so adapt this outline to your specific needs and circumstances. Consulting with professionals and obtaining the required permits and inspections is crucial to a successful and safe project.
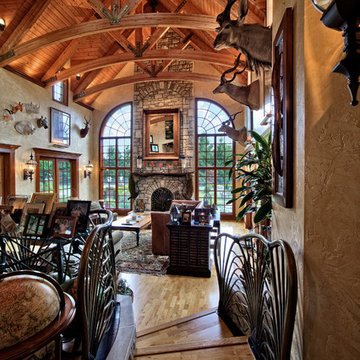
Sponsored
Columbus, OH
Structural Remodeling
Franklin County's Heavy Timber Specialists | Best of Houzz 2020!
 Talon Construction Inc.
Designing and building a kitchen addition is a complex process that involves multiple steps and considerations. Here is a general outline to help you get started on your kitchen addition project:
Define Your Goals and Budget:
• Determine the purpose of the kitchen addition. Is it for more cooking space, a dining area, or a combination of both?
• Establish a realistic budget for your project. Consider all costs, including construction, permits, materials, and furnishings.
Hire a Design Professional:
• Seek the services of a design build company who specializes in kitchen additions.
• Discuss your vision, needs, and budget with the design professional to create a design concept.
Site Evaluation:
• Assess the existing space and structural condition of your home to ensure it can support the addition.
• Consider factors like zoning regulations, setbacks, and building codes.
Design Development:
• Collaborate with your design professional to refine the concept, including the layout, size, and architectural style.
• Choose materials, finishes, and fixtures that fit your design and budget.
Obtain Permits:
• Consult with your local design build contractor to determine the necessary permits and approvals.
• Prepare and submit all required documents, including architectural drawings and engineering plans.
Create Construction Documents:
• Work with your design build professional to develop detailed construction drawings and specifications.
• These documents will serve as a guide for contractors during construction.
Hire a design build contractor:
• Check references, credentials, and licenses before selecting a contractor.
• Sign a detailed contract that outlines the scope of work, timeline, and payment schedule.
Construction Phase:
• Demolition: If needed, remove any existing structures or walls.
• Foundation: Construct the foundation for the addition.
• Framing: Build the structural framework of the addition.
• Plumbing, Electrical, and HVAC: Install or update utilities as required.
• Insulation: Ensure proper insulation for energy efficiency.
• Drywall and Finish Work: Complete the walls and ceilings.
• Flooring and Cabinetry: Install flooring and kitchen cabinets.
• Appliances and Fixtures: Add appliances, plumbing fixtures, and lighting.
• Paint and Finish: Apply paint and finishes to achieve the desired look.
• Final Inspection: Schedule inspections to ensure compliance with building codes.
Final Inspections and Approvals:
• Arrange for final inspections to ensure the addition meets all safety and code requirements.
• Obtain any necessary certificates of occupancy or compliance.
Move In and Enjoy:
• Once all inspections and approvals are received, you can move into your new kitchen addition and start enjoying it.
Remember that every kitchen addition project is unique, so adapt this outline to your specific needs and circumstances. Consulting with professionals and obtaining the required permits and inspections is crucial to a successful and safe project.

 Artistic Landscapes LLC
"Our backyard is truly a work of art! ... it is a beautifully lit and landscaped outdoor entertaining area which we will enjoy for years to come."
— Kristen Mazzotta
Brewster, New York
EXTENSIVE LANDSCAPE PROJECT
Fireplaces, Landscaping - Hardscaping & Pavers, Landscaping - Lighting, Patios, Outdoor Kitchens and Living
Work Completed:
05/05/2017
Would You Hire This Company Again?
Yes
Approximate Cost:
$90,000.00
Description Of Work:
We had two separate projects done. A retaining wall and new staircase which was done this past fall, and an outdoor living space including a patio, outdoor kitchen with pizza oven, and a fire pit area that was completed this spring.
Customer Comments:
"We could not be any happier! My husband is an owner of an Italian restaurant and has always dreamed of having his own backyard kitchen and pizza oven. We weren't sure how everything was going to work in our backyard given that our land is very hilly and sloped. Rhett's design far exceeded our expectations! Because of our sloped yard, we needed to make a few changes to the project once they began working. It ended up adding some additional cost to the original quote, but with the new design we were able to combine a future project of a fire pit area into this one. Rhett also corrected drainage issues we were having with the land. Rhett was onsite overseeing most of the process and was in constant communication with us throughout the project. We were hoping to have the entire project done in time to host our son's birthday party and Rhett assured us the work would be complete, and it was. Our backyard is truly a work of art! Before it was a dark, uninviting space and now it is a beautifully lit and landscaped outdoor entertaining area which we will enjoy for years to come. We are planning on adding a hot tub area, a smaller side patio, and an inground pool in the next few years. We are definitely hiring these guys again to do the work and look forward to completing the backyard we've always wanted! "
Level of Satisfaction:
Overall: A
Price: A
Quality: A
Responsiveness: A
Punctuality: A
Professionalism: A
 Florida Green Construction Inc.
Certified Green Home!
Save Money approx. $150+ monthly savings on utility bills, approx. $20,000 in savings for 10 years and thousands in continued savings over the lifetime of the home, Certified Energy Star and FPL Build Smart Home.
Stay Healthy Attention people with allergies and breathing problems. This home is virtually allergen, dust, mold free. EPA certified indoor AirPLUS. You will be excited after reading our customer testimonials about how great they are feeling, living in a green home.
Be Wise by purchasing this certified Green home. Comparable cost to traditionally built homes. The home of the future at today’s price!
Your major benefits of investing in Green home: in addition to being healthy and economical, the Denise is built with sustainable construction technologies, that will keep your home competitive in the future housing market with newly built homes even in the next 10 – 15 years. Buying a Green home, you are making the best investment for your family.
Stay Safe the Denise with ICF walls is hurricane, tornado, fire resistant & sound suppressant. Substantially lower insurance premiums.
The split floor plan of this elegant & cozy home features an open living area with large great room that flows into the dining room & spacious gourmet kitchen with granite counter tops. This exquisite yet modest home is truly luxurious with ceramic tile & laminate floors throughout, large master suite, plus 2 additional bedrooms.
 Florida Green Construction Inc.
Certified Green Home!
Save Money approx. $150+ monthly savings on utility bills, approx. $20,000 in savings for 10 years and thousands in continued savings over the lifetime of the home, Certified Energy Star and FPL Build Smart Home.
Stay Healthy Attention people with allergies and breathing problems. This home is virtually allergen, dust, mold free. EPA certified indoor AirPLUS. You will be excited after reading our customer testimonials about how great they are feeling, living in a green home.
Be Wise by purchasing this certified Green home. Comparable cost to traditionally built homes. The home of the future at today’s price!
Your major benefits of investing in Green home: in addition to being healthy and economical, the Denise is built with sustainable construction technologies, that will keep your home competitive in the future housing market with newly built homes even in the next 10 – 15 years. Buying a Green home, you are making the best investment for your family.
Stay Safe the Denise with ICF walls is hurricane, tornado, fire resistant & sound suppressant. Substantially lower insurance premiums.
The split floor plan of this elegant & cozy home features an open living area with large great room that flows into the dining room & spacious gourmet kitchen with granite counter tops. This exquisite yet modest home is truly luxurious with ceramic tile & laminate floors throughout, large master suite, plus 2 additional bedrooms.
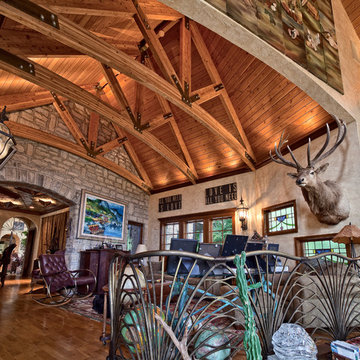
Sponsored
Columbus, OH
Structural Remodeling
Franklin County's Heavy Timber Specialists | Best of Houzz 2020!
 Globe Electric
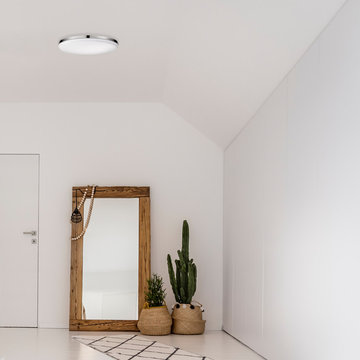
Perfect for a hallway, basement or den, Globe Electric's Ellington Flush Mount Ceiling Light is a great addition to any space. Energy Star certified with an integrated LED, this flush mount will ensure you will not have to change your fixture for 45 years and will save you $396 in energy costs over the lifetime of the light! An ultra slim design mixes with a contemporary finish to keeps it close to the ceiling and always in style. Fully dimmable, you can control the amount of light you have at any given time to create the perfect atmosphere for any situation. Includes a 5 year manufacturer's limited warranty so you can enjoy your light for years to come.

 Saikley Architects
Our busy Silicon Valley clients asked us to convert their tight-quartered 1960’s ranch house to a gracious family home that would meet their long term needs. Ease of living was paramount, both in functionality and in ordered design.
The project was completed on a moderate budget.While retaining most of the structure of the existing house to avoid costly structural changes, we opened walls to improve the sight lines and flow of the house and bring in more light. We made small additions at the front and back bedrooms to gain space for the family and relatives. An existing underused patio area was improved with a simple outdoor kitchen and overhang to extend the living space to the outside. Costs were kept down with choices of modest materials.
Everything was made to be functional. Ample storage has been built into the right places. The details of the kitchen were carefully worked out to accommodate all the wishes of the various cooks in the family. The house is set up to be easy to keep clean. Acoustic walls separate living from bedroom spaces so adults can enjoy time together while children sleep. The outdoor kitchen has easy access to the indoor kitchen and the garage, and its setup promotes socializing while cooking outdoors.
A large part of the narrow back yard was previously unusable space due to a steep slope up to a neighbor’s higher fence. With a new retaining wall and some re-grading we took back more of the yard for the patio and play space on a new lawn.
The remodeled house is a mix of contemporary and traditional elements. Cool colors have a calming effect. Traditional items such as prairie style windows, trellis, mosaic tiles, and Shaker style cabinets, break down the scale in an otherwise streamlined, contemporary design. A new gabled roof with a broad arch at the front of the house marks the entry and resolves a challenging form where the central entry is set back from walls on both sides.
Photography: Kurt Manley
https://saikleyarchitects.com/portfolio/modern-ranch/
 Florida Green Construction Inc.
Certified Green Home!
Save Money approx. $150+ monthly savings on utility bills, approx. $20,000 in savings for 10 years and thousands in continued savings over the lifetime of the home, Certified Energy Star and FPL Build Smart Home.
Stay Healthy Attention people with allergies and breathing problems. This home is virtually allergen, dust, mold free. EPA certified indoor AirPLUS. You will be excited after reading our customer testimonials about how great they are feeling, living in a green home.
Be Wise by purchasing this certified Green home. Comparable cost to traditionally built homes. The home of the future at today’s price!
Your major benefits of investing in Green home: in addition to being healthy and economical, the Denise is built with sustainable construction technologies, that will keep your home competitive in the future housing market with newly built homes even in the next 10 – 15 years. Buying a Green home, you are making the best investment for your family.
Stay Safe the Denise with ICF walls is hurricane, tornado, fire resistant & sound suppressant. Substantially lower insurance premiums.
The split floor plan of this elegant & cozy home features an open living area with large great room that flows into the dining room & spacious gourmet kitchen with granite counter tops. This exquisite yet modest home is truly luxurious with ceramic tile & laminate floors throughout, large master suite, plus 2 additional bedrooms.
148