
Search results for "Adhesive" in Home Design Ideas
 Tile Doctor Ltd
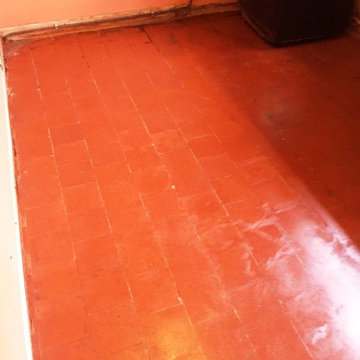
It’s been my experience that it’s not un-common to discover fantastic tiled floors hidden underneath an additional layer of flooring usually carpet or linoleum. This was the case with this property, situated in the town of Canley, Coventry, where the owner had found a Quarry tiled floor underneath Vinyl tiles which had been stuck down using an adhesive.
Quarry tiles are typically hard wearing and very durable and a sensible choice for flooring in high traffic areas of both residential and commercial properties, a tiled floor is of course a difficult to remove so it’s not surprising that tiles do get covered over rather than replaced during redecoration.
Taste’s change and like most property owners who unearth hidden tiled floors, my client was keen to restore them as an original feature. Despite the amount of adhesive and the poor state of the Quarry tiles, I was confident that the floor could be restored to new, so we agreed a date for me to come back to the property and complete the work.
The process of cleaning the Quarry tiled floor – including remove large amounts of adhesive – took a total of two days to complete.
I started by carefully removing the Vinyl tiles using a hand scraper which as you can imagine was a lot of manual effort and the adhesive proved quite difficult to remove. In the end I had to use a combination of a very coarse 50 grit pad fitted to a heavy rotary machine lubricated with water, to clear the area completely of the substance.
The resulting slurry was rinsed away, and the floor was then given a thorough acid rinse with Tile Doctor Grout Clean-Up. Grout Clean-Up is a cleaner which contains concentrated phosphoric acid, and is designed to dissolve minerals such as salts and cement left on the surface of the tile.
This was followed by a final thorough rinse with water, and the excess moisture was soaked up with a wet-vac machine.
After the cleaning process was complete, I left the floor to dry off completely for 24 hours. Upon my return to the house the next day, I checked for any dampness that could have damaged the performance of the sealer, thankfully, the floor was dry and ready to seal, and so I proceeded to apply several coats of Tile Doctor Seal & Go Extra.
Seal & Go Extra is a fully breathable sealer that provides for effective moisture transmission. It provides durable surface protection against dirt and stains, and is suitable for most kinds of internal, natural stone tiled floors, including Quarry, Victorian and Flagstone.
As you can see from the photographs the Quarry tiles came out really well and it’s hard to believe that this is the same floor.
Mick Gayton
Warwickshire Tile Doctor
 Kuarki
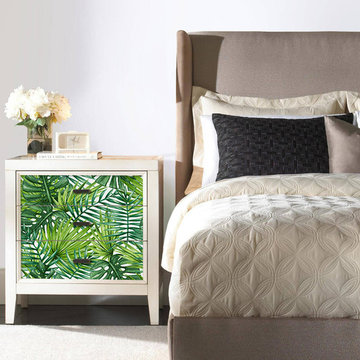
Use our Adhesive Fabric Tropical Leaves to customize your furniture.
Our Our adhesive fabrics are produced in a new generation of non-woven wallpaper, which is easier and faster to hang.
The simple addition of a Our adhesive fabrics in a fun pattern or unexpected motif can liven up your furniture and room.
Our Our adhesive fabrics are produced in a new generation of non-woven wallpaper, which is easier and faster to hang.
The simple addition of a Our adhesive fabrics in a fun pattern or unexpected motif can liven up your furniture and room.
 Kuarki
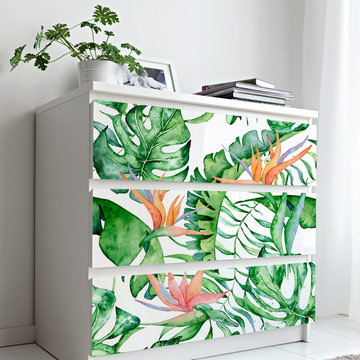
Use our Adhesive Fabric Tropical to customize your furniture.
Our Our adhesive fabrics are produced in a new generation of non-woven wallpaper, which is easier and faster to hang.
The simple addition of a Our adhesive fabrics in a fun pattern or unexpected motif can liven up your furniture and room.
Our Our adhesive fabrics are produced in a new generation of non-woven wallpaper, which is easier and faster to hang.
The simple addition of a Our adhesive fabrics in a fun pattern or unexpected motif can liven up your furniture and room.
Find the right local pro for your project
 Tile Doctor Ltd
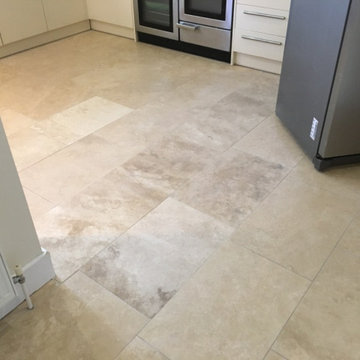
This client from Cobham contacted me in despair, she was quite concerned about her Travertine tiled floor which was cracking. She had the Kitchen and Dining room tiled with Travertine six years ago and recently several cracks had begun to appear in a long line crossing five tiles.
Several holes had also begun to appear and across the threshold to the kitchen from the dining area a serious lip had formed where a tile had risen above its neighbour causing a trip hazard.
After removing a tile from an unobtrusive area, I began to see where the issues lay. The tiler had dabbed the adhesive. This mean that instead of spreading the adhesive equally across the tile and floor they had splurged four lumps in each corner then set the tile down. This is poor working practice that will sooner or later become apparent. It means the areas were no adhesive was applied are eventually compromised resulting in cracking. This could take years or weeks to surface.
After some discussion we decided that I would remove and replace six tiles in total. The client was happy for me to go ahead and agreed a cost for the works to be done.
Returning the following week, firstly I had to remove the grout. This was done with a handheld Fein tool fitted with an oscillating blade. I thought this would be good experience from my son during the holidays, so I took him along and whilst I was working on the grout, he was able to gather the dust in a vacuum cleaner.
Next, I started to remove the cracked tiles with a chisel, starting from the cracks where the tiles would be weakest. This was noisy and messy work which required ear defenders and safety goggles. The process took several hours with the help of my son on general assistance duties. Once the tiles were removed this just left the remaining adhesive attached to the floor to get removed. This was the hardest part of the job, a lot of hammer and chisel work with as much dust gathered as possible to try and contain the mess. I had warned the customer that a considerable amount of mess would be produced and request that she should remove as much items as possible and to tape up her cupboards. Finally, I filled several holes in the sub floor so I would have a flat surface to lay the new tiles on. I left it there for the night to solidify.
Returning the next day, I began laying the replacement tiles down. Colour matching replacement tiles is a difficult task as Travertine is a natural product and colours vary greatly so these were a pretty good match.
Once the adhesive had set, I grouted in the newly laid tiles and once that was dry set about applying a sealer. For this I used two coats of Tile Doctor Ultra Seal which is an impregnating sealer that doesn’t alter the colour of the stone. This would ensure they were nicely protected and hopefully the client will not experience any further issues.
She was very happy with the result and was pleased the floor no long looked unsightly or posed a tripping hazard.
Rupert Mcleod
West Surrey Tile Doctor
 Tile Doctor Ltd
These pictures of a Victorian Tiled Hallway are from a property in Canterbury that was once a nursing home and was now being renovated to become a children’s home. The building was being gutted and extended at the same time and when the carpet was pulled up in the hallway, they were surprised to find a relatively intact Victorian tiled floor underneath.
Whilst they thought it bizarre that anyone would want to cover up such an attractive floor the carpet had protected it over the years. They realized it would make a marvellous feature at the entrance to the property, but professional restoration would be needed to do it justice. After a bit of research, they came across Tile Doctor and got in touch.
Canterbury comes under my North Kent designation, so I went to visit the property and survey the floor and quote for doing the restoration. There were a few missing and loose tiles that would need replacing and refixing also there was a lot of ingrained dirt so a deep clean and application of a new sealer would be required. I gave them a price for the work which they readily accepted, and we arranged a suitable time to carry out the work. Subject to the building schedule I had calculated the floor would take three days to restore.
On the first day I set about replacing and re-fixing the missing, broken, and loose tiles. This is delicate work as you need to extract the old tile without disturbing its neighbours and then clean up the area ready for its replacement. Being a Tile Doctor I keep a selection of stock tiles for repairs, some are reclaimed, and some are replica. Also, there are several companies still making Victorian style tiles so I can usually source what I need.
After the individual missing and broken tiles had been replaced and the adhesive had set, it was then a matter of renovating the floor as a whole. The tiles were covered in a thick layer of carpet adhesive which needed a combination of specialist tools and products to remove. First, a liberal layer of Tile Doctor Remove and Go was applied and left to dwell for thirty minutes. Next, Tile Doctor Pro-Clean was added and scrubbed in with a black pad.
This process softened the adhesive sufficiently in readiness for the next stage which involves using a set of diamond burnishing pads on a weighted buffing machine. Several applications were needed, each time with a successively finer grade of diamond pad and rinsing off the slurry in between. The tiles were first milled using a very coarse 50-grit pad, followed by 100, 200 and finally burnished with a 400-grit burnishing pads. This removed all the adhesive and dirt in the tiles, which was cleaned up using the wet vacuum.
Old Victorian floors like this do not have a damp proof membrane installed under the floor, and with a lot of water being used in the cleaning process I was concerned White efflorescence salts could appear later as the floor dried. To counter this, I gave the floor an acid wash using Tile Doctor Acid Gel to counter and dissolve the salts, it also gives the tiles another clean and will remove any old grout smears further improving the appearance of the tiles. Once done the floor was left to dry overnight.
On my return I tested the floor was dry by taking several moisture readings around the floor with a damp meter. Applying sealer to a damp floor is never advised and can lead to clouding and an unwanted finish.
Happy that the tiles were dry, a single coat of Tile Doctor Colour Grow sealer was applied. This is an impregnating sealer with a colour enhancing component to ‘lift’ the stronger colours of the floor. Colour Grow however does leave a matt appearance and as the client had asked for a shiny finish it was topped up with five coats of Tile Doctor Seal and Go. This is a compatible topical sealer which added a mid to high sheen.
By the end of the third day the Victorian floor looked brand new, and I received the following feedback from the client. Its rare to receive feedback from commercial customers so they were clearly overwhelmed with the transformation.
Did not think this glued covered bad old floor could look sooooo good Fabulous Fantastic job Looks Amazing Thank you
For aftercare I recommend the use of Tile Doctor Neutral Cleaner which isn’t as harsh as many of the products you find in supermarket. Stronger products can actually strip off the sealer over time leaving it vulnerable to dirt and detracting from its appearance.
Graham Davis
North Kent Tile Doctor

 EB GLASS
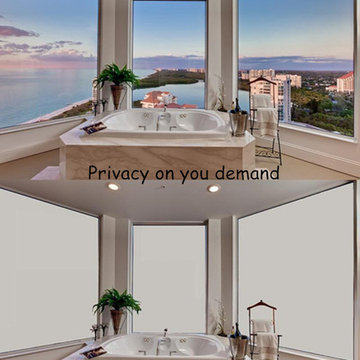
smart film, smart pdlc film, switchable film, switchable smart film, switchable pdlc film, adhesive smart film, adhesive pdlc film, adhesive smart pdlc film, smart pdlc glass, switchable glass, intelligent glass, smart glass, switchable pdlc glass.
EB GLASS
www.dyebinternational.com www.ebsmartglass.com
Pls contact: ebinternational@126.com
skype: francisdong6093
Whatsapp:+86-13665461054
 EB GLASS
smart film, smart pdlc film, switchable film, switchable smart film, switchable pdlc film, adhesive smart film, adhesive pdlc film, adhesive smart pdlc film, smart pdlc glass, switchable glass, intelligent glass, smart glass, switchable pdlc glass.
EB GLASS
www.dyebinternational.com www.ebsmartglass.com
Pls contact: ebinternational@126.com
skype: francisdong6093
Whatsapp:+86-13665461054
 EB GLASS
smart film, smart pdlc film, switchable film, switchable smart film, switchable pdlc film, adhesive smart film, adhesive pdlc film, adhesive smart pdlc film, smart pdlc glass, switchable glass, intelligent glass, smart glass, switchable pdlc glass.
EB GLASS
www.dyebinternational.com www.ebsmartglass.com
Pls contact: ebinternational@126.com
skype: francisdong6093
Whatsapp:+86-13665461054
 Kuarki
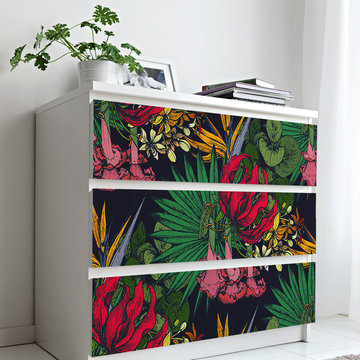
Use our Adhesive Fabric Tropic to customize your furniture.
Our Our adhesive fabrics are produced in a new generation of non-woven wallpaper, which is easier and faster to hang.
The simple addition of a Our adhesive fabrics in a fun pattern or unexpected motif can liven up your furniture and room.
Our Our adhesive fabrics are produced in a new generation of non-woven wallpaper, which is easier and faster to hang.
The simple addition of a Our adhesive fabrics in a fun pattern or unexpected motif can liven up your furniture and room.
 Kuarki
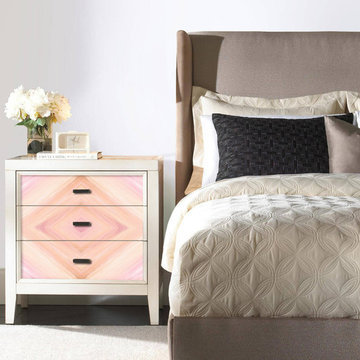
Use our Adhesive Fabric Square Pastel to customize your furniture.
Our Our adhesive fabrics are produced in a new generation of non-woven wallpaper, which is easier and faster to hang.
The simple addition of a Our adhesive fabrics in a fun pattern or unexpected motif can liven up your furniture and room.
Our Our adhesive fabrics are produced in a new generation of non-woven wallpaper, which is easier and faster to hang.
The simple addition of a Our adhesive fabrics in a fun pattern or unexpected motif can liven up your furniture and room.
 Kuarki
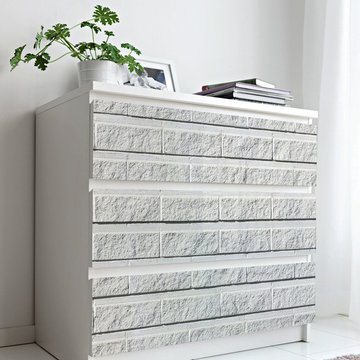
Use our Adhesive Fabric White Brick to customize your furniture.
Our Our adhesive fabrics are produced in a new generation of non-woven wallpaper, which is easier and faster to hang.
The simple addition of a Our adhesive fabrics in a fun pattern or unexpected motif can liven up your furniture and room.
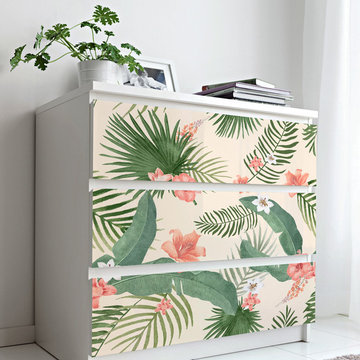 Kuarki
Use our Adhesive Fabric Watercolor Leaves to customize your furniture.
Our adhesive fabrics are produced in a new generation of non-woven wallpaper, which is easier and faster to hang.
The simple addition of a our adhesive fabrics in a fun pattern or unexpected motif can liven up your furniture and room.
Our adhesive fabrics are produced in a new generation of non-woven wallpaper, which is easier and faster to hang.
The simple addition of a our adhesive fabrics in a fun pattern or unexpected motif can liven up your furniture and room.

 Martine Harris Art
This original painting printed on canvas can be ordered in different sizes.
It is as a country side “out of time” landscape, with semi abstract characters.
The tones of its colors make it a fairly universal decorative object and suitable for many different rooms.
You will discover multiple details while watching this painting originally painted on canvas by Franco-American Artist Martine Harris.
™️©️2020 all rights reserved.
All kind of supports & sizes available on link: ⬇️
https://www.pictorem.com/gallery/Martine.Harris
9