
Search results for "Advised recommendations" in Home Design Ideas

 Carson Douglas Landscape Architecture
Joe Dodd
Example of a mountain style home design design in Santa Barbara
Example of a mountain style home design design in Santa Barbara


Find the right local pro for your project
 Moderne Builders
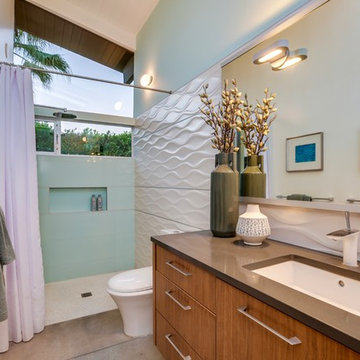
Gorgeous master bath with dramatic retro "wave" tile. Peak Photography
Example of a 1950s bathroom design in Los Angeles
Example of a 1950s bathroom design in Los Angeles
 Ursus Homes, Inc
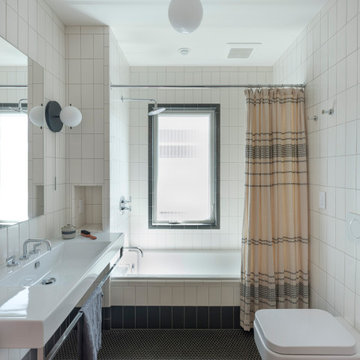
Inspiration for a contemporary white tile mosaic tile floor, gray floor and single-sink alcove bathtub remodel in Seattle with a wall-mount toilet, a wall-mount sink and a niche
 Tile Doctor Ltd
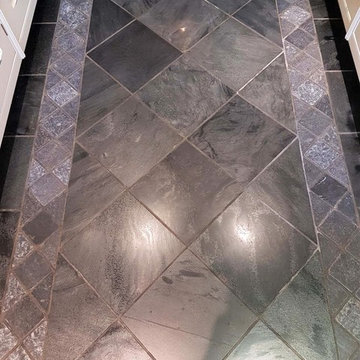
I was recently asked to survey an unusual stone floor at a house in in Harrogate comprising of Slate inlaid with Granite. The client advised that it had not been cleaned properly for 20 years and wanted it renovating! It was now definitely overdue a deep clean and professional attention. Fortunately, having worked on these floors for many years I knew I could make a substantial impact and transform its appearance. Fossilized slate is a beautiful stone when cleaned and sealed correctly.
The owner confessed they had actually been sealing the floor every two years but without a deep clean first, so they were effectively sealing in the dirt each time. I discussed with them the process I would use to clean and re-seal the floor and we agreed a price to carry to out the work.
To remove the layers of old sealer and dirt used a set of Tile Doctor Diamond Burnishing pads. The pads are attached to a rotary floor machine starting with the coarse 400-grit pad which was lubricated with a dilution of Tile Doctor Remove and Go to help strip the floor of dirt and layers of sealer. After rinsing and extracting the soil I worked through the different grades of pads in sequence finishing with the 1500-grit and this time using just water for lubrication.
A set of diamond handheld burnishing blocks were then used to clean up the edges and corners where the large 17” pads struggle to reach. This ensures all areas are treated and free of dirt and old sealer.
The floor was then rinsed and extracted again to remove the remaining soil. I find a wet vacuum is an invaluable tool for this. The floor was then left to dry out overnight ready for sealing the next day.
I returned the next day to seal the floor, first checking with a damp meter that the floor was dry, and the moisture reading was below the acceptable level. These results were fine, so I had a green light to continue and seal the stone.
The customer wanted a shine on the floor so rather than apply a satin sealer which I felt wouldn’t adhere to the stone properly I decided to polish the floor further with a the last of the four burnishing pads which is a very fine 3000-grit pad. You don’t need to use a lot of water with this last pad just a small amount sprayed onto the floor using a technique we refer to as a ‘Spray Burnish’.
To seal the floor, two coats of Tile Doctor Colour Grow were applied. This is an impregnating matt sealer which intensifies the natural colours of this beautiful stone and provides long lasting durable protection.
Even I was impressed with the finished result but more importantly the client was over the moon. To keep the floor looking its best I recommended they use Tile Doctor Stone Soap which is pH neutral. You should always read the label in detail when choosing a floor cleaning product as many are too strong and not recommended for sealed stone surfaces as they will prematurely erode the sealer.
Nigel Stoker
North West Yorkshire Tile Doctor
 Floor Coverings International of East Lake
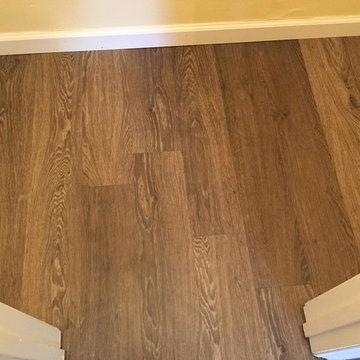
Example of a large classic hallway design in Tampa with yellow walls

 Tile Doctor Ltd
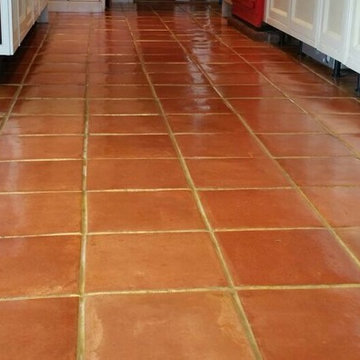
Here’s an interesting job I completed recently in the town of Lymington which is a lovely costal town within the New Forest and on the west side of the Solent. This Terracotta tiled floor was installed in the kitchen and was suffering from an efflorescence issue due to an ongoing leak which resulted in the salts in the water becoming deposited on the surface of the tiles as the water evaporated leaving a white bloom on the surface.
This process is more commonly known as efflorescence and is particularly common in old properties which have no damp proof membrane under the floor and white staining by the cupboards is especially visible in the below photograph.
My client was eager to have the problem fixed, and so enlisted Tile Doctor to get the job done.
To remove the efflorescence, the Terracotta tiled floor was acid washed using a mild dilution of Tile Doctor Grout Clean-Up which is primarily sold to remove grout smears but is equally effective at removing mineral deposits such as the white salts left behind by efflorescence.
The solution was scrubbed into the tiles using a stiff scrubbing brush and was successful at removing the white staining. Naturally it’s not advised to leave acid too long on any surface so the floor was treated in sections and then rinsed off with water and the residue removed using a wet-vacuum.
Following this, the floor was power-scrubbed in combination with a diluted solution of Tile Doctor Pro-Clean. Pro-Clean is a versatile cleaner that also contains stripping properties, allowing it to break down and remove old sealers, it also does a nice job getting the grout clean.
With the efflorescence treated and the floor now clean I was now happy with the condition of the tiles and give them a final rinse under pressure to ensure the floor was neutralised and any trace of products removed.
The Terracotta tiled floor was then left to dry overnight and I came back to seal the floor the next day. To seal the tiles I used three coats of Tile Doctor Seal & Go Extra, which provides a robust surface seal, and is recommended for internal floors with the damp issues.
Hopefully this quick report has offered some useful advice on how to treat efflorescence which is quite a common problem; naturally if you have further questions Tile Doctor does offer a free advice service so do get in touch.
Charles Okwechime
Hampshire Tile Doctor
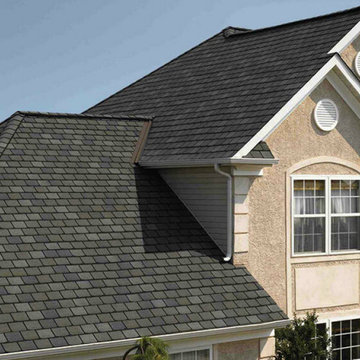
 Southern Roofing Systems of Orange Beach
"Are you in search of a reliable roofing contractor in Orange Beach? Contact Southern Roofing Systems for high-quality and reasonably priced roofing services. We have a committed team whose sole purpose is to satisfy our customers. Our team's dedication to offering top-notch roofing services has made our work stand out. At Southern Roofing Systems, services are delivered on time, with customer experiences specially tailored for each client. Our professionals have undergone credible training; they're also licensed for their jobs. Their vast knowledge of roofing has made it possible for them to provide customers with unsurpassed services. We believe that a roof should do more than just protecting your building. Our team is constantly working on expanding its expertise and familiarizing itself with the latest roof designs. Give our team a chance, and you can rest assured to have a quality and appealing roof after we're done with the job.
Our company stands out for two primary reasons; our expertise in roofing and our reliable customer support. Customer services mean more than just prompt feedback to us; it means patiently advising our customers and helping them make the right choices. Our customer care team is knowledgeable; thus, the information and recommendations they offer customers are dependable. We cover Mobile, Tillman's Corner, Semmes, Saraland, Satsuma, Theodore, Spanish Fort, Daphne, Fairhope, Gulf Shores, and Orange Beach.
Southern Roofing Systems - Orange Beach offers everything from Commercial Roofing, Residential Roofing, and Roof Repairs. Additional services include Roof Insurance Claims Services, Metal Roofing, Shingle Roofing, Storm Repair and Emergency Roof Repair, Tile Roofing, Slate Roofing, and Flat Roofing, to Roof Flashing repair and inspection.
You can rely on Southern Roofing Systems for commercial or residential roofing projects. We promise to get your job done to a very high standard, on time, and on a budget."
 KMS Gardens and Design
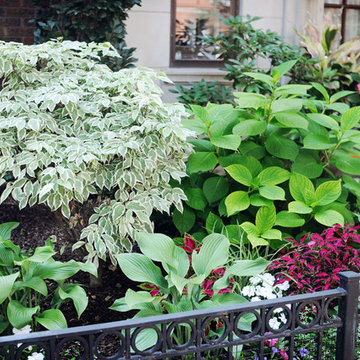
A mixed shrub, perennial and annual border creates texture and color for the summer season.
Photo of a mid-sized traditional partial sun side yard formal garden in Chicago for summer.
Photo of a mid-sized traditional partial sun side yard formal garden in Chicago for summer.
 Victor Mulbauer
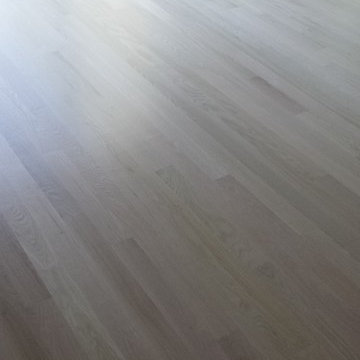
New Installation of Red Oak Wood, 3 1/4 in width. White-washed Bona Stain was used, Bona Finish, as well as Bona Traffic HD. Dustless sanding.
Living room - contemporary living room idea in Detroit
Living room - contemporary living room idea in Detroit
 Warm Timber Saunas & Wine Cellars
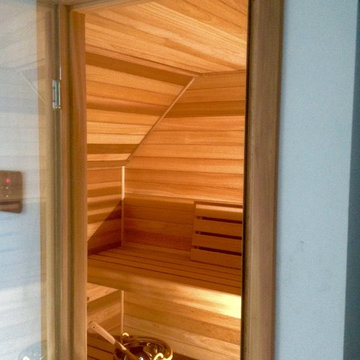
This previously unused attic space is now a sauna/yoga room. The left sauna wall follows the attic rafters down diagonally to allow a wider space for leg room on the twin sauna benches.
 Eagle River Cabinets
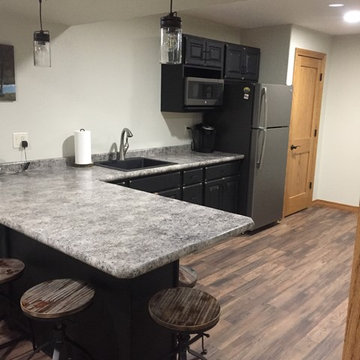
Wet Bar designed by Allison Brandt.
Showplace Wood Products - Oak with Charcoal finish sanded through with Natural undertone. Covington door style.
https://www.houzz.com/pro/showplacefinecabinetry/showplace-wood-products
Formica countertops in Perlato Granite. Applied crescent edge profile.
 Tile Doctor Ltd
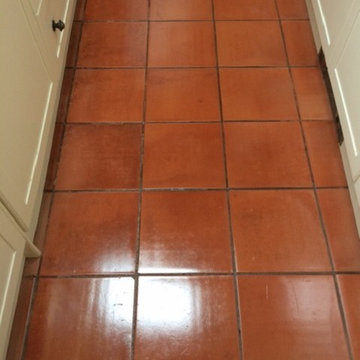
Terracotta is an interesting type of stone manufactured using a variety of techniques dependant on the country of origin which leads to a number of differences such as Spanish Terracotta being less porous than its Mexican counterpart: the former is semi-hand made and finished in a factory kiln, while the latter is completely handmade. Spanish Terracotta is therefore a lot less than porous and ultimately, of a higher quality.
But despite the Spanish Terracotta being less porous, and therefore being less prone to ingrained dirt, it still, like any other stone, needs regular maintenance to keep it looking smart. In the tiling trade, we quite often refer to this as a good old fashioned ‘Clean and Seal’ and this is exactly what was requested by this property owner in Halifax, for their Spanish Terracotta tiled floors in the kitchen and adjacent hallway.
I cleaned both sets of Terracotta tiles using the same process, which involved the application of our reliable alkaline cleaner known as Tile a Doctor Pro Clean, diluted with five parts of warm water. Once the solution had been left to dwell for a short period, it was scrubbed into the tiles to remove all dust, dirt, and general muck. This created a slurry of cleaning residue, which I promptly soaked up using a wet vac. A wet vac machine is an essential tool when it comes to cleaning porous tiles since, unlike a traditional mop and bucket, it sucks the excess trapped dirt out of the clay and thus provides a superior clean.
Following this, I applied a small amount of our heavy duty remover, known as Tile Doctor Remove & Go, to deal with some of the more stubborn stains and paint splashes, before rinsing with clean water and wet vaxing in a similar fashion to before.
Once the clean had been completed I left the tiles to dry completely. This can take 12 to 24 hours depending on numerous factors including whether a Damp proof Membrane and underfloor heating has been installed which can really help reduce drying times. Letting the tiles dry completely before sealing is paramount as moisture can cloud the sealer and affect its performance.
Upon my return to the property I ran some quick damp tests, which revealed the tiles were ready to be sealed. I then applied several coats of Tile Doctor Seal and Go, our topical sealer which provides a satin finish and accentuates colour. A new coat of this product is recommended every six months on Terracotta to ensure the continuous protection of the tiles’ soft clay particles.
My customer was extremely pleased with her refreshed Terracotta tiles. It goes to show what a big difference a bit of regular maintenance can make. I advised the customer that an everyday cleaner called Tile Doctor pH Neutral cleaner can also be used regularly to keep the tiles looking great without damaging the sealer.
Nigel Stoker
North West Yorkshire Tile Doctor
 Eco Star Painting
Step #1 Apply BM CLEAN
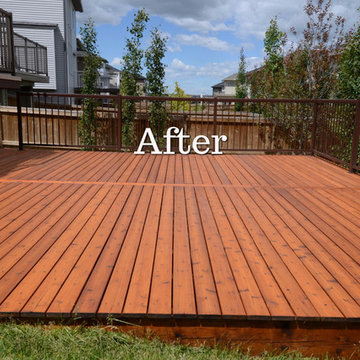
As you can see in the 'Before' picture above, this cedar deck was extremly dirty. This required an extra step in comparison to the typical deck stripping process. My paint rep at Benjamin Moore recommended a product called CLEAN. It comes in one gallon plastic containers and can be applied out of a plastic pail or with a garden sprayer. We used a Garden sprayer and chose a flat tip for application. The three gallon garden sprayer was filled with 2 gallons of water and one gallon of the CLEAN solution. This is a strong mixture and can be reduced to up to 6 parts water and one part of the Benjamin Moore CLEAN.
This approximately 22x20 deck had a board running perpindicular to the rest of the floor boards which divided it into 2 equal parts. Our method was to apply the solution to 3-4 of these 10' boards at a time. Allow it to set up for a few minutes and then scrub away with the deck brush. The agitation loosens up the dirt and grime and is then removed with a pressure washer a board a time. The flat tip on the pressure washer was almost the same width as the floor board. It is important to clean the sides of the board too because any remaining dirt or stain will be visible.
Benjamin Moore Deck Restoration products named Clean,Restore,brighten
Step #2 Apply BM RESTORE
The second step is exactly the same as the first step but with a different solution called Benjamin Moore RESTORE. The deck was dry before we started the 2nd step becuase it was baking hot outside. You use the same 2/1 mixture of water to chemical. This chemical will remove the stain still present in the deck floor. Make sure to rinse the garden sprayer clean before adding the restore solution. Unlike the BM CLEAN, the BM RESTORE has an orange-ish color in appearance. It did a fine job of removing most of the stain, but not 100% of it. There were a few areas that required a 3rd coat of restore but the process was quicker.
Step #3 Apply BM BRIGHTEN
The third step is exactly the same as the first two step but the chemical solution used was Benjamin Moore 'BRIGHTEN'. Again, the garden sprayer was cleaned and filled with 2 parts water and one part Brighten. The brightener not only lightens the wood but it also neutralizes the previous stripper solution. As stated before the Restore adds a bit of color and the Brighten will remove any traces of it. you still have to agitate the brightener with a scrub brush and either pressure wash it off or use a garden hose. We used the pressure washer for faster results. After it dries the wood look a lot brighter but we still found some spots of stain that had not come off.
Apply Sikkens Stain
As stated above the stain we used is called "Sikkens Proluxe" which is basically just a slight re-branding of the classic Sikkens Stain. The formula is exactly the same. In fact, the secondary name is still called 'Cetol' SRD RE. The color chosen was "CEDAR".
The weather was quite hot for a typical Calgary Spring day so we stained a 10' section of floor board at a time. The deck has a metal railing so the supporting feet had to be brushed in with a 2.5" natural bristle paint brush. for the rest of the job a 6" Wooster natural bristle deck brush was used. The handle was remove and a broom handle was inserted. The stain was stirred frequently and poured into a plastic Simms brand roller pan. Semi transparent Oil based stain has the consistency of water so you need to be careful not to spill any of it. When applying to a board you hit the sides first with the brush and then fillin the rest. Ten feet of floor board can be stain in a short period of time. it's important not to leave any streaks so it is adviseable to back-brush the entie length before moving on to the next board. The staining only took about 2.5 hours to complete. One coat is the manufacturers recommendation.
One last thing about Sikkens Stain. To maintain this beautiful look the deck should be re- coated once a year, preferably every spring. It's like applying sunscreen yearly to protect the wood against further damage. Two gallons was enough to cover this 450 sq foot deck.
 Tile Doctor Ltd
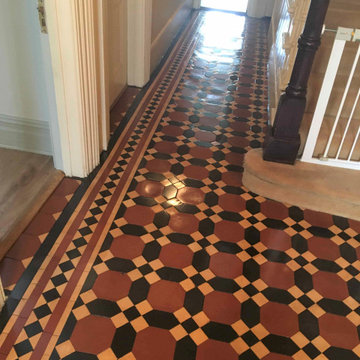
This Victorian tiled hallway floor at a property in Twickenham was in great physical condition considering its age but just hadn’t been cleaned or sealed in quite a few years. Over the years the protective sealer has worn away and dirt tracked in from outside had sunk deep into the pores of the tile. The floor looked dull, and my customer was finding it hard to clean and maintain effectively.
To remove the ground in dirt from within the pores of the tile I needed to apply a strong cleaning product that would breakdown the dirt and deal with any remaining sealer left on the floor. Usually, I find the sealer down the center of the hallway is worn away with use, but you still find traces towards the wall. To do the renovation effectively I would need to remove all the sealer during cleaning otherwise you risk an uneven appearance.
The best sealer stripper and cleaner for the job is a product called Tile Doctor Remove and Go so I mopped a strong dilution onto the floor and then left it to soak in for around fifteen minutes. To get the best from this product it’s advised to give it a long dwell time thereby allowing it to break down old sealer and dissolve the dirt and contaminants.
The floor was then scrubbed with a rotary floor machine to work the product into the pores of the tile and release the trapped dirt. After the first pass the floor was rinsed with a little water and the soil extracted using a machine. After inspecting the floor some areas were re-treated using the same process to ensure all the sealer and dirt had been removed.
After a final inspection I left the tiles to dry off overnight.
The following day I returned and started by taking moisture readings from different parts of the floor. Its not a good idea to apply a sealer to a damp tile and damp areas should be dried out with a heat gun first.
My client was keen to have a classic shiny appearance, so I chose Tile Doctor Seal and Go to add protection to the tiles. The sealer will prevent dirt becoming ingrained in the tile and protect the floor from staining caused by spillages whilst making it very easy for our customer to maintain in the future. As you can see from the pictures, it also gives a nice sheen finish to add lustre to the floor as requested by my customer.
Before leaving we had a quick chat about maintaining the floor and a warning about the use of strong floor cleaning products which can be over strong and prematurely strip the sealer away over time. For this floor I recommend Tile Doctor Neutral cleaner which is an effective cleaner but as its name suggests is pH neutral and mild enough not to harm the sealer.
Jonathan Oldham
South Middlesex Tile Doctor
 Urban Oasis Landscape Design
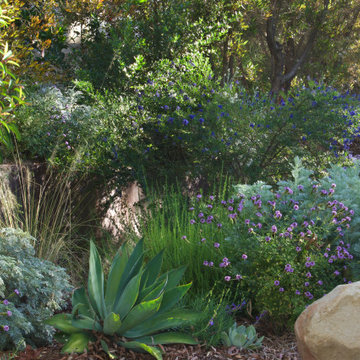
A wild, native spirit radiates out from within the structured lines and angles of the hardscape - softened by a lush and biodiverse selection of California native plants in a velvety palette of soft silvery grays, greens, and purples with the occasional pop of yellow and orange.
 Cindy McCarley Designs
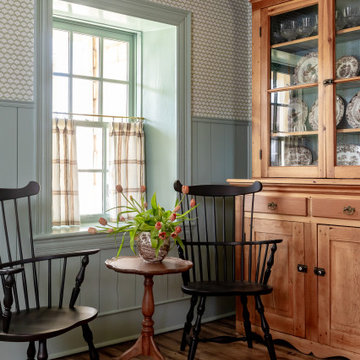
Historic 1880s farmhouse renovation in Spring City, Utah by certified kitchen & bath designer Cindy McCarley. Traditional meets farmhouse chic with sage green cabinetry, marble backsplash, floral wallpaper & copper details. Award-winning interior design preserving vintage charm with modern luxury.
 Get My Rugs LLC
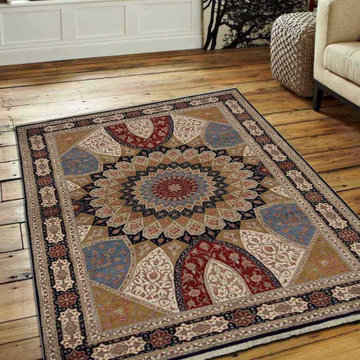
The excellent charm and nice design of this shift wool floor cover can enthral you to the intense and you'll for sure embody this beautiful shaded swish floor cover to your home décor. No matter whether you have got a classic or mod theme of décor at your room, this contemporary wool floor cover can complement it well as it may be a mix of traditional and up to date designs.
Product Features:-
• Construction: Handmade
• Technique: Hand knotted Aras
• Shape: Rectangle
• Pile: 0.75 inches
• Pattern: Oriental
• Material: Wool
• Weight: 30.26 lbs
• Origin of Manufacturing: India
• Recommended Use: Indoor
• Eco-Friendly: Yes
• Shipping: Free Shipping
Handmade by skilled artisans enhancing in-depth color and product durability.Vintage designed and weaved by Hand knotted technique.Soft wool yarn with ultra-plush pile height of 0.75 inches for underfoot comfort.Designer area rugs perfect for Living Room, Bedroom, Study Room, Dining Room, Foyer.Free shipping and quick order dispatch. With quality product we deliver quality services to customers.
Weave:- The weaving of hand knotted rug is entirely different than that of hand Tufted or hand-woven rugs. To create a hand knotted rug, skilled weavers use a hand-knotting gun to create a weave on the top sheet, with a sturdy looped pile which can be left as is or cut. The height of the pile is determined by the initial setting of the loop-length, or, on how much yarn is cut off. Hand knotted rugs have grown popularity owing to quicker preparation, affordable price ranges and for great durability amidst heavy footfall.
Material:- In the universe of rug-fabrics, wool is considered one of the finest, owing to the touch, feel & practical benefits of this natural wonder-fiber. Wool has many qualities that place it far ahead in the rug-making business – e.g. high durability, warmth, rich look & feel etc. Wool is a pre-eminent choice for a classy rug that can last you for decades.
Pile:- The pile of this rug is ideal for any kind of room where traffic is high. This rug will be long lasting if regular cleaning is done. The weaving of this rug is done in such a fashion that doesn’t allow the dust to reach inner surface and offers amazing durability.
Proper Set Up & Care:- Hand knotted rugs are heavy rugs and fits well with any kind of flooring. Unlike rugs of other weave the hand knotted rugs have a cotton backing which makes it anti-skid. These rugs are very durable if maintained properly.
Floor Protection:- Though hand knotted rugs have cotton backing which makes it anti-skid and harmless to the floor but you can always use a high quality rug pad to provide an extra level for floor protection.
Cleaning Methods:- It is advised to choose the vacuum cleaning option as the material is wool and the weaving is hand knotted. For any stain, the users can opt for professional dry cleaning method.
4