
Search results for "Backing effectively" in Home Design Ideas
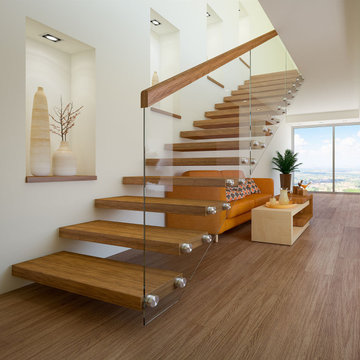
 Guangzhou Longlass New Material Co., Ltd
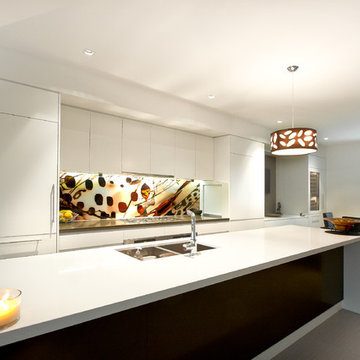
Laminated glass is a safety glass that uses one or more layers of PVB film (polyvinyl butyral) or SGP between two or more pieces of glass. It is made under a special process and is combined into a whole through high temperature and high pressure within a certain period of time.
Longlass Laminated Glass Advantages:
1. We have high class dust-free constant temperature and humidity laminating production line.
2. We are the approved processor by SentryGlass
3. Our products meet the requirements of BS EN12600:2002 Class 1 (C) 1 ,and ANSI Z97.1-2015 Class A ,type 4.
An impact perfbimance test for materials in accordance with BS EN12600:2002 has been performed on the four given samples. The performance classification of the all test samples is Classification 1 (C) 1.
Performance Test
Sample:5mm tempered glass + 1.14 PVB + 5mm tempered glass
Impact Test: In accordance with Clause 5.1 of ANSI Z97.1-2015 Type 4
Thermal Test: In accordance with Clause 5.3 of ANSI Z97.1-2015
The distinguish between PVB & SGP:
1.The shear modulus of SGP is 50 times of that of PVB.
2.The Tear strength of SGP is 5 times of that of PVB.
3.The bearing capacity of SGP is 2 times of that of PVB.
4. The bending of SGP is only 1/4 of that of PVB.
In a word, SGP has better performance than PVB, and it's widely applied in glass path, glass ceiling, glass floor, Stair Treads,etc.
Longlass Laminated Glass Features
Energy saving
When sunlight directly shines on a piece of colorless laminated glass, the PVB interlayer film can absorb most of the heat and only radiate a part of the heat back indoors, making the indoor and outdoor heat difficult to conduct, reducing heat energy consumption, thereby maintaining indoor temperature and saving air conditioning Energy consumption.
Security
it can withstand the penetration of accidental impact. Once the glass is damaged, its fragments will still stick together with the intermediate film, which can avoid personal or property damage caused by the glass falling, and the whole piece of glass remains intact and can continue to withstand impact, wind and rain
Sound insulation
The interlayer film has the function of blocking sound waves, so that the laminated glass can effectively control the transmission of sound and play a good sound insulation effect.
Noise reduction
In the process of sound wave transmission, the glass on both sides of the film is reflected back and forth, and is attenuated and absorbed by the soft film. Generally, the noise can be reduced by 30-40 dB. The thicker the film, the better the noise reduction effect.
Decorative effect
The laminated glass can be sandwiched with various patterns, which can achieve the decorative effect, and there are also decorative effects such as ice glass.
UV resistance
The interlayer film has the function of filtering ultraviolet rays; the special PVB film can make laminated glass weaken the transmission of sunlight, effectively block ultraviolet rays, reduce the fading of indoor fabrics. The color PVB interlayer film has different light transmittance, and can control the ultraviolet and heat gain as needed. It will not block the penetration of visible light .


Find the right local pro for your project
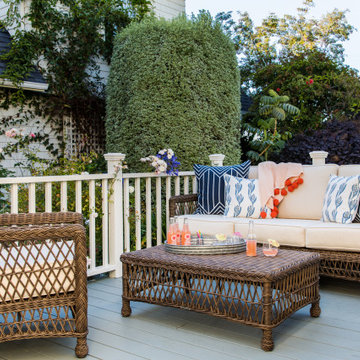



 Austin Ganim Landscape Design, LLC
This spring container has been planted with a variety of perennials (English primrose & Lamium), annuals (pansies), bulbs (daffodils & hyacinths) and incorporates freshly cut forsythia branches.
Austin Ganim Landscape Design, LLC
 Adrienne DeRosa
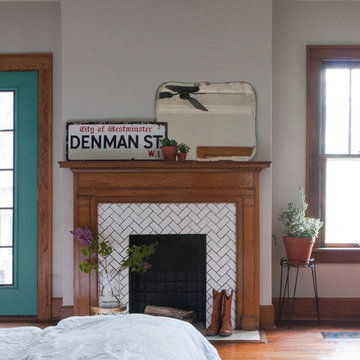
While renovating the master bedroom last year, the Mohrmans replaced the fireplace surround with white ceramic tile. Placed in a herringbone pattern, the tile and dark grout work together to lend a period feel to the room.
As with many renovations, there were some surprises along the way. "From what we could tell the mantle had never been removed", Chelsea explains. "We removed the mantle and found bits and pieces of photos, ticket stubs, coins, etc that had fallen back there over the years. Some of the items were dated back to the 1930’s." Being the eighth owners of the home, it was hard to tell whether there was something there from every previous owner, "... but we gathered it all, placed it in a tin, added our own piece, and placed it back inside the mantle as a time capsule for future owners to find in decades to come."
Sponsored
Westerville, OH

Custom Home Works
Franklin County's Award-Winning Design, Build and Remodeling Expert
 Jay Sifford
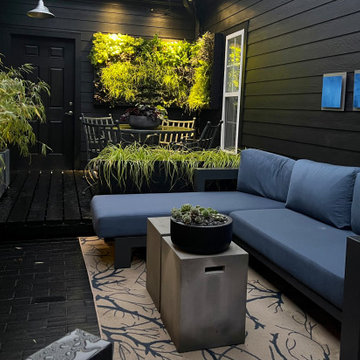
The walls and brick flooring were painted black, which made the space feel larger. Vibrant blues in squares and rectangles were added to mimic the sky and pull it down visually to ground level. A step-up deck was built to separate the dining area from the seating area. The planter filled with 'Everillo' carex further divides the spaces. A living wall was added to create an immersive garden experience.
 Marc-Michaels Interior Design
Aaron Flores, High Res Media
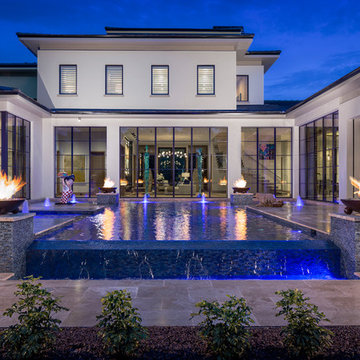
Inspiration for a contemporary pool remodel in Jacksonville
Inspiration for a contemporary pool remodel in Jacksonville

 CARBO Landscape Architecture
Rear garden terraces are framed by forest and lower rain gardens, filled with native birch, willow, fern and iris. Roof drains on the residence and french drains in the lawn terrace fill the space defined by low stone walls. Cypress logs were harvested from nearby river bottoms and milled to create the bridge that connects the terraces. The rain garden extends from forest edge to a large window in the master suite of residence. Photo Credit :Rebecca A O'Neal
 The Mine
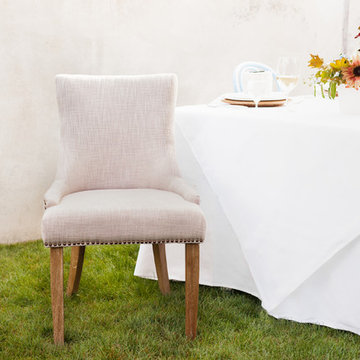
Mercer Lester Dining Chairs (Set of 2)
The Lester dining chair is full of elegant ease with gentle, low sloped arms and a slight hourglass shape to the seat back. The effect is easy-going and timeless.
Includes 2 chairs
Materials: Wood / Fabric
Usage: Assembly Required
Warranty: 30 Day Warranty
Application: Residential
help Arms: Armless
Assembly Required: Assembly Required
Back Style: High Back
Distressed Finish: Distressed
Upholstery: Fabric
Finish Options: Espresso, Whitewashed, Whitewashed Oak
Width: 22 inches
Weight Capacity: 240lbs
Seat Width: 18.1 - 22 inches
Seat Height: 19½ inches
Seat Depth: 18.1 inches
Height: 36.4 inches
BackToFront: 24.8 inches
 Kathleen Jennison
An Arts & Crafts Bungalow is one of my favorite styles of homes. We have quite a few of them in our Stockton Mid-Town area. And when C&L called us to help them remodel their 1923 American Bungalow, I was beyond thrilled.
As per usual, when we get a new inquiry, we quickly Google the project location while we are talking to you on the phone. My excitement escalated when I saw the Google Earth Image of the sweet Sage Green bungalow in Mid-Town Stockton. "Yes, we would be interested in working with you," I said trying to keep my cool.
But what made it even better was meeting C&L and touring their home, because they are the nicest young couple, eager to make their home period perfect. Unfortunately, it had been slightly molested by some bad house-flippers, and we needed to bring the bathroom back to it "roots."
We knew we had to banish the hideous brown tile and cheap vanity quickly. But C&L complained about the condensation problems and the constant fight with mold. This immediately told me that improper remodeling had occurred and we needed to remedy that right away.
The Before: Frustrations with a Botched Remodel
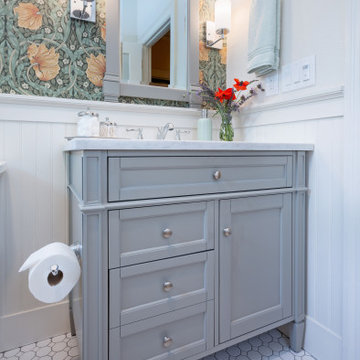
The bathroom needed to be brought back to period appropriate design with all the functionality of a modern bathroom. We thought of things like marble countertop, white mosaic floor tiles, white subway tile, board and batten molding, and of course a fabulous wallpaper.
This small (and only) bathroom on a tight budget required a little bit of design sleuthing to figure out how we could get the proper look and feel. Our goal was to determine where to splurge and where to economize and how to complete the remodel as quickly as possible because C&L would have to move out while construction was going on.
The Process: Hard Work to Remedy Design and Function
During our initial design study, (which included 2 hours in the owners’ home), we noticed framed images of William Morris Arts and Crafts textile patterns and knew this would be our design inspiration. We presented C&L with three options and they quickly selected the Pimpernel Design Concept.
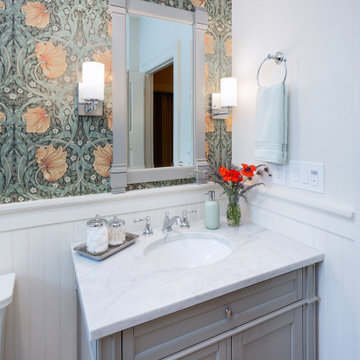
We had originally selected the Black and Olive colors with a black vanity, mirror, and black and white floor tile. C&L liked it but weren’t quite sure about the black, We went back to the drawing board and decided the William & Co Pimpernel Wallpaper in Bayleaf and Manilla color with a softer gray painted vanity and mirror and white floor tile was more to their liking.
After the Design Concept was approved, we went to work securing the building permit, procuring all the elements, and scheduling our trusted tradesmen to perform the work.
We did uncover some shoddy work by the flippers such as live electrical wires hidden behind the wall, plumbing venting cut-off and buried in the walls (hence the constant dampness), the tub barely balancing on two fence boards across the floor joist, and no insulation on the exterior wall.
All of the previous blunders were fixed and the bathroom put back to its previous glory. We could feel the house thanking us for making it pretty again.
The After Reveal: Cohesive Design Decisions
We selected a simple white subway tile for the tub/shower. This is always classic and in keeping with the style of the house.
We selected a pre-fab vanity and mirror, but they look rich with the quartz countertop. There is much more storage in this small vanity than you would think.
The Transformation: A Period Perfect Refresh
We began the remodel just as the pandemic reared and stay-in-place orders went into effect. As C&L were already moved out and living with relatives, we got the go-ahead from city officials to get the work done (after all, how can you shelter in place without a bathroom?).
All our tradesmen were scheduled to work so that only one crew was on the job site at a time. We stayed on the original schedule with only a one week delay.
The end result is the sweetest little bathroom I've ever seen (and I can't wait to start work on C&L's kitchen next).
Thank you for joining me in this project transformation. I hope this inspired you to think about being creative with your design projects, determining what works best in keeping with the architecture of your space, and carefully assessing how you can have the best life in your home.
 Susan Yeley Homes
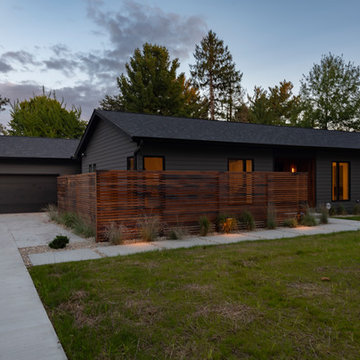
This gem of a house was built in the 1950s, when its neighborhood undoubtedly felt remote. The university footprint has expanded in the 70 years since, however, and today this home sits on prime real estate—easy biking and reasonable walking distance to campus.
When it went up for sale in 2017, it was largely unaltered. Our clients purchased it to renovate and resell, and while we all knew we'd need to add square footage to make it profitable, we also wanted to respect the neighborhood and the house’s own history. Swedes have a word that means “just the right amount”: lagom. It is a guiding philosophy for us at SYH, and especially applied in this renovation. Part of the soul of this house was about living in just the right amount of space. Super sizing wasn’t a thing in 1950s America. So, the solution emerged: keep the original rectangle, but add an L off the back.
With no owner to design with and for, SYH created a layout to appeal to the masses. All public spaces are the back of the home--the new addition that extends into the property’s expansive backyard. A den and four smallish bedrooms are atypically located in the front of the house, in the original 1500 square feet. Lagom is behind that choice: conserve space in the rooms where you spend most of your time with your eyes shut. Put money and square footage toward the spaces in which you mostly have your eyes open.
In the studio, we started calling this project the Mullet Ranch—business up front, party in the back. The front has a sleek but quiet effect, mimicking its original low-profile architecture street-side. It’s very Hoosier of us to keep appearances modest, we think. But get around to the back, and surprise! lofted ceilings and walls of windows. Gorgeous.

 Kathleen Jennison
An Arts & Crafts Bungalow is one of my favorite styles of homes. We have quite a few of them in our Stockton Mid-Town area. And when C&L called us to help them remodel their 1923 American Bungalow, I was beyond thrilled.
As per usual, when we get a new inquiry, we quickly Google the project location while we are talking to you on the phone. My excitement escalated when I saw the Google Earth Image of the sweet Sage Green bungalow in Mid-Town Stockton. "Yes, we would be interested in working with you," I said trying to keep my cool.
But what made it even better was meeting C&L and touring their home, because they are the nicest young couple, eager to make their home period perfect. Unfortunately, it had been slightly molested by some bad house-flippers, and we needed to bring the bathroom back to it "roots."
We knew we had to banish the hideous brown tile and cheap vanity quickly. But C&L complained about the condensation problems and the constant fight with mold. This immediately told me that improper remodeling had occurred and we needed to remedy that right away.
The Before: Frustrations with a Botched Remodel
The bathroom needed to be brought back to period appropriate design with all the functionality of a modern bathroom. We thought of things like marble countertop, white mosaic floor tiles, white subway tile, board and batten molding, and of course a fabulous wallpaper.
This small (and only) bathroom on a tight budget required a little bit of design sleuthing to figure out how we could get the proper look and feel. Our goal was to determine where to splurge and where to economize and how to complete the remodel as quickly as possible because C&L would have to move out while construction was going on.
The Process: Hard Work to Remedy Design and Function
During our initial design study, (which included 2 hours in the owners’ home), we noticed framed images of William Morris Arts and Crafts textile patterns and knew this would be our design inspiration. We presented C&L with three options and they quickly selected the Pimpernel Design Concept.
We had originally selected the Black and Olive colors with a black vanity, mirror, and black and white floor tile. C&L liked it but weren’t quite sure about the black, We went back to the drawing board and decided the William & Co Pimpernel Wallpaper in Bayleaf and Manilla color with a softer gray painted vanity and mirror and white floor tile was more to their liking.
After the Design Concept was approved, we went to work securing the building permit, procuring all the elements, and scheduling our trusted tradesmen to perform the work.
We did uncover some shoddy work by the flippers such as live electrical wires hidden behind the wall, plumbing venting cut-off and buried in the walls (hence the constant dampness), the tub barely balancing on two fence boards across the floor joist, and no insulation on the exterior wall.
All of the previous blunders were fixed and the bathroom put back to its previous glory. We could feel the house thanking us for making it pretty again.
The After Reveal: Cohesive Design Decisions
We selected a simple white subway tile for the tub/shower. This is always classic and in keeping with the style of the house.
We selected a pre-fab vanity and mirror, but they look rich with the quartz countertop. There is much more storage in this small vanity than you would think.
The Transformation: A Period Perfect Refresh
We began the remodel just as the pandemic reared and stay-in-place orders went into effect. As C&L were already moved out and living with relatives, we got the go-ahead from city officials to get the work done (after all, how can you shelter in place without a bathroom?).
All our tradesmen were scheduled to work so that only one crew was on the job site at a time. We stayed on the original schedule with only a one week delay.
The end result is the sweetest little bathroom I've ever seen (and I can't wait to start work on C&L's kitchen next).
Thank you for joining me in this project transformation. I hope this inspired you to think about being creative with your design projects, determining what works best in keeping with the architecture of your space, and carefully assessing how you can have the best life in your home.
 ACRE landscape architecture + design studio
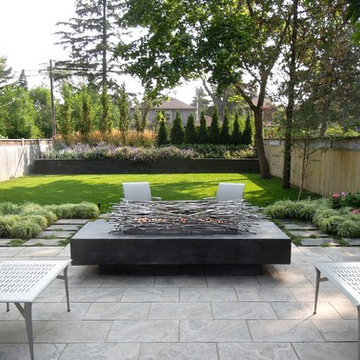
A lovely yard that started as a long bowling alley of lawn. We wanted to create a more human scale in the lounge area without building too many visual barriers. The overall effect is splashes of woodland across a contemporary canvas.
 A.Jennison Interiors
Photo - Jessica Glynn Photography
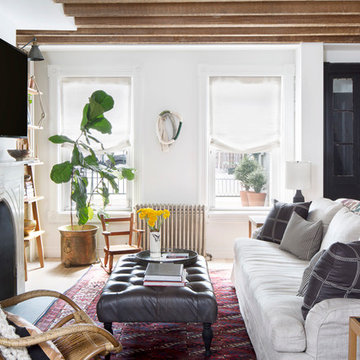
Example of a mid-sized transitional enclosed light wood floor and beige floor living room design in New York with multicolored walls, a standard fireplace, a stone fireplace and a wall-mounted tv
Example of a mid-sized transitional enclosed light wood floor and beige floor living room design in New York with multicolored walls, a standard fireplace, a stone fireplace and a wall-mounted tv
 NRC HOMES
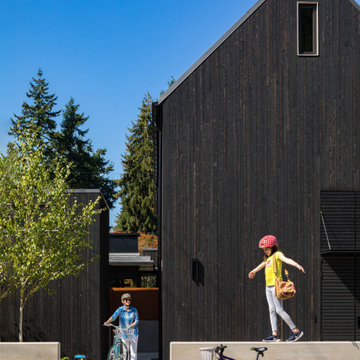
Example of a large farmhouse black two-story wood exterior home design in Seattle with a metal roof and a black roof
 Granit Architects + Interiors
Photo Credit: Andrew Beasley
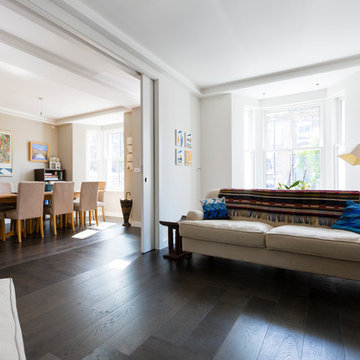
Living room - contemporary living room idea in London
Living room - contemporary living room idea in London
 Black Fox Interiors
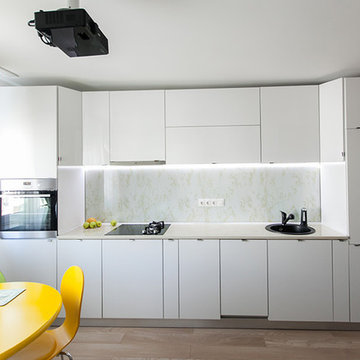
Small trendy single-wall light wood floor eat-in kitchen photo in Other with glass-front cabinets, white cabinets, laminate countertops, white backsplash, glass sheet backsplash, stainless steel appliances, no island and a drop-in sink
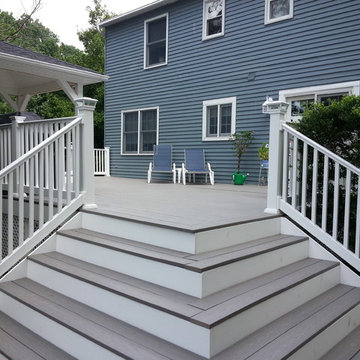
 CnS Contracting LLC
Deck staircase in Monmouth County, NJ
Example of a mid-sized trendy backyard deck design in New York with a pergola
Example of a mid-sized trendy backyard deck design in New York with a pergola
16