
Search results for "Certification" in Home Design Ideas

 A.B. Edward Enterprises, Inc.
A.B. Edward Enterprises, Inc (847) 827-1605 | A+ BBB Rating & Angie's List Award Company. We give FREE Estimates, always!
For installations with new slate, we prefer to install only the highest quality time-tested slates. The combination of high quality slate, expert flashing design and installation, correct soldering, necessary underlayments for the conditions, and proper slate laying and fastening produces an aesthetic, long lasting roof that should have a serviceable life of 100+ years easily. Cutting corners on any one of these factors can shorten the life span of a slate roof from 100+ years to literally just a few years or less.
A.B. Edward Enterprises, Inc. provides high quality roofing slate material to the United States. Founded in 2003, based upon twelve years of experience in the roofing slate industry, we pride ourselves on detailed knowledge of our products and their application.
We focus exclusively on roofing slate together with the needs of home owners and contractors installing it. We have well-established and long-term relationships with many of the best slate producers all over the world. When it comes to any slate roofing project, A.B. Edward Enterprises, Inc. delivers unparalleled service and expertise. We look forward to working with you on your next project.
We offer the following roofing services:
• Roof Tear Offs
• Roof Repair
• Tile Roofs
• Shingle Roofs
• Flat Roofs
• Slate Roofs
• Gutters|Downspouts
• Gravel Roofs
• Energy Saving Roofs
• Fascia Board Replacements
• Torch-Ons
• Roof Coatings
• Plywood Installations
• Hot Mopping
• Solar Fans|Skylights
• Balconies and Decks
• Wood|Composite Shake Roofs
• Attic Ventilation
• Dry Rot Repairs
• Spanish|Mission Tile Specialist
• Inspections|Certifications
• Gutter|Downspout Cleaning
• Built-Up Roof Systems
• Preventive Maintenance
Please browse our website to find out what you need to know about our company, our services and our reputation. We’re sure you’ll agree…you can depend on A.B. Edward Enterprises, Inc. to build or repair your roof to last!
We want you to be completely satisfied with your new roof. That’s why we spend so much time with you before we even set foot on a ladder.
We have the quality and experience you can trust. We are licensed Illinois Roofing Contractors, bonded, and insured. Call us today at (847) 827-1605 for a free estimate!

 Paradise Found Construction
Keith and Amy loved their home in quiet Wake Forest neighborhood on a large corner lot on a cul-de-sac. Over time, Amy had developed allergic reactions to unknown allergens in their home. As her condition worsened, it became impossible for her to spend much time in the home, and they were forced to move out and find temporary housing accommodations.
After months of talking with other home improvement providers and indoor air “experts” and trying other solutions to no avail including having their HVAC ducting cleaned, they turned to Paradise Found Construction and our expertise and experience in transforming indoor environments in homes into healthy and clean living spaces. Because many of the improvements we undertook to create a cleaner environment also provided energy savings, we had our work certified under the 2012 National Green Building Standards (NGBS) and were award a Bronze level certification for the home.
We conducted a thorough investigation and testing regimen that included bringing in our team industry leading air quality and HVAC experts, we developed a comprehensive plan of action that would solve their “sick home syndrome”.
We removed all of the carpeting and pad from the home and thoroughly cleaned all surfaces and filtered the air with advanced HEPA filtration units. There were a few areas of mold in the crawl space which we mitigated as well. We thoroughly air sealed the home, paying particular attention to the ground level and attic floor system. Since the HVAC systems and ducting had become re-contaminated, we cleaned both units and all associated duct work.
To eliminate unhealthy air being drawn into the home from the crawl space, we completely sealed and conditioned the crawl. In order to provide a controlled entry point for clean fresh air into the home we installed an energy efficient stand-alone Energy Recovery Ventilator (ERV).
We installed wood flooring in all of the living areas that did not have wood flooring, and finished all of the flooring using a NO-VOC water-based floor finish. All of the painted surfaces of the home were sealed and painted with NO-VOC latex paint.
To further improve the energy performance of the home in addition to thoroughly air-sealing and sealing and conditioning the crawl space, we installed 100% LED lighting in the home. We improved the water efficiency of the home by installing low-flow EPA WaterSense rated toilets and shower heads, converted all of the bathroom and kitchen faucets to be more water efficient.
Upon completion, Amy and her family was able to move back into their cozy and clean “new home”, and are once again able to enjoy and be comfortable in their home.

 Chapman Design Group, Inc.
This rustic style home on Hartwell Lake was designed and built for the owners to enjoy with family and friends during their active weekend lifestyle. The home was built on a narrow, deep lot that was semi-level on the roadside and steep on the lakeside. The back half of the lot heavily wooded with mature oak and poplar trees reducing the harsh sun’s heat gain on the home.
The exterior utilizes fiber cement cedar shake and lap siding complimented by deep brown colors for the windows, soffit, trim and the large square columns. A nice balance of natural earth toned stacked stone rounds out the exterior materials completing the rustic casual lake living.
The home 5400 SF is designed and built on thee levels each having a primary focus. The main level creates primary daily living for the owners. This level features an open plan with an entry, stair, dining, kitchen and living areas leading to a large lakeside screened porch. A master suite is privately tucked off its own hallway and allowing it to enjoy the lakeside as well with its own private deck. On the opposite side are two bedrooms, a study and a shared bathroom for each to utilize. An open carport for two vehicles was created with the motor court and connects to the mudroom/utility room giving the owners direct entry into their home.
The upper level is for the grand children with an oversized bedroom, bathroom and loft area for play.
The lower level is the considered the party level. Its primary feature is an elevated stage for the owner’s band opened to a large seating area, dining and kitchen for viewing and listening with direct access to another screened porch. Flanking each side is a theater and two additional bedrooms and bathrooms.
Energy Efficient features include:
• The majority of the lower level sunk into the site below grade
• 6” thick walls utilizing advanced framing techniques
• Foil covered roof sheathing
• Extensive use of blown in cellulous
• All windows & doors are double paned low E argon filed glass
• Tank-less water heaters
• Three separate high efficiency HVAC units with programmable thermostats and a fresh air ERV.
Lastly the owner requested we make every effort to sound proof the home. Many materials and techniques gave a duel purpose and added to the energy efficiency.
These items include:
• 2x6 walls with staggered studs
• Extensive use if rock wool acoustic batting
• Tempered glass in all exterior doors and windows
• ¼ thick Mass Loaded Vinyl (MLV) was installed on the top and bottom of the floor trusses and on all lower level walls.
The combination of the design and detailing utilizing these specific materials enabled us to achieve a 5 Star Plus Energy Star Certification with a HERS Index Score of 50. This home received a the 2015 Pinnacle Award from the SC Home Builders Association for the “Best Achievement in Energy Efficiency” sponsored by the SC Department Commerce.
Find the right local pro for your project

 Original Palette Knife Paintings by Lisa Elley
Landscape Painting, California, Tahoe, Birch Tree, Quality, Original Art, Palette Knife Painting. Large Tree Artwork by Lisa Elley
T I T L E: Trees of Tahoe by Lisa Elley.
I N S P I R E D* B Y: Pine Trees take me back to my childhood. Long walks in the crackling leaves, the smell of a wood fire burning, hot chocolate, exploring my grandpa's shed...
This painting features a scene in amazing South Lake Tahoe, here in northern California. The Sierra Nevada mountains are magical all year round, and here they are in the winter.
S I Z E: 36 X 12 X 1.5 Inches.
Y E A R: 2015
M A T E R I A L S: Artist quality oil paints, Gallery Wrapped, Back Stapled Canvas. Sides are painted with continued colors, no frame required. This painting features an extra wide wrap (sides) which makes for a beautiful, modern presentation.
P A I N T I N G* S H I P S: Unframed, stretched and wired, ready to hang.
Certificate of Authenticity Included.
Painting is signed on front and signed & dated on the back.
S H I P P I N G
Domestic shipping is by Fedex or UPS Ground, which includes tracking. International shipping is by USPS Priority Mail International, also with tracking. Purchaser is responsible for customs fees in their own country.
*Artist retains the rights to digital and print reproduction.
M Y B A C K G R O U N D:
All my paintings are oil on canvas, using mainly palette & painting knives, with thick application, bold strokes, painterly detail and rich colors.
The palette knife gives my art a unique combination of contrast, fluidity, depth, texture and impact. I do not typically use a brush, as I prefer the way I can mix buttery paints and smear them on my canvas with a flexible metal blade. The amazing thick texture achieved with the knife reflects the light more than a regular brush painting and gives a beautiful sense of movement, with subtle highlights.
I am originally from New Zealand, where the beauty of nature is unsurpassed. The luminescent beauty of our amazing world inspires me, and I feel it in every stroke. I try to reflect this in my work and invite you to enjoy it as I do.
F O L L O W M E:
http://www.pinterest.com/paintersknife https://www.facebook.com/paintersknife http://www.lisaelley.com

 Bellingham Bay Builders
The Twin Peaks Passive House + ADU was designed and built to remain resilient in the face of natural disasters. Fortunately, the same great building strategies and design that provide resilience also provide a home that is incredibly comfortable and healthy while also visually stunning.
This home’s journey began with a desire to design and build a house that meets the rigorous standards of Passive House. Before beginning the design/ construction process, the homeowners had already spent countless hours researching ways to minimize their global climate change footprint. As with any Passive House, a large portion of this research was focused on building envelope design and construction. The wall assembly is combination of six inch Structurally Insulated Panels (SIPs) and 2x6 stick frame construction filled with blown in insulation. The roof assembly is a combination of twelve inch SIPs and 2x12 stick frame construction filled with batt insulation. The pairing of SIPs and traditional stick framing allowed for easy air sealing details and a continuous thermal break between the panels and the wall framing.
Beyond the building envelope, a number of other high performance strategies were used in constructing this home and ADU such as: battery storage of solar energy, ground source heat pump technology, Heat Recovery Ventilation, LED lighting, and heat pump water heating technology.
In addition to the time and energy spent on reaching Passivhaus Standards, thoughtful design and carefully chosen interior finishes coalesce at the Twin Peaks Passive House + ADU into stunning interiors with modern farmhouse appeal. The result is a graceful combination of innovation, durability, and aesthetics that will last for a century to come.
Despite the requirements of adhering to some of the most rigorous environmental standards in construction today, the homeowners chose to certify both their main home and their ADU to Passive House Standards. From a meticulously designed building envelope that tested at 0.62 ACH50, to the extensive solar array/ battery bank combination that allows designated circuits to function, uninterrupted for at least 48 hours, the Twin Peaks Passive House has a long list of high performance features that contributed to the completion of this arduous certification process. The ADU was also designed and built with these high standards in mind. Both homes have the same wall and roof assembly ,an HRV, and a Passive House Certified window and doors package. While the main home includes a ground source heat pump that warms both the radiant floors and domestic hot water tank, the more compact ADU is heated with a mini-split ductless heat pump. The end result is a home and ADU built to last, both of which are a testament to owners’ commitment to lessen their impact on the environment.
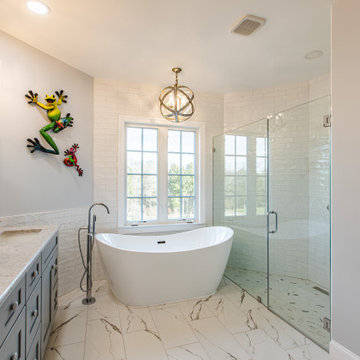
 NV Kitchen and Bath (D.M.V)
We have created a new bathroom with its usage area and accessories unique to you.
Bathroom - modern bathroom idea
Bathroom - modern bathroom idea
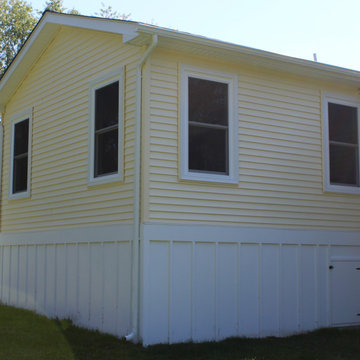
 Talon Construction Inc.
Designing and building a kitchen addition is a complex process that involves multiple steps and considerations. Here is a general outline to help you get started on your kitchen addition project:
Define Your Goals and Budget:
• Determine the purpose of the kitchen addition. Is it for more cooking space, a dining area, or a combination of both?
• Establish a realistic budget for your project. Consider all costs, including construction, permits, materials, and furnishings.
Hire a Design Professional:
• Seek the services of a design build company who specializes in kitchen additions.
• Discuss your vision, needs, and budget with the design professional to create a design concept.
Site Evaluation:
• Assess the existing space and structural condition of your home to ensure it can support the addition.
• Consider factors like zoning regulations, setbacks, and building codes.
Design Development:
• Collaborate with your design professional to refine the concept, including the layout, size, and architectural style.
• Choose materials, finishes, and fixtures that fit your design and budget.
Obtain Permits:
• Consult with your local design build contractor to determine the necessary permits and approvals.
• Prepare and submit all required documents, including architectural drawings and engineering plans.
Create Construction Documents:
• Work with your design build professional to develop detailed construction drawings and specifications.
• These documents will serve as a guide for contractors during construction.
Hire a design build contractor:
• Check references, credentials, and licenses before selecting a contractor.
• Sign a detailed contract that outlines the scope of work, timeline, and payment schedule.
Construction Phase:
• Demolition: If needed, remove any existing structures or walls.
• Foundation: Construct the foundation for the addition.
• Framing: Build the structural framework of the addition.
• Plumbing, Electrical, and HVAC: Install or update utilities as required.
• Insulation: Ensure proper insulation for energy efficiency.
• Drywall and Finish Work: Complete the walls and ceilings.
• Flooring and Cabinetry: Install flooring and kitchen cabinets.
• Appliances and Fixtures: Add appliances, plumbing fixtures, and lighting.
• Paint and Finish: Apply paint and finishes to achieve the desired look.
• Final Inspection: Schedule inspections to ensure compliance with building codes.
Final Inspections and Approvals:
• Arrange for final inspections to ensure the addition meets all safety and code requirements.
• Obtain any necessary certificates of occupancy or compliance.
Move In and Enjoy:
• Once all inspections and approvals are received, you can move into your new kitchen addition and start enjoying it.
Remember that every kitchen addition project is unique, so adapt this outline to your specific needs and circumstances. Consulting with professionals and obtaining the required permits and inspections is crucial to a successful and safe project.
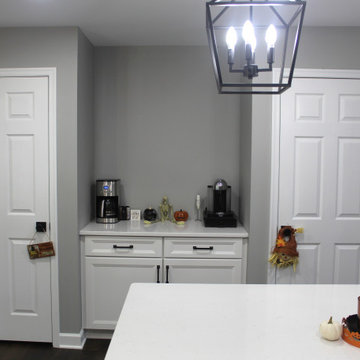 Talon Construction Inc.
Designing and building a kitchen addition is a complex process that involves multiple steps and considerations. Here is a general outline to help you get started on your kitchen addition project:
Define Your Goals and Budget:
• Determine the purpose of the kitchen addition. Is it for more cooking space, a dining area, or a combination of both?
• Establish a realistic budget for your project. Consider all costs, including construction, permits, materials, and furnishings.
Hire a Design Professional:
• Seek the services of a design build company who specializes in kitchen additions.
• Discuss your vision, needs, and budget with the design professional to create a design concept.
Site Evaluation:
• Assess the existing space and structural condition of your home to ensure it can support the addition.
• Consider factors like zoning regulations, setbacks, and building codes.
Design Development:
• Collaborate with your design professional to refine the concept, including the layout, size, and architectural style.
• Choose materials, finishes, and fixtures that fit your design and budget.
Obtain Permits:
• Consult with your local design build contractor to determine the necessary permits and approvals.
• Prepare and submit all required documents, including architectural drawings and engineering plans.
Create Construction Documents:
• Work with your design build professional to develop detailed construction drawings and specifications.
• These documents will serve as a guide for contractors during construction.
Hire a design build contractor:
• Check references, credentials, and licenses before selecting a contractor.
• Sign a detailed contract that outlines the scope of work, timeline, and payment schedule.
Construction Phase:
• Demolition: If needed, remove any existing structures or walls.
• Foundation: Construct the foundation for the addition.
• Framing: Build the structural framework of the addition.
• Plumbing, Electrical, and HVAC: Install or update utilities as required.
• Insulation: Ensure proper insulation for energy efficiency.
• Drywall and Finish Work: Complete the walls and ceilings.
• Flooring and Cabinetry: Install flooring and kitchen cabinets.
• Appliances and Fixtures: Add appliances, plumbing fixtures, and lighting.
• Paint and Finish: Apply paint and finishes to achieve the desired look.
• Final Inspection: Schedule inspections to ensure compliance with building codes.
Final Inspections and Approvals:
• Arrange for final inspections to ensure the addition meets all safety and code requirements.
• Obtain any necessary certificates of occupancy or compliance.
Move In and Enjoy:
• Once all inspections and approvals are received, you can move into your new kitchen addition and start enjoying it.
Remember that every kitchen addition project is unique, so adapt this outline to your specific needs and circumstances. Consulting with professionals and obtaining the required permits and inspections is crucial to a successful and safe project.
 Original Palette Knife Paintings by Lisa Elley
Landscape Painting, California, Tahoe, Birch Tree, Quality, Original Art, Palette Knife Painting. Large 30x30 Tree Artwork by Lisa Elley
T I T L E: Birch Trees of Tahoe by Lisa Elley.
I N S P I R E D* B Y: Birch Trees take me back to my childhood. Long walks in the crackling leaves, the smell of a wood fire burning, hot chocolate, exploring my grandpa's shed...
This painting features a scene in amazing South Lake Tahoe, here in northern California. The Sierra Nevada mountains are magical all year round, and here they are in the fall blazing with color!
S I Z E: 30 X 30 X 1.5 Inches.
Y E A R: 2015
M A T E R I A L S: Artist quality oil paints, Gallery Wrapped, Back Stapled Canvas. Sides are painted with continued colors, no frame required. This painting features an extra wide wrap (sides) which makes for a beautiful, modern presentation.
P A I N T I N G* S H I P S: Unframed, stretched and wired, ready to hang.
Certificate of Authenticity Included.
Painting is signed on front and signed & dated on the back.
S H I P P I N G
Domestic shipping is by Fedex or UPS Ground, which includes tracking. International shipping is by USPS Priority Mail International, also with tracking. Purchaser is responsible for customs fees in their own country.
*Artist retains the rights to digital and print reproduction.
M Y B A C K G R O U N D:
All my paintings are oil on canvas, using mainly palette & painting knives, with thick application, bold strokes, painterly detail and rich colors.
The palette knife gives my art a unique combination of contrast, fluidity, depth, texture and impact. I do not typically use a brush, as I prefer the way I can mix buttery paints and smear them on my canvas with a flexible metal blade. The amazing thick texture achieved with the knife reflects the light more than a regular brush painting and gives a beautiful sense of movement, with subtle highlights.
I am originally from New Zealand, where the beauty of nature is unsurpassed. The luminescent beauty of our amazing world inspires me, and I feel it in every stroke. I try to reflect this in my work and invite you to enjoy it as I do.
F O L L O W M E:
http://www.pinterest.com/paintersknife https://www.facebook.com/paintersknife http://www.lisaelley.com

 Anonymous
Every web hosting company comes with a different package according to the requirements of the customers so that their websites keep on running in a smooth way. Ittotally depends on you which hosting package you choose in order to enjoy the best services for your website.
The common options in web hosting include shared web hosting, VPS, dedicated web hosting, cloud web hosting and more. It is easy to decide what type of web host to choose but choosing the right package is not that easy. Here are top5 features which make your web hosting package the most favorable one:
1. OperationSystem
Operating system is the software which runs on your host. This OS is responsible for managing the server hardware. It also helps in optimizing the use of disk space, RAM, CPU and the network. This OS might not be the same as what you get for thedesktops. The best OS will ensure that the management functions of your website keep on running.
2. WebServer
Usually, the hosting companies provide UNIX Apache or the Microsoft IIS servers. The server should be capable of processing the requests of the users fast. It must further have the SSL certificate.
3. Bandwidth
Thebandwidth provided should be just as accurate. In case your websitehosts thousands of visitors, it is recommended that you choose a large bandwidth so that your revenue stream is not interrupted. In case you have plans of business expansion, the package should have flexibility of bandwidth expansion too. Some hosting companies do offer unlimited bandwidthbut make sure you go to the depth for learning about the package and its pros and cons.
4. Domain
All of the hosting providers usually offer the sub domains but some also provide the external DNS entries to the account which is called add-on domain. This will let you buy additional domains and you will be able to run more than one website even if they are unrelated to each other.
5. ControlPanel
Control panel is the place where you get to manage your web hosting account and you have access to different features and tools for that purpose. There are 2 types of control panels; one is cPanel and the other one is Plesk. You can also get a custom control panel. Usually, cPanel is the most offered and chosen because it comes with amazing features of managing utilities. It allows you to configure the system, web server, email, website, DNS and more.
There are many other features to look for when you are choosing a web hosting package such as DMCA ignore hosting, applications provided, database and FTP. You are required to perform some research on the providers. For that, it is important to know your business needs so that the hosting package you choose caters your business needs in the most precise way. With the understanding of these features, it will get easier to make a wise decision while selecting the web hosting package for your website.
For more Info Please visit us - http://anonymous-offshore.host/
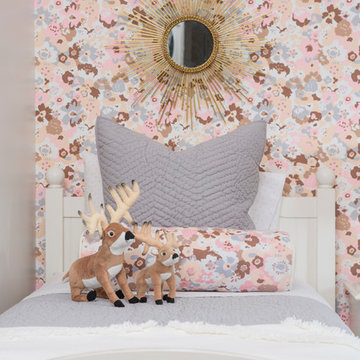
 MOTIV Interiors
Interior Designer: MOTIV Interiors LLC
Photographer: Sam Angel Photography
Design Challenge: This 8 year-old boy and girl were outgrowing their existing setup and needed to update their rooms with a plan that would carry them forward into middle school and beyond. In addition to gaining storage and study areas, could these twins show off their big personalities? Absolutely, we said! MOTIV Interiors tackled the rooms of these youngsters living in Nashville's 12th South Neighborhood and created an environment where the dynamic duo can learn, create, and grow together for years to come.
Design Solution:
In her room, we wanted to create a fun-filled space that supports softball, sleepovers, science, and anything else a girl might want to get into. The star of the show is a beautiful hand-printed wallpaper by Brooklyn designer Aimee Wilder, whose FSC-certified papers contain no VOC’s (Volatile Organic Compounds). That means that in addition to packing a powerful visual punch, they meet our standard for excellent indoor air quality. We also love this wallpaper because it is composed of so many different neutral colors - this room can organically evolve over time without necessarily replacing the paper (which was installed with a no-VOC adhesive).
We refreshed the remaining walls with a scrubbable no-VOC paint from Sherwin Williams (7008 Alabaster) and gave the carpets in both of the twins’ rooms a good cleaning and simple stretch as opposed to replacing them. In order to provide more functional light in her room, we incorporated a corner floor lamp for reading, a telescoping desk lamp for studying, and an eye-catching LED flower pendant on a dimmer switch sourced from Lightology. Custom window treatments in a linen/cotton blend emphasize the height of the room and bring in a little “bling” with antiqued gold hardware.
Before we even thought about aesthetics, however, MOTIV Interiors got to work right away on increasing functionality. We added a spacious storage unit with plenty of baskets for all of our young client’s animal friends, and we made sure to include ample shelf space for books and hobbies as she finds new passions to explore down the road. We always prefer eco-friendly furnishings that are manufactured responsibly, made with sustainably harvested wood (FSC Certified), and use no glue or non-toxic glues and paints.
The bedding in this project is 100% cotton and contains no synthetic fibers. When purchasing bedding, check for the GOTS Certification (Global Organic Textile Standard). The introduction of a desk and drawer unit created a calming space to study and reflect, or write a letter to a friend. Gold accents add a bit of warmth to the workspace, where she can display her memories, goals, and game plans for a bright future.
We hope you enjoyed this project as much as we did! Each design challenge is an opportunity to push the envelope, by creating a new and exciting aesthetic or finding creative ways to incorporate sustainable design principles.
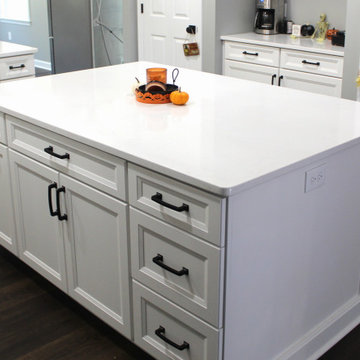 Talon Construction Inc.
Designing and building a kitchen addition is a complex process that involves multiple steps and considerations. Here is a general outline to help you get started on your kitchen addition project:
Define Your Goals and Budget:
• Determine the purpose of the kitchen addition. Is it for more cooking space, a dining area, or a combination of both?
• Establish a realistic budget for your project. Consider all costs, including construction, permits, materials, and furnishings.
Hire a Design Professional:
• Seek the services of a design build company who specializes in kitchen additions.
• Discuss your vision, needs, and budget with the design professional to create a design concept.
Site Evaluation:
• Assess the existing space and structural condition of your home to ensure it can support the addition.
• Consider factors like zoning regulations, setbacks, and building codes.
Design Development:
• Collaborate with your design professional to refine the concept, including the layout, size, and architectural style.
• Choose materials, finishes, and fixtures that fit your design and budget.
Obtain Permits:
• Consult with your local design build contractor to determine the necessary permits and approvals.
• Prepare and submit all required documents, including architectural drawings and engineering plans.
Create Construction Documents:
• Work with your design build professional to develop detailed construction drawings and specifications.
• These documents will serve as a guide for contractors during construction.
Hire a design build contractor:
• Check references, credentials, and licenses before selecting a contractor.
• Sign a detailed contract that outlines the scope of work, timeline, and payment schedule.
Construction Phase:
• Demolition: If needed, remove any existing structures or walls.
• Foundation: Construct the foundation for the addition.
• Framing: Build the structural framework of the addition.
• Plumbing, Electrical, and HVAC: Install or update utilities as required.
• Insulation: Ensure proper insulation for energy efficiency.
• Drywall and Finish Work: Complete the walls and ceilings.
• Flooring and Cabinetry: Install flooring and kitchen cabinets.
• Appliances and Fixtures: Add appliances, plumbing fixtures, and lighting.
• Paint and Finish: Apply paint and finishes to achieve the desired look.
• Final Inspection: Schedule inspections to ensure compliance with building codes.
Final Inspections and Approvals:
• Arrange for final inspections to ensure the addition meets all safety and code requirements.
• Obtain any necessary certificates of occupancy or compliance.
Move In and Enjoy:
• Once all inspections and approvals are received, you can move into your new kitchen addition and start enjoying it.
Remember that every kitchen addition project is unique, so adapt this outline to your specific needs and circumstances. Consulting with professionals and obtaining the required permits and inspections is crucial to a successful and safe project.
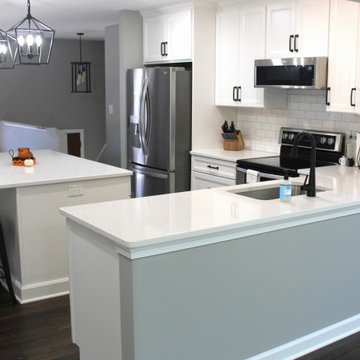 Talon Construction Inc.
Designing and building a kitchen addition is a complex process that involves multiple steps and considerations. Here is a general outline to help you get started on your kitchen addition project:
Define Your Goals and Budget:
• Determine the purpose of the kitchen addition. Is it for more cooking space, a dining area, or a combination of both?
• Establish a realistic budget for your project. Consider all costs, including construction, permits, materials, and furnishings.
Hire a Design Professional:
• Seek the services of a design build company who specializes in kitchen additions.
• Discuss your vision, needs, and budget with the design professional to create a design concept.
Site Evaluation:
• Assess the existing space and structural condition of your home to ensure it can support the addition.
• Consider factors like zoning regulations, setbacks, and building codes.
Design Development:
• Collaborate with your design professional to refine the concept, including the layout, size, and architectural style.
• Choose materials, finishes, and fixtures that fit your design and budget.
Obtain Permits:
• Consult with your local design build contractor to determine the necessary permits and approvals.
• Prepare and submit all required documents, including architectural drawings and engineering plans.
Create Construction Documents:
• Work with your design build professional to develop detailed construction drawings and specifications.
• These documents will serve as a guide for contractors during construction.
Hire a design build contractor:
• Check references, credentials, and licenses before selecting a contractor.
• Sign a detailed contract that outlines the scope of work, timeline, and payment schedule.
Construction Phase:
• Demolition: If needed, remove any existing structures or walls.
• Foundation: Construct the foundation for the addition.
• Framing: Build the structural framework of the addition.
• Plumbing, Electrical, and HVAC: Install or update utilities as required.
• Insulation: Ensure proper insulation for energy efficiency.
• Drywall and Finish Work: Complete the walls and ceilings.
• Flooring and Cabinetry: Install flooring and kitchen cabinets.
• Appliances and Fixtures: Add appliances, plumbing fixtures, and lighting.
• Paint and Finish: Apply paint and finishes to achieve the desired look.
• Final Inspection: Schedule inspections to ensure compliance with building codes.
Final Inspections and Approvals:
• Arrange for final inspections to ensure the addition meets all safety and code requirements.
• Obtain any necessary certificates of occupancy or compliance.
Move In and Enjoy:
• Once all inspections and approvals are received, you can move into your new kitchen addition and start enjoying it.
Remember that every kitchen addition project is unique, so adapt this outline to your specific needs and circumstances. Consulting with professionals and obtaining the required permits and inspections is crucial to a successful and safe project.
 A.B. Edward Enterprises, Inc.
A.B. Edward Enterprises, Inc (847) 827-1605 | A+ BBB Rating & Angie's List Award Company. We give FREE Estimates, always!
For installations with new slate, we prefer to install only the highest quality time-tested slates. The combination of high quality slate, expert flashing design and installation, correct soldering, necessary underlayments for the conditions, and proper slate laying and fastening produces an aesthetic, long lasting roof that should have a serviceable life of 100+ years easily. Cutting corners on any one of these factors can shorten the life span of a slate roof from 100+ years to literally just a few years or less.
A.B. Edward Enterprises, Inc. provides high quality roofing slate material to the United States. Founded in 2003, based upon twelve years of experience in the roofing slate industry, we pride ourselves on detailed knowledge of our products and their application.
We focus exclusively on roofing slate together with the needs of home owners and contractors installing it. We have well-established and long-term relationships with many of the best slate producers all over the world. When it comes to any slate roofing project, A.B. Edward Enterprises, Inc. delivers unparalleled service and expertise. We look forward to working with you on your next project.
We offer the following roofing services:
• Roof Tear Offs
• Roof Repair
• Tile Roofs
• Shingle Roofs
• Flat Roofs
• Slate Roofs
• Gutters|Downspouts
• Gravel Roofs
• Energy Saving Roofs
• Fascia Board Replacements
• Torch-Ons
• Roof Coatings
• Plywood Installations
• Hot Mopping
• Solar Fans|Skylights
• Balconies and Decks
• Wood|Composite Shake Roofs
• Attic Ventilation
• Dry Rot Repairs
• Spanish|Mission Tile Specialist
• Inspections|Certifications
• Gutter|Downspout Cleaning
• Built-Up Roof Systems
• Preventive Maintenance
Please browse our website to find out what you need to know about our company, our services and our reputation. We’re sure you’ll agree…you can depend on A.B. Edward Enterprises, Inc. to build or repair your roof to last!
We want you to be completely satisfied with your new roof. That’s why we spend so much time with you before we even set foot on a ladder.
We have the quality and experience you can trust. We are licensed Illinois Roofing Contractors, bonded, and insured. Call us today at (847) 827-1605 for a free estimate!

 Alan Mizrahi Lighting Design
The WM2170 Butterflies Crystal Chandelier is a breathtaking expression of movement and light. Delicate drops of multicolored crystal are joined to metal seeds, forming intricate floral or butterfly-like shapes that cascade gracefully like waterfalls or float like clouds of shimmering color. Suspended on nearly invisible stainless steel wires, each installation is entirely tailor-made — customized to suit any space in terms of size, shape, color palette, density, and layout. From dramatic sculptural installations in stairwells or grand entrances to smaller, intimate ceiling fixtures, the design possibilities are endless. Illuminated by integrated downlights or a custom reflector plate, the chandelier glows with radiant beauty — merging form and function in a magical display of artistry and elegance.
SPECIFICATIONS:
Collection: Residential
Size: 58" Wide x 28” Length x 68" Height (Custom sizes also available)
Shape: Butterflies
Metal Finished: Brushed Nickel (Different finish available at no additional cost)
Materials: Crystal & Metal
Weight: 128 LBS.
Extension: Adjustable cord customizable up to 12 ft.
Bulbs: 34L 110V USA/220V Europe 40 watt LED Gi6 bulbs (included)
Certification Approved: UL-CE-EU
Assembly: Some assembly required.
Dimmer Switch Compatible: Optional
Shipping: Free Door-To-Door Shipping Worldwide!
Rush Order: 4-6 Weeks; 18% added to the total
Regular Lead Time: 6-12 Weeks
Warranty: 5 Years Full Coverage (includes replacement parts)
CRYSTAL COLOR:
Smoke
Cognac
Frosted
Mixed Colors
Clear (as showing)
METAL FINISH:
NICKEL
Chrome
SILVER LEAF
POLISHED BRASS
hand-rubbed antique brass (as shown in image)
SIZE & PRICE:
ROUND SHAPE
28" Diameter x 40" Height $3,508.00
36" Diameter x 48" Height $4,202.00
44" Diameter x 54" Height $5,910.00
55" Diameter x 68" Height $7,484.00
66" Diameter x 76" Height $9,312.00
RECTANGULAR SHAPE
28" Wide x 12” Length x 40" Height $3,616.00
38" Wide x 18” Length x 48" Height $4,520.00
44" Wide x 24” Length x 54" Height $6,352.00
58" Wide x 28” Length x 68" Height $7,888.00 (as shown in image)
66" Wide x 36” Length x 76" Height $10,048.00
76" Wide x 48” Length x 82" Height $11,976.00
96" Wide x 48” Length x 86" Height $12,984.00
106" Wide x 48” Length x 86" Height $14,759.00
**Custom Sizes, Finishes, Colors, Available Upon Request**
 Original Palette Knife Paintings by Lisa Elley
Landscape Painting, California, Tahoe, Birch Tree, Quality, Original Art, Palette Knife Painting. Large 30x30 Tree Artwork by Lisa Elley
T I T L E: Birch Trees of Tahoe by Lisa Elley.
I N S P I R E D* B Y: Birch Trees take me back to my childhood. Long walks in the crackling leaves, the smell of a wood fire burning, hot chocolate, exploring my grandpa's shed...
This painting features a scene in amazing South Lake Tahoe, here in northern California. The Sierra Nevada mountains are magical all year round, and here they are in the fall blazing with color!
S I Z E: 30 X 30 X 1.5 Inches.
Y E A R: 2015
M A T E R I A L S: Artist quality oil paints, Gallery Wrapped, Back Stapled Canvas. Sides are painted with continued colors, no frame required. This painting features an extra wide wrap (sides) which makes for a beautiful, modern presentation.
P A I N T I N G* S H I P S: Unframed, stretched and wired, ready to hang.
Certificate of Authenticity Included.
Painting is signed on front and signed & dated on the back.
S H I P P I N G
Domestic shipping is by Fedex or UPS Ground, which includes tracking. International shipping is by USPS Priority Mail International, also with tracking. Purchaser is responsible for customs fees in their own country.
*Artist retains the rights to digital and print reproduction.
M Y B A C K G R O U N D:
All my paintings are oil on canvas, using mainly palette & painting knives, with thick application, bold strokes, painterly detail and rich colors.
The palette knife gives my art a unique combination of contrast, fluidity, depth, texture and impact. I do not typically use a brush, as I prefer the way I can mix buttery paints and smear them on my canvas with a flexible metal blade. The amazing thick texture achieved with the knife reflects the light more than a regular brush painting and gives a beautiful sense of movement, with subtle highlights.
I am originally from New Zealand, where the beauty of nature is unsurpassed. The luminescent beauty of our amazing world inspires me, and I feel it in every stroke. I try to reflect this in my work and invite you to enjoy it as I do.
F O L L O W M E:
http://www.pinterest.com/paintersknife
https://www.facebook.com/paintersknife
http://www.lisaelley.com
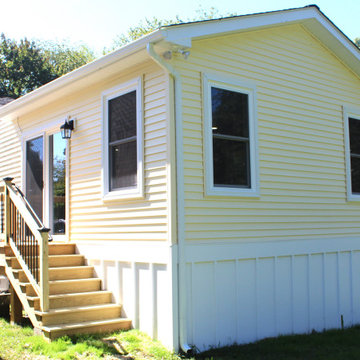 Talon Construction Inc.
Designing and building a kitchen addition is a complex process that involves multiple steps and considerations. Here is a general outline to help you get started on your kitchen addition project:
Define Your Goals and Budget:
• Determine the purpose of the kitchen addition. Is it for more cooking space, a dining area, or a combination of both?
• Establish a realistic budget for your project. Consider all costs, including construction, permits, materials, and furnishings.
Hire a Design Professional:
• Seek the services of a design build company who specializes in kitchen additions.
• Discuss your vision, needs, and budget with the design professional to create a design concept.
Site Evaluation:
• Assess the existing space and structural condition of your home to ensure it can support the addition.
• Consider factors like zoning regulations, setbacks, and building codes.
Design Development:
• Collaborate with your design professional to refine the concept, including the layout, size, and architectural style.
• Choose materials, finishes, and fixtures that fit your design and budget.
Obtain Permits:
• Consult with your local design build contractor to determine the necessary permits and approvals.
• Prepare and submit all required documents, including architectural drawings and engineering plans.
Create Construction Documents:
• Work with your design build professional to develop detailed construction drawings and specifications.
• These documents will serve as a guide for contractors during construction.
Hire a design build contractor:
• Check references, credentials, and licenses before selecting a contractor.
• Sign a detailed contract that outlines the scope of work, timeline, and payment schedule.
Construction Phase:
• Demolition: If needed, remove any existing structures or walls.
• Foundation: Construct the foundation for the addition.
• Framing: Build the structural framework of the addition.
• Plumbing, Electrical, and HVAC: Install or update utilities as required.
• Insulation: Ensure proper insulation for energy efficiency.
• Drywall and Finish Work: Complete the walls and ceilings.
• Flooring and Cabinetry: Install flooring and kitchen cabinets.
• Appliances and Fixtures: Add appliances, plumbing fixtures, and lighting.
• Paint and Finish: Apply paint and finishes to achieve the desired look.
• Final Inspection: Schedule inspections to ensure compliance with building codes.
Final Inspections and Approvals:
• Arrange for final inspections to ensure the addition meets all safety and code requirements.
• Obtain any necessary certificates of occupancy or compliance.
Move In and Enjoy:
• Once all inspections and approvals are received, you can move into your new kitchen addition and start enjoying it.
Remember that every kitchen addition project is unique, so adapt this outline to your specific needs and circumstances. Consulting with professionals and obtaining the required permits and inspections is crucial to a successful and safe project.
 Paradise Found Construction
Keith and Amy loved their home in quiet Wake Forest neighborhood on a large corner lot on a cul-de-sac. Over time, Amy had developed allergic reactions to unknown allergens in their home. As her condition worsened, it became impossible for her to spend much time in the home, and they were forced to move out and find temporary housing accommodations.
After months of talking with other home improvement providers and indoor air “experts” and trying other solutions to no avail including having their HVAC ducting cleaned, they turned to Paradise Found Construction and our expertise and experience in transforming indoor environments in homes into healthy and clean living spaces. Because many of the improvements we undertook to create a cleaner environment also provided energy savings, we had our work certified under the 2012 National Green Building Standards (NGBS) and were award a Bronze level certification for the home.
We conducted a thorough investigation and testing regimen that included bringing in our team industry leading air quality and HVAC experts, we developed a comprehensive plan of action that would solve their “sick home syndrome”.
We removed all of the carpeting and pad from the home and thoroughly cleaned all surfaces and filtered the air with advanced HEPA filtration units. There were a few areas of mold in the crawl space which we mitigated as well. We thoroughly air sealed the home, paying particular attention to the ground level and attic floor system. Since the HVAC systems and ducting had become re-contaminated, we cleaned both units and all associated duct work.
To eliminate unhealthy air being drawn into the home from the crawl space, we completely sealed and conditioned the crawl. In order to provide a controlled entry point for clean fresh air into the home we installed an energy efficient stand-alone Energy Recovery Ventilator (ERV).
We installed wood flooring in all of the living areas that did not have wood flooring, and finished all of the flooring using a NO-VOC water-based floor finish. All of the painted surfaces of the home were sealed and painted with NO-VOC latex paint.
To further improve the energy performance of the home in addition to thoroughly air-sealing and sealing and conditioning the crawl space, we installed 100% LED lighting in the home. We improved the water efficiency of the home by installing low-flow EPA WaterSense rated toilets and shower heads, converted all of the bathroom and kitchen faucets to be more water efficient.
Upon completion, Amy and her family was able to move back into their cozy and clean “new home”, and are once again able to enjoy and be comfortable in their home.
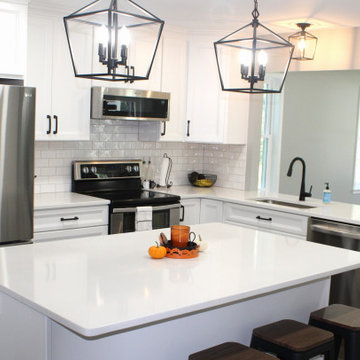 Talon Construction Inc.
Designing and building a kitchen addition is a complex process that involves multiple steps and considerations. Here is a general outline to help you get started on your kitchen addition project:
Define Your Goals and Budget:
• Determine the purpose of the kitchen addition. Is it for more cooking space, a dining area, or a combination of both?
• Establish a realistic budget for your project. Consider all costs, including construction, permits, materials, and furnishings.
Hire a Design Professional:
• Seek the services of a design build company who specializes in kitchen additions.
• Discuss your vision, needs, and budget with the design professional to create a design concept.
Site Evaluation:
• Assess the existing space and structural condition of your home to ensure it can support the addition.
• Consider factors like zoning regulations, setbacks, and building codes.
Design Development:
• Collaborate with your design professional to refine the concept, including the layout, size, and architectural style.
• Choose materials, finishes, and fixtures that fit your design and budget.
Obtain Permits:
• Consult with your local design build contractor to determine the necessary permits and approvals.
• Prepare and submit all required documents, including architectural drawings and engineering plans.
Create Construction Documents:
• Work with your design build professional to develop detailed construction drawings and specifications.
• These documents will serve as a guide for contractors during construction.
Hire a design build contractor:
• Check references, credentials, and licenses before selecting a contractor.
• Sign a detailed contract that outlines the scope of work, timeline, and payment schedule.
Construction Phase:
• Demolition: If needed, remove any existing structures or walls.
• Foundation: Construct the foundation for the addition.
• Framing: Build the structural framework of the addition.
• Plumbing, Electrical, and HVAC: Install or update utilities as required.
• Insulation: Ensure proper insulation for energy efficiency.
• Drywall and Finish Work: Complete the walls and ceilings.
• Flooring and Cabinetry: Install flooring and kitchen cabinets.
• Appliances and Fixtures: Add appliances, plumbing fixtures, and lighting.
• Paint and Finish: Apply paint and finishes to achieve the desired look.
• Final Inspection: Schedule inspections to ensure compliance with building codes.
Final Inspections and Approvals:
• Arrange for final inspections to ensure the addition meets all safety and code requirements.
• Obtain any necessary certificates of occupancy or compliance.
Move In and Enjoy:
• Once all inspections and approvals are received, you can move into your new kitchen addition and start enjoying it.
Remember that every kitchen addition project is unique, so adapt this outline to your specific needs and circumstances. Consulting with professionals and obtaining the required permits and inspections is crucial to a successful and safe project.
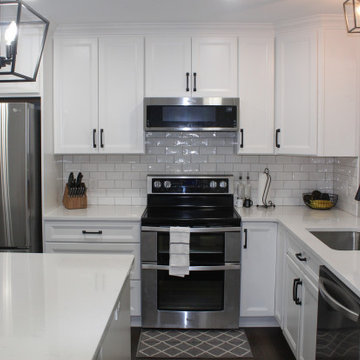 Talon Construction Inc.
Designing and building a kitchen addition is a complex process that involves multiple steps and considerations. Here is a general outline to help you get started on your kitchen addition project:
Define Your Goals and Budget:
• Determine the purpose of the kitchen addition. Is it for more cooking space, a dining area, or a combination of both?
• Establish a realistic budget for your project. Consider all costs, including construction, permits, materials, and furnishings.
Hire a Design Professional:
• Seek the services of a design build company who specializes in kitchen additions.
• Discuss your vision, needs, and budget with the design professional to create a design concept.
Site Evaluation:
• Assess the existing space and structural condition of your home to ensure it can support the addition.
• Consider factors like zoning regulations, setbacks, and building codes.
Design Development:
• Collaborate with your design professional to refine the concept, including the layout, size, and architectural style.
• Choose materials, finishes, and fixtures that fit your design and budget.
Obtain Permits:
• Consult with your local design build contractor to determine the necessary permits and approvals.
• Prepare and submit all required documents, including architectural drawings and engineering plans.
Create Construction Documents:
• Work with your design build professional to develop detailed construction drawings and specifications.
• These documents will serve as a guide for contractors during construction.
Hire a design build contractor:
• Check references, credentials, and licenses before selecting a contractor.
• Sign a detailed contract that outlines the scope of work, timeline, and payment schedule.
Construction Phase:
• Demolition: If needed, remove any existing structures or walls.
• Foundation: Construct the foundation for the addition.
• Framing: Build the structural framework of the addition.
• Plumbing, Electrical, and HVAC: Install or update utilities as required.
• Insulation: Ensure proper insulation for energy efficiency.
• Drywall and Finish Work: Complete the walls and ceilings.
• Flooring and Cabinetry: Install flooring and kitchen cabinets.
• Appliances and Fixtures: Add appliances, plumbing fixtures, and lighting.
• Paint and Finish: Apply paint and finishes to achieve the desired look.
• Final Inspection: Schedule inspections to ensure compliance with building codes.
Final Inspections and Approvals:
• Arrange for final inspections to ensure the addition meets all safety and code requirements.
• Obtain any necessary certificates of occupancy or compliance.
Move In and Enjoy:
• Once all inspections and approvals are received, you can move into your new kitchen addition and start enjoying it.
Remember that every kitchen addition project is unique, so adapt this outline to your specific needs and circumstances. Consulting with professionals and obtaining the required permits and inspections is crucial to a successful and safe project.
105