
Search results for "Chemicals" in Home Design Ideas

 Artistic Floors by Design, Inc.
Weinrauch Photography
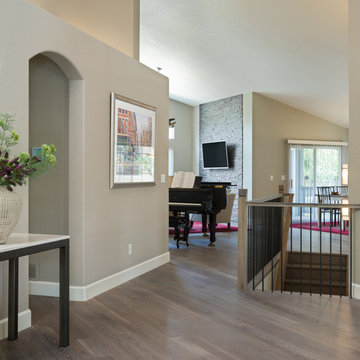
Large transitional open concept light wood floor and gray floor living room photo in Denver with a music area, gray walls, a standard fireplace, a stone fireplace and a wall-mounted tv
Large transitional open concept light wood floor and gray floor living room photo in Denver with a music area, gray walls, a standard fireplace, a stone fireplace and a wall-mounted tv
 Designtra
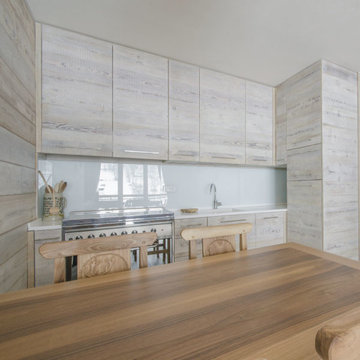
Bio wood is a completely chemical free wood flooring made from European larch and crafted in Italy. This wood species is known for its beautiful elongated and dimensional grain.
Bio wood is vapor treated, the planks are placed in sealed basins that emit a steam composed of water and other natural elements creating a natural sealer on the finished surface. This vapor treatment and drying creates an extremely durable, non-permeable finish. These planks have a hand-sawn surface, and due to the nature of the finishing system each plank is subtly different.
This collection is a variable width floor and contains three different plank widths.
*These planks are completely chemical free and certified for use in bio buildings.
Find the right local pro for your project



 Gulfcoast General Contracting & Construction Servi
Living room - industrial living room idea in Austin




 Windy City Painters
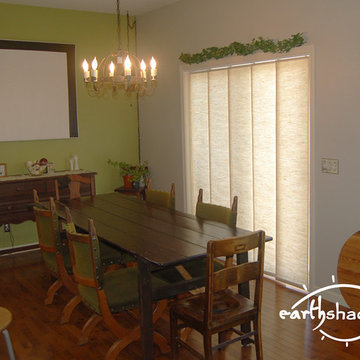
Metal Porch Stairs Painting in Lakeview, Chicago | Windy City Painters
Lakeview is one of Chicago's most architecturally diverse neighborhoods — vintage courtyard buildings, rooftop-deck condos, newly converted three-flats, and classic brick two-flats all line the same block. What they share is this: exposed metal. Back porch stairs, handrails, balconies, and exterior landings define the rear streetscape of nearly every building in the neighborhood. And in Chicago, exposed metal without proper protective coatings doesn't last.
Windy City Painters recently completed a full metal porch stairs painting project in Lakeview that illustrates exactly what professional metal refinishing looks like — and why preparation is everything.
The Problem: Years of Chicago Weather Had Done Their Damage
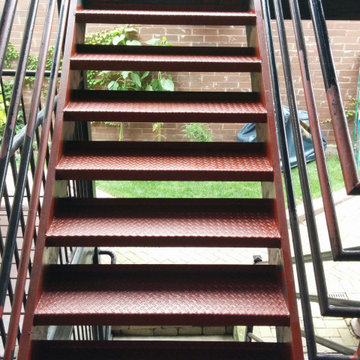
The client's back porch stairs were structurally sound — the diamond-plate steel treads were solid underfoot and the handrails were stable. However, the original paint system had long since failed. Surface rust had spread across the treads and risers. The old coating was peeling at every seam, edge, and weld point. Meanwhile, the black handrails were chalky and beginning to show rust at the bases.
Notably, this is a pattern Windy City Painters sees constantly in Lakeview. The neighborhood's diverse housing stock — ranging from pre-war courtyard buildings to 1990s condo conversions — often features original metal porch work that has never received a proper professional refinish. Homeowners and property managers patch-paint over rust for years, which ultimately accelerates the problem rather than solving it.
The solution isn't more paint. It's a complete system: mechanical rust removal, chemical treatment, primer, and a durable topcoat engineered for exterior metal.
The Windy City Painters Process for Metal Porch Stairs Painting
Windy City Painters approaches every metal porch stairs painting project with the same disciplined sequence. Consequently, our finishes outlast the competition by years.
Step 1 — Mechanical Preparation Our crew wire-brushes all loose rust, flaking paint, and surface contamination from every tread, riser, stringer, and handrail section. For heavier rust accumulation, we use grinding discs to cut down to clean, bare metal. This step is non-negotiable. Additionally, we pay particular attention to weld seams, bolt plates, and edge returns — the spots where moisture consistently hides and rust reliably starts.
Step 2 — Chemical Rust Treatment After mechanical prep, we apply a rust-converting primer to any remaining rust residue. This chemically neutralizes active rust and converts it into a stable, paintable surface. Moreover, the converter bonds to the metal and creates an additional barrier against future oxidation.
Step 3 — Rust-Inhibiting Primer Windy City Painters then applies a full coat of oil-based, rust-inhibiting primer to all prepared metal surfaces. This primer penetrates bare metal and creates the critical bond layer that everything else depends on. Skipping this step — or substituting a latex primer — is the single biggest reason DIY metal paint jobs fail within one season.
Step 4 — Two Topcoats of Industrial Enamel We apply two full coats of oil-based industrial enamel in the client's chosen color. For this Lakeview project, the stairs received a deep red finish and the handrails received gloss black — a classic combination that reads beautifully against the surrounding brick. Each coat is allowed to cure fully before the next is applied. Furthermore, we back-roll every surface to eliminate lap marks and ensure consistent film build.
Step 5 — Final Inspection and Cleanup Windy City Painters inspects every inch of the completed work before calling a project done. We remove all masking, clean up the work area completely, and walk the client through the finished result. In addition, we advise on a maintenance schedule to maximize the life of the coating system.
Why Metal Porch Stairs Painting Matters for Lakeview Properties
Metal porch stairs are among the most visible exterior features of Chicago residential buildings. Therefore, their condition directly affects curb appeal, property value, and — most importantly — structural safety. Rust that penetrates deeply enough will compromise the structural integrity of stairs and railings. Meanwhile, peeling paint signals to buyers, renters, and neighbors that a property is deferred.
In contrast, freshly refinished metal porch stairs signal exactly the opposite. They say the property is maintained, the owner takes pride in the building, and the structure is safe. For Lakeview landlords and homeowners alike, metal porch stair refinishing delivers an exceptional return on investment.
Professional Advice for Lakeview Homeowners
Before starting a metal porch stairs painting project, Windy City Painters recommends the following:
Don't paint over rust. Any rust left beneath a topcoat will continue to spread and will lift the new paint within months. Mechanical removal is essential.
Choose oil-based products for exterior metal. Latex paints don't adhere to metal as reliably and lack the film hardness needed to withstand foot traffic and freeze-thaw cycles.
Time your project right. Ideal conditions for metal painting are 50°F–90°F with low humidity. Chicago's spring and early fall are perfect windows.
Don't skip the primer. A properly applied rust-inhibiting primer is what separates a seven-year finish from a one-year failure.
Budget for full prep. Preparation typically represents 60–70% of the labor on a metal refinishing project. That's where the money is well spent.
Windy City Painters: Lakeview's Trusted Metal Refinishing Contractor
Windy City Painters has refined the process of exterior metal painting and refinishing across Chicago's North Side and Near West Side. We work in Lakeview regularly — on courtyard buildings, two-flats, coach houses, and commercial properties — and we understand the unique demands that Chicago's climate places on exterior metal. As a result, our coating systems are selected and applied for maximum longevity in this specific environment.
See more of our work and request a free estimate at www.windypainters.com.
Ready to transform your Lakeview home? Contact Windy City Painters for a free estimate — visit www.windypainters.com today. Proudly serving Wicker Park, West Town, Lincoln Park, Roscoe Village, Lakeview, Ukrainian Village, River North, and all of Chicago.
 Eco Star Painting
Step #1 Apply BM CLEAN
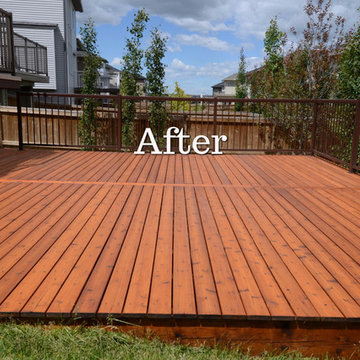
As you can see in the 'Before' picture above, this cedar deck was extremly dirty. This required an extra step in comparison to the typical deck stripping process. My paint rep at Benjamin Moore recommended a product called CLEAN. It comes in one gallon plastic containers and can be applied out of a plastic pail or with a garden sprayer. We used a Garden sprayer and chose a flat tip for application. The three gallon garden sprayer was filled with 2 gallons of water and one gallon of the CLEAN solution. This is a strong mixture and can be reduced to up to 6 parts water and one part of the Benjamin Moore CLEAN.
This approximately 22x20 deck had a board running perpindicular to the rest of the floor boards which divided it into 2 equal parts. Our method was to apply the solution to 3-4 of these 10' boards at a time. Allow it to set up for a few minutes and then scrub away with the deck brush. The agitation loosens up the dirt and grime and is then removed with a pressure washer a board a time. The flat tip on the pressure washer was almost the same width as the floor board. It is important to clean the sides of the board too because any remaining dirt or stain will be visible.
Benjamin Moore Deck Restoration products named Clean,Restore,brighten
Step #2 Apply BM RESTORE
The second step is exactly the same as the first step but with a different solution called Benjamin Moore RESTORE. The deck was dry before we started the 2nd step becuase it was baking hot outside. You use the same 2/1 mixture of water to chemical. This chemical will remove the stain still present in the deck floor. Make sure to rinse the garden sprayer clean before adding the restore solution. Unlike the BM CLEAN, the BM RESTORE has an orange-ish color in appearance. It did a fine job of removing most of the stain, but not 100% of it. There were a few areas that required a 3rd coat of restore but the process was quicker.
Step #3 Apply BM BRIGHTEN
The third step is exactly the same as the first two step but the chemical solution used was Benjamin Moore 'BRIGHTEN'. Again, the garden sprayer was cleaned and filled with 2 parts water and one part Brighten. The brightener not only lightens the wood but it also neutralizes the previous stripper solution. As stated before the Restore adds a bit of color and the Brighten will remove any traces of it. you still have to agitate the brightener with a scrub brush and either pressure wash it off or use a garden hose. We used the pressure washer for faster results. After it dries the wood look a lot brighter but we still found some spots of stain that had not come off.
Apply Sikkens Stain
As stated above the stain we used is called "Sikkens Proluxe" which is basically just a slight re-branding of the classic Sikkens Stain. The formula is exactly the same. In fact, the secondary name is still called 'Cetol' SRD RE. The color chosen was "CEDAR".
The weather was quite hot for a typical Calgary Spring day so we stained a 10' section of floor board at a time. The deck has a metal railing so the supporting feet had to be brushed in with a 2.5" natural bristle paint brush. for the rest of the job a 6" Wooster natural bristle deck brush was used. The handle was remove and a broom handle was inserted. The stain was stirred frequently and poured into a plastic Simms brand roller pan. Semi transparent Oil based stain has the consistency of water so you need to be careful not to spill any of it. When applying to a board you hit the sides first with the brush and then fillin the rest. Ten feet of floor board can be stain in a short period of time. it's important not to leave any streaks so it is adviseable to back-brush the entie length before moving on to the next board. The staining only took about 2.5 hours to complete. One coat is the manufacturers recommendation.
One last thing about Sikkens Stain. To maintain this beautiful look the deck should be re- coated once a year, preferably every spring. It's like applying sunscreen yearly to protect the wood against further damage. Two gallons was enough to cover this 450 sq foot deck.
12