
Search results for "Choose check" in Home Design Ideas

 Talon Construction Inc.
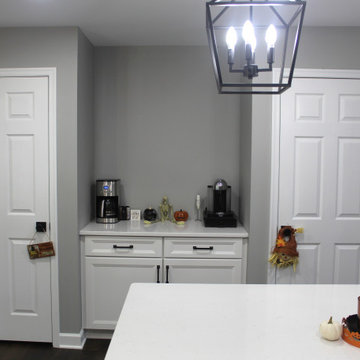
Designing and building a kitchen addition is a complex process that involves multiple steps and considerations. Here is a general outline to help you get started on your kitchen addition project:
Define Your Goals and Budget:
• Determine the purpose of the kitchen addition. Is it for more cooking space, a dining area, or a combination of both?
• Establish a realistic budget for your project. Consider all costs, including construction, permits, materials, and furnishings.
Hire a Design Professional:
• Seek the services of a design build company who specializes in kitchen additions.
• Discuss your vision, needs, and budget with the design professional to create a design concept.
Site Evaluation:
• Assess the existing space and structural condition of your home to ensure it can support the addition.
• Consider factors like zoning regulations, setbacks, and building codes.
Design Development:
• Collaborate with your design professional to refine the concept, including the layout, size, and architectural style.
• Choose materials, finishes, and fixtures that fit your design and budget.
Obtain Permits:
• Consult with your local design build contractor to determine the necessary permits and approvals.
• Prepare and submit all required documents, including architectural drawings and engineering plans.
Create Construction Documents:
• Work with your design build professional to develop detailed construction drawings and specifications.
• These documents will serve as a guide for contractors during construction.
Hire a design build contractor:
• Check references, credentials, and licenses before selecting a contractor.
• Sign a detailed contract that outlines the scope of work, timeline, and payment schedule.
Construction Phase:
• Demolition: If needed, remove any existing structures or walls.
• Foundation: Construct the foundation for the addition.
• Framing: Build the structural framework of the addition.
• Plumbing, Electrical, and HVAC: Install or update utilities as required.
• Insulation: Ensure proper insulation for energy efficiency.
• Drywall and Finish Work: Complete the walls and ceilings.
• Flooring and Cabinetry: Install flooring and kitchen cabinets.
• Appliances and Fixtures: Add appliances, plumbing fixtures, and lighting.
• Paint and Finish: Apply paint and finishes to achieve the desired look.
• Final Inspection: Schedule inspections to ensure compliance with building codes.
Final Inspections and Approvals:
• Arrange for final inspections to ensure the addition meets all safety and code requirements.
• Obtain any necessary certificates of occupancy or compliance.
Move In and Enjoy:
• Once all inspections and approvals are received, you can move into your new kitchen addition and start enjoying it.
Remember that every kitchen addition project is unique, so adapt this outline to your specific needs and circumstances. Consulting with professionals and obtaining the required permits and inspections is crucial to a successful and safe project.
 Talon Construction Inc.
Designing and building a kitchen addition is a complex process that involves multiple steps and considerations. Here is a general outline to help you get started on your kitchen addition project:
Define Your Goals and Budget:
• Determine the purpose of the kitchen addition. Is it for more cooking space, a dining area, or a combination of both?
• Establish a realistic budget for your project. Consider all costs, including construction, permits, materials, and furnishings.
Hire a Design Professional:
• Seek the services of a design build company who specializes in kitchen additions.
• Discuss your vision, needs, and budget with the design professional to create a design concept.
Site Evaluation:
• Assess the existing space and structural condition of your home to ensure it can support the addition.
• Consider factors like zoning regulations, setbacks, and building codes.
Design Development:
• Collaborate with your design professional to refine the concept, including the layout, size, and architectural style.
• Choose materials, finishes, and fixtures that fit your design and budget.
Obtain Permits:
• Consult with your local design build contractor to determine the necessary permits and approvals.
• Prepare and submit all required documents, including architectural drawings and engineering plans.
Create Construction Documents:
• Work with your design build professional to develop detailed construction drawings and specifications.
• These documents will serve as a guide for contractors during construction.
Hire a design build contractor:
• Check references, credentials, and licenses before selecting a contractor.
• Sign a detailed contract that outlines the scope of work, timeline, and payment schedule.
Construction Phase:
• Demolition: If needed, remove any existing structures or walls.
• Foundation: Construct the foundation for the addition.
• Framing: Build the structural framework of the addition.
• Plumbing, Electrical, and HVAC: Install or update utilities as required.
• Insulation: Ensure proper insulation for energy efficiency.
• Drywall and Finish Work: Complete the walls and ceilings.
• Flooring and Cabinetry: Install flooring and kitchen cabinets.
• Appliances and Fixtures: Add appliances, plumbing fixtures, and lighting.
• Paint and Finish: Apply paint and finishes to achieve the desired look.
• Final Inspection: Schedule inspections to ensure compliance with building codes.
Final Inspections and Approvals:
• Arrange for final inspections to ensure the addition meets all safety and code requirements.
• Obtain any necessary certificates of occupancy or compliance.
Move In and Enjoy:
• Once all inspections and approvals are received, you can move into your new kitchen addition and start enjoying it.
Remember that every kitchen addition project is unique, so adapt this outline to your specific needs and circumstances. Consulting with professionals and obtaining the required permits and inspections is crucial to a successful and safe project.
 Talon Construction Inc.
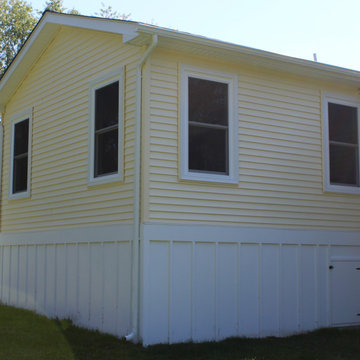
Designing and building a kitchen addition is a complex process that involves multiple steps and considerations. Here is a general outline to help you get started on your kitchen addition project:
Define Your Goals and Budget:
• Determine the purpose of the kitchen addition. Is it for more cooking space, a dining area, or a combination of both?
• Establish a realistic budget for your project. Consider all costs, including construction, permits, materials, and furnishings.
Hire a Design Professional:
• Seek the services of a design build company who specializes in kitchen additions.
• Discuss your vision, needs, and budget with the design professional to create a design concept.
Site Evaluation:
• Assess the existing space and structural condition of your home to ensure it can support the addition.
• Consider factors like zoning regulations, setbacks, and building codes.
Design Development:
• Collaborate with your design professional to refine the concept, including the layout, size, and architectural style.
• Choose materials, finishes, and fixtures that fit your design and budget.
Obtain Permits:
• Consult with your local design build contractor to determine the necessary permits and approvals.
• Prepare and submit all required documents, including architectural drawings and engineering plans.
Create Construction Documents:
• Work with your design build professional to develop detailed construction drawings and specifications.
• These documents will serve as a guide for contractors during construction.
Hire a design build contractor:
• Check references, credentials, and licenses before selecting a contractor.
• Sign a detailed contract that outlines the scope of work, timeline, and payment schedule.
Construction Phase:
• Demolition: If needed, remove any existing structures or walls.
• Foundation: Construct the foundation for the addition.
• Framing: Build the structural framework of the addition.
• Plumbing, Electrical, and HVAC: Install or update utilities as required.
• Insulation: Ensure proper insulation for energy efficiency.
• Drywall and Finish Work: Complete the walls and ceilings.
• Flooring and Cabinetry: Install flooring and kitchen cabinets.
• Appliances and Fixtures: Add appliances, plumbing fixtures, and lighting.
• Paint and Finish: Apply paint and finishes to achieve the desired look.
• Final Inspection: Schedule inspections to ensure compliance with building codes.
Final Inspections and Approvals:
• Arrange for final inspections to ensure the addition meets all safety and code requirements.
• Obtain any necessary certificates of occupancy or compliance.
Move In and Enjoy:
• Once all inspections and approvals are received, you can move into your new kitchen addition and start enjoying it.
Remember that every kitchen addition project is unique, so adapt this outline to your specific needs and circumstances. Consulting with professionals and obtaining the required permits and inspections is crucial to a successful and safe project.
Find the right local pro for your project
 Talon Construction Inc.
Designing and building a kitchen addition is a complex process that involves multiple steps and considerations. Here is a general outline to help you get started on your kitchen addition project:
Define Your Goals and Budget:
• Determine the purpose of the kitchen addition. Is it for more cooking space, a dining area, or a combination of both?
• Establish a realistic budget for your project. Consider all costs, including construction, permits, materials, and furnishings.
Hire a Design Professional:
• Seek the services of a design build company who specializes in kitchen additions.
• Discuss your vision, needs, and budget with the design professional to create a design concept.
Site Evaluation:
• Assess the existing space and structural condition of your home to ensure it can support the addition.
• Consider factors like zoning regulations, setbacks, and building codes.
Design Development:
• Collaborate with your design professional to refine the concept, including the layout, size, and architectural style.
• Choose materials, finishes, and fixtures that fit your design and budget.
Obtain Permits:
• Consult with your local design build contractor to determine the necessary permits and approvals.
• Prepare and submit all required documents, including architectural drawings and engineering plans.
Create Construction Documents:
• Work with your design build professional to develop detailed construction drawings and specifications.
• These documents will serve as a guide for contractors during construction.
Hire a design build contractor:
• Check references, credentials, and licenses before selecting a contractor.
• Sign a detailed contract that outlines the scope of work, timeline, and payment schedule.
Construction Phase:
• Demolition: If needed, remove any existing structures or walls.
• Foundation: Construct the foundation for the addition.
• Framing: Build the structural framework of the addition.
• Plumbing, Electrical, and HVAC: Install or update utilities as required.
• Insulation: Ensure proper insulation for energy efficiency.
• Drywall and Finish Work: Complete the walls and ceilings.
• Flooring and Cabinetry: Install flooring and kitchen cabinets.
• Appliances and Fixtures: Add appliances, plumbing fixtures, and lighting.
• Paint and Finish: Apply paint and finishes to achieve the desired look.
• Final Inspection: Schedule inspections to ensure compliance with building codes.
Final Inspections and Approvals:
• Arrange for final inspections to ensure the addition meets all safety and code requirements.
• Obtain any necessary certificates of occupancy or compliance.
Move In and Enjoy:
• Once all inspections and approvals are received, you can move into your new kitchen addition and start enjoying it.
Remember that every kitchen addition project is unique, so adapt this outline to your specific needs and circumstances. Consulting with professionals and obtaining the required permits and inspections is crucial to a successful and safe project.
 Talon Construction Inc.
Designing and building a kitchen addition is a complex process that involves multiple steps and considerations. Here is a general outline to help you get started on your kitchen addition project:
Define Your Goals and Budget:
• Determine the purpose of the kitchen addition. Is it for more cooking space, a dining area, or a combination of both?
• Establish a realistic budget for your project. Consider all costs, including construction, permits, materials, and furnishings.
Hire a Design Professional:
• Seek the services of a design build company who specializes in kitchen additions.
• Discuss your vision, needs, and budget with the design professional to create a design concept.
Site Evaluation:
• Assess the existing space and structural condition of your home to ensure it can support the addition.
• Consider factors like zoning regulations, setbacks, and building codes.
Design Development:
• Collaborate with your design professional to refine the concept, including the layout, size, and architectural style.
• Choose materials, finishes, and fixtures that fit your design and budget.
Obtain Permits:
• Consult with your local design build contractor to determine the necessary permits and approvals.
• Prepare and submit all required documents, including architectural drawings and engineering plans.
Create Construction Documents:
• Work with your design build professional to develop detailed construction drawings and specifications.
• These documents will serve as a guide for contractors during construction.
Hire a design build contractor:
• Check references, credentials, and licenses before selecting a contractor.
• Sign a detailed contract that outlines the scope of work, timeline, and payment schedule.
Construction Phase:
• Demolition: If needed, remove any existing structures or walls.
• Foundation: Construct the foundation for the addition.
• Framing: Build the structural framework of the addition.
• Plumbing, Electrical, and HVAC: Install or update utilities as required.
• Insulation: Ensure proper insulation for energy efficiency.
• Drywall and Finish Work: Complete the walls and ceilings.
• Flooring and Cabinetry: Install flooring and kitchen cabinets.
• Appliances and Fixtures: Add appliances, plumbing fixtures, and lighting.
• Paint and Finish: Apply paint and finishes to achieve the desired look.
• Final Inspection: Schedule inspections to ensure compliance with building codes.
Final Inspections and Approvals:
• Arrange for final inspections to ensure the addition meets all safety and code requirements.
• Obtain any necessary certificates of occupancy or compliance.
Move In and Enjoy:
• Once all inspections and approvals are received, you can move into your new kitchen addition and start enjoying it.
Remember that every kitchen addition project is unique, so adapt this outline to your specific needs and circumstances. Consulting with professionals and obtaining the required permits and inspections is crucial to a successful and safe project.
 Insideout Kitchens
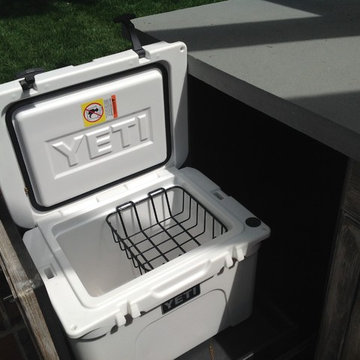
Yeti Cooler Pull out Cabinet instead of ice maker
Home design - transitional home design idea in Charlotte
Home design - transitional home design idea in Charlotte

 Zelaya Properties LLC
We used: Custom cherry cabinetry in Arts & Crafts Shaker style by Kabinart in Boulder and Espresso stains. Liberty Hardware Venetian bronze 1-1/2" cabinet knobs. KitchenAid Architect II Series 22 CF counter-depth French door refrigerator. KitchenAid Architect Series II 27" convection single wall oven. KitchenAid 36" 6-burner dual fuel freestanding commercial-style range. KitchenAid Architect II Series 24" dishwasher. Sharp Insight Pro Series 24" built-in microwave drawer (Model #KB6524PS). Crystorama Solaris 12" wide pendant lights in English bronze. Granite countertops in Brown Fantasy. 3"x6" polished marble backsplash.
Paint colors:
Walls: Glidden Silver Cloud 30YY 63/024
Ceilings/Trims/Doors: Glidden Swan White GLC23
Robert B. Narod Photography
Sponsored
Columbus, OH

Hope Restoration & General Contracting
Columbus Design-Build, Kitchen & Bath Remodeling, Historic Renovations
 Tile Doctor Ltd
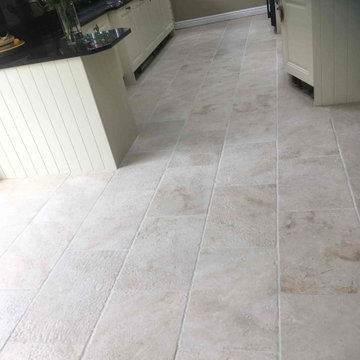
This client from Nantwich had a beautiful Travertine tiled floor installed in their very large kitchen and utility area. Realising that their tiles didn’t look as good as when they were installed, they got in touch to ask if I could clean and re-seal the tiles and grouting.
I went over to survey the floor and could see the grout had darkened (it was originally white) and the travertine was trapping dirt in the natural pits of the stone. I conducted a test clean on the grout and Travertine which responded well, the client was impressed, and I was asked to do the whole floor. Happy with my quote for restoring the tile and grout we scheduled a date to do the work.
Nantwich is a medieval market town in Cheshire, well known for its Tudor and Georgian architecture. It has one of the highest concentrations of listed buildings in England and many of these properties have very old floors.
We scheduled in a date for the work, and I began by cleaning the floor with a strong solution of Tile Doctor Remove and Go worked into the grout and pitting with hand brushes. I then used a wire brush on the grout to get it really clean. The soiled solution was rinsed off with water and extracted with a wet vacuum.
Once done the Travertine was burnished using a series of Tile Doctor burnishing pads from 400 through to 1500-grit attached to the rotary machine, rinsing with water in between to remove the soiling. The pads are encrusted with diamond and after being worked over each pad three times do an amazing job of removing ingrained dirt and bringing up the polish on the stone.
The floor needs to be dry before I can apply the sealer so once the burnishing was done, I gave it a final finish and extracted as much moisture as possible with the wet vacuum.
The Travertine was left to dry off overnight and I returned the next day to apply a sealer, first checking the floor was dry with a damp meter. The readings were acceptable, so I was able to get on with the sealing. My client had requested a natural finish, so I had recommended Tile Doctor Ultra-Seal which is almost invisible sealer that provides protection but doesn’t change the look of the stone. Only a couple of coats are required and being an impregnating sealer, it works by soaking into stone and occupying the pores so dirt can’t become ingrained there.
Once the sealer had dried the floor looked so much cleaner and I had a very happy customer who left the following feedback:
“Kamilla has totally transformed our tumbled travertine kitchen floor. It looks like new again, we are so pleased. Kamilla explained the whole process and was a pleasure to deal with. We are delighted with the end result, Kamilla worked so hard, would highly recommend.”
For aftercare cleaning and maintenance, I recommended they use Tile Doctor Stone Soap which is pH neutral and mild enough to use every day. You must be careful when choosing a cleaner for sealed floors as many products are too strong and will reduce the lifespan of the sealer.
Kamila Logonzy
East Cheshire Tile Doctor
 Tile Doctor Ltd
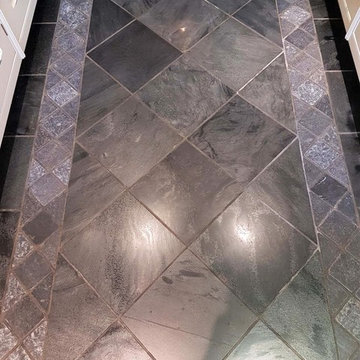
I was recently asked to survey an unusual stone floor at a house in in Harrogate comprising of Slate inlaid with Granite. The client advised that it had not been cleaned properly for 20 years and wanted it renovating! It was now definitely overdue a deep clean and professional attention. Fortunately, having worked on these floors for many years I knew I could make a substantial impact and transform its appearance. Fossilized slate is a beautiful stone when cleaned and sealed correctly.
The owner confessed they had actually been sealing the floor every two years but without a deep clean first, so they were effectively sealing in the dirt each time. I discussed with them the process I would use to clean and re-seal the floor and we agreed a price to carry to out the work.
To remove the layers of old sealer and dirt used a set of Tile Doctor Diamond Burnishing pads. The pads are attached to a rotary floor machine starting with the coarse 400-grit pad which was lubricated with a dilution of Tile Doctor Remove and Go to help strip the floor of dirt and layers of sealer. After rinsing and extracting the soil I worked through the different grades of pads in sequence finishing with the 1500-grit and this time using just water for lubrication.
A set of diamond handheld burnishing blocks were then used to clean up the edges and corners where the large 17” pads struggle to reach. This ensures all areas are treated and free of dirt and old sealer.
The floor was then rinsed and extracted again to remove the remaining soil. I find a wet vacuum is an invaluable tool for this. The floor was then left to dry out overnight ready for sealing the next day.
I returned the next day to seal the floor, first checking with a damp meter that the floor was dry, and the moisture reading was below the acceptable level. These results were fine, so I had a green light to continue and seal the stone.
The customer wanted a shine on the floor so rather than apply a satin sealer which I felt wouldn’t adhere to the stone properly I decided to polish the floor further with a the last of the four burnishing pads which is a very fine 3000-grit pad. You don’t need to use a lot of water with this last pad just a small amount sprayed onto the floor using a technique we refer to as a ‘Spray Burnish’.
To seal the floor, two coats of Tile Doctor Colour Grow were applied. This is an impregnating matt sealer which intensifies the natural colours of this beautiful stone and provides long lasting durable protection.
Even I was impressed with the finished result but more importantly the client was over the moon. To keep the floor looking its best I recommended they use Tile Doctor Stone Soap which is pH neutral. You should always read the label in detail when choosing a floor cleaning product as many are too strong and not recommended for sealed stone surfaces as they will prematurely erode the sealer.
Nigel Stoker
North West Yorkshire Tile Doctor
 Tile Doctor Ltd
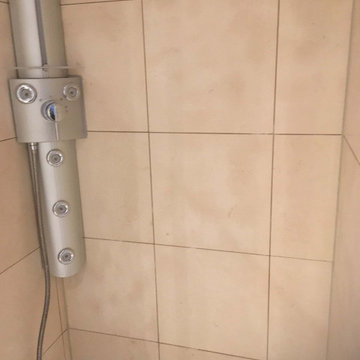
I was asked to look at renovating a shower cubicle at a property in in Manchester city centre that had been clad in White Limestone tiles. I understood the bathroom had been installed 12 years prior, but now the tiles were looking grubby, mouldy and dirty.
The client had lived at the property for the last two years and in an attempt to resolve the problems had used a few different household products such as flash and bleach, they had tried everything, and nothing had helped. I suspected that these strong acidic cleaners had actually made the problem worse by stripping off what was left of the sealer that was protecting the Limestone, allowing dirt to become ingrained in the stone.
I visited the property and ran a few cleaning tests in the shower cubicle with Tile Doctor products. This allows me to see which product will have the best results and gives the customer confidence that we can resolve their issues. The results were immediate, they could see the difference and they were happy to accept my quote and agree a date for my return to complete the work.
I arrived several weeks later and made a start. The tiles were scrubbed by hand with a strong dilution of Tile Doctor Remove and Go with excellent results. This product is designed to remove coatings and sealers, and in this case, it did a great job of drawing out the ingrained stains and dirt build-up. This removed what was left of the sealer and took off most of the dirt and mould. The Limestone tiles and grout were then rinsed with water to remove the soil.
Next I needed to restore the smooth surface of the limestone which had been etched by the use of strong acidic cleaning products. To do this I used a set of six-inch diamond burnishing pads attached to a hand buffer to hone and restore the stone.
I then dried the shower tiles and grout with a heat gun checking the moisture levels with damp meter until I was satisfied it was completely dry.
The last step was to re-seal the Limestone and Grout using a couple of coats of Tile Doctor Colour Grow. This is natural coloured intensifying sealer which provides durable protection to the surface allowing it to breathe and enhancing the colours.
The Customer was amazed with the difference and left the following feedback!
“Kamila was friendly, professional and kept me informed about what to expect before she took on the job and during the tile cleaning. The tiles look absolutely amazing after her work – I feel as though I have a brand new bathroom! Kamila also gave me helpful tips on looking after limestone tiles. I can’t recommend her highly enough.”
For future cleaning I recommended the use of Tile Doctor Aqua-Pro which is a pH neutral shower tile cleaner designed for use on sealed surfaces. Most cleaning products you find in supermarkets are overly strong and will erode the sealer prematurely, so when choosing a cleaning product always read the label and make sure it’s safe to use on Sealed Stone tiles.
Alex Logonzy
Greater Manchester Tile Doctor



 SabaRehman Abdulrehman
Phoenix's food scene is vibrant and thriving, but also one of the most closely watched in the country. Health inspectors in Maricopa County are strict, and customers expect spotless dining spaces.
To stay competitive, restaurant owners and food vendors must stay on top of evolving health codes, sanitation protocols, and food safety benchmarks. That starts with a firm grip on restaurant cleaning safety standards. Ignoring sanitation rules risks more than bad reviews. It invites citations, customer complaints, and operational shutdowns.
Whether you're operating a food truck or a restaurant, following these Phoenix cleaning standards helps you stay compliant, pass health inspections, and build customer trust.
Importance of a Clean Phoenix Restaurant that Follows Food Health and Safety Standards
The restaurant industry in Phoenix operates under strict oversight. The Maricopa County Environmental Services Department conducts regular inspections, and violations can result in fines or closures. In this climate, restaurant cleaning is not just a hygiene standard. It is a business-critical measure.
Proper food handling and establishment cleaning protocols reduce the risk of foodborne illnesses, control pests, protect equipment, and keep your staff safe. Inconsistent practices, on the other hand, can quickly become liabilities.
Start With the Food Code
Phoenix food vendors must comply with the 2017 FDA Food Code as adopted by Maricopa County. This includes rules on:
- Sanitizing food-contact surfaces after each use
- Maintaining proper water temperatures for dishwashing
- Cleaning restrooms frequently and keeping them stocked
- Storing cleaning chemicals away from prep areas
- Daily: Wipe prep tables, mop floors, clean grills, sanitize cutting boards
- Weekly: Deep clean kitchen hoods, polish cooking equipment, disinfect drains
- Monthly: Check pest control measures, clean freezer coils, and inspect HVAC filters
- Using the right sanitizers and PPE
- Logging cleaning times and who performed the task
- Identifying signs of mold, grease buildup, or rodent activity
- Conducting thorough surface cleaning to ensure all food-contact surfaces are sanitized regularly
- Food-safe and non-corrosive
- Effective against norovirus, salmonella, and E. coli
- Clearly labeled and stored in original containers
- Seal gaps around doors and pipes
- Store dry goods in sealed, elevated containers
- Keep outdoor waste bins locked and distanced from entry points
- Record cleaning completion in real time
- Alert managers when tasks are missed
- Keep a historical record for inspections
- Is certified and understands the Arizona food codes
- Provides documented service reports
- Offers customized cleaning plans
- Offers flexible scheduling around your operating hours
- Cross-contamination prevention: Regularly clean food prep surfaces and tools, and use separate equipment for raw meats, vegetables, and ready-to-eat foods. Proper cleaning prevents any contact with food that could lead to cross-contamination and affects food quality.
- Temperature monitoring: While not directly related to cleaning, maintaining proper food temperature is essential. Hot foods should be stored above 140°F, and cold foods below 40°F. Regularly monitor temperatures and clean temperature gauges to ensure accuracy.
- Proper storage: Use clean storage containers and shelving for food storage, keeping items off the floor. Ensure all food is sealed and labeled to avoid contamination risks and comply with food safety standards.

 Moderne Builders
Gorgeous master bath with dramatic retro "wave" tile. Peak Photography
Example of a 1950s bathroom design in Los Angeles
Example of a 1950s bathroom design in Los Angeles
Sponsored
Westerville, OH

Custom Home Works
Franklin County's Award-Winning Design, Build and Remodeling Expert

 G and S Installation USA, LLC.
Can you spot the caulk?!?!?
Our installation team at G&S takes great pride in having spot-on caulk jobs!
Trendy home office photo in Bridgeport
Trendy home office photo in Bridgeport
 StoneUnlimited Kitchen and Bath Remodeling
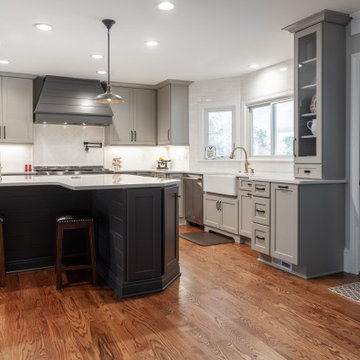
Choosing to abandon uniformity in your kitchen can be a great choice if you're looking to opt out of a monochrome aesthetic. Two-toned kitchen cabinets add visual interest and contrast while drawing focus to different features within the space. Designs utilizing two-toned cabinets have become very popular in recent years and it's not a trend that will be fading out any time soon.
Our clients opted for a combination of Earl Grey and Macchiato Classic cabinetry in their two-toned kitchen. The large island with its second faucet, sink, microwave drawer and lower storage is the focal point of the room and a great work surface for food prep and entertaining. A vertical pull out PowerDock was installed into the top of the island for plugging in kitchen tools, phones and laptops. Dolomite Marble subway tile and Brunello quartz countertops brighten up the kitchen and balance out the tone of the cabinets creating a light and airy feel. The addition of contrasting touches such as the Honey Bronze, Flat Black hardware and Champaign Bronze faucets, accessories the room beautifully. The subdued and sophisticated style of this two-toned kitchen is exquisite and shows the various ways that two-tone cabinets can be versatile and appealing.
Some of the other areas that were remodeled in this home included the complete overhaul of the existing stair well, a guest bath and laundry area.
The guest bath has beautiful vanity cabinets in Celest finish, Monochrome Lotus Deco tile and very reflective Midnight Dots in the shower floor and niche. The combination of all three give a striking white, blue and black design that will inspire and show that you can use pattern and texture in small spaces. A twenty four inch wall mounted shower seat can be lifted and secured when in use and tucked away to allow access out of the shower. A pocket door from the guest bathroom provides a second access point to the hallway with the laundry that has also been revamped with the same style and finish of cabinetry.
 Anam Interior
Introduction
Flooring plays an important role in the appearance, comfort, and functionality of a villa. From elegant marble floors in living rooms to durable porcelain tiles in kitchens and bathrooms, the right flooring can transform any residential space.
For homeowners in Qatar, selecting suitable flooring requires consideration of design preferences, durability, maintenance, and room functionality. This guide explores popular flooring materials and how to choose the right options for luxury villa interiors.
1. Popular Flooring Options for Villas in Qatar
Different flooring materials offer different advantages. Understanding their characteristics helps homeowners make informed decisions.
Marble Flooring
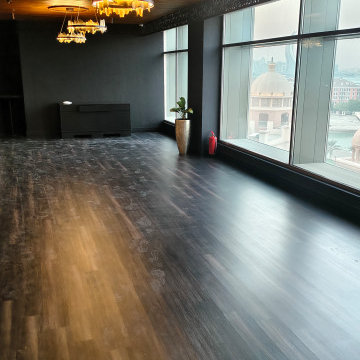
Marble is a popular choice for luxury villas because of its natural patterns, elegant appearance, and timeless appeal. It is particularly suitable for living rooms, entrance halls, staircases, and formal majlis areas.
Benefits:
Unique natural patterns and colours.
Elegant appearance for luxury interiors.
Available in polished and honed finishes.
Can be professionally polished and restored.
However, marble requires appropriate maintenance and can be sensitive to acidic substances and staining. Polished marble may also become slippery when wet.
Porcelain Tiles
Porcelain tiles offer durability, low water absorption, and a wide range of designs. They are suitable for different residential areas, including kitchens, bathrooms and living spaces.
Benefits:
Generally easy to maintain.
Low water absorption.
Available in marble, stone, and wood-effect designs.
Suitable options for high-traffic areas.
Granite Flooring
Granite is a natural stone known for its hardness and distinctive appearance. It can be considered for entrances, staircases, and other areas where durability is important.
Ceramic Tiles
Ceramic tiles provide an affordable flooring option with various colours, patterns, and finishes. Their suitability depends on the specific product and intended application.
2. Choosing the Right Flooring for Different Villa Areas
Each area of a villa has different flooring requirements.
Living rooms and majlis: Marble and large-format porcelain tiles can create an elegant and spacious appearance.
Bedrooms: Neutral-coloured marble or porcelain can complement comfortable and relaxing interiors.
Kitchens: Durable, easy-to-clean porcelain tiles are often a practical choice.
Bathrooms: Textured or matte tiles with appropriate slip resistance are recommended.
Staircases and entrances: Marble and granite can create an attractive first impression, with suitable attention to safety and edge detailing.
Selecting materials according to the function of each space helps create a balanced villa interior.
3. Popular Marble Colours and Finishes
Marble colour and finish can influence the overall atmosphere of a villa.
White marble: Creates a bright, elegant appearance with natural veining.
Beige and cream marble: Adds warmth and complements neutral furniture.
Grey marble: Works well with contemporary and minimalist interiors.
Dark marble: Creates a dramatic appearance in selected feature areas.
Polished marble offers a reflective surface, while honed marble provides a softer, matte finish. The right option depends on the room's purpose, maintenance requirements, and safety considerations.
4. Marble vs. Porcelain: Which Is Better?
Both materials offer advantages for villa flooring.
Feature
Marble
Porcelain
Appearance
Natural patterns
Multiple designs
Durability
Varies by stone
Generally high
Maintenance
Requires specific care
Generally easier
Water absorption
Varies by stone
Very low
Design
Natural luxury
Versatile finishes
Marble is suitable for homeowners who prefer natural stone and distinctive patterns. Porcelain is a practical alternative for those seeking durability and easier maintenance. Both materials can also be combined in different areas of a villa.
5. Important Factors Before Installing Flooring
Before selecting flooring for your villa in Qatar, consider the following:
Material quality: Check the material specifications, finish, dimensions, and suitability for each room.
Slip resistance: Select appropriate finishes for bathrooms, kitchens, and other moisture-prone areas.
Installation quality: Proper subfloor preparation, adhesives, grout, and movement joints contribute to long-term performance.
Maintenance: Understand the cleaning and care requirements of the selected material.
Design coordination: Ensure the flooring complements furniture, lighting, wall finishes, and the overall interior design concept.
Professional material selection and installation can help prevent common flooring problems and improve the finished appearance.
6. What Affects Flooring Costs in Qatar?
The cost of marble and flooring installation depends on several factors:
Type and quality of material.
Origin and availability.
Flooring area and tile dimensions.
Existing floor removal and preparation.
Installation labour and materials.
Decorative patterns, skirting and finishing.
Homeowners planning a complete villa renovation should also consider flooring as part of the overall fit-out budget.
For more information, read our related guide on Interior Fit-Out Cost in Qatar.
7. Professional Villa Interior Design and Flooring Selection
Flooring should be selected as part of a complete interior design plan. The right combination of materials, colours, furniture and lighting helps create a cohesive residential environment.
At ANAM Interiors, villa interior design and fit-out solutions focus on combining aesthetics with functionality through space planning, material selection, and coordinated execution.
Explore our Villa Interior Design in Qatar guide to discover more residential design ideas.
 SabaRehman Abdulrehman
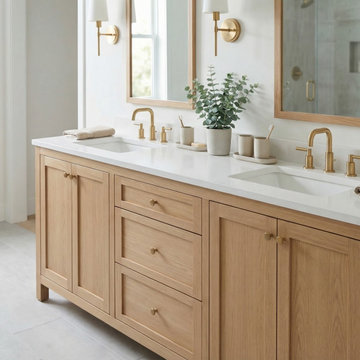
Morning routines shouldn’t involve a traffic jam at the sink. The 2025 Houzz Bathroom Trends Study found that 65 percent of U.S. renovators now choose a double-sink vanity to skip the wait. Designers agree: Titan Builders dubbed 2025 “the year of bigger, storage-packed double vanities,” forecasting dual-basin setups in family, guest, and even powder baths. As KBIS 2025 launches land, prototypes for 2026 layer in spa-grade wood, built-in outlets, and planet-friendly finishes. In this guide, we rank six standout models and show you how to size, install, and enjoy a clutter-free, two-sink future.
Methodology and selection criteria
A well-planned double-sink vanity keeps busy morning routines calm and clutter-free.
Before we crowned any winners, we mapped the entire 2024–2026 double-sink (dual-basin) market. That meant parsing KBIS exhibitor releases, scraping bestseller lists from Home Depot, Lowe’s, and Wayfair, and reviewing designer short lists in trade magazines. The sweep produced 110 candidate vanities, giving us visibility into every style, price tier, and material in play.
We then scored each model against six weighted factors that continue to matter long after installers leave:
- Build quality – 25 percent.Solid hardwood frames, dovetail drawers, and furniture-grade plywood backs, never particleboard in disguise.
- Design versatility – 20 percent.Lines and finishes that suit modern, classic, or farmhouse baths without dating quickly.
- Sustainability – 15 percent.FSC-certified wood, CARB 2 compliance, and low-VOC finishes for healthier air.
- Storage efficiency – 15 percent.Deep drawers, tilt-outs, or power cubbies that corral countertop clutter.
- Value for money – 15 percent.Fair street price for the materials, stone tops, sinks, and soft-close hardware included.
- Brand reputation and warranty – 10 percent.Manufacturers with responsive support and at least a one-year parts guarantee.
- Footprint: 72 W × 22 D × 36 H in. (183 × 56 × 91 cm)
- Crated weight: 506 lb / 230 kg
- Street price: about $2,575 with marble top and basins, Q4 2025
- Footprint: 48 W × 22 D in. (122 × 56 cm)
- Height: 34.8 in. (88 cm) with backsplash
- Sliding barn door plus 3 drawers
- Pre-drilled 8-in. faucet spacing, sinks included
- Footprint: 60 W × 21 D × 34 H in. (152 × 53 × 86 cm)
- Integrated power: 4 AC + 2 USB, UL-listed
- Crated weight: 300 lb / 136 kg
- Street price: about $2,349 at Home Depot, Q4 2025
- Footprint: 72 W × 22 D in. (183 × 56 cm)
- Height: 34 in. (86 cm) plus 4 in. backsplash
- Counter: 1 in. Carrara marble, apron-front sinks included
- Hardware: oil-rubbed bronze, soft-close doors and drawers
- Footprint: 60 W × 22 D × 34 H in. (152 × 56 × 86 cm)
- Construction: solid poplar and plywood, waterfall quartz top
- Integrated slim power bank, soft-close doors and drawers
- Target price: just under $2,300 with top and basins
Sponsored
Columbus, OH
Hope Restoration & General Contracting
Columbus Design-Build, Kitchen & Bath Remodeling, Historic Renovations

 Five Star Tree Care
You might have heard the expression “strong as Oak” somewhere before. Although this saying might make you think it is talking about the strong physical attributes of the tree; like the storm-resistant trunk or the strong root system, it is actually referring to something deeper than that. Five Star Tree Services is here to dive deep into the ancient history of this magnificent tree!
Throughout Greek mythology and time, the Oak tree has continuously been represented as a symbol of wisdom. It has also been the embodiment of time, strength, and wisdom. The Greeks have linked the oldest oak tree, which surpassed 300 years old, as Zeus, the God of Thunder.
When we talk about this tree outside of all the symbolism it represents, it also has many other useful uses for us and animals as well. This includes things like having a strong root system that aids against erosion, producing acorns that feed farm animals, very strong wood that we can use for furniture, bringing beauty to any yard, and being a good home for wildlife.
This particular tree is easy to spot amongst many others. You can depict an Oak tree by the iconic broad canopy, multi pointed leaves, and strong branches coming from the trunk. At full maturity, these trees stretch out as much as they get tall. Meaning that these trees are perfect for hanging swings, providing plenty of shade, or partake in a lovely family picnic.
Oak trees are probably the most well-known and famous trees in the world. This is due to all the people who love the overall look of the tree, history, and symbolism. This tree is depicted throughout history and also has appeared in some of Hollywood’s movies. You may have seen the movie Forrest Gump and might have noticed a big beautiful tree with a couple different scenes. The Oak tree appears in the movie for the scene where Forrest and Jenny are kids and sitting on a low hanging branch. In another scene, you get to see a row of oaks and the iconic scene of “run Forrest, run”. As well as at the end of the movie where Forrest has Jenny buried. Throughout this movie, the Oak tree symbolizes strength and at-home consistency.
If you are thinking about planting one of these majestic trees, you are going to need to seriously consider the placement of the permanent location where this tree will stay for its whole life. You need to think about the future growth of this tree and make accommodations for how big and wide it will get. This means thinking hundreds of years into the future and planning accordingly.
Maintaining this magnificent tree is a necessity for its longevity, overall aesthetic, and for safety reasons. It will require a full pruning every couple of years and yearly fertilization in order to give the Oak tree the best care possible and to help it last many lifetimes.
How Five Star Tree Service Can Help
Oak trees are very symbolic, strong, and beautiful trees. When given enough room for growth, they are perfect for any home! This tress will leave a legacy for many generations to see and behold. If you have been contemplating adding this beautiful tree to your property, Five Star Tree Services would love to help you with our Toronto Tree Planting services! Our highly knowledgeable team will be able to assist you in choosing the perfect location for this tree and of course, planting it for you! If you are interested in our services, give us a call today at (416) 990-3355. To learn more, check out our website for more information.

 User
Reference: BB514EW-US
Model: PEGASUS WHITE
Color: White
Shape: rectangular
Finish: polished
US Dimensions: 23.62''x15.75''x4.72''
EU Dimensions: 60x40x12cm
US Drain size: 1-1/2"
Faucet hole size: 1.38" - 35mm
Weight: 88 lbs - 40 Kgs
Material: Guangxi White marble grade A
Rectangular Natural stone vessel sink PEGASUS WHITE - 23.62''x15.75''x4.72'' - genuine interior decoration Guangxi White marble. The "Exceptional" cut in the block without any comparison with plastic and other chemical resin market often unaffordable. You will definitely not let anyone feel indifferent with this 100% natural stone unique in the US and exclusively available on Living'ROC.net.
How to make your bathroom unique! Made from a superb block of Guangxi White Marble this basin will delight lovers of beautiful work, looking for rare, products. Add value to your home by transforming your bathroom into an oasis of elegance, calm, and tranquillity. Discover the well-being and the restful feeling our creation can offer you.
PEGASUS WHITE is one of the most fashionable in our bathrooms range. This vessel sink is not only beautiful to look at it is also functional with its height and its edges allowing a large amount of water. Guangxi marble is dominant in strength of great value and authentic in look and feel.
Our creation is delivered without an overflow drain and faucet (not included) - every US drains and faucets models you can find on the market will fit perfectly on Living'ROC vessel sink. This model is ready to use over the countertop.
The photos you see online have been taken with extreme care by our Founder CEO - Florent LEPVREAU to give our visitors an idea on how it might looks like. However product may vary from block to block as only mother nature decides what you may receive because each sink is unique. Therefore, we invite you to browse on our product portfolio to see the differences in each piece. We also draw your attention to the fact that veining, crystallization, that may appear to be cracks, but are actually indigenous to the stone, and other variations of colors up to 30% and more sometime (often on marble and onyx) and various stone features make all the charm of the stone and distinguish it from non-natural materials! Torrence White , Bali White, Toji White, Pegasus white, tahiti White, Rondo White are all made and carved from the same Guangxi White Marble and it can't be considered as a pure white as you can see. Our Quality Control photos shown on our portfolio are not available to choose by numbers.

 InnovationLand
This Houston outdoor kitchen and entertaining area offers a modern take on Mediterranean style.
Designed and built by Outdoor Homescapes of Houston, this fully loaded family and entertaining space echoes the stucco, travertine tile patio and Mediterranean style of the existing home while exuding a more modern, transitional style.
“This was a high-profile client – both VPs of different oil and gas companies who entertain affluent guests on a regular basis – so they wanted to make sure they had high-end appliances and all the latest amenities they could order,” says Lisha Maxey, senior designer for Outdoor Homescapes and owner of LGH Design Services in Houston. “They also have two kids, ages 7 and 10, and wanted a family gathering space that better accompanied their new, luxurious pool.”
What really sets apart this outside kitchen design idea, however, is the way the elements are used throughout the space.
“Usually, outdoor kitchen designs for a backyard are grouped into one island or cabinet,” explains Outdoor Homescapes of Houston owner Wayne Franks. “But here, the patio, roof and fireplace were all in place, separated by stucco columns, and the outdoor kitchen elements had to work around them.”
A 14-foot-long cooking island houses a built-in Fire Magic grill with a Magic View Window (allows the chef to check on food without lifting the lid and losing valuable heat). The island, the countertop of which is "Carnaval" granite from Lackstone, also features a Fire Magic power burner, warming drawer and trash drawer. On one side of the fireplace, forming an “L” with the cooking island, sits a built-in Primo ceramic grill.
On the other side of the fireplace is a 3-foot-long cabinet housing a bar with a wine cooler, ice maker and upper cabinet. And finally, just outside the patio door is a 7-foot-long cabinet with a modern Kohler sink with a high-arc Moen faucet (sink and faucet from Faucets Direct), a trash drawer and another upper cabinet.
Outdoor Homescapes of Houston, by the way, outfitted both cabinets with glass inserts, custom pulls and three-way sensor lighting.
“At the beginning, this was basically a blank space with a fireplace in the middle,” says Maxey. So Outdoor Homescapes upgraded the fireplace with Austin Stack Stone in white (No. 401) from Colorstonescreenshot vickers mosaic tile rectangle. "The stone added that pop,” notes Maxey.
The fireplace’s espresso-colored, distressed wood mantel (from Mantels.com) and upper wood cabinets were both stained with the Minwax color Jacobean. The ceiling fans were also updated with ones featuring similarly espresso-colored, wooden fan blades, to match.
The table in the middle - a cast-iron, Mediterranean style gem with hand-forged scrollwork designs from Patio 1 in Houston – seats 10.
“We wanted this kind of Mediterranean feel,” says Maxey. “We wanted rustic, but the appliance package was so new, with all its stainless steel, so we kept a the cabinets and the columns stucco instead of stone for a more clean, modern look and then did the custom tile backsplash and mosaic in more of a rustic, Mediterranean look."
The backsplash is a 1-inch travertine tile background with 4-inch square metallic insets, both from Floor & Decor. The tile for the 18-by-24-inch rectangle mosaic came from Great Britain Tile Co. and included a Dianno Reale tumbled border and background. The bronze, diamond-shaped insets are tumbled Dark Emperdor tile and the scrolls are tumbled Noce tile.
The client, who admits they have high standards, was more than pleased with the project – especially browsing through Outdoor Homescapes’ vast library of patio kitchen design ideas, the 3D virtual video tour that let them preview the project from every angle before construction. They also liked the personalized design consultation.
"OH provides a very neat service where one of their designers will either shop/buy for you or shop with you for the more detailed pieces that will finish your home," reads the client's review on Houzz. "This was a very positive, personalized feature ... Lisha helped narrow down an enormous marketplace of materials and finishes to a few we could choose from."
36