
Search results for "Client contends" in Home Design Ideas
 Home service
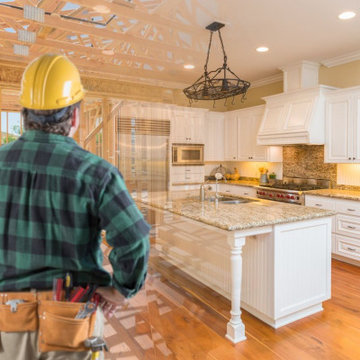
Your kitchen is more than just a cooking space; it's the heart of your home—a place for family gatherings, shared meals, and unforgettable memories. If you're here, chances are you're dreaming of a kitchen upgrade that better serves your needs while enhancing its beauty and functionality. Whether you're aiming for a sleek modern design, a functional workspace, or a charming rustic vibe, finding the right kitchen remodel services is key to turning that dream into reality.
This guide will walk you through everything you need to know about choosing the best kitchen remodel near me. From understanding your specific needs to identifying reliable services, we've got you covered.
Understanding Your Unique Kitchen Remodeling Needs
Before hiring a kitchen remodel service, it’s essential to pinpoint why you're looking to remodel in the first place. Knowing your priorities will help you make informed decisions and ensure you choose a service that aligns with your vision.
1. Functionality Upgrades
Is your kitchen outdated or inefficient? Maybe you're dealing with limited countertop space or outdated appliances that make cooking a hassle. A remodel can help optimize the layout and incorporate modern solutions, such as smart appliances or ergonomic cabinets.
2. Aesthetic Enhancements
Perhaps you’re looking to give your kitchen a fresh, stylish look that reflects your personality. Whether it’s a chic industrial design or a cozy farmhouse style, professional remodelers can help bring your aesthetic dreams to life.
3. Improved Home Value
A beautifully renovated kitchen is one of the top features potential buyers look for. According to real estate experts, a well-designed kitchen remodel can deliver up to a 70%-80% return on investment.
4. Lifestyle Changes
Has your family grown? Do you cook at home more often now? Your kitchen should adapt to these shifts, accommodating more people or making meal prep seamless.
Clearly outlining your specific goals will make it easier to choose home remodeling contractor professionals who can meet (and exceed) your expectations.
Researching for the Best Kitchen Remodel Services Near Me
Once you’ve defined your needs, the next step is to start researching. But how do you pinpoint the best kitchen remodelers in your area? Here are actionable tips:
1. Read Reviews and Testimonials
Start by checking online reviews on platforms like Google, Yelp, and Houzz. Look for consistently positive feedback, with special attention paid to customer comments about quality, communication, and timelines.
2. Check Portfolios
A picture is worth a thousand words—and reading about a remodeling company’s success isn’t enough. Browse their portfolio to ensure the quality of their work aligns with what you’re envisioning.
3. Ask for Recommendations
Word of mouth is still one of the best ways to find trustworthy services. Ask friends, family, or coworkers if they’ve worked with a remodeling service they’d recommend.
4. Look for Professional Credentials
Make sure the companies you’re vetting hold all required licenses, certifications, and insurance. It’s a sign of their professionalism and ensures accountability.
5. Conduct Interviews
Consider meeting with a few top contenders. Ask about their experience, approach to projects similar to yours, and estimated costs. Don’t shy away from asking detailed questions—it’s important to feel confident in your choice.
By thoroughly researching, you'll narrow down your options and find a remodeler who matches your vision, budget, and style.
Key Factors to Consider Before Hiring
Deciding on the right kitchen remodel near me is about more than just skills. Here are some critical factors to weigh before signing any contracts.
1. Set a Clear Budget
It’s important to have a realistic budget in mind before you begin. A reliable remodeler will respect your financial boundaries and offer solutions that maximize your investment without overspending.
2. Outline Your Timeline
Discussing deadlines ensures the project starts and finishes on time. Make sure the remodeler can meet your schedule without compromising quality.
3. Communication is Key
Clear communication is essential. You want experts who listen carefully to your needs, explain their process, and keep you updated throughout the project.
4. Warranties and Guarantees
Always ask if the service provides warranties for craftsmanship and materials. It’s a sign they stand by the quality of their work.
Why RightWay Home Builders is the Solution to Your Kitchen Remodeling Needs
Looking for trusted experts who deliver stunning, functional kitchens? Meet RightWay Home Builders, a leading name in local remodeling services. Here's why they're a standout choice for your kitchen remodel project.
1. Proven Expertise: With over 10 years of experience in the industry, their portfolio boasts beautifully transformed kitchens that reflect each client’s unique style.
2. Customer-Centric Approach: RightWay prioritizes the client experience. From the initial consultation to the project's completion, their team ensures you’re heard every step of the way.
3. Comprehensive Services: From initial designs to installation, RightWay Home Builders handles every stage of remodeling with precision and care.
Their happy customers say it all. “RightWay took my outdated kitchen and turned it into something from a magazine. Their attention to detail was amazing, and they were a pleasure to work with!” - Sarah M.
Why Visit RightWayHomeBuilders.com?
Booking your dream remodel has never been simpler. RightWay’s website offers a streamlined process where you can request a consultation, view portfolios, and even access exclusive home remodeling tips. Don’t wait! Visit https://www.rightwayhomebuilders.com to kick-start your remodeling adventure.
FAQs About Kitchen Remodeling
1. How much does a kitchen remodel cost?
The cost depends on the size of your kitchen and the scope of the project, but the average remodel.
2. How long does the remodeling process take?
Most remodeling projects take 6 to 12 weeks, depending on the complexity.
3. Will a kitchen remodel increase my home’s value?
Absolutely! A well-done remodel can boost your home value significantly and make it more appealing to buyers.
4. Can I stay home during the remodel?
While it’s possible, the noise and dust might be inconvenient. Many clients prefer staying elsewhere temporarily.
Conclusion
Your dream kitchen is closer than you think. Whether you're upgrading for better functionality, fresh aesthetics, or added value, investing in the right kitchen remodel service will ensure your vision comes to life.
Explore your options, do your research, and don’t hesitate to reach out to trusted experts like RightWay Home Builders. Begin the first step today—schedule your consultation at RightWayHomeBuilders.com and take the leap toward the ultimate kitchen transformation.
 Robin's Nest Interiors
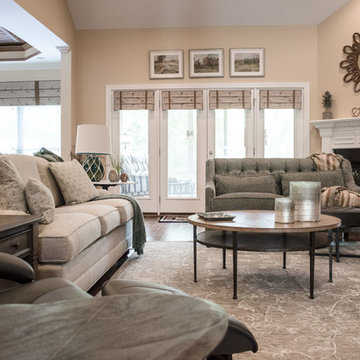
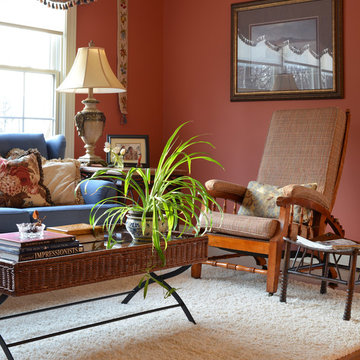
This project was for a long time client of mine who lives in a wonderful patio home with a finished basement. There were several challenges with which to contend. First, as you enter the Foyer, all of the spaces are open to each other so we had to make sure everything worked together. Second, furniture arrangement had always been a struggle for the large living area with the fireplace on an angled corner wall and large built-in. Last, although the homeowner loves color – especially blue/greens – we had to convince her to bring it into her home as an accent and make it work with the other spaces.
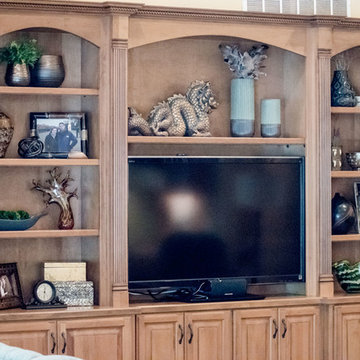
We started with a neutral sofa positioned across from the built-ins and paired it with a settee in a blue/green fabric. The settee does not block the fireplace and reinforces our color scheme. The homeowner upgraded her husband’s chair and ottoman with a contemporary leather one, and we added a perfectly scaled swivel chair to the corner next to the built-ins. We finished off the space with a mixture of unique accent tables including a beautiful coffee table with wood inlay, a small metal french drink table, a two-tiered egg shaped table, and a pedestal table with marble top. We added lighting, artwork and accessories to the built-ins and tables to complete the space. We also added blue/green accessories to the breakfast area to make the spaces flow seamlessly.
We love how these spaces in the Open Concept Redesign turned out. It is a very pleasing palette that does not overwhelm the spaces, but adds interest. Enjoy!
 Robin's Nest Interiors
This project was for a long time client of mine who lives in a wonderful patio home with a finished basement. There were several challenges with which to contend. First, as you enter the Foyer, all of the spaces are open to each other so we had to make sure everything worked together. Second, furniture arrangement had always been a struggle for the large living area with the fireplace on an angled corner wall and large built-in. Last, although the homeowner loves color – especially blue/greens – we had to convince her to bring it into her home as an accent and make it work with the other spaces.
We started with a neutral sofa positioned across from the built-ins and paired it with a settee in a blue/green fabric. The settee does not block the fireplace and reinforces our color scheme. The homeowner upgraded her husband’s chair and ottoman with a contemporary leather one, and we added a perfectly scaled swivel chair to the corner next to the built-ins. We finished off the space with a mixture of unique accent tables including a beautiful coffee table with wood inlay, a small metal french drink table, a two-tiered egg shaped table, and a pedestal table with marble top. We added lighting, artwork and accessories to the built-ins and tables to complete the space. We also added blue/green accessories to the breakfast area to make the spaces flow seamlessly.
We love how these spaces in the Open Concept Redesign turned out. It is a very pleasing palette that does not overwhelm the spaces, but adds interest. Enjoy!
Find the right local pro for your project

 TOC design & construction inc.
DESIGNED BY TOC design
CONSTRUCTION BY TOC design & Construction inc.
PHOTOS BY : Tania Scardellato
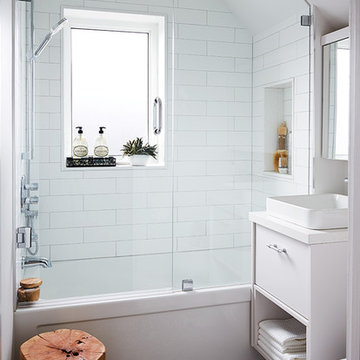
I was fortunate to have a young family approach me in desperate need to renovate there only 3 piece bathroom. This space was In dire need of a remodel, with old brown wall to wall tiles and a dated bulky yellow brown single sink vanity.
Storage was a must, lighting a necessity, and proper accessibility to the shower bath area.
We had a tight budget to respect, but a full gut of this bathroom was required. And a good thing too, once we started doing the demolition we noticed that mildew and rotting floors and walls had accumulated throughout the years. Doing it right the first time is no joke when dealing with water and electrical issues.
We discarded all reminisce of old and built from scratch, new walls, new plumbing, new electrical ,new insulation and a new window, a new fan that actually exhausted outside ( I say this laughing as you would be amazed at how many fans are installed but don’t exhaust outside, and you the client would never know unless you go inside the attic space.
Once all the hard stuff was done, the rest is just a matter of smart design. If you have a small bathroom here are some tips to guide you.
10 tips for making a small bathroom feel larger
Is your tiny bathroom cramping your functionality and style, leaving you longing for the enormous bathrooms gracing the pages of design magazines? Even if your bathroom is a fraction of the size, all it takes is some design savvy to make the most of the space you have. Consider these 10 smart tips that will help your bathroom look, feel and function like those larger contenders.
1-Get creative with corners
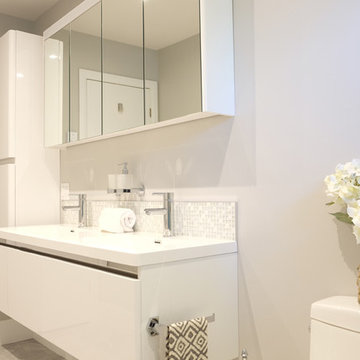
Space is at a premium in small bathrooms, so it's important to maximize every inch. Corners, for example, provide extra space for shelving, storage units and even hooks. Get creative and install unique design solutions that are not only functional, but also eye-catching. If you love the airiness of floating cabinets, add baskets or decorative boxes under for extra storage. If you are installing floating cabinets insure that they are installed securely to studs or plywood at wall.
2- Let solid colors shine
Busy patterns have a shrinking effect and make small bathrooms seem even smaller. Conversely, light natural hues make a space feel more open. If you're itching to get creative with design, experiment with textures but keep overpowering patterns to a minimum. Tone on tone is the best to achieve this.
3 - Maximize your bathtub
A bathtub takes up a significant portion of the room, but modern, compact options with curved basins, can make the tub feel larger when in use, all while conserving space.
4 - Select a smaller faucet
A faucet is jewelry for the bathroom. And just as accessories can overpower an outfit, a big bulky faucet isn't flattering in a small bath. Single-handle designs conserve counter space, while a wall-mount installation frees it up all together and can create quite the wow-factor, if the budget can accommodate the required changes to plumbing behind the wall.
5 - Make vanity storage simple
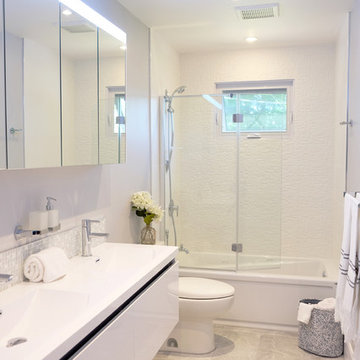
If you're in a storage war with your small bathroom, you're not alone in the battle. Toiletries and personal supplies without a place to call home only add clutter and chaos. Store smart with a space-saving vanity, the dual sink vanity shown here, looks quite simple, but in reality it has 4 sets of full extension drawers, and the vanity tower adds extra storage without overpowering the use of space.
6 - Show off the shower
Shower curtains may be pretty, but they interrupt the visual flow of a bathing space and make it feel significantly smaller. In bathrooms with small footprints, opt for a clear glass sliding shower door that doesn't require the clearance of one with a hinged design. Or as shown in this design and for fraction less expensive a half hinged panel installed on a fixed tempered glass panel. If you're embarking on a big remodel, create the illusion of more space by using same tile in the shower that's used throughout; instead of seeing them as two separate zones, the eye will read them as one.
7 - Discover the treasure of hidden storage
Work with a contractor, and you just might find some serious storage potential hidden behind your walls. Whether it's utilizing space between the studs for shallow shelving or a creating a small linen closet by annexing space from an adjacent room, even small additions can make a big difference.
8 - Focal Point
Tile is a beautiful, durable addition to any bathroom. For dainty spaces, consider installing tile at a diagonal to accentuate the focal point or as in this bathroom I used an oversized textured pattern to bring depth to the space at the window wall.
9 - Choose the right lights
Strategically install light to reflect and brighten a small bathroom to make it appear larger. Recessed lighting is an affordable solution for tiny rooms, offering ample light while taking up little space. Wall sconces alongside a mirror also reflect off the walls and make a room feel bright and airy. I always recommend going with LED lighting at 2800 to 3000K.
10 – Accessorize
This is your time to shine in your decorating skills, have fun with your towels, you can change the color scheme daily just by adding pops of color in your accessories, make sure to get items that serve a dual purpose, like baskets, boxes they can always be used as hampers, storing of towels and even a nice display for your guest.
 Unique Home Solutions Inc.
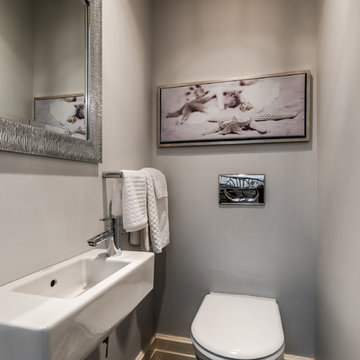
Beautiful property right on the hill in Westmount. The 10 foot ceilings and leaded windows give it a lot of character.
If you would like a consultation for staging your property or re-designing it, give us a call at 514-222-5553. We have been serving clients since 2006. www.uniquehomesolutions.ca
 Robin's Nest Interiors
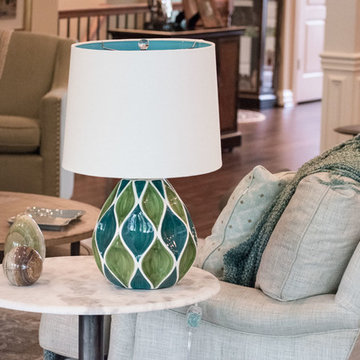
This project was for a long time client of mine who lives in a wonderful patio home with a finished basement. There were several challenges with which to contend. First, as you enter the Foyer, all of the spaces are open to each other so we had to make sure everything worked together. Second, furniture arrangement had always been a struggle for the large living area with the fireplace on an angled corner wall and large built-in. Last, although the homeowner loves color – especially blue/greens – we had to convince her to bring it into her home as an accent and make it work with the other spaces.
We started with a neutral sofa positioned across from the built-ins and paired it with a settee in a blue/green fabric. The settee does not block the fireplace and reinforces our color scheme. The homeowner upgraded her husband’s chair and ottoman with a contemporary leather one, and we added a perfectly scaled swivel chair to the corner next to the built-ins. We finished off the space with a mixture of unique accent tables including a beautiful coffee table with wood inlay, a small metal french drink table, a two-tiered egg shaped table, and a pedestal table with marble top. We added lighting, artwork and accessories to the built-ins and tables to complete the space. We also added blue/green accessories to the breakfast area to make the spaces flow seamlessly.
We love how these spaces in the Open Concept Redesign turned out. It is a very pleasing palette that does not overwhelm the spaces, but adds interest. Enjoy!
 Robin's Nest Interiors
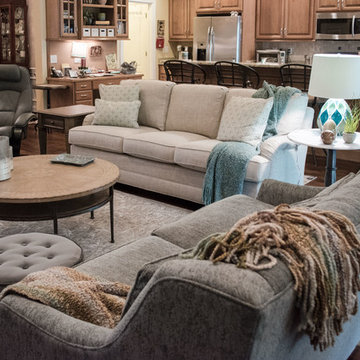
This project was for a long time client of mine who lives in a wonderful patio home with a finished basement. There were several challenges with which to contend. First, as you enter the Foyer, all of the spaces are open to each other so we had to make sure everything worked together. Second, furniture arrangement had always been a struggle for the large living area with the fireplace on an angled corner wall and large built-in. Last, although the homeowner loves color – especially blue/greens – we had to convince her to bring it into her home as an accent and make it work with the other spaces.
We started with a neutral sofa positioned across from the built-ins and paired it with a settee in a blue/green fabric. The settee does not block the fireplace and reinforces our color scheme. The homeowner upgraded her husband’s chair and ottoman with a contemporary leather one, and we added a perfectly scaled swivel chair to the corner next to the built-ins. We finished off the space with a mixture of unique accent tables including a beautiful coffee table with wood inlay, a small metal french drink table, a two-tiered egg shaped table, and a pedestal table with marble top. We added lighting, artwork and accessories to the built-ins and tables to complete the space. We also added blue/green accessories to the breakfast area to make the spaces flow seamlessly.
We love how these spaces in the Open Concept Redesign turned out. It is a very pleasing palette that does not overwhelm the spaces, but adds interest. Enjoy!
Sponsored
Columbus, OH

Trish Takacs Design
Award Winning & Highly Skilled Kitchen & Bath Designer in Columbus
 Robin's Nest Interiors
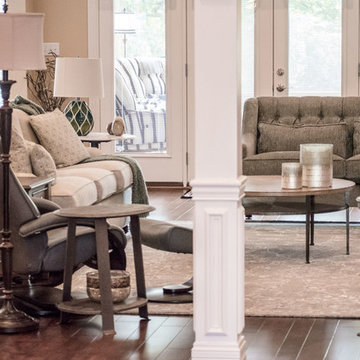
This project was for a long time client of mine who lives in a wonderful patio home with a finished basement. There were several challenges with which to contend. First, as you enter the Foyer, all of the spaces are open to each other so we had to make sure everything worked together. Second, furniture arrangement had always been a struggle for the large living area with the fireplace on an angled corner wall and large built-in. Last, although the homeowner loves color – especially blue/greens – we had to convince her to bring it into her home as an accent and make it work with the other spaces.
We started with a neutral sofa positioned across from the built-ins and paired it with a settee in a blue/green fabric. The settee does not block the fireplace and reinforces our color scheme. The homeowner upgraded her husband’s chair and ottoman with a contemporary leather one, and we added a perfectly scaled swivel chair to the corner next to the built-ins. We finished off the space with a mixture of unique accent tables including a beautiful coffee table with wood inlay, a small metal french drink table, a two-tiered egg shaped table, and a pedestal table with marble top. We added lighting, artwork and accessories to the built-ins and tables to complete the space. We also added blue/green accessories to the breakfast area to make the spaces flow seamlessly.
We love how these spaces in the Open Concept Redesign turned out. It is a very pleasing palette that does not overwhelm the spaces, but adds interest. Enjoy!

 TOC design & construction inc.
DESIGNED BY TOC design
CONSTRUCTION BY TOC design & Construction inc.
PHOTOS BY : Tania Scardellato
I was fortunate to have a young family approach me in desperate need to renovate there only 3 piece bathroom. This space was In dire need of a remodel, with old brown wall to wall tiles and a dated bulky yellow brown single sink vanity.
Storage was a must, lighting a necessity, and proper accessibility to the shower bath area.
We had a tight budget to respect, but a full gut of this bathroom was required. And a good thing too, once we started doing the demolition we noticed that mildew and rotting floors and walls had accumulated throughout the years. Doing it right the first time is no joke when dealing with water and electrical issues.
We discarded all reminisce of old and built from scratch, new walls, new plumbing, new electrical ,new insulation and a new window, a new fan that actually exhausted outside ( I say this laughing as you would be amazed at how many fans are installed but don’t exhaust outside, and you the client would never know unless you go inside the attic space.
Once all the hard stuff was done, the rest is just a matter of smart design. If you have a small bathroom here are some tips to guide you.
10 tips for making a small bathroom feel larger
Is your tiny bathroom cramping your functionality and style, leaving you longing for the enormous bathrooms gracing the pages of design magazines? Even if your bathroom is a fraction of the size, all it takes is some design savvy to make the most of the space you have. Consider these 10 smart tips that will help your bathroom look, feel and function like those larger contenders.
1-Get creative with corners
Space is at a premium in small bathrooms, so it's important to maximize every inch. Corners, for example, provide extra space for shelving, storage units and even hooks. Get creative and install unique design solutions that are not only functional, but also eye-catching. If you love the airiness of floating cabinets, add baskets or decorative boxes under for extra storage. If you are installing floating cabinets insure that they are installed securely to studs or plywood at wall.
2- Let solid colors shine
Busy patterns have a shrinking effect and make small bathrooms seem even smaller. Conversely, light natural hues make a space feel more open. If you're itching to get creative with design, experiment with textures but keep overpowering patterns to a minimum. Tone on tone is the best to achieve this.
3 - Maximize your bathtub
A bathtub takes up a significant portion of the room, but modern, compact options with curved basins, can make the tub feel larger when in use, all while conserving space.
4 - Select a smaller faucet
A faucet is jewelry for the bathroom. And just as accessories can overpower an outfit, a big bulky faucet isn't flattering in a small bath. Single-handle designs conserve counter space, while a wall-mount installation frees it up all together and can create quite the wow-factor, if the budget can accommodate the required changes to plumbing behind the wall.
5 - Make vanity storage simple
If you're in a storage war with your small bathroom, you're not alone in the battle. Toiletries and personal supplies without a place to call home only add clutter and chaos. Store smart with a space-saving vanity, the dual sink vanity shown here, looks quite simple, but in reality it has 4 sets of full extension drawers, and the vanity tower adds extra storage without overpowering the use of space.
6 - Show off the shower
Shower curtains may be pretty, but they interrupt the visual flow of a bathing space and make it feel significantly smaller. In bathrooms with small footprints, opt for a clear glass sliding shower door that doesn't require the clearance of one with a hinged design. Or as shown in this design and for fraction less expensive a half hinged panel installed on a fixed tempered glass panel. If you're embarking on a big remodel, create the illusion of more space by using same tile in the shower that's used throughout; instead of seeing them as two separate zones, the eye will read them as one.
7 - Discover the treasure of hidden storage
Work with a contractor, and you just might find some serious storage potential hidden behind your walls. Whether it's utilizing space between the studs for shallow shelving or a creating a small linen closet by annexing space from an adjacent room, even small additions can make a big difference.
8 - Focal Point
Tile is a beautiful, durable addition to any bathroom. For dainty spaces, consider installing tile at a diagonal to accentuate the focal point or as in this bathroom I used an oversized textured pattern to bring depth to the space at the window wall.
9 - Choose the right lights
Strategically install light to reflect and brighten a small bathroom to make it appear larger. Recessed lighting is an affordable solution for tiny rooms, offering ample light while taking up little space. Wall sconces alongside a mirror also reflect off the walls and make a room feel bright and airy. I always recommend going with LED lighting at 2800 to 3000K.
10 – Accessorize
This is your time to shine in your decorating skills, have fun with your towels, you can change the color scheme daily just by adding pops of color in your accessories, make sure to get items that serve a dual purpose, like baskets, boxes they can always be used as hampers, storing of towels and even a nice display for your guest.
 TOC design & construction inc.
DESIGNED BY TOC design
CONSTRUCTION BY TOC design & Construction inc.
PHOTOS BY : Tania Scardellato
I was fortunate to have a young family approach me in desperate need to renovate there only 3 piece bathroom. This space was In dire need of a remodel, with old brown wall to wall tiles and a dated bulky yellow brown single sink vanity.
Storage was a must, lighting a necessity, and proper accessibility to the shower bath area.
We had a tight budget to respect, but a full gut of this bathroom was required. And a good thing too, once we started doing the demolition we noticed that mildew and rotting floors and walls had accumulated throughout the years. Doing it right the first time is no joke when dealing with water and electrical issues.
We discarded all reminisce of old and built from scratch, new walls, new plumbing, new electrical ,new insulation and a new window, a new fan that actually exhausted outside ( I say this laughing as you would be amazed at how many fans are installed but don’t exhaust outside, and you the client would never know unless you go inside the attic space.
Once all the hard stuff was done, the rest is just a matter of smart design. If you have a small bathroom here are some tips to guide you.
10 tips for making a small bathroom feel larger
Is your tiny bathroom cramping your functionality and style, leaving you longing for the enormous bathrooms gracing the pages of design magazines? Even if your bathroom is a fraction of the size, all it takes is some design savvy to make the most of the space you have. Consider these 10 smart tips that will help your bathroom look, feel and function like those larger contenders.
1-Get creative with corners
Space is at a premium in small bathrooms, so it's important to maximize every inch. Corners, for example, provide extra space for shelving, storage units and even hooks. Get creative and install unique design solutions that are not only functional, but also eye-catching. If you love the airiness of floating cabinets, add baskets or decorative boxes under for extra storage. If you are installing floating cabinets insure that they are installed securely to studs or plywood at wall.
2- Let solid colors shine
Busy patterns have a shrinking effect and make small bathrooms seem even smaller. Conversely, light natural hues make a space feel more open. If you're itching to get creative with design, experiment with textures but keep overpowering patterns to a minimum. Tone on tone is the best to achieve this.
3 - Maximize your bathtub
A bathtub takes up a significant portion of the room, but modern, compact options with curved basins, can make the tub feel larger when in use, all while conserving space.
4 - Select a smaller faucet
A faucet is jewelry for the bathroom. And just as accessories can overpower an outfit, a big bulky faucet isn't flattering in a small bath. Single-handle designs conserve counter space, while a wall-mount installation frees it up all together and can create quite the wow-factor, if the budget can accommodate the required changes to plumbing behind the wall.
5 - Make vanity storage simple
If you're in a storage war with your small bathroom, you're not alone in the battle. Toiletries and personal supplies without a place to call home only add clutter and chaos. Store smart with a space-saving vanity, the dual sink vanity shown here, looks quite simple, but in reality it has 4 sets of full extension drawers, and the vanity tower adds extra storage without overpowering the use of space.
6 - Show off the shower
Shower curtains may be pretty, but they interrupt the visual flow of a bathing space and make it feel significantly smaller. In bathrooms with small footprints, opt for a clear glass sliding shower door that doesn't require the clearance of one with a hinged design. Or as shown in this design and for fraction less expensive a half hinged panel installed on a fixed tempered glass panel. If you're embarking on a big remodel, create the illusion of more space by using same tile in the shower that's used throughout; instead of seeing them as two separate zones, the eye will read them as one.
7 - Discover the treasure of hidden storage
Work with a contractor, and you just might find some serious storage potential hidden behind your walls. Whether it's utilizing space between the studs for shallow shelving or a creating a small linen closet by annexing space from an adjacent room, even small additions can make a big difference.
8 - Focal Point
Tile is a beautiful, durable addition to any bathroom. For dainty spaces, consider installing tile at a diagonal to accentuate the focal point or as in this bathroom I used an oversized textured pattern to bring depth to the space at the window wall.
9 - Choose the right lights
Strategically install light to reflect and brighten a small bathroom to make it appear larger. Recessed lighting is an affordable solution for tiny rooms, offering ample light while taking up little space. Wall sconces alongside a mirror also reflect off the walls and make a room feel bright and airy. I always recommend going with LED lighting at 2800 to 3000K.
10 – Accessorize
This is your time to shine in your decorating skills, have fun with your towels, you can change the color scheme daily just by adding pops of color in your accessories, make sure to get items that serve a dual purpose, like baskets, boxes they can always be used as hampers, storing of towels and even a nice display for your guest.
 TOC design & construction inc.
DESIGNED BY TOC design
CONSTRUCTION BY TOC design & Construction inc.
PHOTOS BY : Tania Scardellato
I was fortunate to have a young family approach me in desperate need to renovate there only 3 piece bathroom. This space was In dire need of a remodel, with old brown wall to wall tiles and a dated bulky yellow brown single sink vanity.
Storage was a must, lighting a necessity, and proper accessibility to the shower bath area.
We had a tight budget to respect, but a full gut of this bathroom was required. And a good thing too, once we started doing the demolition we noticed that mildew and rotting floors and walls had accumulated throughout the years. Doing it right the first time is no joke when dealing with water and electrical issues.
We discarded all reminisce of old and built from scratch, new walls, new plumbing, new electrical ,new insulation and a new window, a new fan that actually exhausted outside ( I say this laughing as you would be amazed at how many fans are installed but don’t exhaust outside, and you the client would never know unless you go inside the attic space.
Once all the hard stuff was done, the rest is just a matter of smart design. If you have a small bathroom here are some tips to guide you.
10 tips for making a small bathroom feel larger
Is your tiny bathroom cramping your functionality and style, leaving you longing for the enormous bathrooms gracing the pages of design magazines? Even if your bathroom is a fraction of the size, all it takes is some design savvy to make the most of the space you have. Consider these 10 smart tips that will help your bathroom look, feel and function like those larger contenders.
1-Get creative with corners
Space is at a premium in small bathrooms, so it's important to maximize every inch. Corners, for example, provide extra space for shelving, storage units and even hooks. Get creative and install unique design solutions that are not only functional, but also eye-catching. If you love the airiness of floating cabinets, add baskets or decorative boxes under for extra storage. If you are installing floating cabinets insure that they are installed securely to studs or plywood at wall.
2- Let solid colors shine
Busy patterns have a shrinking effect and make small bathrooms seem even smaller. Conversely, light natural hues make a space feel more open. If you're itching to get creative with design, experiment with textures but keep overpowering patterns to a minimum. Tone on tone is the best to achieve this.
3 - Maximize your bathtub
A bathtub takes up a significant portion of the room, but modern, compact options with curved basins, can make the tub feel larger when in use, all while conserving space.
4 - Select a smaller faucet
A faucet is jewelry for the bathroom. And just as accessories can overpower an outfit, a big bulky faucet isn't flattering in a small bath. Single-handle designs conserve counter space, while a wall-mount installation frees it up all together and can create quite the wow-factor, if the budget can accommodate the required changes to plumbing behind the wall.
5 - Make vanity storage simple
If you're in a storage war with your small bathroom, you're not alone in the battle. Toiletries and personal supplies without a place to call home only add clutter and chaos. Store smart with a space-saving vanity, the dual sink vanity shown here, looks quite simple, but in reality it has 4 sets of full extension drawers, and the vanity tower adds extra storage without overpowering the use of space.
6 - Show off the shower
Shower curtains may be pretty, but they interrupt the visual flow of a bathing space and make it feel significantly smaller. In bathrooms with small footprints, opt for a clear glass sliding shower door that doesn't require the clearance of one with a hinged design. Or as shown in this design and for fraction less expensive a half hinged panel installed on a fixed tempered glass panel. If you're embarking on a big remodel, create the illusion of more space by using same tile in the shower that's used throughout; instead of seeing them as two separate zones, the eye will read them as one.
7 - Discover the treasure of hidden storage
Work with a contractor, and you just might find some serious storage potential hidden behind your walls. Whether it's utilizing space between the studs for shallow shelving or a creating a small linen closet by annexing space from an adjacent room, even small additions can make a big difference.
8 - Focal Point
Tile is a beautiful, durable addition to any bathroom. For dainty spaces, consider installing tile at a diagonal to accentuate the focal point or as in this bathroom I used an oversized textured pattern to bring depth to the space at the window wall.
9 - Choose the right lights
Strategically install light to reflect and brighten a small bathroom to make it appear larger. Recessed lighting is an affordable solution for tiny rooms, offering ample light while taking up little space. Wall sconces alongside a mirror also reflect off the walls and make a room feel bright and airy. I always recommend going with LED lighting at 2800 to 3000K.
10 – Accessorize
This is your time to shine in your decorating skills, have fun with your towels, you can change the color scheme daily just by adding pops of color in your accessories, make sure to get items that serve a dual purpose, like baskets, boxes they can always be used as hampers, storing of towels and even a nice display for your guest.
 TOC design & construction inc.
DESIGNED BY TOC design
CONSTRUCTION BY TOC design & Construction inc.
PHOTOS BY : Tania Scardellato
I was fortunate to have a young family approach me in desperate need to renovate there only 3 piece bathroom. This space was In dire need of a remodel, with old brown wall to wall tiles and a dated bulky yellow brown single sink vanity.
Storage was a must, lighting a necessity, and proper accessibility to the shower bath area.
We had a tight budget to respect, but a full gut of this bathroom was required. And a good thing too, once we started doing the demolition we noticed that mildew and rotting floors and walls had accumulated throughout the years. Doing it right the first time is no joke when dealing with water and electrical issues.
We discarded all reminisce of old and built from scratch, new walls, new plumbing, new electrical ,new insulation and a new window, a new fan that actually exhausted outside ( I say this laughing as you would be amazed at how many fans are installed but don’t exhaust outside, and you the client would never know unless you go inside the attic space.
Once all the hard stuff was done, the rest is just a matter of smart design. If you have a small bathroom here are some tips to guide you.
10 tips for making a small bathroom feel larger
Is your tiny bathroom cramping your functionality and style, leaving you longing for the enormous bathrooms gracing the pages of design magazines? Even if your bathroom is a fraction of the size, all it takes is some design savvy to make the most of the space you have. Consider these 10 smart tips that will help your bathroom look, feel and function like those larger contenders.
1-Get creative with corners
Space is at a premium in small bathrooms, so it's important to maximize every inch. Corners, for example, provide extra space for shelving, storage units and even hooks. Get creative and install unique design solutions that are not only functional, but also eye-catching. If you love the airiness of floating cabinets, add baskets or decorative boxes under for extra storage. If you are installing floating cabinets insure that they are installed securely to studs or plywood at wall.
2- Let solid colors shine
Busy patterns have a shrinking effect and make small bathrooms seem even smaller. Conversely, light natural hues make a space feel more open. If you're itching to get creative with design, experiment with textures but keep overpowering patterns to a minimum. Tone on tone is the best to achieve this.
3 - Maximize your bathtub
A bathtub takes up a significant portion of the room, but modern, compact options with curved basins, can make the tub feel larger when in use, all while conserving space.
4 - Select a smaller faucet
A faucet is jewelry for the bathroom. And just as accessories can overpower an outfit, a big bulky faucet isn't flattering in a small bath. Single-handle designs conserve counter space, while a wall-mount installation frees it up all together and can create quite the wow-factor, if the budget can accommodate the required changes to plumbing behind the wall.
5 - Make vanity storage simple
If you're in a storage war with your small bathroom, you're not alone in the battle. Toiletries and personal supplies without a place to call home only add clutter and chaos. Store smart with a space-saving vanity, the dual sink vanity shown here, looks quite simple, but in reality it has 4 sets of full extension drawers, and the vanity tower adds extra storage without overpowering the use of space.
6 - Show off the shower
Shower curtains may be pretty, but they interrupt the visual flow of a bathing space and make it feel significantly smaller. In bathrooms with small footprints, opt for a clear glass sliding shower door that doesn't require the clearance of one with a hinged design. Or as shown in this design and for fraction less expensive a half hinged panel installed on a fixed tempered glass panel. If you're embarking on a big remodel, create the illusion of more space by using same tile in the shower that's used throughout; instead of seeing them as two separate zones, the eye will read them as one.
7 - Discover the treasure of hidden storage
Work with a contractor, and you just might find some serious storage potential hidden behind your walls. Whether it's utilizing space between the studs for shallow shelving or a creating a small linen closet by annexing space from an adjacent room, even small additions can make a big difference.
8 - Focal Point
Tile is a beautiful, durable addition to any bathroom. For dainty spaces, consider installing tile at a diagonal to accentuate the focal point or as in this bathroom I used an oversized textured pattern to bring depth to the space at the window wall.
9 - Choose the right lights
Strategically install light to reflect and brighten a small bathroom to make it appear larger. Recessed lighting is an affordable solution for tiny rooms, offering ample light while taking up little space. Wall sconces alongside a mirror also reflect off the walls and make a room feel bright and airy. I always recommend going with LED lighting at 2800 to 3000K.
10 – Accessorize
This is your time to shine in your decorating skills, have fun with your towels, you can change the color scheme daily just by adding pops of color in your accessories, make sure to get items that serve a dual purpose, like baskets, boxes they can always be used as hampers, storing of towels and even a nice display for your guest.
Sponsored
Columbus, OH

Wannemacher Interiors
Customized Award-Winning Interior Design Solutions in Franklin Cnty OH
 TOC design & construction inc.
DESIGNED BY TOC design
CONSTRUCTION BY TOC design & Construction inc.
PHOTOS BY : Tania Scardellato
I was fortunate to have a young family approach me in desperate need to renovate there only 3 piece bathroom. This space was In dire need of a remodel, with old brown wall to wall tiles and a dated bulky yellow brown single sink vanity.
Storage was a must, lighting a necessity, and proper accessibility to the shower bath area.
We had a tight budget to respect, but a full gut of this bathroom was required. And a good thing too, once we started doing the demolition we noticed that mildew and rotting floors and walls had accumulated throughout the years. Doing it right the first time is no joke when dealing with water and electrical issues.
We discarded all reminisce of old and built from scratch, new walls, new plumbing, new electrical ,new insulation and a new window, a new fan that actually exhausted outside ( I say this laughing as you would be amazed at how many fans are installed but don’t exhaust outside, and you the client would never know unless you go inside the attic space.
Once all the hard stuff was done, the rest is just a matter of smart design. If you have a small bathroom here are some tips to guide you.
10 tips for making a small bathroom feel larger
Is your tiny bathroom cramping your functionality and style, leaving you longing for the enormous bathrooms gracing the pages of design magazines? Even if your bathroom is a fraction of the size, all it takes is some design savvy to make the most of the space you have. Consider these 10 smart tips that will help your bathroom look, feel and function like those larger contenders.
1-Get creative with corners
Space is at a premium in small bathrooms, so it's important to maximize every inch. Corners, for example, provide extra space for shelving, storage units and even hooks. Get creative and install unique design solutions that are not only functional, but also eye-catching. If you love the airiness of floating cabinets, add baskets or decorative boxes under for extra storage. If you are installing floating cabinets insure that they are installed securely to studs or plywood at wall.
2- Let solid colors shine
Busy patterns have a shrinking effect and make small bathrooms seem even smaller. Conversely, light natural hues make a space feel more open. If you're itching to get creative with design, experiment with textures but keep overpowering patterns to a minimum. Tone on tone is the best to achieve this.
3 - Maximize your bathtub
A bathtub takes up a significant portion of the room, but modern, compact options with curved basins, can make the tub feel larger when in use, all while conserving space.
4 - Select a smaller faucet
A faucet is jewelry for the bathroom. And just as accessories can overpower an outfit, a big bulky faucet isn't flattering in a small bath. Single-handle designs conserve counter space, while a wall-mount installation frees it up all together and can create quite the wow-factor, if the budget can accommodate the required changes to plumbing behind the wall.
5 - Make vanity storage simple
If you're in a storage war with your small bathroom, you're not alone in the battle. Toiletries and personal supplies without a place to call home only add clutter and chaos. Store smart with a space-saving vanity, the dual sink vanity shown here, looks quite simple, but in reality it has 4 sets of full extension drawers, and the vanity tower adds extra storage without overpowering the use of space.
6 - Show off the shower
Shower curtains may be pretty, but they interrupt the visual flow of a bathing space and make it feel significantly smaller. In bathrooms with small footprints, opt for a clear glass sliding shower door that doesn't require the clearance of one with a hinged design. Or as shown in this design and for fraction less expensive a half hinged panel installed on a fixed tempered glass panel. If you're embarking on a big remodel, create the illusion of more space by using same tile in the shower that's used throughout; instead of seeing them as two separate zones, the eye will read them as one.
7 - Discover the treasure of hidden storage
Work with a contractor, and you just might find some serious storage potential hidden behind your walls. Whether it's utilizing space between the studs for shallow shelving or a creating a small linen closet by annexing space from an adjacent room, even small additions can make a big difference.
8 - Focal Point
Tile is a beautiful, durable addition to any bathroom. For dainty spaces, consider installing tile at a diagonal to accentuate the focal point or as in this bathroom I used an oversized textured pattern to bring depth to the space at the window wall.
9 - Choose the right lights
Strategically install light to reflect and brighten a small bathroom to make it appear larger. Recessed lighting is an affordable solution for tiny rooms, offering ample light while taking up little space. Wall sconces alongside a mirror also reflect off the walls and make a room feel bright and airy. I always recommend going with LED lighting at 2800 to 3000K.
10 – Accessorize
This is your time to shine in your decorating skills, have fun with your towels, you can change the color scheme daily just by adding pops of color in your accessories, make sure to get items that serve a dual purpose, like baskets, boxes they can always be used as hampers, storing of towels and even a nice display for your guest.
 Debbie Etheridge Interior Design
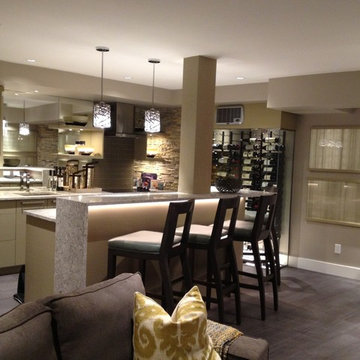
An active family who have been friends and clients of Debbie Etheridge for many years presented her with an exciting yet formidable challenge--to transform their lower level, a dark unfinished basement into a useable, comfortable space where they could relax and lounge as a family, or entertain guests in style. Debbie Etheridge had completed several projects on the family's homes over the years but with this project she had her work cut out. In addition to being a dank, dark below ground basement with no delineated functional rooms, the space possessed many different angles and awkward ducting bulkheads to contend with. With the use of durable vinyl plank flooring, multileveled, innovative lighting, quartz countertops, sleek wood cabinetry, back-painted glass, and stacked stone columns, Debbie designed a space which exudes comfort, elegance and light. In addition to the recessed pots and wall washers, she used pendants, LED under cabinet and counter lighting and specified the installation of metallic back painted glass panels to dramatically enhance reflected brightness and somewhat mimic windows in the windowless space. Durable fabrics (like chenille) in neutral colours wear well and add cozy texture. A custom wine unit was installed. Before the transformation the space was just a large, unruly storage area. Now, the newly designed space functions as the bedazzling basement of they family's dreams. The contractor Paul Blewman of PTB Construction skillfully orchestrated the build, and the quarter cut white oak slab cabinetry for the kitchen and bathroom was provided by Kitchens by Design in North Vancouver.
 Robin's Nest Interiors
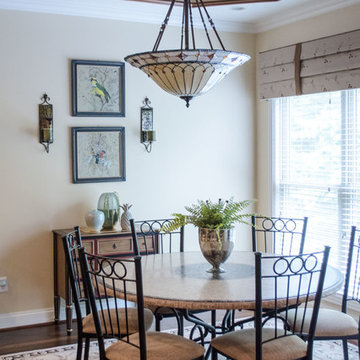
This project was for a long time client of mine who lives in a wonderful patio home with a finished basement. There were several challenges with which to contend. First, as you enter the Foyer, all of the spaces are open to each other so we had to make sure everything worked together. Second, furniture arrangement had always been a struggle for the large living area with the fireplace on an angled corner wall and large built-in. Last, although the homeowner loves color – especially blue/greens – we had to convince her to bring it into her home as an accent and make it work with the other spaces.
We started with a neutral sofa positioned across from the built-ins and paired it with a settee in a blue/green fabric. The settee does not block the fireplace and reinforces our color scheme. The homeowner upgraded her husband’s chair and ottoman with a contemporary leather one, and we added a perfectly scaled swivel chair to the corner next to the built-ins. We finished off the space with a mixture of unique accent tables including a beautiful coffee table with wood inlay, a small metal french drink table, a two-tiered egg shaped table, and a pedestal table with marble top. We added lighting, artwork and accessories to the built-ins and tables to complete the space. We also added blue/green accessories to the breakfast area to make the spaces flow seamlessly.
We love how these spaces in the Open Concept Redesign turned out. It is a very pleasing palette that does not overwhelm the spaces, but adds interest. Enjoy!
 White Buttons
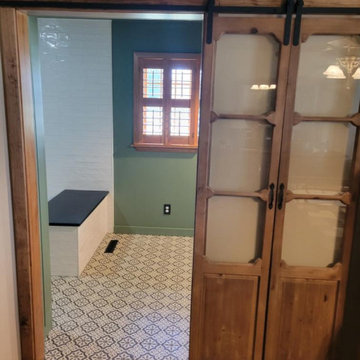
The new bathroom received the beautiful antique doors which are purely for aesthetics because as you can see they can still be seen through, this bathroom is in an interior bathroom, connected to a bedroom so once the bedroom door is shut no one walking by will inadvertently see more than they wanted to and my client gets her wish of fabulous antique sliding doors which we picked up at a local store. The client loves pattern and fell in love with this floor tile immediately when we went out on our first sourcing trip. The shower tile was picked for its movement and ability to work well with the patterned floor. We are still waiting on the shower wall installation. The Green walls/ceiling were suggested and approved as a calming color. We had three top contenders and ended up with wth this strong but gentle green color from Magnolia paint - Market Place was the color we ended up using.
Sponsored
Columbus, OH

Snider & Metcalf Interior Design, LTD
Leading Interior Designers in Columbus, Ohio & Ponte Vedra, Florida
 Robin's Nest Interiors
This project was for a long time client of mine who lives in a wonderful patio home with a finished basement. There were several challenges with which to contend. First, as you enter the Foyer, all of the spaces are open to each other so we had to make sure everything worked together. Second, furniture arrangement had always been a struggle for the large living area with the fireplace on an angled corner wall and large built-in. Last, although the homeowner loves color – especially blue/greens – we had to convince her to bring it into her home as an accent and make it work with the other spaces.
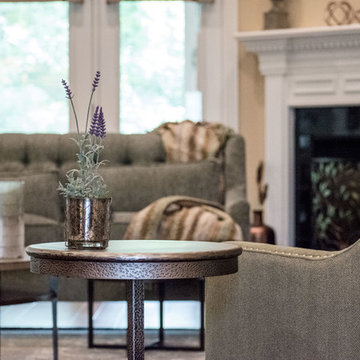
We started with a neutral sofa positioned across from the built-ins and paired it with a settee in a blue/green fabric. The settee does not block the fireplace and reinforces our color scheme. The homeowner upgraded her husband’s chair and ottoman with a contemporary leather one, and we added a perfectly scaled swivel chair to the corner next to the built-ins. We finished off the space with a mixture of unique accent tables including a beautiful coffee table with wood inlay, a small metal french drink table, a two-tiered egg shaped table, and a pedestal table with marble top. We added lighting, artwork and accessories to the built-ins and tables to complete the space. We also added blue/green accessories to the breakfast area to make the spaces flow seamlessly.
We love how these spaces in the Open Concept Redesign turned out. It is a very pleasing palette that does not overwhelm the spaces, but adds interest. Enjoy!
 Robin's Nest Interiors
This project was for a long time client of mine who lives in a wonderful patio home with a finished basement. There were several challenges with which to contend. First, as you enter the Foyer, all of the spaces are open to each other so we had to make sure everything worked together. Second, furniture arrangement had always been a struggle for the large living area with the fireplace on an angled corner wall and large built-in. Last, although the homeowner loves color – especially blue/greens – we had to convince her to bring it into her home as an accent and make it work with the other spaces.
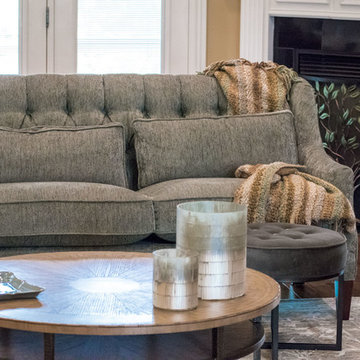
We started with a neutral sofa positioned across from the built-ins and paired it with a settee in a blue/green fabric. The settee does not block the fireplace and reinforces our color scheme. The homeowner upgraded her husband’s chair and ottoman with a contemporary leather one, and we added a perfectly scaled swivel chair to the corner next to the built-ins. We finished off the space with a mixture of unique accent tables including a beautiful coffee table with wood inlay, a small metal french drink table, a two-tiered egg shaped table, and a pedestal table with marble top. We added lighting, artwork and accessories to the built-ins and tables to complete the space. We also added blue/green accessories to the breakfast area to make the spaces flow seamlessly.
We love how these spaces in the Open Concept Redesign turned out. It is a very pleasing palette that does not overwhelm the spaces, but adds interest. Enjoy!
 Robin's Nest Interiors
This project was for a long time client of mine who lives in a wonderful patio home with a finished basement. There were several challenges with which to contend. First, as you enter the Foyer, all of the spaces are open to each other so we had to make sure everything worked together. Second, furniture arrangement had always been a struggle for the large living area with the fireplace on an angled corner wall and large built-in. Last, although the homeowner loves color – especially blue/greens – we had to convince her to bring it into her home as an accent and make it work with the other spaces.
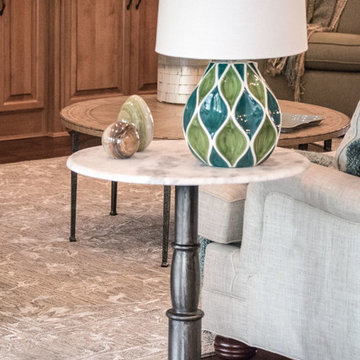
We started with a neutral sofa positioned across from the built-ins and paired it with a settee in a blue/green fabric. The settee does not block the fireplace and reinforces our color scheme. The homeowner upgraded her husband’s chair and ottoman with a contemporary leather one, and we added a perfectly scaled swivel chair to the corner next to the built-ins. We finished off the space with a mixture of unique accent tables including a beautiful coffee table with wood inlay, a small metal french drink table, a two-tiered egg shaped table, and a pedestal table with marble top. We added lighting, artwork and accessories to the built-ins and tables to complete the space. We also added blue/green accessories to the breakfast area to make the spaces flow seamlessly.
We love how these spaces in the Open Concept Redesign turned out. It is a very pleasing palette that does not overwhelm the spaces, but adds interest. Enjoy!
2