
Search results for "Common indicators" in Home Design Ideas
 Five Star Tree Care
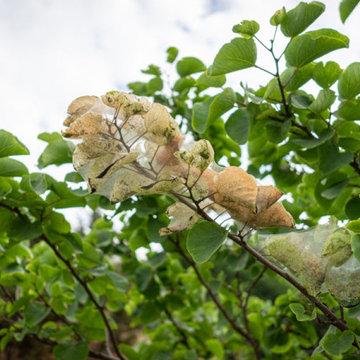
During the summer, certain tree pests are particularly active and bent on the destruction of your beloved trees. Spider mites are one of these pests that like to make themselves at home all over your plants. Their only goal in life is to eat plant leaves. A great way to stop their destruction is being able to recognize the warning signs of their infestation. Once you have identified them, you can take care of them and put in precautions in order to keep them away and stop any future problems from them. We here at Five Star Tree Services have come up with ways that you can identify this pest and get rid of it before it’s too late for your precious plants.
Some Info on Spider Mites
You might have seen these little pests before but didn’t know what they were. They are these tiny creatures that are related to ticks and spiders.
What They Look Like
In order to see them properly, you will need to look at them through a magnifying glass. These little bugs come in a number of different patterns and colours. Being so incredibly small, they are roughly a millimeter at the most. For reverence, that’s about as thick as your credit card. Trying to look at them without a magnifying glass, all you might see are these tiny moving dots that might be brown, red, black, or yellow.
Causes of Spider Mites
Due to their shier tininess, these little invaders can waltz right into your gardens undetected. It’s even possible that you have bought a plant for a nursery or garden center that has had spider mites on them. They can even be brought into your garden by the wind. These little pests have the ability to spread very quickly due to their ability to eat a number of different plants. They are not very picky when it comes to eating your plants. They like outdoor and indoor plants, deciduous and evergreen, virtually nothing is safe from them.
How To Tell You Have Spider Mites
Spider mites prefer to cut and feed on the bottoms of tree leaves, however, the damage they do can be seen at the top of the leaf. Three key things to look for that indicate you have a spider mite infestations are:
Yellowing or bronze look to your tree in one or many different areas (common with a big infestation)
Silky webs that are woven around the leaves and stems
Little yellow or white spots appearing at the top of the leaves/needles
If you are suspicious that your plant has spider mites, one way to know for sure is holding a sheet of paper under an infected branch and shaking it. You will be able to see the little mites on the paper.
Rid Your Plants of Spider Mites
Whether it’s the summer or winter, follow these tips for treating spider mites.
Summer:
You can use a forceful water spray to knock them off of your tree. Once they are gone, periodically use your hose to rinse your trees for the season. Make sure to get the bottom of the leaves because this is where the mites like to live.
Winter:
This also includes any time before the buds come out in the spring. If your tree has spider mites, during this time, you will only see the eggs settled on the branches of your tree. Apply dormant oil to all the eggs before they hatch.
It is also handy to know what natural predators eat spider mites. Certain rival insects such as lacewings and predator beetles will aid in getting rid of your pesky mites.
Preventing Spider Mites
Spider mites are most active during drought season. When trees are stressed, this is when they attack. If you are experiencing extended hot days and long dry periods, it is important to keep your trees hydrated. This means giving them at least an inch of water a week and making sure you have enough mulch around them.
How Five Star Tree Service Can Help
Spider mites are a pest. Catching them before they do any permanent damage is important. If using the dormant oil or spraying your tree with water doesn’t seem to be working, you can give us at Five Star Tree Services a call at (416) 990-3355 and we will come and help take care of them. Visit our website to see a full list of our available tree care services in Toronto!
 hengdecarpet
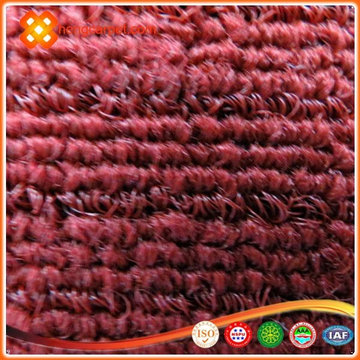
[Product name] Rugs
Model: ST asphalt bottom Packing: 6㎡ / box
Material: PP Weight: 30 kg / box
Specifications: 500mm * 500mm
Performance: conventional fire retardant, sound absorption, abrasion, laying simple, easy wiring, nice
Scope: not only for advanced office buildings, science parks, factories and other places, but also in the airport terminal, restaurant, boat dock waiting halls, railway stations, supermarkets, hospitals, schools, nursing homes, nurseries, theaters, family and other places are commonly used.
Construction: using composite materials for asphalt bottom liner, carpet surface for polypropylene, flexible, dimensionally stable, to leave the border, no edges, comfortable, and environmental requirements of the test indicators attached with international standards, and is the interior the ideal product.
Advantages: between the box stitching intact, conducted bacteria, pollution treatment, flame retardant, wear, noise insulation, antistatic, flameproof and other high quality, thermal insulation, sound-absorbing effect is good, in heat and cold weather environment no distortion, no cracking; compared with ordinary carpet, carpet tile backing composite water resistance, resistance to moisture, corrosion; and the use of dope dyed ensure lasting bright colors.
http://www.hengdecarpet.com/prodinfo.asp?pid=276

 Tile Doctor Ltd
I was contacted about a Georgian property in the Kent village of Leeds , to see if I could do anything to improve a Travertine tiled floor. The use of Travertine was extensive and had been installed throughout the ground floor including the kitchen, dining room, utility and bathroom WC. Travertine is probably my favourite stone, but it is acid sensitive and attracts dirt easily, due to its ‘holey’ composition.
Initially we discussed the floor over the phone where I got to know about the issues they were experiencing, and I detailed the renovation process I normally use to restore it including the products and timelines. Naturally they wanted to me to provide a quote for the work however its tricky to do that accurately without seeing the floor, so I arranged a date to pop over.
Upon arriving I could see the tiles and the wide grout joints had extensive, ingrained dirt indicating the previous sealer had long since worn away. This is a common issue with stone floors, and to re-assure myself and the client it could be resolved I cleaned a small area in the utility room with pleasing results!
This test clean helped me to understand which products and methods would work best on the floor and later that day I emailed over a detailed quote for the renovation. Happy with the quote I received a reply the same day asking when I could start.
My colleague and I arrived on the agreed date and work started with adding protection to all areas that required it. We use a lot of water during the cleaning process and some materials such as MDF can become damaged with water ingress, so it makes sense to do this.
To get the floor clean, a coarse Carbide Brush fitted to a rotary machine was run over the Travertine tiles to scrub in a strong solution of Tile Doctor Pro-Clean. This process generates a lot of slurry as the dirt was washed out of the stone and grout which is extracted with a wet vacuum as we progressed.
Next it was on hands and knees with more Tile Doctor Pro-Clean and handheld brushes run over stubborn areas and along the grout lines to take them from 80% up to 100%.
Happy with the results, the next step was to renovate the stone using a series of diamond encrusted burnishing pads. Using only water for lubrication this process starts with the application of a coarse 400-grit burnishing pad attached to the floor buffer. This produces a lot of slurry which again was removed with a wet vacuum.
This left the Travertine clean, but the pores of the stone had been opened giving the floor a matt finish and more absorbent than it was originally. To further refine the appearance of the stone the next two burnishing pads were applied which are 800 and 1500-grit. These pads polish the stone and close the pores, restoring the natural sheen in the process. After each pad was applied the slurry was rinsed off the floor with water and extracted with the wet vacuum. Once complete the floor was left to dry off fully overnight.
I arrived the next day and took several moisture readings from the floor to check that it had dried off sufficiently overnight. The results were good, so work moved onto sealing the Travertine with two coats of Tile Doctor Ultra Seal which is a natural look impregnating sealer. It works by soaking into the stone, occupying the pores and thereby preventing dirt from becoming ingrained there. This ensures dirt remains on the surface where it is easily cleaned away.
The final step in the floor’s renovation was to apply the last of the diamond polishing pads which is a very fine 3000-grit. This pad further improves the polished appearance of the stone resulting in a satisfying sheen.
The work made a massive difference to the floor, and I received an email the next day from one of the owners who was really pleased with the transformation:
”Floors look brilliant. Very pleased.”
For the care and maintenance of polished sealed floors I recommend the use of Tile Doctor’s Stone Soap which is a gentle but effective cleaning product that won’t impact the sealer and contains a patina enhancer. When it comes to sealed floors my mantra is:
“If you look after the sealer, the sealer will look after the floor!”
Graham Davis
North Kent Tile Doctor
Find the right local pro for your project
 Ánforas de Mar
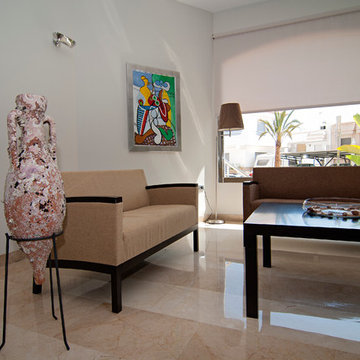
Amphora replica of the Dressel Catalan type that were produced in the Roman times of the Emperor Augustus (1st century BC). They were made in the western Mediterranean regions in the workshops of the northern Mediterranean coast of Hispania in the kilns of the main Roman cities of the area like Tarraco (present day Tarragona). Their use was widespread throughout all the western provinces of the Mediterranean mainly for carrying and preserving wine, although some remains have also been found in areas of Great Britain and in eastern Mediterranean provinces, indicating that this type of amphorae was commonly used from the 1st century BC up until the 2nd century AD.
They were probably used to hold wine produced in the area where the amphorae were made.
 Green Gorge Construction
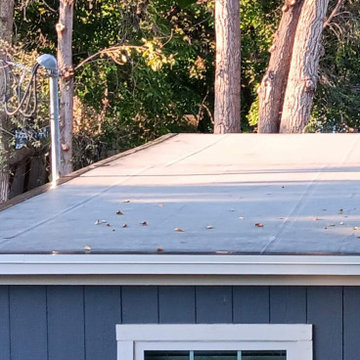
Due to its deteriorating condition, the asphalt roll roofing on this ADU required replacement before the Fall rains. Asphalt roll roofing generally lasts only 5-10 years, leading to ongoing maintenance challenges. The original 1×10 sheathing showed significant sagging in several spots, resulting in standing water not suitable for asphalt. Additionally, there was a complete absence of ventilation after improper installation of R-21 fiberglass insulation, leaving no air gap between the sheathing and insulation. A noticeable hump along the center of the roof indicated that the load-bearing wall had been supporting that section since construction, contributing to light sagging between the walls.
The old roof was completely removed down to the joists, revealing a solid base for the new installation. The central hump was eliminated by shaving the high point along that line. 2×6 beams were ripped in half then nailed on top of the existing joists, creating a 1.5″ gap for insulation and providing strong attachment points for the OSB sheathing, which was secured with screws to prevent any potential issues with nail heads popping through over the roof’s expected lifespan of over 50 years. The EPDM membrane was then adhered using glue and contact cement along the edges of each sheet, with the ends folded over the roof edges and secured with termination bars. Drip edge flashing was added and taped to ensure a water-tight seal, and EPDM-safe caulking was applied over the seams for additional protection. Finally, all exposed wood was primed and painted.
The new roof features a 60mil commercial-grade EPDM rubber membrane, offering a lifespan exceeding 50 years, in stark contrast to the 5-10 year lifespan of asphalt roll roofing.
Using two sheets of EPDM for installation streamlined the process, resulting in one single seam across the entire roof, compared to the asphalt roll’s dimensions of 3 feet wide by 33 feet long, which created 8 vertical seams and 9 horizontal seams—significantly increasing the risk of leakage and failure. Wrapping the rubber over the edge of the roof effectively addressed concerns about water infiltration at the edges, an issue prevalent with the asphalt and drip edge interface.
Another benefit to removing the splitting 1×10 decking and replacing it with OSB sheathing is the increase in structural integrity, moisture resistance, longevity and consistency.
The project successfully transformed the ADU’s roof from a maintenance-prone asphalt roll system to a highly durable 60mil EPDM rubber membrane. By addressing critical structural issues, including sagging sheathing and inadequate ventilation, the team ensured that the new roof not only offers superior water resistance and longevity but also meets higher performance standards for insulation and durability. The replacement process eliminated common weak points, such as numerous seams and poor edge sealing, which were vulnerabilities in the old roofing system. The result is a streamlined, secure installation that provides peace of mind and long-term value, with a lifespan extending well beyond the original roof.
 Shapiro & Company Architects
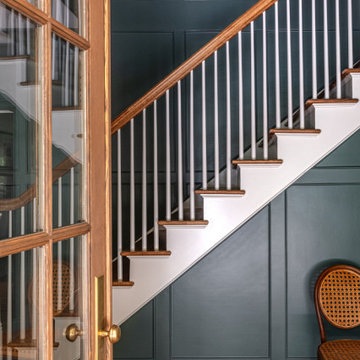
Our clients loved this tree-lined older, established neighborhood. They bought a house there that needed substantial renovations as it probably had not been updated in 30-40 years. They contacted Shapiro & Co in hopes that they would be able to transition an older, outdated house to a home that retained its character but was redesigned to meet the current needs of the family. The house foyer was very small and not accomodating for visitors so the architects relocated the entry and added a welcoming front porch. After an assessment of the existing conditions, it was determined that the kitchen, while serving its purpose in the 1940s, was completely out of character and in the wrong location for a modern family's needs. So the architects relocated and created an entirely new kitchen, and family and dining spaces. As indicative of homes in the ’40s and '50s, the master bedroom and bathroom were very small and not meeting current needs. Therefore we repurposed one bedroom into the master bath and dressing area and reorganized and enlarged the master bedroom area. The original second-floor plan was very small and confining. We captured some attic space and were able to create two bedrooms with ensuite bathrooms and a central common room for the children. By a sensitive assessment of the client’s needs and while maintaining the charm of the home, we were able to completely renovate and enlarge the house while keeping it in context with the beautiful neighborhood.
Contractor: RKA Construction, LLC
Interior: Lindsey Black Interiors
Photographer: Sélavie Photography
 Paula Feral Interiorismo
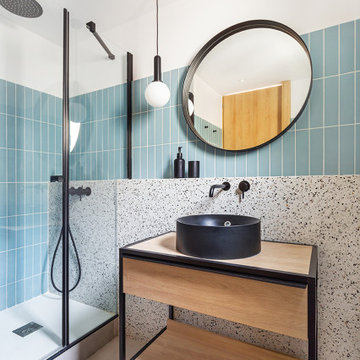
Inspiration for a contemporary blue tile gray floor and single-sink alcove shower remodel in Barcelona with open cabinets, light wood cabinets, white walls, a vessel sink, wood countertops, a hinged shower door and a freestanding vanity
 Shapiro & Company Architects
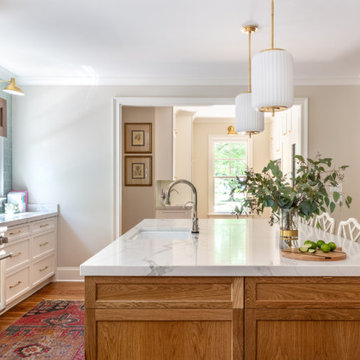
Our clients loved this tree-lined older, established neighborhood. They bought a house there that needed substantial renovations as it probably had not been updated in 30-40 years. They contacted Shapiro & Co in hopes that they would be able to transition an older, outdated house to a home that retained its character but was redesigned to meet the current needs of the family. The house foyer was very small and not accomodating for visitors so the architects relocated the entry and added a welcoming front porch. After an assessment of the existing conditions, it was determined that the kitchen, while serving its purpose in the 1940s, was completely out of character and in the wrong location for a modern family's needs. So the architects relocated and created an entirely new kitchen, and family and dining spaces. As indicative of homes in the ’40s and '50s, the master bedroom and bathroom were very small and not meeting current needs. Therefore we repurposed one bedroom into the master bath and dressing area and reorganized and enlarged the master bedroom area. The original second-floor plan was very small and confining. We captured some attic space and were able to create two bedrooms with ensuite bathrooms and a central common room for the children. By a sensitive assessment of the client’s needs and while maintaining the charm of the home, we were able to completely renovate and enlarge the house while keeping it in context with the beautiful neighborhood.
Contractor: RKA Construction, LLC
Interior: Lindsey Black Interiors
Photographer: Sélavie Photography
3