
Search results for "Complex issue" in Home Design Ideas

 Tile Doctor Ltd
This ground floor flat in the City of Oxford had been converted from a shop which as you can imagine, was quite complex. One significant element involved in the conversation was the restoration of an old Quarry tiled floor which ran through the main hallway and had for many years been covered in a commercial linoleum covering.
When the linoleum covering was removed, the sheer amount of glue which had been used to affix it had completely ruined the appearance and condition of the Quarry tiles. There was also a lot of concrete in the bathroom, and our client was keen to have this removed in the hope that the tiles beneath were salvageable.
My first task at the property was to deal with the adhesive. I covered the entire floor area with Tile Doctor Remove and Go and then covered it with a plastic sheet and leaving it to soak into the glue and break it down overnight. Remove and Go is powerful stripper with a long-dwell time, formulated to break down adhesives and paint stains, amongst other coatings.
I returned the next day and, removing the plastic sheeting, I scrubbed the floor with a carbon brush attached to a rotary floor scrubber to remove the huge glue deposits. I worked in sections, rinsing each area of the floor with water after it had been scrubbed. Once I had finished the entire floor there was still some glue remaining, so I covered it again with a solution of Remove and Go combined with Tile Doctor HBU Nanotech, which utilises nano-sized particles to get underneath tough stains, dissolve them, and lift them out. I left this solution on the floor for about two hours to dwell and scrubbed it again.
During the next day of work, I used a very coarse 100 grit diamond burnishing pad to manually grind away the remaining stubborn bits of glue. Paying attention to the bathroom, I used a 50-grit coarse milling pad followed up with a 100-grit diamond burnishing pad to do the same to the area of concrete.
The next part of the process was to use Tile Doctor Grout Clean Up to acid wash the floor. This was successful in removing the last bits of cement and the remaining residue of the glue. To complete the cleaning process, I then rinsed the floor with plenty of water and vacuumed up any soiled solution.
I opted to leave the floor alone for a couple of days to fully dry off so that it could be sealed upon my return. This is crucial as any moisture or damp issues can damage the performance of the sealer and expose the floor to further ingrained dirt and staining.
To seal the floor, I used Tile Doctor Colour Grow. This is an impregnating sealer that also enhances the natural reddish shades in the Quarry. I applied two coats of the sealer, giving the floor the natural look matte finish the customer desired.
The customer was very impressed with the results of this thorough restoration. She even left the following feedback:
“I cannot recommend this service enough. The Oxford Tile Doctor (Barry) was a superstar: he cleaned up the tiles in my hallway, which were covered in a very thick layer of glue, and removed concrete from the tiles. They now look superb and I’m really happy with the outcome. Barry was always on time, considerate, and kept me up to date. The quote for the job was exactly right. I would not hesitate to recommend him.”
 User
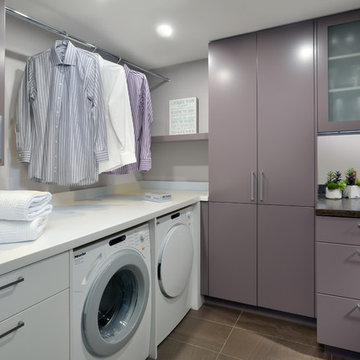
UserThis south facing lakefront condo unit our clients purchased, with its terrace and solaria overlooking the water, was virtually in its original state, never having been renovated. Upon beginning construction, the space was completely opened to the stunning view. A contemporary aesthetic was created while implementing warmth with the choice of materials. With this openness came a new set of issues: mechanical travel and connection to existing runs, all inside a typical concrete condo structure. What we think is a true example of design complexity rendering simplicity.
 User
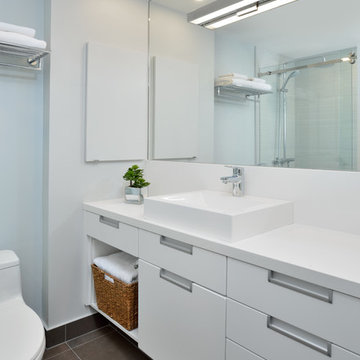
UserThis south facing lakefront condo unit our clients purchased, with its terrace and solaria overlooking the water, was virtually in its original state, never having been renovated. Upon beginning construction, the space was completely opened to the stunning view. A contemporary aesthetic was created while implementing warmth with the choice of materials. With this openness came a new set of issues: mechanical travel and connection to existing runs, all inside a typical concrete condo structure. What we think is a true example of design complexity rendering simplicity.
Find the right local pro for your project
 User
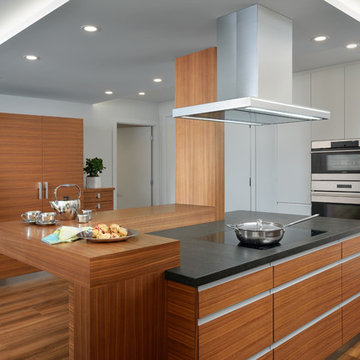
UserThis south facing lakefront condo unit our clients purchased, with its terrace and solaria overlooking the water, was virtually in its original state, never having been renovated. Upon beginning construction, the space was completely opened to the stunning view. A contemporary aesthetic was created while implementing warmth with the choice of materials. With this openness came a new set of issues: mechanical travel and connection to existing runs, all inside a typical concrete condo structure. What we think is a true example of design complexity rendering simplicity.
 Tile Doctor Ltd
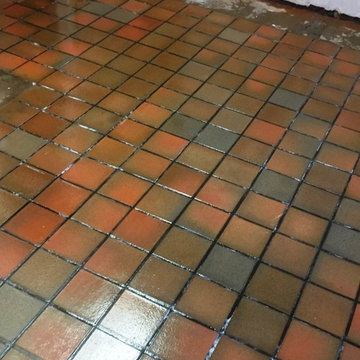
Recently I was called to a house in the very small town of Marton in Warwickshire which is known for its proximity to the medieval “Marton Bridge”, which lies just to the north, crossing the River Leam.
The entire downstairs flooring of my client’s house consisted of Quarry tiles apart from one room where the tiles had been covered by screed and then linoleum. Quarry tiles are a classic hard wearing tile used for both internal and external commercial and residential flooring due to its ability to withstand heavy usage. Reception areas, outdoor patios and porches, for example, are commonly tiled using Quarry.
My client wanted to restore the covered floor back to its original state so that it would match the rest of the downstairs. Realising that this would be a complex and physically demanding task, my client decided to call in Tile Doctor to carry out the restoration.
Removing the Linoleum covering was a relatively straightforward process, so I was able to do this relatively quickly. The main issue concerned removing the screed, which is far more difficult to remove, requiring a lot of physical scraping. Thus I opted to call in some extra manpower in the form of the Nottinghamshire Tile Doctor, Steve Carpenter. With the two of us armed with scrapers we set about removing the screed, taking extra care not to damage the Quarry tile underneath.
Once Steve and I had scraped off as much of the screed as physically possible, I applied a strong dilution of Tile Doctor Remove & Go, a stripper with cleaning properties that is particularly effective at breaking down coatings such as adhesives, plasters and sealers. The product was left to dwell for ten minutes before I worked it into the stone with a scrubbing pad.
After cleaning the tiles, I noticed a layer of grout haze on the surface of the exposed Quarry tiles, so I applied Tile Doctor Grout Clean-Up to remove it. Once the cleaning process was complete I gave the floor a thorough rinse with clean water, before soaking up the resulting residue with a wet-vac machine. The first day of work was a gruelling 12 hours long, but I was very pleased with the results and left the floor to dry overnight.
On day two I returned to finish the job by sealing the newly uncovered Quarry tiles, but not before using a damp meter to check that they were completely dry. Any excess moisture left on unsealed tiles can potentially effect the performance of any sealers that are applied. I sealed the tiles using Tile Doctor Colour Grow, an impregnating, colour-enhancing sealer which gave the surface an aesthetically pleasing shine, as well as durable protection against dirt and wear for the future.
After two long days of work the job was done and the transformation was fantastic and highly rewarding to see, the house now has a fantastic looking Quarry tiled floor running throughout the entirety of the lower level.
Mick Gayton
Warwickshire Tile Doctor
 CiHUB Indochine
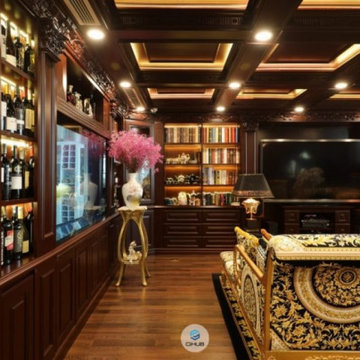
The project is a penthouse of the most beautiful class in the Ciputra urban complex - where Vietnamese elites and tycoons live. This apartment has a private elevator that leads directly from the basement to the house without having to share it with any other owners. Therefore, privacy and privilege are absolutely valued.
As a European Neoclassical enthusiast and have lived and worked in Western countries for many years, CiHUB's customer – Lisa has set strict requirements on conveying the true spirit of Tan interior. Classic standards and European construction, quality and warranty standards. Budget is not a priority issue, instead, homeowners pose a much more difficult problem that includes:
Using all the finest and most sophisticated materials in a Neoclassical style, highlighting the very distinct personality of the homeowner through the fact that all furniture is made-to-measure but comes from famous brands. luxury brands such as Versace carpets, Hermes chairs... Unmatched, exclusive.
The CiHUB team and experts have invested a lot of enthusiasm, time sketching out the interior plan, presenting and convincing the homeowner, and through many times refining the design to create a standard penthouse apartment. Neoclassical, unique and only for homeowners. This is not a product for the masses, but thanks to that, Cihub has reached the satisfaction of homeowners thanks to the adventure in every small detail of the apartment.

 THE Remodel Group
A luxurious en suite bath was created within this classic 1925 Portland bungalow by reconfiguring the second story’s original small bedrooms and tiny half bath. In this welcoming new urban boho space, eclectic finishes mingle harmoniously, integrated through subtle repetition of shapes and materials.
A furniture-style vanity sets the tone for this luxurious space, introducing materials, colors, shapes, and textures that repeat throughout. Individual walnut hexagons join to create distinctive vanity doors, offset beautifully by horizontal-grain drawers. Topping the cabinetry is a simple concrete countertop with integral sinks. An expansive framed mirror above enlarges and brightens the room. Within the mirror, sconces float, their globes a nod to the hexagons below. Champagne bronze fixtures reflect the warm walnut glow. Nestled into the back corner, a stunning shower features waterjet tiles in a double herringbone pattern, each precisely cut and laid to maintain design integrity at every surface transition. Teak floor tiles and a pebbled niche hint at the classic spa experience. Across from the shower, a large hexagonal window provides a treetop view from the free-standing tub below. The gentle oval of the tub and the beaded chandelier above provide a pleasing contrast to the strong lines surrounding it, as do the softly-shaded pebbles in the full-length niche. Shiplap wainscotting wraps the room, creating an illusion of height in the compact space. Subtle flooring and soft green walls create an understated backdrop for the bold mix of materials, unifying them into a serene oasis.
Asking a century-old home to accommodate a modern luxury bath is a tall order. Asbestos-laden plaster and flooring had to be abated. The subfloor had to be leveled and reinforced to increase strength and prevent deflection. Water lines and multiple electrical circuits had to be brought across and up without disturbing a beautifully-paneled ceiling, something we accomplished by firring out stair walls to hide the chases. Our client had visions of a leafy view from her tub, but the new layout eliminated existing windows. Placing a new window was complicated by deep eaves and flat soffits. By pushing the header into the roofline, however, we were able to accommodate a picture window. The flat soffit was replaced by an inverse hip lined with stained tongue and groove cedar, tying it to the bathroom finishes. Bringing materials up a narrow staircase became truly challenging when it was time to install the big items. However, strategic removal of drywall around the landing got the job done. Our attention to detail is showcased in the shower tile, where precise cuts were required at surface transitions to maintain the integrity of a complex double herringbone lay. The project was delivered on time.
Savvy layout choices minimized spending on structural changes. Because we were dealing with dormer space, head height was an issue. Raising the ceiling would have been complex and expensive so our design accommodated the constraints – tub on the low outside wall, shower on the full-height interior wall. The vanity spanned the spread, accommodating our petite client on the exterior side and her taller husband on the interior side. An under-eave closet was closed off to create room for both a freestanding tub and a separate shower. Rather than building replacement storage elsewhere, we simply added a new door into the closet from the primary bedroom. This was made possible by absorbing the short hallway separating the existing bed and bathroom into the primary bedroom. This new layout also created an en suite relationship between the primary bedroom and the new bath. We saved additional dollars by selecting a furniture-style vanity rather than using custom cabinetry, and the countertop with integral sinks provided a cost savings over a more traditional quartz countertop with undermount sinks. Affordable shower tiles allowed us to put more money into a dynamic tile layout. The project was delivered within budget.

 Wine Refrigeration Los Angeles
We specialize in professional appliance repair services for all major brands and models. Whether it’s a refrigerator that’s not cooling, a washer that won’t spin, or an oven that won’t heat, our experienced technicians can quickly diagnose and fix the problem. We’re committed to delivering fast, reliable, and affordable service with transparent pricing and no hidden fees. Our team takes pride in being punctual, respectful, and thorough on every job. From simple repairs to complex issues, customer satisfaction is always our top priority. Count on us to keep your home appliances running smoothly with expert care and attention.
 Talon Construction Inc.
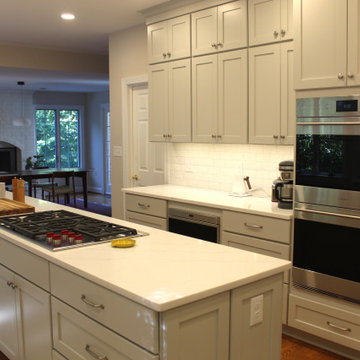
Renovating an open kitchen can be an exciting project that can improve the functionality, aesthetics, and value of your home. Here are some steps to guide you through the process:
Planning and Design:
Define your goals and budget for the renovation.
Determine the layout of your open kitchen. Consider factors like the work triangle (the relationship between the stove, sink, and refrigerator) and the flow of traffic.
Choose a design style and color scheme that suits your preferences and complements the rest of your home.
Research and Inspiration:
Collect inspiration from magazines, websites, and social media platforms to get ideas for your open kitchen design.
Create a mood board or vision board to help you visualize the final look.
Hiring Professionals:
Depending on the scale of your renovation, you may need to hire professionals, such as architects, interior designers, contractors, and electricians. Make sure to check references and get multiple quotes.
Demolition and Structural Work:
If your renovation involves structural changes, like removing walls, this is the time to do it. Ensure that the necessary permits are obtained.
Plumbing and Electrical Work:
Update or reconfigure plumbing and electrical systems as needed. This may include adding or moving outlets, switches, and lighting fixtures.
Cabinetry and Countertops:
Choose and install new kitchen cabinets and countertops. This is a significant part of your renovation and will greatly influence the kitchen's appearance and functionality.
Appliances:
Update or install new kitchen appliances, including the refrigerator, stove, oven, microwave, and dishwasher.
Flooring:
Select and install flooring that is suitable for a kitchen, such as hardwood, tile, laminate, or vinyl. Ensure it complements the overall design.
Backsplash and Wall Finishes:
Install a backsplash that matches your design and protects your walls. Consider materials like tile, glass, or stainless steel.
Lighting:
Choose and install various types of lighting, including ambient, task, and accent lighting. Pendant lights above an island or breakfast bar can add style and functionality.
Paint and Finishing Touches:
Paint the walls and ceiling in the colors you've selected. Add finishing touches like hardware, window treatments, and decorative elements.
Furniture and Accessories:
Bring in furniture, such as a dining table and chairs, barstools, and any other pieces you need to complete the space. Decorate with accessories like artwork, plants, and decorative items.
Final Inspection and Cleanup:
Ensure that all work meets safety and building code requirements. Clean the entire area thoroughly.
Enjoy Your New Kitchen:
Once the renovation is complete and everything is in its place, enjoy your beautiful, functional open kitchen.
Remember that open kitchen renovations can be complex and may require careful planning. It's essential to stay within your budget, communicate with your contractors and designers, and be flexible as unexpected issues may arise during the process. Ultimately, a well-executed open kitchen renovation can enhance the heart of your home and improve your overall living space.
 Gardens of Babylon Landscapes
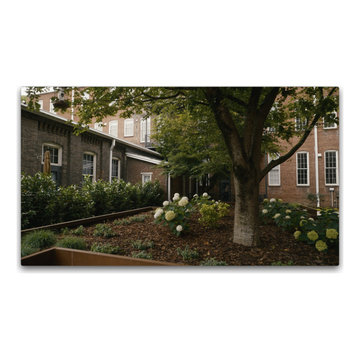
For this historic apartment complex in Nashville’s Germantown neighborhood, we transformed a neglected courtyard into a warm, functional retreat for residents by first addressing major drainage issues, then redesigning the space to encourage gathering and relaxation. We preserved two mature cherry trees and turned cramped planters into shared garden beds filled with native plants. From there, we added stamped concrete walkways, patios, built-in seating, a fire pit, and ambient lighting to create a cozy, peaceful atmosphere that feels like an extension of home. The result is a tenfold increase in how usable the space is—a blend of rustic charm and natural textures that residents now enjoy daily, whether they’re reading under the trees, walking their dogs, or gathering around the fire.
 Automotive Locksmith
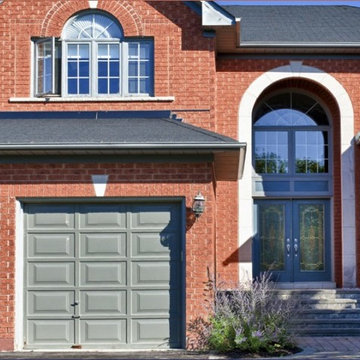
We have been providing top notch garage door services for over 10 years now. We always aim to provide hundred percent satisfaction to all of our clients by providing quick, friendly and professional garage door services at fair price. To be able to do this, we make sure that our highly regarded garage door technicians are well trained and knowledgeable in the garage door industry.
We can effectively resolve any garage door problems you might be having right now, from simple repair, parts installation to the most complex garage door issues. Our team of technicians can deal with different garage door systems like section and panel, tilt-up, roll-up, overhead and more.
With our decades in the garage door industry, we have established the reputation of providing its customers with good service and fair prices as well as giving accurate solution in every garage door problem that you have.
Residential Garage Door
Commercial Garage Door
Garage Door Openers
Garage Door Parts
Garage Door Accessories
Garage Door Tuneup
Garage Door Maintenance
Emergency Garage Door
Call Us: (805) 342-0085
Visit Us: http://805commercialgaragedoors.com/wooden-garage-doors
 Wanda Ely Architect Inc.
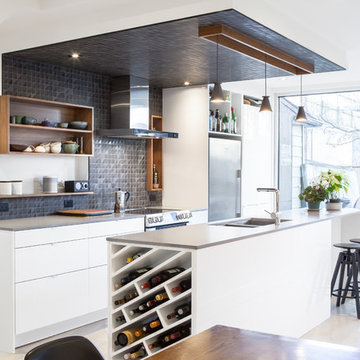
A bold, black basalt tile backsplash folds up the wall and onto the ceiling, and is punctuated by three walnut boxes that house pendant lights over the island and store kitchenware near the main prep space. Bar seating at the end of the island is perfect for quick morning breakfasts, and snacks after school.
Photo by Scott Norsworthy
 Wanda Ely Architect Inc.
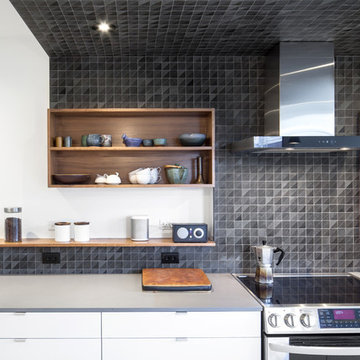
The walnut boxes and appliance shelf provide easily accessible space for storing frequently used items while keeping the countertop clutter-free for preparing food.
Photo by Scott Norsworthy
 Automotive Locksmith
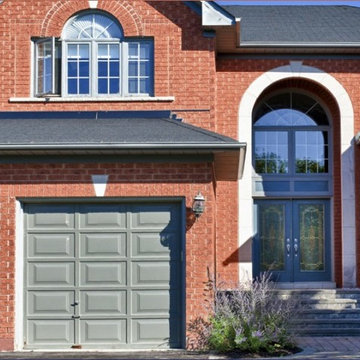
We have been providing top notch garage door services for over 10 years now. We always aim to provide hundred percent satisfaction to all of our clients by providing quick, friendly and professional garage door services at fair price. To be able to do this, we make sure that our highly regarded garage door technicians are well trained and knowledgeable in the garage door industry.
We can effectively resolve any garage door problems you might be having right now, from simple repair, parts installation to the most complex garage door issues. Our team of technicians can deal with different garage door systems like section and panel, tilt-up, roll-up, overhead and more.
With our decades in the garage door industry, we have established the reputation of providing its customers with good service and fair prices as well as giving accurate solution in every garage door problem that you have.
Residential Garage Door
Commercial Garage Door
Garage Door Openers
Garage Door Parts
Garage Door Accessories
Garage Door Tuneup
Garage Door Maintenance
Emergency Garage Door
Call Us: (805) 342-0085
Visit Us: http://805commercialgaragedoors.com/moorpark

 Studio Earthbox
A cozy balcony garden on a second floor apartment. A new living space created for all members of the family-including a 15 month old.
Small trendy porch idea in Delhi
Small trendy porch idea in Delhi
 Windy City Painters
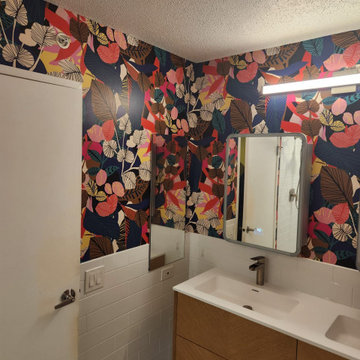
Expert wallpaper installer Lakeview services transform Chicago homes with precision and style. This stunning project showcases our commitment to quality craftsmanship in one of Chicago's most desirable neighborhoods.
Project Overview and Architecture
This beautiful Lakeview greystone required careful wallpaper installation that would complement the home's original architectural details. The vintage building's unique character demanded specialized techniques to ensure perfect results while preserving the historic charm that makes these homes so special.
Materials and Products
We utilized premium wallpaper adhesive, professional smoothing tools, and high-quality materials specifically chosen for Chicago's climate conditions. Our team selected products that work exceptionally well with the plaster walls common in vintage Lakeview homes.
Installation Process
First, we thoroughly prepared surfaces by repairing imperfections and priming walls. Next, we precisely measured and cut each strip, ensuring perfect pattern alignment. Then, we applied adhesive evenly and positioned wallpaper with expert precision. Finally, we eliminated bubbles, trimmed edges, and completed finishing touches.
Chicago Home Challenges
Lakeview's vintage homes present unique challenges including uneven plaster walls, settling issues, and temperature fluctuations. Our wallpaper installer Lakeview expertise addresses these concerns with specialized preparation techniques and climate-appropriate materials that ensure lasting results.
Results and Quality
The finished installation showcases flawless pattern matching, smooth surfaces, and crisp edges that enhance the room's architectural features. This wallpaper installer Lakeview project demonstrates our commitment to excellence and attention to detail.
Professional Tips
Homeowners should always hire experienced professionals for wallpaper installation. Proper surface preparation is crucial for longevity. Additionally, choosing quality materials appropriate for Chicago's climate ensures your investment lasts for years.
See more work and request free estimate at windypainters.com.
Q: Why choose professional wallpaper installer Lakeview services over DIY? / A: Professional installation prevents costly mistakes, ensures proper adhesion, and guarantees beautiful results that enhance your home's value and appearance.
Q: How do you handle vintage Lakeview home challenges? / A: Our wallpaper installer Lakeview team addresses plaster walls, settling issues, and architectural details with specialized techniques and appropriate materials.
Q: What preparation is required before wallpaper installation? / A: We repair wall imperfections, apply primer, ensure smooth surfaces, and address any moisture issues for optimal wallpaper installer Lakeview results.
Q: How long does professional wallpaper installation take? / A: Most rooms require 1-2 days depending on complexity, though our wallpaper installer Lakeview team works efficiently while maintaining quality standards.
Q: Can you work with designer or specialty wallpapers? / A: Absolutely, our wallpaper installer Lakeview experts handle luxury papers, grasscloth, murals, and specialty materials with appropriate techniques and care.
Q: Do you remove existing wallpaper before installation? / A: Yes, we provide complete removal services using safe methods that protect your walls and prepare surfaces for new wallpaper installer Lakeview projects.
Q: How do you ensure pattern alignment and matching? / A: Our wallpaper installer Lakeview professionals use precise measuring, professional tools, and years of experience to achieve perfect pattern continuity.
Q: What types of walls can accommodate wallpaper? / A: We install wallpaper on various surfaces including drywall, plaster, and painted walls after proper preparation for wallpaper installer Lakeview projects.
Q: How do you handle corners and trim work? / A: Our wallpaper installer Lakeview team uses specialized techniques for inside corners, outside corners, and detailed trim work ensuring professional results.
Q: What warranty do you provide on installation? / A: Windy City Painters guarantees our wallpaper installer Lakeview work with comprehensive warranty coverage protecting your investment and ensuring satisfaction.
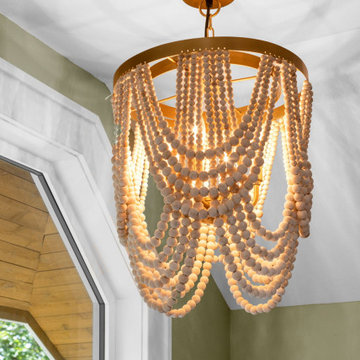 THE Remodel Group
A luxurious en suite bath was created within this classic 1925 Portland bungalow by reconfiguring the second story’s original small bedrooms and tiny half bath. In this welcoming new urban boho space, eclectic finishes mingle harmoniously, integrated through subtle repetition of shapes and materials.
A furniture-style vanity sets the tone for this luxurious space, introducing materials, colors, shapes, and textures that repeat throughout. Individual walnut hexagons join to create distinctive vanity doors, offset beautifully by horizontal-grain drawers. Topping the cabinetry is a simple concrete countertop with integral sinks. An expansive framed mirror above enlarges and brightens the room. Within the mirror, sconces float, their globes a nod to the hexagons below. Champagne bronze fixtures reflect the warm walnut glow. Nestled into the back corner, a stunning shower features waterjet tiles in a double herringbone pattern, each precisely cut and laid to maintain design integrity at every surface transition. Teak floor tiles and a pebbled niche hint at the classic spa experience. Across from the shower, a large hexagonal window provides a treetop view from the free-standing tub below. The gentle oval of the tub and the beaded chandelier above provide a pleasing contrast to the strong lines surrounding it, as do the softly-shaded pebbles in the full-length niche. Shiplap wainscotting wraps the room, creating an illusion of height in the compact space. Subtle flooring and soft green walls create an understated backdrop for the bold mix of materials, unifying them into a serene oasis.
Asking a century-old home to accommodate a modern luxury bath is a tall order. Asbestos-laden plaster and flooring had to be abated. The subfloor had to be leveled and reinforced to increase strength and prevent deflection. Water lines and multiple electrical circuits had to be brought across and up without disturbing a beautifully-paneled ceiling, something we accomplished by firring out stair walls to hide the chases. Our client had visions of a leafy view from her tub, but the new layout eliminated existing windows. Placing a new window was complicated by deep eaves and flat soffits. By pushing the header into the roofline, however, we were able to accommodate a picture window. The flat soffit was replaced by an inverse hip lined with stained tongue and groove cedar, tying it to the bathroom finishes. Bringing materials up a narrow staircase became truly challenging when it was time to install the big items. However, strategic removal of drywall around the landing got the job done. Our attention to detail is showcased in the shower tile, where precise cuts were required at surface transitions to maintain the integrity of a complex double herringbone lay. The project was delivered on time.
Savvy layout choices minimized spending on structural changes. Because we were dealing with dormer space, head height was an issue. Raising the ceiling would have been complex and expensive so our design accommodated the constraints – tub on the low outside wall, shower on the full-height interior wall. The vanity spanned the spread, accommodating our petite client on the exterior side and her taller husband on the interior side. An under-eave closet was closed off to create room for both a freestanding tub and a separate shower. Rather than building replacement storage elsewhere, we simply added a new door into the closet from the primary bedroom. This was made possible by absorbing the short hallway separating the existing bed and bathroom into the primary bedroom. This new layout also created an en suite relationship between the primary bedroom and the new bath. We saved additional dollars by selecting a furniture-style vanity rather than using custom cabinetry, and the countertop with integral sinks provided a cost savings over a more traditional quartz countertop with undermount sinks. Affordable shower tiles allowed us to put more money into a dynamic tile layout. The project was delivered within budget.
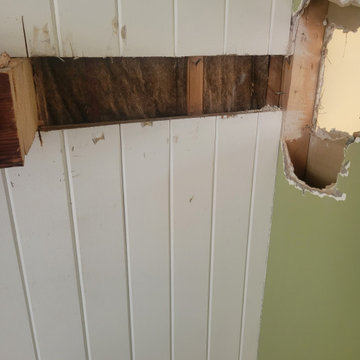
 Dream Builderz
In these pictures, our highly skilled team is diligently repairing the damaged area surrounding a chimney, ensuring the structure remains secure and watertight. Chimney damage, often caused by weather exposure, water infiltration, or wear over time, can compromise both the integrity of the chimney and surrounding roofline if not addressed promptly. Using precise masonry techniques, durable flashing installation, and expert craftsmanship, we are restoring this critical area to protect the home from future leaks and structural issues. At Dream Builderz, we take pride in tackling complex repairs with unmatched attention to detail, combining years of experience with industry-best practices to provide lasting solutions. Let us safeguard your home while enhancing its durability and value! #HomeAddition #HomeRemodel #HomeRenovation #DreamBuilderz #BuildingDreams #DreamHome #HomeConstruction #GeneralContractor #Construction #CustomBuild #LoveYourHome
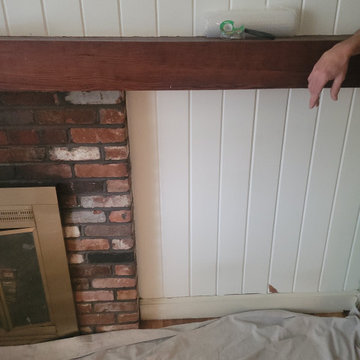 Dream Builderz
In these pictures, our highly skilled team is diligently repairing the damaged area surrounding a chimney, ensuring the structure remains secure and watertight. Chimney damage, often caused by weather exposure, water infiltration, or wear over time, can compromise both the integrity of the chimney and surrounding roofline if not addressed promptly. Using precise masonry techniques, durable flashing installation, and expert craftsmanship, we are restoring this critical area to protect the home from future leaks and structural issues. At Dream Builderz, we take pride in tackling complex repairs with unmatched attention to detail, combining years of experience with industry-best practices to provide lasting solutions. Let us safeguard your home while enhancing its durability and value! #HomeAddition #HomeRemodel #HomeRenovation #DreamBuilderz #BuildingDreams #DreamHome #HomeConstruction #GeneralContractor #Construction #CustomBuild #LoveYourHome
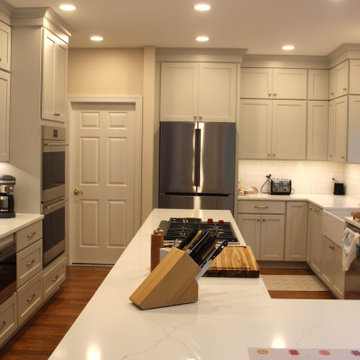 Talon Construction Inc.
Renovating an open kitchen can be an exciting project that can improve the functionality, aesthetics, and value of your home. Here are some steps to guide you through the process:
Planning and Design:
Define your goals and budget for the renovation.
Determine the layout of your open kitchen. Consider factors like the work triangle (the relationship between the stove, sink, and refrigerator) and the flow of traffic.
Choose a design style and color scheme that suits your preferences and complements the rest of your home.
Research and Inspiration:
Collect inspiration from magazines, websites, and social media platforms to get ideas for your open kitchen design.
Create a mood board or vision board to help you visualize the final look.
Hiring Professionals:
Depending on the scale of your renovation, you may need to hire professionals, such as architects, interior designers, contractors, and electricians. Make sure to check references and get multiple quotes.
Demolition and Structural Work:
If your renovation involves structural changes, like removing walls, this is the time to do it. Ensure that the necessary permits are obtained.
Plumbing and Electrical Work:
Update or reconfigure plumbing and electrical systems as needed. This may include adding or moving outlets, switches, and lighting fixtures.
Cabinetry and Countertops:
Choose and install new kitchen cabinets and countertops. This is a significant part of your renovation and will greatly influence the kitchen's appearance and functionality.
Appliances:
Update or install new kitchen appliances, including the refrigerator, stove, oven, microwave, and dishwasher.
Flooring:
Select and install flooring that is suitable for a kitchen, such as hardwood, tile, laminate, or vinyl. Ensure it complements the overall design.
Backsplash and Wall Finishes:
Install a backsplash that matches your design and protects your walls. Consider materials like tile, glass, or stainless steel.
Lighting:
Choose and install various types of lighting, including ambient, task, and accent lighting. Pendant lights above an island or breakfast bar can add style and functionality.
Paint and Finishing Touches:
Paint the walls and ceiling in the colors you've selected. Add finishing touches like hardware, window treatments, and decorative elements.
Furniture and Accessories:
Bring in furniture, such as a dining table and chairs, barstools, and any other pieces you need to complete the space. Decorate with accessories like artwork, plants, and decorative items.
Final Inspection and Cleanup:
Ensure that all work meets safety and building code requirements. Clean the entire area thoroughly.
Enjoy Your New Kitchen:
Once the renovation is complete and everything is in its place, enjoy your beautiful, functional open kitchen.
Remember that open kitchen renovations can be complex and may require careful planning. It's essential to stay within your budget, communicate with your contractors and designers, and be flexible as unexpected issues may arise during the process. Ultimately, a well-executed open kitchen renovation can enhance the heart of your home and improve your overall living space.
8