
Search results for "Compound machine" in Home Design Ideas

 The Robin Kencel Team
Striking and Sophisticated. This new residence offers the very best of contemporary design brought to life with the finest execution and attention to detail. Designed by notable Washington D.C architect. The 7,200 SQ FT main residence with separate guest house is set on 5+ acres of private property. Conveniently located in the Greenwich countryside and just minutes from the charming town of Armonk.
Enter the residence and step into a dramatic atrium Living Room with 22’ floor to ceiling windows, overlooking expansive grounds. At the heart of the house is a spacious gourmet kitchen featuring Italian made cabinetry with an ancillary catering kitchen. There are two master bedrooms, one at each end of the house and an additional three generously sized bedrooms each with en suite baths. There is a 1,200 sq ft. guest cottage to complete the compound.
A progressive sensibility merges with city sophistication in a pristine country setting. Truly special.
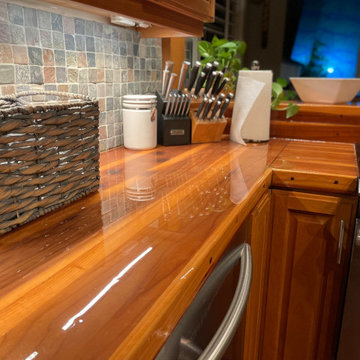
 Clear Winner Finishes
Finish only on existing countertops. Original finish was a few coats of single-part polyurethane...
My refinish process included a complete sanding prep, counter-sinking and filling fastener holes along front edge, and 3 pours of thick clear bar top epoxy.
Wet sanding and machined compound polish on final.
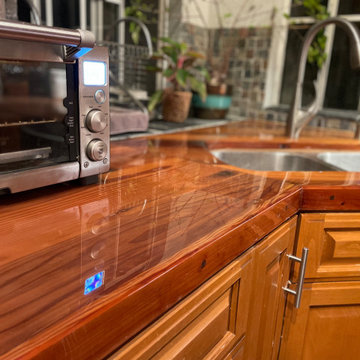 Clear Winner Finishes
Finish only on existing countertops. Original finish was a few coats of single-part polyurethane...
My refinish process included a complete sanding prep, counter-sinking and filling fastener holes along front edge, and 3 pours of thick clear bar top epoxy.
Wet sanding and machined compound polish on final.
Find the right local pro for your project
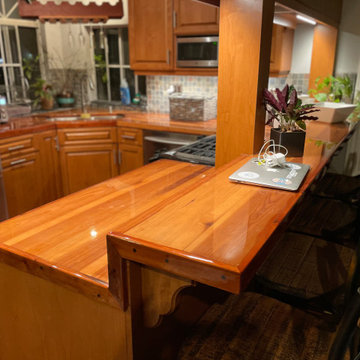 Clear Winner Finishes
Finish only on existing countertops. Original finish was a few coats of single-part polyurethane...
My refinish process included a complete sanding prep, counter-sinking and filling fastener holes along front edge, and 3 pours of thick clear bar top epoxy.
Wet sanding and machined compound polish on final.
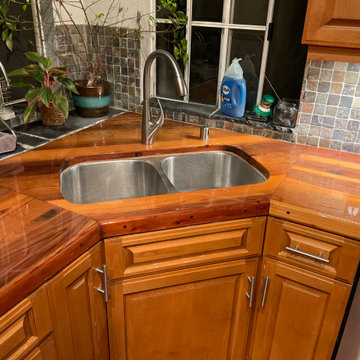 Clear Winner Finishes
Finish only on existing countertops. Original finish was a few coats of single-part polyurethane...
My refinish process included a complete sanding prep, counter-sinking and filling fastener holes along front edge, and 3 pours of thick clear bar top epoxy.
Wet sanding and machined compound polish on final.
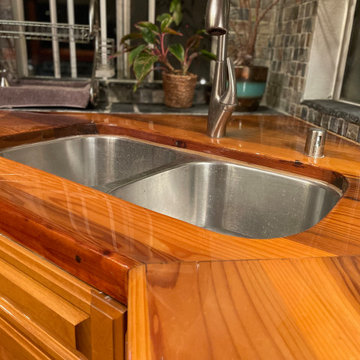 Clear Winner Finishes
Finish only on existing countertops. Original finish was a few coats of single-part polyurethane...
My refinish process included a complete sanding prep, counter-sinking and filling fastener holes along front edge, and 3 pours of thick clear bar top epoxy.
Wet sanding and machined compound polish on final.
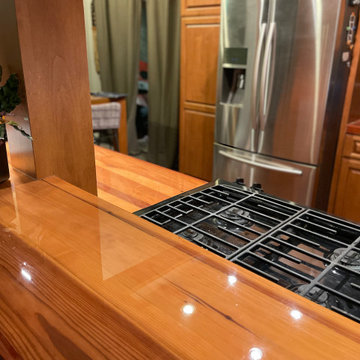 Clear Winner Finishes
Finish only on existing countertops. Original finish was a few coats of single-part polyurethane...
My refinish process included a complete sanding prep, counter-sinking and filling fastener holes along front edge, and 3 pours of thick clear bar top epoxy.
Wet sanding and machined compound polish on final.
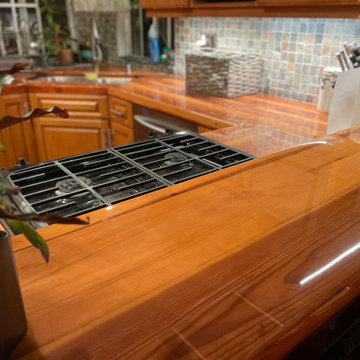 Clear Winner Finishes
Finish only on existing countertops. Original finish was a few coats of single-part polyurethane...
My refinish process included a complete sanding prep, counter-sinking and filling fastener holes along front edge, and 3 pours of thick clear bar top epoxy.
Wet sanding and machined compound polish on final.
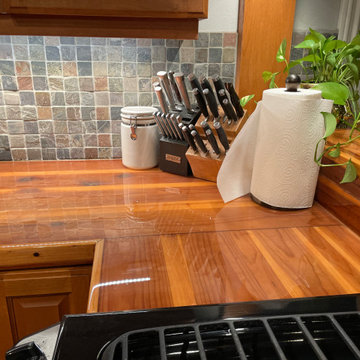 Clear Winner Finishes
Finish only on existing countertops. Original finish was a few coats of single-part polyurethane...
My refinish process included a complete sanding prep, counter-sinking and filling fastener holes along front edge, and 3 pours of thick clear bar top epoxy.
Wet sanding and machined compound polish on final.
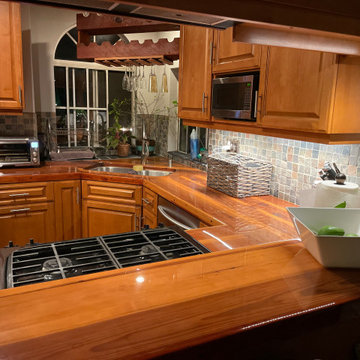 Clear Winner Finishes
Finish only on existing countertops. Original finish was a few coats of single-part polyurethane...
My refinish process included a complete sanding prep, counter-sinking and filling fastener holes along front edge, and 3 pours of thick clear bar top epoxy.
Wet sanding and machined compound polish on final.
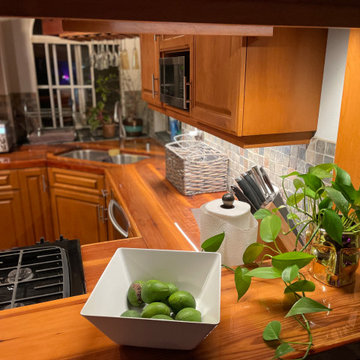 Clear Winner Finishes
Finish only on existing countertops. Original finish was a few coats of single-part polyurethane...
My refinish process included a complete sanding prep, counter-sinking and filling fastener holes along front edge, and 3 pours of thick clear bar top epoxy.
Wet sanding and machined compound polish on final.
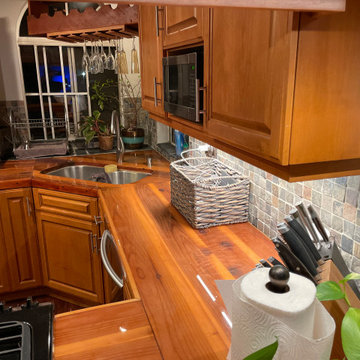 Clear Winner Finishes
Finish only on existing countertops. Original finish was a few coats of single-part polyurethane...
My refinish process included a complete sanding prep, counter-sinking and filling fastener holes along front edge, and 3 pours of thick clear bar top epoxy.
Wet sanding and machined compound polish on final.
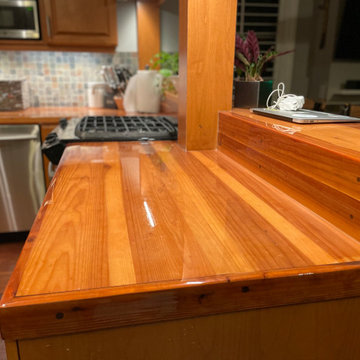 Clear Winner Finishes
Finish only on existing countertops. Original finish was a few coats of single-part polyurethane...
My refinish process included a complete sanding prep, counter-sinking and filling fastener holes along front edge, and 3 pours of thick clear bar top epoxy.
Wet sanding and machined compound polish on final.

 Living Stone Design + Build
Professional-grade garage featuring industrial design elements with sophisticated storage solutions and premium finishes. The space combines functional workshop features with modern amenities, showcasing durable flooring, high-capacity lighting, and custom storage systems designed for automotive and workshop equipment.

 BK Interior Design
A young family of five seeks to create a family compound constructed by a series of smaller dwellings. Each building is characterized by its own style that reinforces its function. But together they work in harmony to create a fun and playful weekend getaway.

 Patrick Ahearn Architect
Greg Premru
Example of a mid-sized beach style medium tone wood floor great room design in Boston with white walls
Example of a mid-sized beach style medium tone wood floor great room design in Boston with white walls

 Tile Doctor Ltd
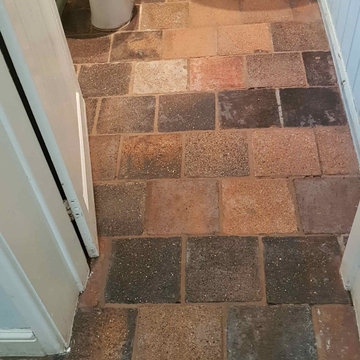
We were contacted by a client from Formby asking for advice on how to remove a thick layer of floor leveller from her Quarry tiled floor. I suspect at some point in the past a previous owner had decided to cover the tiles with lino and a cement-based levelling compound was applied to level the floor first. My client had tried to remove it herself but found it very hard going and after realising she had quite a project on her hands decided to call us instead and see if we could help with the restoration.
I worked out a quote for the client which would include removing the self-levelling compound, cleaning up the tiles and then sealing them to improve its appearance and protect it going forward. The quote was accepted, and a date agreed for the restoration to be completed which would take two days.
We have a variety of tools that we can use for removing cement but in this case, I decided to use an air operated pin gun. The head of the gun has long pins of different length which are fired at the floor gently chipping away at the floor compound, this made short work of breaking up the cement so it could be swept away. A lot easier than the method the client had previously tried.
With the floor clear of cement, it was given an acid wash with Tile Doctor Acid Gel scrubbed in with a buffing machine fitted with a black pad. The acidic formula cleans up the stone of old cement including fine particles of dust. Afterwards the gel was rinsed off the floor with water and extracted with a wet vacuum.
We let the floor dry out overnight and returned the next morning to apply the sealer. For the best results, the stone needs to be dry so before sealing I always take several moisture readings with a damp meter to make sure. The results were good so the first of what would be three coats of sealer were applied to the floor. I used Tile Doctor Colour Grow for sealing, it is an impregnating sealer that works by occupying the pores in the store thereby protecting it from within, it also brings out the colour in the stone.
Once done the floor looked great, the old self-levelling compound was gone and the rich colours in the tile had been restored. In fact is was only when finished did we realise these were in fact Baked Clay Quarry Tiles, minerals are added during manufacturing to give then colour, although 95% clay they are very tough like stone. The client was over the moon with the outcome, the floor had been restored to its’ former glory.
For aftercare I recommended the use of Tile Doctor Neutral Tile Cleaner to keep the floor in good condition. It is pH neutral so will ensure the newly applied sealer is not compromised and the floor will continue to look good for a long while to come.
Andrew Robb
Merseyside Tile Doctor

 Tile Doctor Ltd
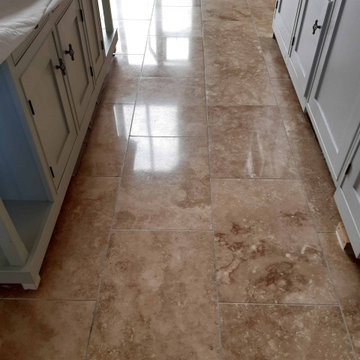
Located in Burgh Castle West of Great Yarmouth, this Travertine stone floor was a classic example of an incomplete installation. By incomplete I mean the tiler had done a fine job of laying and grouting the tiles but had left it at that and not sealed the stone. Natural stone like Travertine is porous and needs a sealer to stop dirt becoming ingrained in its pores, a sealer will also improve its appearance.
Without a sealer this floor now looked very dull, pale, rather damaged with pitting and heavily soiled with ingrained dirt. Pitting in stone like this is a natural feature of Travertine however it can be exacerbated with the use of acid cleaning products. This was a floor in urgent need of a face lift, and I was confident it could be transformed into a very beautiful floor.
I think it is true to say that most tilers will skilfully lay a floor for you but usually don’t have the knowledge, experience or equipment to finish the surface properly and when it comes to sealing many will recommend a product and suggest you take care of it yourself. Naturally if your find yourself in that position don’t insist the tiler does it, better to give us a call and have it done properly.
Our first job was to backfill the larger pits in the stone which as I mentioned are a natural feature of travertine material, but they can trap dirt and so its best if they are plugged with a suitably rigid filler. Also, if left alone the larger holes can quickly become larger as their edges crumble and break up leading to the entire tile becoming unstable. Replacing a tile in a floor like this is possible however its an extremely awkward job to do and it can be difficult to find an exact match for replacement.
Filling was done using a two-part, neutral cream-coloured polyester compound which gels in about fifteen minutes after addition of the catalyst. After this initial period, the excess product is trimmed off level with the surface of the tile before it sets harder than the stone itself in around sixty minutes. The fully cured compound can then be cut and machined as though it were part of the stone structure.
Our second job was to remove deep scratches caused by the unprotected feet of workmen’s ladders. This was done using Tile Doctor 50-grit and 100-grit diamond hand burnishing pads with a little water as a cutting medium. Shallower scratching present across the rest of the floor was removed using a Tile Doctor 200-grit soft milling pad driven by our Klindex 17″ rotary machine.
This abrasive action produces a fine slurry which was then rinsed with water and extracted using our 400psi Ninja machine in preparation for the next stage of the refinishing process. These machines were an expensive investment for our business however they are very robust and effective producing a good result that saves time.
Next task was to restore the polished appearance of the Travertine which was done using the application of a set of Tile Doctor burnishing pads. The process starts by applying a coarse 400-grit diamond pad, again fitted to the Klindex rotary machine. This cleans the tile and improves the matt finish left by the milling pad; again, the slurry was rinse-extracted before moving on to the next pad in the set. Next came the finer diamond polishing stages of 800 grit and 1500 grit, slurry being removed as before between the grades. By this time, all the scratches had been removed and the Travertine floor had visually pleasing even sheen across the whole surface. The last pad in the set is applied dry with a little water sprayed onto the tile so we left the area to dry out thoroughly overnight with the assistance of our large capacity dehumidifier.
Returning the following morning, we found that the floor had dried out perfectly and was ready to be vacuumed and spray burnished with the last pad in the set which is a 3000-grit very fine pad applied using a small amount of water sprayed from a trigger bottle resulting in a deep, rich shine across the floor surface.
Last step in the face lift was to seal the floor with a generous coat of Tile Doctor Ultra-Seal, a premium grade penetrating sealer recommended for use in Kitchens and food preparation areas. Having left the floor to soak up as much of the Tile Doctor Ultra-Seal as it could, the excess product was removed and the whole area allowed to dry completely with the assistance of our industrial air moving fan. Finally, the floor was spray buffed to a deep shine using a white maintenance pad.
The client was extremely pleased with our results and was amazed at the variation of colours within the stone which had never been visible previously.
Nick White
Norfolk Tile Doctor
1