
Search results for "Considerable all" in Home Design Ideas

 Talon Construction Inc.
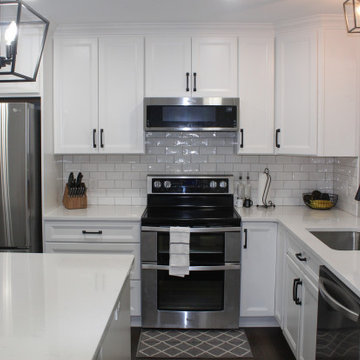
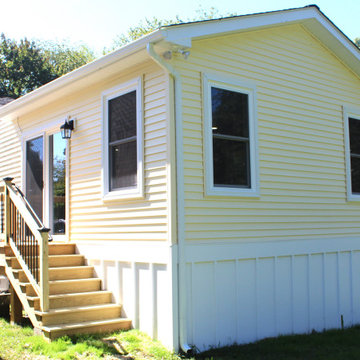
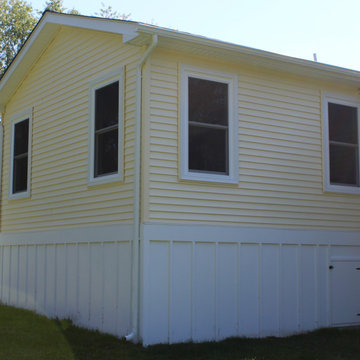
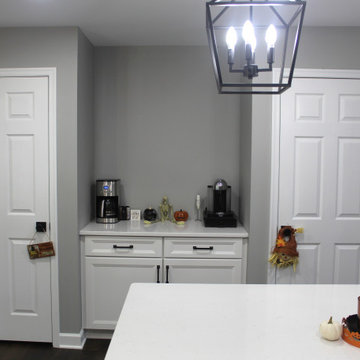
Designing and building a kitchen addition is a complex process that involves multiple steps and considerations. Here is a general outline to help you get started on your kitchen addition project:
Define Your Goals and Budget:
• Determine the purpose of the kitchen addition. Is it for more cooking space, a dining area, or a combination of both?
• Establish a realistic budget for your project. Consider all costs, including construction, permits, materials, and furnishings.
Hire a Design Professional:
• Seek the services of a design build company who specializes in kitchen additions.
• Discuss your vision, needs, and budget with the design professional to create a design concept.
Site Evaluation:
• Assess the existing space and structural condition of your home to ensure it can support the addition.
• Consider factors like zoning regulations, setbacks, and building codes.
Design Development:
• Collaborate with your design professional to refine the concept, including the layout, size, and architectural style.
• Choose materials, finishes, and fixtures that fit your design and budget.
Obtain Permits:
• Consult with your local design build contractor to determine the necessary permits and approvals.
• Prepare and submit all required documents, including architectural drawings and engineering plans.
Create Construction Documents:
• Work with your design build professional to develop detailed construction drawings and specifications.
• These documents will serve as a guide for contractors during construction.
Hire a design build contractor:
• Check references, credentials, and licenses before selecting a contractor.
• Sign a detailed contract that outlines the scope of work, timeline, and payment schedule.
Construction Phase:
• Demolition: If needed, remove any existing structures or walls.
• Foundation: Construct the foundation for the addition.
• Framing: Build the structural framework of the addition.
• Plumbing, Electrical, and HVAC: Install or update utilities as required.
• Insulation: Ensure proper insulation for energy efficiency.
• Drywall and Finish Work: Complete the walls and ceilings.
• Flooring and Cabinetry: Install flooring and kitchen cabinets.
• Appliances and Fixtures: Add appliances, plumbing fixtures, and lighting.
• Paint and Finish: Apply paint and finishes to achieve the desired look.
• Final Inspection: Schedule inspections to ensure compliance with building codes.
Final Inspections and Approvals:
• Arrange for final inspections to ensure the addition meets all safety and code requirements.
• Obtain any necessary certificates of occupancy or compliance.
Move In and Enjoy:
• Once all inspections and approvals are received, you can move into your new kitchen addition and start enjoying it.
Remember that every kitchen addition project is unique, so adapt this outline to your specific needs and circumstances. Consulting with professionals and obtaining the required permits and inspections is crucial to a successful and safe project.
 Talon Construction Inc.
Designing and building a kitchen addition is a complex process that involves multiple steps and considerations. Here is a general outline to help you get started on your kitchen addition project:
Define Your Goals and Budget:
• Determine the purpose of the kitchen addition. Is it for more cooking space, a dining area, or a combination of both?
• Establish a realistic budget for your project. Consider all costs, including construction, permits, materials, and furnishings.
Hire a Design Professional:
• Seek the services of a design build company who specializes in kitchen additions.
• Discuss your vision, needs, and budget with the design professional to create a design concept.
Site Evaluation:
• Assess the existing space and structural condition of your home to ensure it can support the addition.
• Consider factors like zoning regulations, setbacks, and building codes.
Design Development:
• Collaborate with your design professional to refine the concept, including the layout, size, and architectural style.
• Choose materials, finishes, and fixtures that fit your design and budget.
Obtain Permits:
• Consult with your local design build contractor to determine the necessary permits and approvals.
• Prepare and submit all required documents, including architectural drawings and engineering plans.
Create Construction Documents:
• Work with your design build professional to develop detailed construction drawings and specifications.
• These documents will serve as a guide for contractors during construction.
Hire a design build contractor:
• Check references, credentials, and licenses before selecting a contractor.
• Sign a detailed contract that outlines the scope of work, timeline, and payment schedule.
Construction Phase:
• Demolition: If needed, remove any existing structures or walls.
• Foundation: Construct the foundation for the addition.
• Framing: Build the structural framework of the addition.
• Plumbing, Electrical, and HVAC: Install or update utilities as required.
• Insulation: Ensure proper insulation for energy efficiency.
• Drywall and Finish Work: Complete the walls and ceilings.
• Flooring and Cabinetry: Install flooring and kitchen cabinets.
• Appliances and Fixtures: Add appliances, plumbing fixtures, and lighting.
• Paint and Finish: Apply paint and finishes to achieve the desired look.
• Final Inspection: Schedule inspections to ensure compliance with building codes.
Final Inspections and Approvals:
• Arrange for final inspections to ensure the addition meets all safety and code requirements.
• Obtain any necessary certificates of occupancy or compliance.
Move In and Enjoy:
• Once all inspections and approvals are received, you can move into your new kitchen addition and start enjoying it.
Remember that every kitchen addition project is unique, so adapt this outline to your specific needs and circumstances. Consulting with professionals and obtaining the required permits and inspections is crucial to a successful and safe project.

 Renovisions
One of the hottest trends in bath design right now has been the use of cleaner lines and fewer details as seen in this beautiful wood vanity in a dark coffee stained finish. This transitional style vanity has it all in both beauty and functionality categories. The dark wood added a fashionable and almost formal feel and partnered with the Carrera-look Silestone in color ‘Lyra’ we see a striking complement that certainly sets the tone for this space. Our client requested a larger sink that serves as a utility sink in this newly remodeled ‘Bath/Laundry Renovision’, so we recommended the Kohler, ‘Ladena’ which is elegant, spacious and a perfect choice for our client.
Find the right local pro for your project

 Brooks + Scarpa Architects
Description: In early 1994, the architects began work on the project and while in construction (demolition, grading and foundations) the owner, due to circumstances beyond his control, halted all construction of the project. Seven years later the owner returned to the architects and asked them to complete the partially constructed house. Due to code changes, city ordinances and a wide variety of obstacles it was determined that the house was unable to be completed as originally designed.
After much consideration the client asked the architect if it were possible to alter/remodel the partially constructed house, which was a remodel/addition to a 1970’s ranch style house, into a project that fit into current zoning and structural codes. The owner also requested that the house’s footprint and partially constructed foundations remain to avoid the need for further entitlements and delays on an already long overdue and difficult hillside site.
The architects’ main challenge was how to alter the design that reflected an outdated philosophical approach to architecture that was nearly a decade old. How could the house be re-conceived reflecting the architect and client’s maturity on a ten-year-old footprint?
The answer was to remove almost all of the previously proposed existing interior walls and transform the existing footprint into a pavilion-like structure that allows the site to in a sense “pass through the house”. This allowed the client to take better advantage of a limited and restricted building area while capturing extraordinary panoramic views of the San Fernando Valley and Hollywood Hills. Large 22-foot high custom sliding glass doors allow the interior and exterior to become one. Even the studio is separated from the house and connected only by an exterior bridge. Private spaces are treated as loft-like spaces capturing volume and views while maintaining privacy.
Limestone floors extend from inside to outside and into the lap pool that runs the entire length of the house creating a horizon line at the edge of the view. Other natural materials such as board formed concrete, copper, steel and cherry provides softness to the objects that seem to float within the interior volume. By placing objects and materials "outside the frame," a new frame of reference deepens our sense of perception. Art does not reproduce what we see; rather it makes us see.

 TaylorPro Design and Remodeling, Inc.
"When we bought our house in Poway 11 years ago, we were so happy with our huge master bath and Jacuzzi tub. It was such a huge step-up from our prior home. But just like the rest of the house, the master bath was already almost 20 years old and getting out dated and in need of remodeling. We broke up our remodeling projects into every couple of years, doing what we could ourselves and hiring out for the rest. The master bath was the last project and much too big for us to do on our own. We got 3 quotes from 3 contractors listed on Angie’s list which all had good reviews. One was a major re modeler and the other two were smaller contractors. We ended up going with TaylorPro because he was right in the middle and had great reviews.
Kerry was very responsive getting us a timely estimate and had great suggestions for what we were looking for. From the start to finish it turned out to be a wonderful experience! To our delight, they were able to get started ahead of what we were told. Everything went almost as scheduled and we were informed constantly on where we were in the project. Kerry was very responsive to all our concerns or requests and we were never left wondering what the next step would be. His crew was wonderful, so polite and hard working. They were very professional, on time, considerate and knew exactly what they were doing.
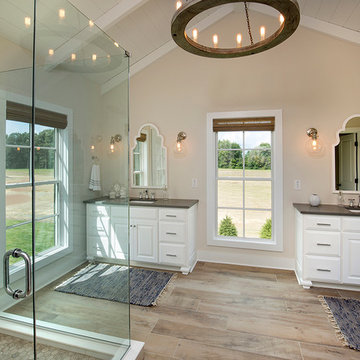
There were certain things we were really looking for in the remodel. First off, the bathroom was pretty large with a high ceiling. In the winter months, it was always really cold and hard to heat. To solve that we had TaylorPro install heated flooring beneath the travertine tiles. We also needed a custom vanity that would conceal hair appliances, most of our personal toiletries and have enough storage for everything else. The cabinetry was custom designed to exactly what we were looking for. Lastly, we wanted a classic, timeless look using tumbled travertine. After consulting with his designer we were able to select all the tile, accent tile and a beautiful frameless glass shower enclosure.
The finished project was beyond our highest expectations and we won’t hesitate to use Kerry and his crew for any future jobs or recommend him to family and friends."
~ Mark and Amy B, Clients
Frameless shower door, glass tile with rope border, dark and light travertine tiles on walls, travertine on floor, heated floor by NuHeat, tub and sinks by Kohler, shower/tub/vanity fixtures Hansgrohe, toilet Toto, custom cabinets by Thead Custom Cabinetry.
Photo by Kerry W. Taylor
 Talon Construction Inc.
Designing and building a kitchen addition is a complex process that involves multiple steps and considerations. Here is a general outline to help you get started on your kitchen addition project:
Define Your Goals and Budget:
• Determine the purpose of the kitchen addition. Is it for more cooking space, a dining area, or a combination of both?
• Establish a realistic budget for your project. Consider all costs, including construction, permits, materials, and furnishings.
Hire a Design Professional:
• Seek the services of a design build company who specializes in kitchen additions.
• Discuss your vision, needs, and budget with the design professional to create a design concept.
Site Evaluation:
• Assess the existing space and structural condition of your home to ensure it can support the addition.
• Consider factors like zoning regulations, setbacks, and building codes.
Design Development:
• Collaborate with your design professional to refine the concept, including the layout, size, and architectural style.
• Choose materials, finishes, and fixtures that fit your design and budget.
Obtain Permits:
• Consult with your local design build contractor to determine the necessary permits and approvals.
• Prepare and submit all required documents, including architectural drawings and engineering plans.
Create Construction Documents:
• Work with your design build professional to develop detailed construction drawings and specifications.
• These documents will serve as a guide for contractors during construction.
Hire a design build contractor:
• Check references, credentials, and licenses before selecting a contractor.
• Sign a detailed contract that outlines the scope of work, timeline, and payment schedule.
Construction Phase:
• Demolition: If needed, remove any existing structures or walls.
• Foundation: Construct the foundation for the addition.
• Framing: Build the structural framework of the addition.
• Plumbing, Electrical, and HVAC: Install or update utilities as required.
• Insulation: Ensure proper insulation for energy efficiency.
• Drywall and Finish Work: Complete the walls and ceilings.
• Flooring and Cabinetry: Install flooring and kitchen cabinets.
• Appliances and Fixtures: Add appliances, plumbing fixtures, and lighting.
• Paint and Finish: Apply paint and finishes to achieve the desired look.
• Final Inspection: Schedule inspections to ensure compliance with building codes.
Final Inspections and Approvals:
• Arrange for final inspections to ensure the addition meets all safety and code requirements.
• Obtain any necessary certificates of occupancy or compliance.
Move In and Enjoy:
• Once all inspections and approvals are received, you can move into your new kitchen addition and start enjoying it.
Remember that every kitchen addition project is unique, so adapt this outline to your specific needs and circumstances. Consulting with professionals and obtaining the required permits and inspections is crucial to a successful and safe project.
 Talon Construction Inc.
Designing and building a kitchen addition is a complex process that involves multiple steps and considerations. Here is a general outline to help you get started on your kitchen addition project:
Define Your Goals and Budget:
• Determine the purpose of the kitchen addition. Is it for more cooking space, a dining area, or a combination of both?
• Establish a realistic budget for your project. Consider all costs, including construction, permits, materials, and furnishings.
Hire a Design Professional:
• Seek the services of a design build company who specializes in kitchen additions.
• Discuss your vision, needs, and budget with the design professional to create a design concept.
Site Evaluation:
• Assess the existing space and structural condition of your home to ensure it can support the addition.
• Consider factors like zoning regulations, setbacks, and building codes.
Design Development:
• Collaborate with your design professional to refine the concept, including the layout, size, and architectural style.
• Choose materials, finishes, and fixtures that fit your design and budget.
Obtain Permits:
• Consult with your local design build contractor to determine the necessary permits and approvals.
• Prepare and submit all required documents, including architectural drawings and engineering plans.
Create Construction Documents:
• Work with your design build professional to develop detailed construction drawings and specifications.
• These documents will serve as a guide for contractors during construction.
Hire a design build contractor:
• Check references, credentials, and licenses before selecting a contractor.
• Sign a detailed contract that outlines the scope of work, timeline, and payment schedule.
Construction Phase:
• Demolition: If needed, remove any existing structures or walls.
• Foundation: Construct the foundation for the addition.
• Framing: Build the structural framework of the addition.
• Plumbing, Electrical, and HVAC: Install or update utilities as required.
• Insulation: Ensure proper insulation for energy efficiency.
• Drywall and Finish Work: Complete the walls and ceilings.
• Flooring and Cabinetry: Install flooring and kitchen cabinets.
• Appliances and Fixtures: Add appliances, plumbing fixtures, and lighting.
• Paint and Finish: Apply paint and finishes to achieve the desired look.
• Final Inspection: Schedule inspections to ensure compliance with building codes.
Final Inspections and Approvals:
• Arrange for final inspections to ensure the addition meets all safety and code requirements.
• Obtain any necessary certificates of occupancy or compliance.
Move In and Enjoy:
• Once all inspections and approvals are received, you can move into your new kitchen addition and start enjoying it.
Remember that every kitchen addition project is unique, so adapt this outline to your specific needs and circumstances. Consulting with professionals and obtaining the required permits and inspections is crucial to a successful and safe project.
Sponsored
Columbus, OH

Wannemacher Interiors
Customized Award-Winning Interior Design Solutions in Franklin Cnty OH
 Talon Construction Inc.
Designing and building a kitchen addition is a complex process that involves multiple steps and considerations. Here is a general outline to help you get started on your kitchen addition project:
Define Your Goals and Budget:
• Determine the purpose of the kitchen addition. Is it for more cooking space, a dining area, or a combination of both?
• Establish a realistic budget for your project. Consider all costs, including construction, permits, materials, and furnishings.
Hire a Design Professional:
• Seek the services of a design build company who specializes in kitchen additions.
• Discuss your vision, needs, and budget with the design professional to create a design concept.
Site Evaluation:
• Assess the existing space and structural condition of your home to ensure it can support the addition.
• Consider factors like zoning regulations, setbacks, and building codes.
Design Development:
• Collaborate with your design professional to refine the concept, including the layout, size, and architectural style.
• Choose materials, finishes, and fixtures that fit your design and budget.
Obtain Permits:
• Consult with your local design build contractor to determine the necessary permits and approvals.
• Prepare and submit all required documents, including architectural drawings and engineering plans.
Create Construction Documents:
• Work with your design build professional to develop detailed construction drawings and specifications.
• These documents will serve as a guide for contractors during construction.
Hire a design build contractor:
• Check references, credentials, and licenses before selecting a contractor.
• Sign a detailed contract that outlines the scope of work, timeline, and payment schedule.
Construction Phase:
• Demolition: If needed, remove any existing structures or walls.
• Foundation: Construct the foundation for the addition.
• Framing: Build the structural framework of the addition.
• Plumbing, Electrical, and HVAC: Install or update utilities as required.
• Insulation: Ensure proper insulation for energy efficiency.
• Drywall and Finish Work: Complete the walls and ceilings.
• Flooring and Cabinetry: Install flooring and kitchen cabinets.
• Appliances and Fixtures: Add appliances, plumbing fixtures, and lighting.
• Paint and Finish: Apply paint and finishes to achieve the desired look.
• Final Inspection: Schedule inspections to ensure compliance with building codes.
Final Inspections and Approvals:
• Arrange for final inspections to ensure the addition meets all safety and code requirements.
• Obtain any necessary certificates of occupancy or compliance.
Move In and Enjoy:
• Once all inspections and approvals are received, you can move into your new kitchen addition and start enjoying it.
Remember that every kitchen addition project is unique, so adapt this outline to your specific needs and circumstances. Consulting with professionals and obtaining the required permits and inspections is crucial to a successful and safe project.
 Talon Construction Inc.
Designing and building a kitchen addition is a complex process that involves multiple steps and considerations. Here is a general outline to help you get started on your kitchen addition project:
Define Your Goals and Budget:
• Determine the purpose of the kitchen addition. Is it for more cooking space, a dining area, or a combination of both?
• Establish a realistic budget for your project. Consider all costs, including construction, permits, materials, and furnishings.
Hire a Design Professional:
• Seek the services of a design build company who specializes in kitchen additions.
• Discuss your vision, needs, and budget with the design professional to create a design concept.
Site Evaluation:
• Assess the existing space and structural condition of your home to ensure it can support the addition.
• Consider factors like zoning regulations, setbacks, and building codes.
Design Development:
• Collaborate with your design professional to refine the concept, including the layout, size, and architectural style.
• Choose materials, finishes, and fixtures that fit your design and budget.
Obtain Permits:
• Consult with your local design build contractor to determine the necessary permits and approvals.
• Prepare and submit all required documents, including architectural drawings and engineering plans.
Create Construction Documents:
• Work with your design build professional to develop detailed construction drawings and specifications.
• These documents will serve as a guide for contractors during construction.
Hire a design build contractor:
• Check references, credentials, and licenses before selecting a contractor.
• Sign a detailed contract that outlines the scope of work, timeline, and payment schedule.
Construction Phase:
• Demolition: If needed, remove any existing structures or walls.
• Foundation: Construct the foundation for the addition.
• Framing: Build the structural framework of the addition.
• Plumbing, Electrical, and HVAC: Install or update utilities as required.
• Insulation: Ensure proper insulation for energy efficiency.
• Drywall and Finish Work: Complete the walls and ceilings.
• Flooring and Cabinetry: Install flooring and kitchen cabinets.
• Appliances and Fixtures: Add appliances, plumbing fixtures, and lighting.
• Paint and Finish: Apply paint and finishes to achieve the desired look.
• Final Inspection: Schedule inspections to ensure compliance with building codes.
Final Inspections and Approvals:
• Arrange for final inspections to ensure the addition meets all safety and code requirements.
• Obtain any necessary certificates of occupancy or compliance.
Move In and Enjoy:
• Once all inspections and approvals are received, you can move into your new kitchen addition and start enjoying it.
Remember that every kitchen addition project is unique, so adapt this outline to your specific needs and circumstances. Consulting with professionals and obtaining the required permits and inspections is crucial to a successful and safe project.
 Talon Construction Inc.
Designing and building a kitchen addition is a complex process that involves multiple steps and considerations. Here is a general outline to help you get started on your kitchen addition project:
Define Your Goals and Budget:
• Determine the purpose of the kitchen addition. Is it for more cooking space, a dining area, or a combination of both?
• Establish a realistic budget for your project. Consider all costs, including construction, permits, materials, and furnishings.
Hire a Design Professional:
• Seek the services of a design build company who specializes in kitchen additions.
• Discuss your vision, needs, and budget with the design professional to create a design concept.
Site Evaluation:
• Assess the existing space and structural condition of your home to ensure it can support the addition.
• Consider factors like zoning regulations, setbacks, and building codes.
Design Development:
• Collaborate with your design professional to refine the concept, including the layout, size, and architectural style.
• Choose materials, finishes, and fixtures that fit your design and budget.
Obtain Permits:
• Consult with your local design build contractor to determine the necessary permits and approvals.
• Prepare and submit all required documents, including architectural drawings and engineering plans.
Create Construction Documents:
• Work with your design build professional to develop detailed construction drawings and specifications.
• These documents will serve as a guide for contractors during construction.
Hire a design build contractor:
• Check references, credentials, and licenses before selecting a contractor.
• Sign a detailed contract that outlines the scope of work, timeline, and payment schedule.
Construction Phase:
• Demolition: If needed, remove any existing structures or walls.
• Foundation: Construct the foundation for the addition.
• Framing: Build the structural framework of the addition.
• Plumbing, Electrical, and HVAC: Install or update utilities as required.
• Insulation: Ensure proper insulation for energy efficiency.
• Drywall and Finish Work: Complete the walls and ceilings.
• Flooring and Cabinetry: Install flooring and kitchen cabinets.
• Appliances and Fixtures: Add appliances, plumbing fixtures, and lighting.
• Paint and Finish: Apply paint and finishes to achieve the desired look.
• Final Inspection: Schedule inspections to ensure compliance with building codes.
Final Inspections and Approvals:
• Arrange for final inspections to ensure the addition meets all safety and code requirements.
• Obtain any necessary certificates of occupancy or compliance.
Move In and Enjoy:
• Once all inspections and approvals are received, you can move into your new kitchen addition and start enjoying it.
Remember that every kitchen addition project is unique, so adapt this outline to your specific needs and circumstances. Consulting with professionals and obtaining the required permits and inspections is crucial to a successful and safe project.

 Airport Home Appliances
As the owner of custom home builder Silva Management Inc. and its sister luxury retail store Lusso, Hao Chen knows that choosing the right appliances for a home requires careful consideration. “We build these homes to sell, and we chose Thermador because people get excited to see the brand in a luxury home,” he says. When designing a kitchen for his projects Hao aims to create a space that is “elegant but not personal. We want the home-buyer to have the freedom to make the kitchen their own, while still giving them a kitchen that is beautiful to start.”
For a recent project in Cupertino, Hao and his design team combined a Navy-Blue paint color with white and off -white countertops and backsplash. He also put in a 24k gold island sink faucet, gold cabinet handles, and other gold decorative pieces to give the space a luxury feel. To create a less monolithic space, Hao used a Thermador wine preservation column to divide the right side of the kitchen into a wine bar area. “We wanted to create a separate space within the room without disrupting the flow, so we accented it with stainless steel to match the wine column and carried over the navy blue to connect the space with the rest of the kitchen,” says Hao.
With projects in development all over the Bay Area, Hao Chen and Lusso are making waves with their home designs and are one of the hottest firms in the Silicon Valley. He credits his team for the success of his business and says, “It’s important to invest in people’s talents. We get better work out of each other when we follow our passions and trust one another.”
 Home Improvement
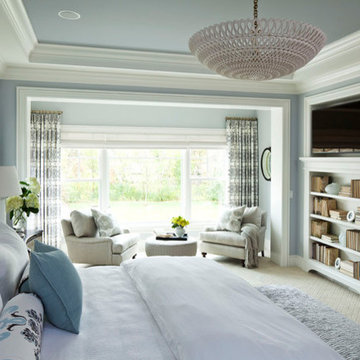
West or east, home is the best. Happy, warm, harmonious home is the dream and target of people. How to decorate our home is very important. We have the experience that the bedding we saw in emporium is beautiful, but the effect does not good when we bring it home. This is because we do not choose bedding according to the color collocation of our dream bedrooms. Here are some classic color collocation methods for you:
Color collocation of light with dark: when the main color of your dream bedroom is light, such as white, light color bedding will make your bedroom feel pale, ordinary and have no sense of color. On the contrary, dark or bright color bedding such as chocolate, purple, green, yellow will make your space full of vitality. The collocation of light and dark color gives people strong visual impact. So when your dream bedroom have dark color as its main tone, light or bright color like white, pink, red and yellow goes well with it. The space will feel depressing if you use dark color bedding.
Color collocation method of similar color: it means choose bedding with similar color to the main color of bedroom. For example, when the main color of your dream bedroom is purple, white bedding with few purple decoration patterns is good choice. There would be no layering if you use bedding in large area purple.
Collocation method of matching complex with simple: if the decoration style of bedroom is complex, concise and elegant bedding goes well with it, or the space will be disorderly and unsystematic.
The intensity of lighting: light intensity is the factor that people often neglect. Avoid using dark color bedding in bedroom with dark light.
The relationship of whole and part: the main color of bedroom is whole, bedding color is part. A guest cannot usurp the host's role. So does the bedding. There should be primary and secondary in bedroom color collocation. Bedding color only plays the role of embellishing.
Take all the elements in bedroom into consideration: all the elements in dream bedroom – wall, furniture, floor, and bedding – should be considered. They should be in consistent.
We all know that color has the function of mood adjustment. We should choose color according to our actually needs.
Green and purple is good to soothe the nerves and relax people. Patient with phobia and schizophrenia can choose the two colors.
Light saffron yellow, blue and pink can make people exciting, happy and full of hope. Depression and anxiety disorder patient can choose them.
Cyan is good to produce sleepiness. It suit for those insomniac.
Besides, warm color bedding with thicker fabric suit to use in winter and autumn for the decrease of temperature.

 TV Lift Cabinet by Cabinet Tronix
Being in business doing TV lift cabinet furniture for 13 years, the rewards of happy clients, building relationships and getting to be creative never gets old. This was a great project and as I, the client is very happy with their 100% hand carved pop up TV motorized designer piece.
We worked back and forth for months on getting the finish just perfect and so glad we all were patient and wanted the same outcome. The result from this piece was nothing short of exciting and stunning.
Cabinet Tronix, ship anywhere, specializes in tailor made pieces where we take all elements from furniture design, TV size, components, space constraints, custom and included finishes into consideration. Furniture pieces alone can be ordered.
Answers from a handful of questions sets the entire project scope up quickly. Any of our designs can be changed in size, finish, placed at the foot of the bed ... against as wall or window, next to a fire place and as a room divider or centrally located in the middle of the room.
We use Logitect Harmony Ultimate home as our remote or can be shipped our ready for your AV company to hook up with what they have.
Simple to complex, steam line modern to ornate hand carved pieces, our design or custom everything is possible.
Our US Made, quiet and durable, pop-up TV lift cabinet designs can be built with a component section to house your electronic equipment, positioned how you like and finished the way you require. Before your Pop up TV cabinet ships, each cabinet system goes through a thorough furniture, finish, TV lift, and technical quality control check list. To further increase your excitement, we provide detailed pictures of your furniture system before it ships.
We white glove ship the hidden TV furniture into your home by a professional furniture delivery company.
619-459-5037
Sponsored
Columbus, OH
Wannemacher Interiors
Customized Award-Winning Interior Design Solutions in Franklin Cnty OH
 TaylorPro Design and Remodeling, Inc.
"When we bought our house in Poway 11 years ago, we were so happy with our huge master bath and Jacuzzi tub. It was such a huge step-up from our prior home. But just like the rest of the house, the master bath was already almost 20 years old and getting out dated and in need of remodeling. We broke up our remodeling projects into every couple of years, doing what we could ourselves and hiring out for the rest. The master bath was the last project and much too big for us to do on our own. We got 3 quotes from 3 contractors listed on Angie’s list which all had good reviews. One was a major re modeler and the other two were smaller contractors. We ended up going with TaylorPro because he was right in the middle and had great reviews.
Kerry was very responsive getting us a timely estimate and had great suggestions for what we were looking for. From the start to finish it turned out to be a wonderful experience! To our delight, they were able to get started ahead of what we were told. Everything went almost as scheduled and we were informed constantly on where we were in the project. Kerry was very responsive to all our concerns or requests and we were never left wondering what the next step would be. His crew was wonderful, so polite and hard working. They were very professional, on time, considerate and knew exactly what they were doing.
There were certain things we were really looking for in the remodel. First off, the bathroom was pretty large with a high ceiling. In the winter months, it was always really cold and hard to heat. To solve that we had TaylorPro install heated flooring beneath the travertine tiles. We also needed a custom vanity that would conceal hair appliances, most of our personal toiletries and have enough storage for everything else. The cabinetry was custom designed to exactly what we were looking for. Lastly, we wanted a classic, timeless look using tumbled travertine. After consulting with his designer we were able to select all the tile, accent tile and a beautiful frameless glass shower enclosure.
The finished project was beyond our highest expectations and we won’t hesitate to use Kerry and his crew for any future jobs or recommend him to family and friends."
~ Mark and Amy B, Clients
Frameless shower door, glass tile with rope border, dark and light travertine tiles on walls, travertine on floor, heated floor by NuHeat, tub and sinks by Kohler, shower/tub/vanity fixtures Hansgrohe, toilet Toto, custom cabinets by Thead Custom Cabinetry.
Photo by Kerry W. Taylor
 TaylorPro Design and Remodeling, Inc.
"When we bought our house in Poway 11 years ago, we were so happy with our huge master bath and Jacuzzi tub. It was such a huge step-up from our prior home. But just like the rest of the house, the master bath was already almost 20 years old and getting out dated and in need of remodeling. We broke up our remodeling projects into every couple of years, doing what we could ourselves and hiring out for the rest. The master bath was the last project and much too big for us to do on our own. We got 3 quotes from 3 contractors listed on Angie’s list which all had good reviews. One was a major re modeler and the other two were smaller contractors. We ended up going with TaylorPro because he was right in the middle and had great reviews.
Kerry was very responsive getting us a timely estimate and had great suggestions for what we were looking for. From the start to finish it turned out to be a wonderful experience! To our delight, they were able to get started ahead of what we were told. Everything went almost as scheduled and we were informed constantly on where we were in the project. Kerry was very responsive to all our concerns or requests and we were never left wondering what the next step would be. His crew was wonderful, so polite and hard working. They were very professional, on time, considerate and knew exactly what they were doing.
There were certain things we were really looking for in the remodel. First off, the bathroom was pretty large with a high ceiling. In the winter months, it was always really cold and hard to heat. To solve that we had TaylorPro install heated flooring beneath the travertine tiles. We also needed a custom vanity that would conceal hair appliances, most of our personal toiletries and have enough storage for everything else. The cabinetry was custom designed to exactly what we were looking for. Lastly, we wanted a classic, timeless look using tumbled travertine. After consulting with his designer we were able to select all the tile, accent tile and a beautiful frameless glass shower enclosure.
The finished project was beyond our highest expectations and we won’t hesitate to use Kerry and his crew for any future jobs or recommend him to family and friends."
~ Mark and Amy B, Clients
Frameless shower door, glass tile with rope border, dark and light travertine tiles on walls, travertine on floor, heated floor by NuHeat, tub and sinks by Kohler, shower/tub/vanity fixtures Hansgrohe, toilet Toto, custom cabinets by Thead Custom Cabinetry.
Photo by Kerry W. Taylor

 Inform Interiors
B&B Italia Bend sofa and Metropolitan chair
Bensen orange U Turn chairs
Lapalma Miunn stools
Designer
Andrea McLean, Andrea McLean Design Office
http://www.andreamclean.ca/
Photographer
Ema Peter, Ema Peter Photography
http://www.emapeter.com/
Styling
Laura Melling, Laura Melling Interior Design & Styling
http://www.lauramelling.com/
Contractor
Michael Macartney, Woodquest Construction
http://woodquest.ca/

 Architectural Collaborative
Situated on a sloping site with a shared driveway and prescribed parking on the lower level, the home was designed to maximize daylight into the walk-out basement. In placing the parking in the center and wrapping the basement spaces around it, all rooms are afforded exterior views. By locating much of the home’s program below street level, the 3244 s.f. house is able to maintain a scale in keeping with the surrounding residences. The grade along the front of the site was pulled back from the home with stepped retaining walls revealing a sunken garden and above-ground basement walls. An entry bridge allows access to the front door above the sunken garden.
UV-responsive, color-changing metal siding and cedar rainscreen clad the flat roof volumes of the home while fiber cement boards encase the shed roof volume. The shed was created to provide passive solar daylighting and conditioning in the vaulted living and dining rooms as well as an ideal surface for future solar panels.
The home possesses a myriad of outdoor living spaces including a front balcony and sunken courtyard, side balcony terrace, and rear screened porch and deck above a covered patio. The south side balcony is wrapped with a metal and cedar clad bamboo planter which acts as a privacy screen and shading device.
Accessibility was a strong consideration in the design as the homeowners were forward-thinking about aging in place. ADA-sized doorways and thresholds are provided as well as a shelled elevator shaft from the basement level.


 Edgewater Design Group
As written in Northern Home & Cottage by Elizabeth Edwards
Sara and Paul Matthews call their head-turning home, located in a sweet neighborhood just up the hill from downtown Petoskey, “a very human story.” Indeed it is. Sara and her husband, Paul, have a special-needs son as well as an energetic middle-school daughter. This home has an answer for everyone. Located down the street from the school, it is ideally situated for their daughter and a self-contained apartment off the great room accommodates all their son’s needs while giving his caretakers privacy—and the family theirs. The Matthews began the building process by taking their thoughts and
needs to Stephanie Baldwin and her team at Edgewater Design Group. Beyond the above considerations, they wanted their new home to be low maintenance and to stand out architecturally, “But not so much that anyone would complain that it didn’t work in our neighborhood,” says Sara. “We
were thrilled that Edgewater listened to us and were able to give us a unique-looking house that is meeting all our needs.” Lombardy LLC built this handsome home with Paul working alongside the construction crew throughout the project. The low maintenance exterior is a cutting-edge blend of stacked stone, black corrugated steel, black framed windows and Douglas fir soffits—elements that add up to an organic contemporary look. The use of black steel, including interior beams and the staircase system, lend an industrial vibe that is courtesy of the Matthews’ friend Dan Mello of Trimet Industries in Traverse City. The couple first met Dan, a metal fabricator, a number of years ago, right around the time they found out that their then two-year-old son would never be able to walk. After the couple explained to Dan that they couldn’t find a solution for a child who wasn’t big enough for a wheelchair, he designed a comfortable, rolling chair that was just perfect. They still use it. The couple’s gratitude for the chair resulted in a trusting relationship with Dan, so it was natural for them to welcome his talents into their home-building process. A maple floor finished to bring out all of its color-tones envelops the room in warmth. Alder doors and trim and a Doug fir ceiling reflect that warmth. Clearstory windows and floor-to-ceiling window banks fill the space with light—and with views of the spacious grounds that will
become a canvas for Paul, a retired landscaper. The couple’s vibrant art pieces play off against modernist furniture and lighting that is due to an inspired collaboration between Sara and interior designer Kelly Paulsen. “She was absolutely instrumental to the project,” Sara says. “I went through
two designers before I finally found Kelly.” The open clean-lined kitchen, butler’s pantry outfitted with a beverage center and Miele coffee machine (that allows guests to wait on themselves when Sara is cooking), and an outdoor room that centers around a wood-burning fireplace, all make for easy,
fabulous entertaining. A den just off the great room houses the big-screen television and Sara’s loom—
making for relaxing evenings of weaving, game watching and togetherness. Tourgoers will leave understanding that this house is everything great design should be. Form following function—and solving very human issues with soul-soothing style.
 Edgewater Design Group
As written in Northern Home & Cottage by Elizabeth Edwards
Sara and Paul Matthews call their head-turning home, located in a sweet neighborhood just up the hill from downtown Petoskey, “a very human story.” Indeed it is. Sara and her husband, Paul, have a special-needs son as well as an energetic middle-school daughter. This home has an answer for everyone. Located down the street from the school, it is ideally situated for their daughter and a self-contained apartment off the great room accommodates all their son’s needs while giving his caretakers privacy—and the family theirs. The Matthews began the building process by taking their thoughts and
needs to Stephanie Baldwin and her team at Edgewater Design Group. Beyond the above considerations, they wanted their new home to be low maintenance and to stand out architecturally, “But not so much that anyone would complain that it didn’t work in our neighborhood,” says Sara. “We
were thrilled that Edgewater listened to us and were able to give us a unique-looking house that is meeting all our needs.” Lombardy LLC built this handsome home with Paul working alongside the construction crew throughout the project. The low maintenance exterior is a cutting-edge blend of stacked stone, black corrugated steel, black framed windows and Douglas fir soffits—elements that add up to an organic contemporary look. The use of black steel, including interior beams and the staircase system, lend an industrial vibe that is courtesy of the Matthews’ friend Dan Mello of Trimet Industries in Traverse City. The couple first met Dan, a metal fabricator, a number of years ago, right around the time they found out that their then two-year-old son would never be able to walk. After the couple explained to Dan that they couldn’t find a solution for a child who wasn’t big enough for a wheelchair, he designed a comfortable, rolling chair that was just perfect. They still use it. The couple’s gratitude for the chair resulted in a trusting relationship with Dan, so it was natural for them to welcome his talents into their home-building process. A maple floor finished to bring out all of its color-tones envelops the room in warmth. Alder doors and trim and a Doug fir ceiling reflect that warmth. Clearstory windows and floor-to-ceiling window banks fill the space with light—and with views of the spacious grounds that will
become a canvas for Paul, a retired landscaper. The couple’s vibrant art pieces play off against modernist furniture and lighting that is due to an inspired collaboration between Sara and interior designer Kelly Paulsen. “She was absolutely instrumental to the project,” Sara says. “I went through
two designers before I finally found Kelly.” The open clean-lined kitchen, butler’s pantry outfitted with a beverage center and Miele coffee machine (that allows guests to wait on themselves when Sara is cooking), and an outdoor room that centers around a wood-burning fireplace, all make for easy,
fabulous entertaining. A den just off the great room houses the big-screen television and Sara’s loom—
making for relaxing evenings of weaving, game watching and togetherness. Tourgoers will leave understanding that this house is everything great design should be. Form following function—and solving very human issues with soul-soothing style.
 Edgewater Design Group
As written in Northern Home & Cottage by Elizabeth Edwards
Sara and Paul Matthews call their head-turning home, located in a sweet neighborhood just up the hill from downtown Petoskey, “a very human story.” Indeed it is. Sara and her husband, Paul, have a special-needs son as well as an energetic middle-school daughter. This home has an answer for everyone. Located down the street from the school, it is ideally situated for their daughter and a self-contained apartment off the great room accommodates all their son’s needs while giving his caretakers privacy—and the family theirs. The Matthews began the building process by taking their thoughts and
needs to Stephanie Baldwin and her team at Edgewater Design Group. Beyond the above considerations, they wanted their new home to be low maintenance and to stand out architecturally, “But not so much that anyone would complain that it didn’t work in our neighborhood,” says Sara. “We
were thrilled that Edgewater listened to us and were able to give us a unique-looking house that is meeting all our needs.” Lombardy LLC built this handsome home with Paul working alongside the construction crew throughout the project. The low maintenance exterior is a cutting-edge blend of stacked stone, black corrugated steel, black framed windows and Douglas fir soffits—elements that add up to an organic contemporary look. The use of black steel, including interior beams and the staircase system, lend an industrial vibe that is courtesy of the Matthews’ friend Dan Mello of Trimet Industries in Traverse City. The couple first met Dan, a metal fabricator, a number of years ago, right around the time they found out that their then two-year-old son would never be able to walk. After the couple explained to Dan that they couldn’t find a solution for a child who wasn’t big enough for a wheelchair, he designed a comfortable, rolling chair that was just perfect. They still use it. The couple’s gratitude for the chair resulted in a trusting relationship with Dan, so it was natural for them to welcome his talents into their home-building process. A maple floor finished to bring out all of its color-tones envelops the room in warmth. Alder doors and trim and a Doug fir ceiling reflect that warmth. Clearstory windows and floor-to-ceiling window banks fill the space with light—and with views of the spacious grounds that will
become a canvas for Paul, a retired landscaper. The couple’s vibrant art pieces play off against modernist furniture and lighting that is due to an inspired collaboration between Sara and interior designer Kelly Paulsen. “She was absolutely instrumental to the project,” Sara says. “I went through
two designers before I finally found Kelly.” The open clean-lined kitchen, butler’s pantry outfitted with a beverage center and Miele coffee machine (that allows guests to wait on themselves when Sara is cooking), and an outdoor room that centers around a wood-burning fireplace, all make for easy,
fabulous entertaining. A den just off the great room houses the big-screen television and Sara’s loom—
making for relaxing evenings of weaving, game watching and togetherness. Tourgoers will leave understanding that this house is everything great design should be. Form following function—and solving very human issues with soul-soothing style.
107