
Search results for "Contaminated" in Home Design Ideas
 Borealis Landscape & Design DBA Skipley Farm
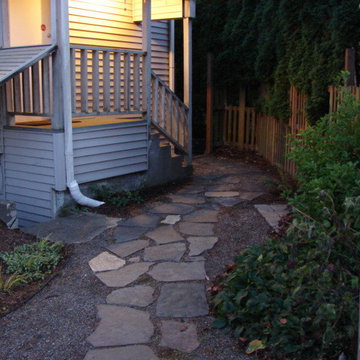
1/4 minus gravel is is same path material used in Seattle Parks. Here we have set Montana Ironstone on the 1/4 minus gravel to great utility. The reason I prefer this grade is the ability to pack tight like concrete so that it will set the stone steady and does not grow weeds as readily as a more coarse gravel might. The other reason I like this is that is does not "contaminate" the surrounding beds like a larger particle might. Gil Schieber
 Pennsylvania Landscape & Nursery Association
u2014 ALE: Wayne Rain Garden
Pennsylvania Landscape & Nursery Association
u2014 ALE: Wayne Rain Garden
Terren Landscapes http://www.terrenlandscapes.com
2014 PLNA Awards for Landscape Excellence winner
Category: Residential Up to $15,000
Award Level: Gold
Project Description:
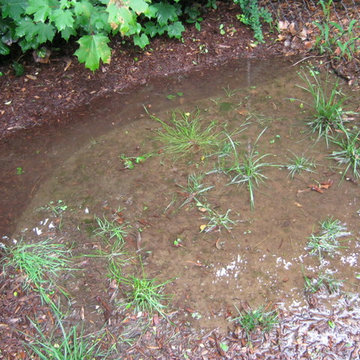
Our company was contracted by the client to provide a creative solution to an ongoing drainage problem. Their property is located within 30 feet of a local stream that collects storm water from the surrounding area. The nearby stream and high water table caused the lawn area at the side of their home to flood and to remain waterlogged for a few days after each storm. The client not only had difficulty growing plants in the existing conditions, but also had a problem with mosquitoes due to standing water.
Our goal was to design a self-contained, naturalistic rain garden that slowed storm water runoff, allowed for percolation, and promoted infiltration while permitting excess clean water to enter the nearby stream with diminished force. As designed, the rain garden allows the earth to slowly and more naturally
absorb excess storm water while filtering out toxins such as excess nitrogen and phosphorous which are frequently found in the landscape, therefore reducing the contaminants entering the stream.
A percolation test was conducted with criteria of absorbing a one-inch rainstorm within four hours without overflow. The one-inch storm calculation included an existing downspout from the home, which would be piped into the rain garden to reduce roof runoff. The first test failed due to a deep layer of high clay-content soil. Excavation continued until a layer of sandy loam was reached, the percolation test was repeated, and a successful test result was achieved. Next, the entire rain garden basin was excavated to the sandy loam layer and the soil amended with compost and sand to create a highly porous planting media.
Geotextile fabric was placed to help reduce migration of the surface stone into the soil and allow for minimal maintenance. Gravel, river stone and small boulders were carefully placed to achieve the look of a natural streambed.
A palette of mostly native plants with a few non-invasive ornamentals were chosen for their ability to survive in extreme conditions ranging from floods to drought and were placed according to their specific preferences.
Wetland plants were chosen for the lowest portion of the rain garden as that area remains saturated for longer periods of time, with a Chionanthus virginicus as a focal point surrounded by irises and ferns at the lowest depth.
Plants tolerant of drier conditions were chosen for the upper edges of the garden. The beautiful colors of Monarda, Ligularia, Eupatorium, Solidago, Chelone, and Rudbeckia were scattered within the upper edge, while movement and softness were incorporated by use of the graceful Nassella that lines the border. Finally, winter interest was provided with a backdrop of Cornus sericea.
As built, this small rain garden creates tremendous impact by decreasing the amount of storm water runoff not only on our client's property, but also in the neighboring stream. It serves as a means of slowing the water and providing an area for infiltration back into the earth. The plants provide a habitat for birds, butterflies, and insects, working in harmony with nature and providing beautiful visual interest year-round.
Photo Credit:
Lisa C. Falls
 Pennsylvania Landscape & Nursery Association
Terren Landscapes http://www.terrenlandscapes.com
2014 PLNA Awards for Landscape Excellence Winner
Category: Residential $30,000-$60,000
Award Level: Silver
Project Description:
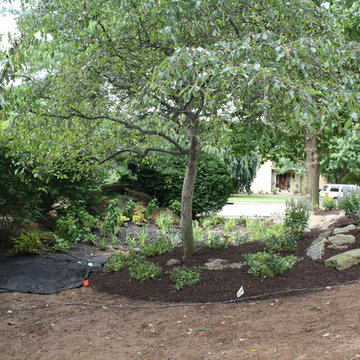
Our company was contracted to do a master plan for the family who was in desperate need of a rear yard renovation. The existing lawn area remained saturated throughout most of the year and the runoff from the neighboring property ran across their back yard, down the side of their property and all the way to the sidewalk in front of their house. The water was so intense that it had begun to cut through the back yard and erode the soil across the sidewalk and into the nearby storm drain.
By identifying these drainage problems and discussing solutions with the homeowner, we were able to design and create the aesthetically pleasing and sustainable solution of a rain garden. The goal was to slow down storm water runoff, and catch pollution and sediment by creating a rain garden that acts as a filter prior to entering the storm drain, while enhancing the aesthetics of the property.
The rain garden created was a shallow depression, 12 - 16" deep that collects rainfall runoff from all downspouts of the home and water collected into perforated pipes underneath the lawn area. The perforated pipe begins at the highest elevation in the yard and ends in the rain garden, the new lowest elevation that has been excavated down to an 8" depth. The perforated pipe captures the runoff water and allows the water to seep slowly back into the
ground as it runs across the property and into the garden. The garden was lined with a geotextile filter fabric to aide in removing contaminants from the water, prevent migration of the stone in to the soil, and minimalize maintenance.
A large variety of plant material was chosen, focusing mainly on native wetland species for their tolerance of our local soil types, moisture conditions and
the habitat they provide for wildlife. The garden was abundant with native wildlife and was a sustainable ecosystem for birds and butterflies upon completion of the project.
After planting, we arranged decorative stone throughout the garden to slow the flow of water and help prevent erosion. The combination of vegetative and stone surfaces provides temporary storage for runoff before the water either evaporates or infiltrates the soil.
The surrounding beds throughout the property were also all amended with compost and replanted with plants that work in harmony with the rain garden. The front, side, and rear yards are a beautiful display of colors that bloom throughout the seasons and the plants throughout the entire property provide food and shelter for native wildlife.
The rear yard that was once a muddy play space for the kids is now a dry lawn space that can be utilized by the family and their neighbors. This multi functional garden has become the focal point of the residence.
Photo Credit:
Terren Landscapes
Find the right local pro for your project
 Diamon-Fusion International
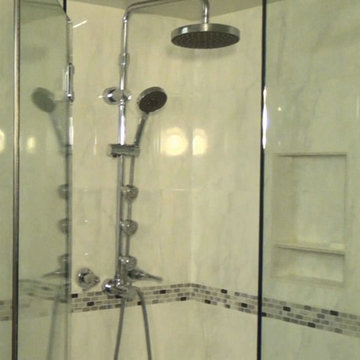
We applied DFI's patented easy-to-clean glass protective coatings on all the shower doors in this house. makes surfaces easier to clean by making them more water and oil repellent. The less water and oil sticks to the surface, the less it can deposit its contents, such as hard water stains, soap scum, and other contaminants that can make your surfaces spotted and ugly.
 Tile Doctor Ltd
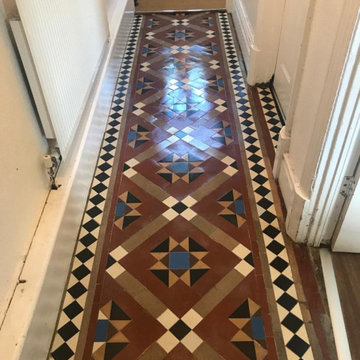
I recently worked on the restoration of a Victorian tiled hallway in Cwmbran Wales which is six miles North of Newport. As you can see from the photographs the floor was in quite a neglected dirty state and many of the the black and white border tiles needed removing and replacing. The worst part was the area by the front door where most of the tiles had been removed and then backfilled with concrete. I can only assume at some point in the past it was deemed to difficult or expensive to restore the floor, so they simply covered it up.
After visiting to survey the floor I did offer to source replacements for the concreted section and restore that as part of the work however my client’s budget would not stretch to that at the time. My quote was therefore focused on the main section of flooring and included replacing border tiles, deep cleaning the whole floor and then sealing the tiles to add protection. Although I did need to check that I could indeed source the replacement tiles before being able to provide the quote which as it turned out would not be an issue.
They were happy to go ahead and we arranged a suitable time to carry out the work which would enable me to work in the property whilst minimising contact with the owners due to the Covid-19 situation.
I spend the first day sorting out the black and white border tiles which needed to be gently prised out of position without upsetting the main part of the floor. The exposed subfloor was then cleaned up to remove old adhesive and replacements were fitted where required and secured into place. The floor would need to be solid before cleaning so that was left for day two so the new adhesive could go off overnight.
On day two I gave the floor an initial clean using a combination of Tile Doctor Pro-Clean and Remove and Go diluted with water. This produces a strong cleaner/stripper that will tackle dirt and remove coatings such as previous sealers. The old tiles had accumulated years of ingrained dirt, so I needed this extra power to remove the years of dirt and contaminates from the tile. It was sprayed onto the tiles and then left to soak in for ten minutes before being actively scrubbed into the tile using a rotary machine fitted with a black scrubbing pad. The soil was then rinsed off with water and extracted with a wet vacuum. The floor was inspected, and the process repeated on the tough stains until I was satisfied all the dirt had been removed.
Next the floor was treated to an acid wash using Tile Doctor Acid Gel using a similar method as before. This is an important treatment for these old Victorian floors that have no damp proof course as it neutralises efflorescent salts trapped in the tile which can appear as white salt deposits later. Once I was happy with the condition of the floor it was given a final rinse and left to dry off. I use a wet vacuum to remove liquids from the floor and on this last extraction I spent extra time to remove as much moisture from the tiles as possible.
I came back a few days later and after checking the tiles were dry using a damp meter, I started the application of the sealer. For this floor I applied seven coats of Tile Doctor Seal and Go for a satin finish. Tile Doctor Seal and Go is a specially formulated water-based sealer that provides both stain resistance and a durable low-sheen finish. It is perfect on a floor of this age where it leaves a lovely finish and will remain durable in what is a essentially a high traffic area.
Although we didn’t manage to sort out the area by the front door the client managed to fit a made to measure coir door mat along with carpet bar which was quite practical and looked fine so they were able to resolve that problem without blowing their budget.
The client was over the moon with results, the floor had a lovely pattern and the colours now shone through. I suggested the use of Tile Doctor Neutral Tile Cleaner to keep the floor clean and in good condition. It is neutral in pH so will ensure that the newly applied sealer stays in place and will ensure maintenance is nice and easy for them.
Paul Wales
Monmouthshire Tile Doctor
 Hominter
Collection: Glass Mosaic Tiles
Material: Glass
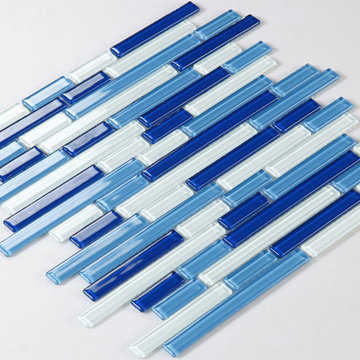
Color: Blue and White
Surface Finish: Glossy, easy for cleaning.
Shape: Strip
Sheet Size: 300mmx300mm
Chip Size: 15mmx48mm, 15x98mm,15x148mm
Thickness: 4mm
Application: Glass mosaic tiles are impervious to the elements, thus it is great for both interior and exterior use so moisture is not an issue. Glass mosaic tiles are great on floors and walls and have been most popular in bathrooms, spas, kitchen backsplash, wall facades and pools as well as a variety of other applications.
Characteristics: The glass mosaic tile has a zero water absorption rate, and this tile exceeds ANSI standards for water absorption for mosaic tile. It is strong, durable, contamination free, and only the best quality tiles are selected as our tiles are inspected for blemishes before shipment.

 ACES, Advanced Concrete Enhancement Solutions
We always grind the concrete to be sure we remove all contaminates and give a good profile for the epoxy coating to attach and bind. notice there is no dust with this system, it is all being vacuumed away.
 Tile Doctor Ltd
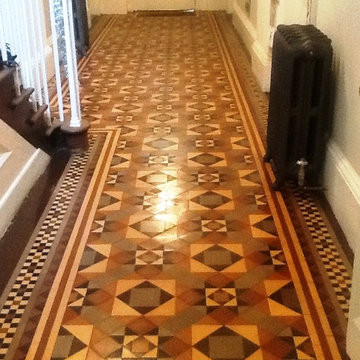
This hallway floor was actually at a house in the town of Stamford which is just over the northern border of Northamptonshire and slightly out of my area; however I was recommended to the owner by another client which is always welcome and a testimonial in itself. I work right across the county so it wasn’t long before I was in the general area and arranged a visit to carry out an inspection of the Victorian Quarry tiled floor and provide a quote for a full restoration.
The owner of the house had just moved in recently and although the floor was in good overall physical, it was in need of a thorough clean and new seal to bring back some life to the tiles. Additionally she was having lots of other building work done to the house and she wanted to retain this as an original feature of the property. My quote was accepted and I was able to book the work in for the following week.
These first photos show how dull the floor looked due to a build-up of builder’s dust and general wear and tear. They also show some of the equipment needed to undertake the following cleaning process.
I used a brush and vacuum to remove as much loose debris and dust from the surface of the floor as possible. I then applied a strong dilution of Tile Doctor Pro Clean to the floor which is a strong alkaline cleaner which can also be used to remove sealers; the solution was left it to dwell for roughly ten minutes before agitating it with scrubbing pads and brushes to remove the muck that was lifted to the surface. This was then wet-vacuumed twice to remove all the slurry and neutralise any chemicals.
As it was such an old property I then used a steamer to heat up the tiles and draw up any contaminants and assist with the drying process. I also chose to install two fans and a dehumidifier to dry the floor even further.
With the cleaning process complete – and achieving a marked difference to the appearance of the floor – I left the tiles to finish drying for 24 hours.
Upon my return to the house, I checked for any excess moisture by running damp tests as this has the potential to affect the performance of the sealer. Once satisfied with the results, I sealed the floor with two coats of Tile Doctor Colour Grow, a colour enhancing sealant which offers both a robust surface seal and an aesthetically pleasing finish.
I also carried out water repellency tests to ensure the sealer was working as expected and the floor had sufficient protection and will be hard-wearing for a hallway which is a high traffic area.
On my client’s return to the house she was very happy with the final results – in fact, she was also in contact about some further work in the New Year!
Phil Vissian
Northamptonshire Tile Doctor
 Hominter
Collection: Glass Mosaic Tiles
Material: Glass
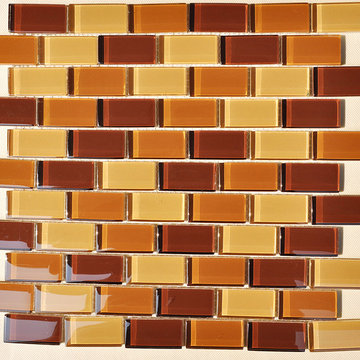
Color: TAN
Surface Finish: Glossy, easy for cleaning.
Shape: Strip
Sheet Size: 300mmx310mm
Chip Size: 25mmx50mm
Thickness: 8mm
Application: Glass mosaic tiles are impervious to the elements, thus it is great for both interior and exterior use so moisture is not an issue. Glass mosaic tiles are great on floors and walls and have been most popular in bathrooms, spas, kitchen backsplash, wall facades and pools as well as a variety of other applications.
Characteristics: The glass mosaic tile has a zero water absorption rate, and this tile exceeds ANSI standards for water absorption for mosaic tile. It is strong, durable, contamination free, and only the best quality tiles are selected as our tiles are inspected for blemishes before shipment.
 ASHTON HOMES,LLC
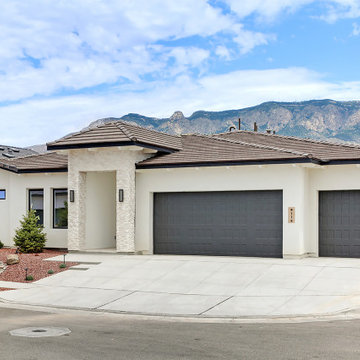
JUST FINISHED! State-of-the-Art Green Built custom Ashton Home in North Star, Desert Ridge, La Cueva school district. NAA City lot on 1/4 acre in gated community. 4 Bed, 5 Bath, 3 Car garage with 2 Living areas, Outdoor living area with stone fireplace and dining area large enough for outdoor kitchen, Butlers Pantry, Mud Room, Chef Kitchen with all Built-in Commercial appliances, 50 sq ft island that seats 6, 10'-14' high ceilings throughout, 8' tall doors, Master suite with walk-in shower with 2 heads, soaking tub, large double vanity, Master closet with built-in cabinets and seat. Barn doors, built-in cabinets eveywhere including hardwood buffet cabinet in Dining Room. All bedrooms have own private bathrooms and closets. Total energy efficiency with 49 HERS score meaning gas and electric for home is $100+-/mo. Passive Radon system, ERV (Energy Recovery Ventilator) for continuous fresh air exchanges, whole house water filter for contaminant free water at all faucets. Light and Bright open, spacious floor plan with Transitional timeless styling. Great for entertaining with 3 designated areas for entertaining. This is the last of the City lots that are 1/4 acre with City utilities next to open space, private schools, parks and recreation centers, new retail with restaurants, shopping and entertainment. Call 505-271-1191
 Proline Range Hoods
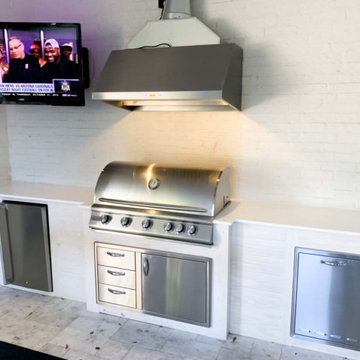
The PLFL 832 range hood insert is the perfect companion for your custom hood. With a 1000 CFM blower, this insert will accommodate any cooking style. It has enough power for low-heat cooking, Asian cooking, and anything in between. Stainless steel baffle filters will trap grease and dirt as unwanted contaminants travel outside your kitchen. They are dishwasher-safe too, which makes cleaning easy.
The PLFL range hood insert also features two Halogen lights for great coverage of your range. Next to the lights is the control panel, a user-friendly digital display – and it's concealed under the hood too, hidden from your guests.
For more product information, click on the link below:
https://www.prolinerangehoods.com/catalogsearch/result/?q=plfl%20insert

 Phinney Ridge Painting
We have painted several houseboats in Seattle, they do require the renting of a barge, extra masking and prep to make sure we do not contaminate the water.
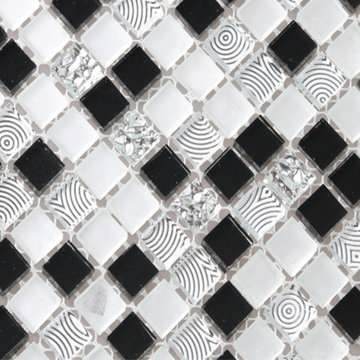 Hominter
Collection: Glass Mosaic Tiles
Material: Glass
Color: Black and White
Surface Finish: Glossy, easy for cleaning.
Shape: Square
Sheet Size: 300mmx300mm
Chip Size: 15mmx15mm
Thickness: 4mm
Application: Glass mosaic tiles are impervious to the elements, thus it is great for both interior and exterior use so moisture is not an issue. Glass mosaic tiles are great on floors and walls and have been most popular in bathrooms, spas, kitchen backsplash, wall facades and pools as well as a variety of other applications.
Characteristics: The glass mosaic tile has a zero water absorption rate, and this tile exceeds ANSI standards for water absorption for mosaic tile. It is strong, durable, contamination free, and only the best quality tiles are selected as our tiles are inspected for blemishes before shipment.


 Colorado Alpines & Wildflower Farm
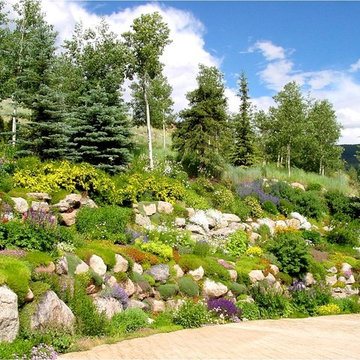
Colorado Alpines & Wildflower Farm | www.thewildflowerfarm.com
Inspiration for a landscaping in Denver.
Inspiration for a landscaping in Denver.
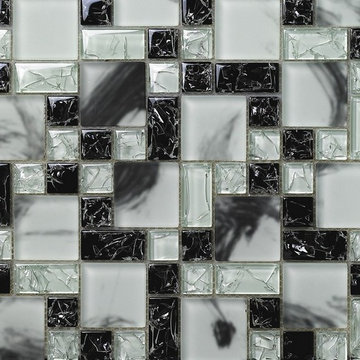 Hominter
Collection: Glass Mosaic Tiles
Material: Glass
Color: Grey
Surface Finish: Glossy, easy for cleaning.
Shape: Square and Strip
Sheet Size: 300mmx300mm
Chip Size: 23mmx23mm, 23mmx48mm, 48mmx48mm
Thickness: 8mm
Application: Glass mosaic tiles are impervious to the elements, thus it is great for both interior and exterior use so moisture is not an issue. Glass mosaic tiles are great on floors and walls and have been most popular in bathrooms, spas, kitchen backsplash, wall facades and pools as well as a variety of other applications.
Characteristics: The glass mosaic tile has a zero water absorption rate, and this tile exceeds ANSI standards for water absorption for mosaic tile. It is strong, durable, contamination free, and only the best quality tiles are selected as our tiles are inspected for blemishes before shipment.
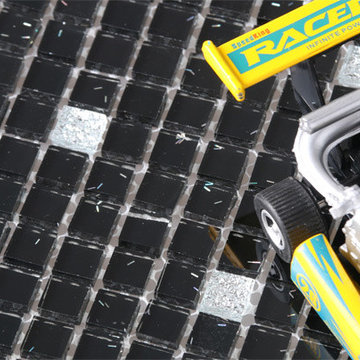 Hominter
Collection: Glass Mosaic Tiles
Material: Glass
Color: Black
Surface Finish: Glossy, easy for cleaning.
Shape: Square
Sheet Size: 300mmx300mm
Chip Size: 15mmx15mm
Thickness: 4mm
Application: Glass mosaic tiles are impervious to the elements, thus it is great for both interior and exterior use so moisture is not an issue. Glass mosaic tiles are great on floors and walls and have been most popular in bathrooms, spas, kitchen backsplash, wall facades and pools as well as a variety of other applications.
Characteristics: The glass mosaic tile has a zero water absorption rate, and this tile exceeds ANSI standards for water absorption for mosaic tile. It is strong, durable, contamination free, and only the best quality tiles are selected as our tiles are inspected for blemishes before shipment.
 Windy City Painters
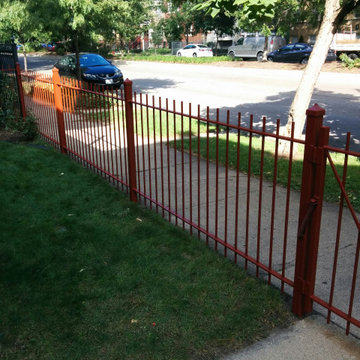
Ever notice how your iron fence looks worse every spring after another Chicago winter? That slow deterioration is not cosmetic - it is active metal failure that compounds every freeze-thaw cycle until replacement becomes the only option. Windy City Painters works with homeowners across the Chicago North Side and Near West Side to restore original iron fencing on greystones, two-flats, Victorian brownstones, and coach houses before that point is reached.
PROJECT OVERVIEW
This iron fence restoration involved a classic Chicago residential property with original wrought iron fencing showing surface rust across the majority of pickets, flaking previous paint coats, and localized deep pitting near the base rails. A structural check identified two loose pickets requiring welding before any surface preparation or coating began. Total linear footage fell in the mid-range for a standard Chicago residential lot.
MATERIALS AND PRODUCTS
Windy City Painters selected Ospho rust converter for chemically neutralizing active iron oxide before priming. Ospho reacts with rust to form a stable phosphate compound that stops corrosion progression rather than simply sealing over it. Sherwin-Williams DTM rust-inhibitive primer was applied to all bare and converted surfaces, followed by two finish coats of Rust-Oleum DTM in satin black. DTM - direct to metal - formulas provide corrosion inhibitors built into the coating matrix, which matters significantly in Chicago's climate.
THE PROCESS
Step 1 - Structural Assessment and Welding Coordination. Before any surface preparation begins, Windy City Painters inspects every picket and rail connection for structural integrity. Loose or cracked iron must be welded before coating. Paint applied over a compromised joint will fail within one season as movement continues to break the bond. On this project, two pickets were tack-welded by a coordinating welder before prep started.
Step 2 - Wire Wheel Grinding and Needle Gun Descaling. All rusted sections were ground to bare or near-bare metal using wire wheel attachments and needle gun descaling tools. This step removes loose scale, flaking previous coatings, and surface contamination that would prevent primer adhesion. Skipping mechanical prep is the single most common reason iron fence paint fails prematurely on Chicago properties.
Step 3 - Ospho Rust Converter Application. Ospho was brushed into all pitted and converted areas and allowed to cure fully. The phosphoric acid chemistry converts iron oxide into iron phosphate, arresting active rust and creating a surface that accepts primer more effectively than bare metal alone. Corroseal is an equivalent alternative used on projects with heavier pitting.
Step 4 - DTM Primer and Finish Coat Application. Sherwin-Williams DTM rust-inhibitive primer was applied across all prepared surfaces. Two topcoats of Rust-Oleum DTM in satin black followed after full primer cure. DTM finish coats add a second corrosion-inhibiting layer and provide the UV and weather resistance needed for Chicago exterior iron work.
CHICAGO-SPECIFIC CHALLENGES
Chicago iron fencing faces conditions that accelerate corrosion faster than most US markets. Lake humidity keeps metal surface moisture elevated through much of the year. Road salt splash from winter maintenance reaches fencing along parkways and sidewalk edges, introducing chlorides that aggressively attack iron. Freeze-thaw cycles expand any rust pocket that has formed under paint, lifting coatings from the inside and creating the classic bubbled-paint appearance homeowners notice every spring.
WHAT TO EXPECT LONG-TERM
With Ospho conversion, DTM primer, and two DTM finish coats properly applied over mechanically prepared surfaces, most Chicago residential iron fences hold 5-8 years before needing significant touch-up. Annual visual inspection for any chips or bare spots, with immediate touch-up using Rust-Oleum DTM, extends that window considerably.
PRO TIPS
Tip 1 - Address any bare metal spot the same season you notice it. A pinhole of exposed iron becomes a rust bubble within one Chicago winter and a flaking section by the following spring.
Tip 2 - Never paint over active rust without a converter step. Ospho or Corroseal is inexpensive insurance against a complete repaint two years early.
Tip 3 - Check picket bases at grade level every spring. Ground contact accelerates corrosion at the base faster than anywhere else on the fence. Catching it early keeps welding out of the equation.
Contact Windy City Painters at windypainters.com for a project estimate.
FAQ
Q: What does iron fence painting cost in Chicago? A: Residential iron fence painting with proper rust prep typically runs $300-$900 for standard lot footage. Windy City Painters provides itemized estimates based on linear footage, rust severity, and whether structural welding is required before surface preparation begins.
Q: Do you paint over rust or remove it first? A: Windy City Painters always addresses active rust before priming. Ospho or Corroseal rust converter chemically neutralizes iron oxide, and wire wheel grinding removes loose scale - coating over unaddressed rust guarantees early failure on Chicago iron fences.
Q: When does an iron fence need welding before painting? A: Loose pickets, cracked rails, or connections with visible movement require welding before any coating work begins. Paint cannot stabilize a structural joint - Windy City Painters coordinates with welders when this condition is identified during initial assessment.
Q: How long does iron fence paint last in Chicago? A: With mechanical prep, Ospho conversion, and Sherwin-Williams or Rust-Oleum DTM coatings, properly restored iron fencing holds 5-8 years in Chicago's freeze-thaw climate before needing significant maintenance.
Q: Is Ospho better than Corroseal for Chicago iron fences? A: Both are effective rust converters. Ospho is a liquid phosphoric acid treatment suited for moderate rust and pitting. Corroseal is a latex-based converter-primer hybrid better suited to heavier rust profiles. Windy City Painters selects based on site conditions.
Q: What finish sheen works best on iron fencing? A: Satin or semi-gloss black is the traditional and most durable choice for Chicago greystone and brownstone properties. Satin hides minor surface imperfections better than gloss while still providing adequate UV and moisture resistance.
Q: Can iron fence painting be done in spring or fall in Chicago? A: Yes. Windy City Painters schedules iron fence work in temperatures above 50 degrees Fahrenheit with low ambient humidity - spring and early fall are often ideal windows that avoid both winter cold and peak summer humidity.
 Timeless Interiors
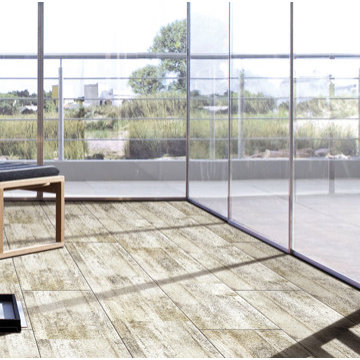
Eclectic in style and versatile in use, the Moda collection was designed as a contamination of different styles. Moda is distinguished by its attention to detail and meets the requirements of modern lifestyles and of a constantly evolving culture. Moda collection is multifunctional, suitable for floors and walls, interior and exteriors.

12