
Search results for "Continu test" in Home Design Ideas
 User
UserDECO Window Fashions
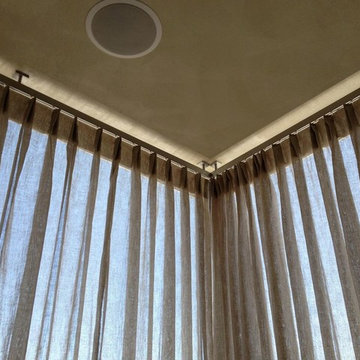
Sheer pleated custom made drapes, ceiling mount metal rod.
Trendy bedroom photo in Austin
Trendy bedroom photo in Austin

 TreHus Architects+Interior Designers+Builders
Example of a large classic u-shaped dark wood floor eat-in kitchen design in Minneapolis with a double-bowl sink, recessed-panel cabinets, white cabinets, white backsplash, stainless steel appliances, an island and black countertops
Find the right local pro for your project

 Industrial Projects
Creating a comfortable outdoor living space is a priority for many homeowners and DIY enthusiasts. With rising summer temperatures, installing a shade tarp in your backyard offers an affordable and effective solution for sun protection. We’ve developed this detailed, step-by-step guide to help you confidently install a shade tarp that not only shields you from the sun but also adds aesthetic appeal to your outdoor area.
Benefits of Installing a Backyard Shade Tarp
Before diving into the installation process, let’s explore the key benefits of having a backyard shade tarp:
Provides UV Protection: Keeps your family and guests safe from harmful sun exposure.
Reduces Outdoor Temperatures: Creates a cooler, more enjoyable outdoor space.
Protects Outdoor Furniture: Extends the life of patio furniture by reducing sun damage.
Enhances Outdoor Aesthetics: Adds a modern, stylish look to your yard.
Budget-Friendly: More affordable compared to permanent structures like pergolas.
Materials and Tools You’ll Need
To begin your DIY backyard shade project, gather the following materials and tools:
Materials:
Shade tarp (UV-resistant and breathable)
Sturdy posts or existing structures (trees, fences, walls)
Mounting hardware (eye bolts, D-rings, turnbuckles, snap hooks)
Nylon or polyester rope, or stainless-steel wire
Concrete (if installing new posts)
Tools:
Power drill
Measuring tape
Level
Ladder
Wrench or adjustable spanner
Post hole digger (if installing new posts)
Step 1: Plan Your Shade Tarp Layout
The first step in installing your backyard shade tarp is careful planning. Take time to assess your outdoor area and answer these key questions:
Where is the sun’s path throughout the day?
What size and shape of tarp best suits your space?
Will you anchor the tarp to existing structures or install new posts?
What height do you want the tarp to sit at for maximum shade and airflow?
Pro Tip: Use string or garden hoses to visualize the tarp layout on the ground before making permanent decisions.
Step 2: Measure and Mark Anchor Points
Once you’ve determined the tarp’s location and orientation:
Measure the tarp dimensions.
Mark the exact points where each corner of the tarp will be anchored.
Ensure that the anchor points are at least 5–10% longer than the tarp size to allow for tensioning and slight adjustments.
Consider slope angles for water runoff. Aim for at least a 20-degree angle to prevent water pooling on the tarp.
Step 3: Install Support Posts (If Necessary)
If your backyard lacks existing anchor points like trees or fences, you’ll need to install sturdy support posts:
Dig post holes at least 24 inches deep and 8-12 inches wide for stability.
Set posts in concrete, making sure they remain plumb and level.
Allow the concrete to cure for at least 24–48 hours before applying tension from the tarp.
We recommend using pressure-treated wood, galvanized steel poles, or aluminum posts for longevity and strength.
Step 4: Install Mounting Hardware
With your anchor points ready, it’s time to install the necessary hardware:
Attach eye bolts or pad eyes securely into walls, posts, or other fixed structures.
For added flexibility and adjustability, install turnbuckles or tensioners to fine-tune the tarp’s tightness.
Connect snap hooks, D-rings, or carabiners to make assembly and disassembly easier.
Make sure all hardware is rated for outdoor use to prevent rust and corrosion.
Step 5: Attach and Tension the Shade Tarp
Now it’s time for the most satisfying part—mounting the shade tarp:
Begin by attaching one corner of the tarp to an anchor point.
Gradually attach the remaining corners, moving diagonally for even tension.
Adjust each connection point using your turnbuckles, ropes, or cables.
Pull the tarp tight enough to avoid sagging, but not so tight that it risks tearing.
Check that the tarp maintains the desired slope for rainwater runoff and adjust tension as needed.
Step 6: Final Adjustments and Safety Check
Before enjoying your new shaded area:
Inspect all anchor points and hardware for stability.
Test the tarp’s tension and make adjustments for even distribution.
Ensure that no sharp edges or loose connections remain that could damage the tarp or pose a safety hazard.
Confirm that the tarp is secure in windy conditions by giving it a gentle tug.
If you live in an area with frequent high winds, consider removing the tarp during storms to prevent damage.
Step 7: Enjoy Your Shaded Backyard Oasis
Once installed, your backyard shade tarp provides a comfortable and protective space for outdoor gatherings, relaxation, or family activities. You can decorate underneath with outdoor furniture, string lights, or potted plants to create a personalized outdoor retreat.
Maintenance Tips for Long-Lasting Shade Tarp Performance
To extend the life of your shade tarp, follow these maintenance guidelines:
Regularly check for wear and tear, especially around anchor points and seams.
Clean the tarp periodically with mild soap and water to prevent mildew buildup.
Store the tarp indoors during harsh weather seasons if it's not designed for year-round use.
Tighten hardware as needed to maintain proper tension and avoid sagging.
By following these simple care steps, your shade tarp will continue to deliver years of sun protection and outdoor comfort.
Conclusion: Upgrade Your Outdoor Space with a DIY Shade Tarp
Installing a shade tarp in your backyard is a cost-effective and rewarding DIY project. With careful planning, quality materials, and proper installation techniques, you’ll enjoy cool, shaded outdoor living all season long. This step-by-step guide ensures your project goes smoothly from start to finish.

 NanaWall
The Harmonious Blending of Inside to Out with Wood Framed Patio Doors
By NanaWall Systems, September 3, 2025
Wood framed patio doors
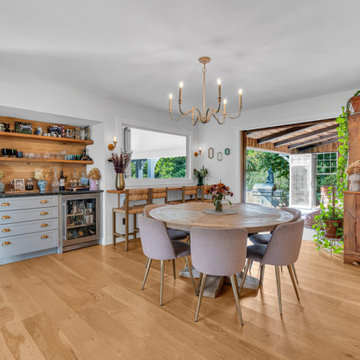
Some homes are designed to impress from the outside. This one was reimagined to breathe from the inside out with wood framed patio doors. For a family of music lovers and outdoor enthusiasts, the goal was about connection. Connection to each other, to the seasons, to nature, to sound, and to their lush backyard space for daily life and family gatherings.
Designed by Jason Hanrahan of Mode Architects, the home features a thoughtfully placed NanaWall kitchen pass-through window and, later, wide bifold doors in the family sunroom. The design evolved in two phases to fit the family’s indoor-outdoor lifestyle perfectly. The result is a renovation defined by openness, light, and laid-back living.
A Home Shaped by Light, Music, Wood Framed Patio Doors, and a Pass-Through Window
Kitchen Renovation Opens Space to Light and Entertaining with a Pass-Through Window
During phase one of the renovation, the existing kitchen was reimagined to replace a restrictive floor plan and outdated appliances. Central to its new design is a three-panel NanaWall SL60 folding window system—sized at counter height to serve as a flexible pass-through window for alfresco dining and entertaining. Custom divided lites were added to complement the home’s existing window styles.
The window frames were finished in a warm, off-white on both interior and exterior, tying the kitchen seamlessly to the rest of the home and its façade. The result is a transitional space that connects the kitchen directly to the outdoor dining area, a seamless connection across spaces.
“The countertop-height NanaWall system made the kitchen fit better into the family’s lifestyle,” says Hanrahan. “It supports hosting and day-to-day use without turning the kitchen into a full opening.”
Designed for Living: Home Reimagined Around How the Family Connects
After phase one introduced a NanaWall pass-through window in the kitchen, making serving, conversation, and time outside effortless, the homeowners returned to MODE to reimagine their older sunroom. The goal: a living room and music lounge that could open completely to the backyard. The solution was incorporating a full-height, five-panel NW Clad 740 wood framed patio doors. The Generation 4 folding glass wall offered the slimmest aluminum clad frames available, and therefore, was the ideal solution to achieve seamless connectivity.
Outside, the frames were finished in a warm off-white to match the façade. Inside, solid wood frames seamlessly integrate with the mushroom wood paneling and millwork. The nearly 15-foot-wide system was customized with divided lites placed high up to add rhythm while preserving unobstructed views and keeping transitions seamless.
“We wanted to maximize the opening size,” says Jason. “Not just to maximize light, but literally the opening as well. The family sunroom space became more useful.”
A Living Sunroom That Folds Open to the Garden
MODE centered the second half of the home renovation on the family sunroom, featuring wood framed patio doors to create a seamless transition from the interior to the garden. It’s the difference between “a room with a view” and a room that becomes the view. With the nearly 8-foot-tall system open, music spills outside; with it closed, daylight, acoustics, and comfort remain finely tuned.
“You are sitting in the house with the family. The opening frames the view of the pond and the trees,” describes Architect Jason Hanrahan. “They liked how it connected them with their family when they were outside… it made it more cohesive.”
Choosing Materials that Reflect Nature and Serenity
According to the architect, the design aims to bring the outdoors in with an organic material approach. Inside, the room is wrapped in mushroom wood reclaimed boards, whose textured grain warms the acoustics and steadies the eye. Large-format tiles keep lines calm and maintenance easy.
Outside, a long concrete tread and natural stone hold the grade without hard edges. Nothing shouts; everything contributes to a single idea: bring the outdoors in and the indoors out.
Energy Efficiency Meets Everyday Living
The systems’ energy-efficient and performance engineering make the sunroom a four-season retreat. The architect chose NanaWall wood framed patio doors to maximize the existing exterior opening, provide intuitive and easy daily operation, and create a threshold that feels like part of the floor rather than a barrier. T hese are hallmarks of NanaWall wood framed patio doors: engineered for durability and frequent use, precision-gliding panels, and performance-tested.
To ensure year-round comfort, the NanaWall wood framed patio doors and pass-through window were specified with double glazed panels for optimal performance regardless of weather. Paired with the thermally broken Low Profile Saddle Sill, the bifold door not only offers energy efficiency but also a seamless, barefoot-friendly threshold to the outdoors.
Final Thoughts
From weeknight dinners to weekend music sessions, this is now a home that meets the family at the place they actually live, gather, and connect in. The kitchen pass-through window keeps everyday hosting effortless. The music room turns into a garden room in seconds, inviting breezes and conversation across one continuous plane.
Here, NanaWall wood framed patio doors added versatile usable square footage and extended the soul of the home outdoors. By focusing on how the family truly lives, this home now opens in all the right ways: to light, to laughter, to nature, and to each other.
Visit the NanaWall inspiration gallery to explore more homes like this, designed for connection, built for modern living!
 Custom Surface Solutions
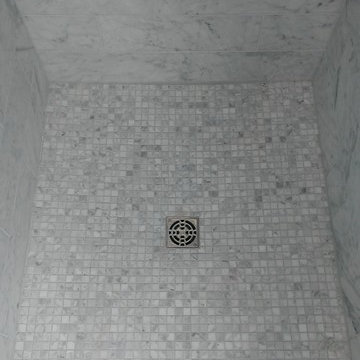
Custom Surface Solutions (www.css-tile.com) - Owner Craig Thompson (512) 430-1215. This project shows a new construction master bathroom with two showers, and wall mounted vanities. Shower wall tile and vanity wall wainscots and floor base tile is 6" x 18" Carrera Marble on offset subway pattern. Shower floors are 5/8" Carrera Marble mosaic tile. All exposed edges including windows, shower walls, top wainscots and floor base are custom bull-nose profiled. Shower floor is custom mud set with SchluterSystems waterproofing and drain system.

 VIVA TILES INC
Modern Bathroom Design.
By using Carrera Polished White Porcelain Tiles on the floor you will get the most "wow" reaction from any guest.
You also can use another two selections which are Statuario White Polished and Astoria White Polished porcelain tiles.
Designer & Builder #Alireza Ghanbari
Provided by #Dizeh Design Build
Tile Supplier #VIVA TILES INC




 Tuttle's Carpet One Floor & Home
Tuttle's Carpet One Floor & Home
Your Trusted Source for the Finest Flooring Solutions in Orange County
Location: Laguna Niguel, CA 92677
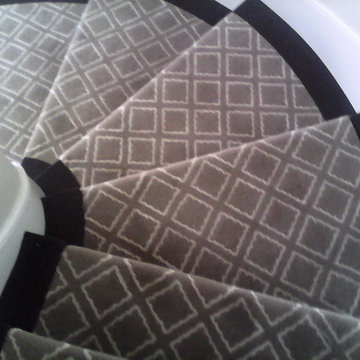
Trendy wooden spiral staircase photo in Orange County with wooden risers
Trendy wooden spiral staircase photo in Orange County with wooden risers

 MSI
MSICalacatta Verona Quartz has a soft white background and subtle veins. This stunning quartz requires no ongoing maintenance, is easy to clean, and durable, making it the perfect choice for busy residential and commercial kitchens.

 Jay Sifford
Staghorn fern (Platycerium superbum) in the garden of Robert Fuchs and Michael Coronado, Homestead, FL. Photo by Jay Sifford.
Home design - tropical home design idea in Miami
Home design - tropical home design idea in Miami
 Carpet Design Group, LLC
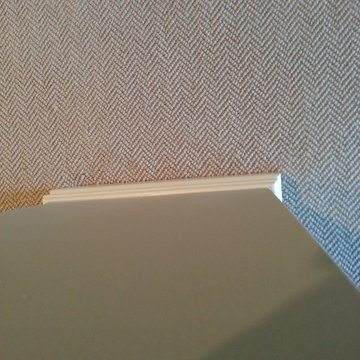
Example of a large classic master carpeted bedroom design in Detroit with gray walls and no fireplace




 Stonebridge Mosaics
A unique pattern of Thassos and Mother of Pearl in a brilliant shade of icy blue!
Example of a minimalist kitchen design in New York with blue backsplash and mosaic tile backsplash
Example of a minimalist kitchen design in New York with blue backsplash and mosaic tile backsplash
 William Byrd Homes
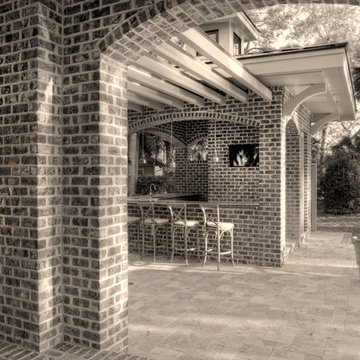
Example of a large beach style backyard patio fountain design in Charleston with a pergola

24