
Search results for "Coverage recommendation" in Home Design Ideas
 3rd Street Inn
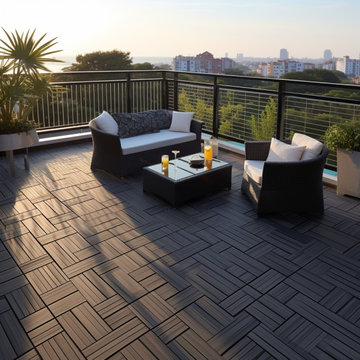
★ 3RD STREET INN® DECK TILES - 3rd Street Inn® Deck Tiles are made from 100% solid acacia hardwood. Acacia is known for its excellent resistance to rot and decay from outdoor elements including rain, sun, mold, mildew, and insects. Each 3rd Street Inn® Interlocking Patio Tile provides 12"x12" (1 Square Foot) of coverage and is available as a 6-pack (6 Square Feet), 10-pack (10 Square Feet), and 20-pack (20 Square Feet).
★ EASY INSTALLATION & NO HARDWARE NEEDED - 3RD STREET INN® interlocking deck flooring features snap-lock connectors for easy DIY installation without the use of tools or hardware. Install our interlocking deck cover tiles in your area by lining them up and then stepping on the seams until you hear an audible "click" to lock them in. All 3rd Street Inn® deck flooring options are made completely hardware free so that there aren't any components to rust and break down in the outdoor elements like other inferior tile patio decking
★ INDOOR AND OUTDOOR DECK FLOORING - 3rd Street Inn® Patio Tiles create a beautiful space both inside and outside. All that is needed is a solid surface and the deck flooring can be laid directly on top of it. Our composite deck tiles can be installed on top of concrete, wood, carpet, pavers, or any other solid surface. Great for decks, patios, balconies, around pools, saunas, showers, sun rooms, mud rooms, bedrooms, and more.
★ DURABLE BEAUTY - 3rd Street Inn® interlocking composite deck tiles are sanded and oiled for a beautiful, scratch resistant finish. All 3rd Street Inn® outdoor patio flooring is non-slip and great for high or low traffic areas inside or outside of the home. To increase the lifespan of your tile decking when used for outdoor applications, standard decking care is recommended. For best results, coat your decking with a UV-rated weatherproofing sealer twice a year and re-stain as needed. The tile decking can also be painted different colors in order to create the look that you want!
★ VERSATILE INSTALLATION OPTIONS- 3rd Street Inn® Interlocking Flooring Tiles not only look great in permanent installations on decks, patios, and around pools, they also offer a great temporary solution for installations in apartments and condos that can easily be removed when needed. For a custom fit, the interlocking patio tiles can be easily cut with a skill saw or jigsaw to accommodate areas of all shapes and sizes. Add 3rd Street Inn® Wooden Deck Flooring to your home and bring your space to life!
We recommend using a UV rated weatherproof sealant twice yearly. This sealant is a crucial step in the life of the decking tiles and can extend the life of the decking tiles, in some cases, pending the climate, by 1 to 2 years.
The life of a decking tile is heavily dependent on the climate of where they are located. Hot, humid climates, rainy climates, and cold, snowy climates can cause the decking tiles to deteriorate faster than using them in a climate controlled environment, like inside of a house or indoor venue.
 Talon Construction Inc.
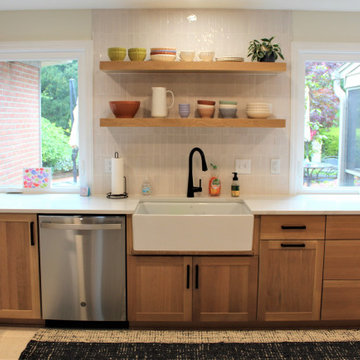
To find a Frederick kitchen contractor with a great reputation, follow these steps:
Start by asking friends, family members, neighbors, or colleagues who have recently had their kitchens remodeled. Personal recommendations are valuable as they come from people you trust.
Look for online reviews on websites like Google, Houzz, or Yelp. These platforms often feature customer feedback and ratings for local contractors, providing insight into their reputation and the quality of their work.
Check the websites of local kitchen contractors in Frederic. A reputable contractor typically showcases their previous projects, customer testimonials, and certifications on their website.
Ensure that the contractor is licensed, insured, and bonded. A valid license and insurance coverage indicate professionalism and a commitment to their work.
Look for contractors who are members of professional organizations, such as the National Kitchen and Bath Association (NKBA) or the National Association of the Remodeling Industry (NARI). Membership in these organizations often signifies a dedication to industry standards and best practices.
Ask for References. Don't hesitate to ask potential contractors for references of past clients. Contact these references and ask about their experience working with the contractor, the quality of work, and overall satisfaction.
Remember that a great reputation is built on a history of satisfied customers and quality workmanship. Take your time to research and find the best kitchen contractor for your needs.
 SabaRehman Abdulrehman
Bathrooms are no longer just functional spaces; they’re mini sanctuaries where we unwind, reset, and start or end the day. One of the biggest trends driving modern bathroom design is the move towards open, spacious layouts – and at the centre of that look is the wet room shower screen.
At BathroomNation, we’ve helped countless homeowners transform traditional bathrooms into sleek, practical wet rooms using high-quality wet room shower screens. In this blog, we’ll explain what a wet room shower screen is, why it’s such a smart choice, how to plan and style it, and what to look for when choosing the perfect one for your home.
What Is a Wet Room Shower Screen?
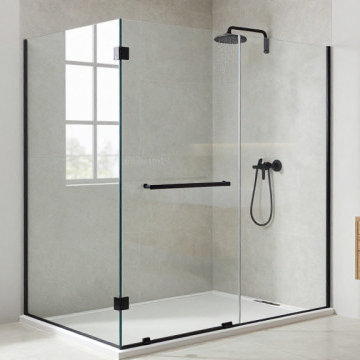
A wet room shower screen is a fixed or semi-fixed glass panel designed to separate your shower area from the rest of the bathroom floor, without enclosing it like a traditional cubicle. Instead of a full tray and door, you have:
- A level or gently sloped floor (often fully tiled)
- A walk-in, open shower space
- One or more glass panels providing splash protection
- Small bathrooms that feel cramped
- Rooms with limited or no natural light
- Long, narrow spaces where every inch counts
- Ideal for people with limited mobility
- Safer for older users and children
- More comfortable for everyday use
- Almost invisible glass boundaries
- Minimal metal hardware and framing
- A seamless link between shower and non-shower areas
- Quick to wipe down after a shower
- Simple to clean with standard glass cleaner
- Less prone to discoloured seals and hard-to-reach dirt
- The shower head is positioned sensibly to minimise overspray
- Your bathroom is medium or large in size
- You want an ultra‑open, walk‑in feel
- Extends coverage
- Helps keep more water inside the shower area
- Still keeps the openness of a walk‑in design
- Increase the effective width of protection during showering
- Fold the panel away slightly when not in use to open up the space
- 8mm toughened safety glass as standard
- 10mm toughened glass for an even more solid, premium feel
- Prevent water spots and mineral build-up
- Make daily and weekly cleaning quicker
- Keep your wet room shower screen looking clear and new for longer
- Taller screens (often 1900mm or more) provide better splash control
- Various widths let you create both compact and expansive walk-in areas
- Enhance rigidity and safety
- Are typically mounted at the top, near the ceiling or wall
- Can be designed in finishes that match your brassware (chrome, black, brass, etc.)
- Chrome
- Brushed nickel
- Matt black
- Brushed brass or gold tone
- Where the shower head will be placed (ceiling, wall‑mounted, or both)
- How water will naturally fall and drain
- How much splash you’re comfortable with elsewhere in the room
- The floor needs a gentle, even fall towards the drain
- You can use a central drain or linear (channel) drain
- Waterproofing (tanking) is essential beneath tiles or flooring
- Catch most of the spray from your shower head
- Shield the main walkway and dry areas
- Clear, frameless-style glass panel
- Large-format light grey or stone‑effect tiles
- Wall‑mounted rainfall shower head with matching controls
- Floating vanity and wall-hung toilet
- Wet room shower screen with black profile and support bar
- Concrete or stone-look tiles on floor and walls
- Black rainfall shower and matching mixer valve
- Simple timber stool or bench for warmth
- Ultra-clear glass wet room shower screen
- Natural stone or stone‑effect tiles in warm tones
- Brushed brass shower fittings
- Niche shelving built into the wall for toiletries
- Open, walk-in design
- Easier access, especially for mobility needs
- More airy look, less visual clutter
- Simpler to clean (fewer frames and corners)
- Fully enclosed, more contained water
- Usually involves a tray and door
- Can feel more “boxed in” in smaller rooms
Find the right local pro for your project
 3rd Street Inn
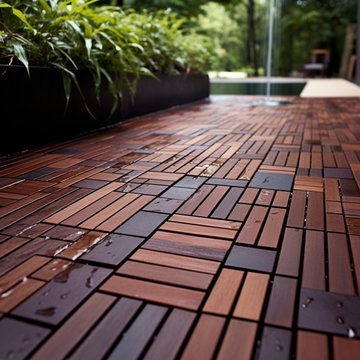
★ 3RD STREET INN® DECK TILES - 3rd Street Inn® Deck Tiles are made from 100% solid acacia hardwood. Acacia is known for its excellent resistance to rot and decay from outdoor elements including rain, sun, mold, mildew, and insects. Each 3rd Street Inn® Interlocking Patio Tile provides 12"x12" (1 Square Foot) of coverage and is available as a 6-pack (6 Square Feet), 10-pack (10 Square Feet), and 20-pack (20 Square Feet).
★ EASY INSTALLATION & NO HARDWARE NEEDED - 3RD STREET INN® interlocking deck flooring features snap-lock connectors for easy DIY installation without the use of tools or hardware. Install our interlocking deck cover tiles in your area by lining them up and then stepping on the seams until you hear an audible "click" to lock them in. All 3rd Street Inn® deck flooring options are made completely hardware free so that there aren't any components to rust and break down in the outdoor elements like other inferior tile patio decking
★ INDOOR AND OUTDOOR DECK FLOORING - 3rd Street Inn® Patio Tiles create a beautiful space both inside and outside. All that is needed is a solid surface and the deck flooring can be laid directly on top of it. Our composite deck tiles can be installed on top of concrete, wood, carpet, pavers, or any other solid surface. Great for decks, patios, balconies, around pools, saunas, showers, sun rooms, mud rooms, bedrooms, and more.
★ DURABLE BEAUTY - 3rd Street Inn® interlocking composite deck tiles are sanded and oiled for a beautiful, scratch resistant finish. All 3rd Street Inn® outdoor patio flooring is non-slip and great for high or low traffic areas inside or outside of the home. To increase the lifespan of your tile decking when used for outdoor applications, standard decking care is recommended. For best results, coat your decking with a UV-rated weatherproofing sealer twice a year and re-stain as needed. The tile decking can also be painted different colors in order to create the look that you want!
★ VERSATILE INSTALLATION OPTIONS- 3rd Street Inn® Interlocking Flooring Tiles not only look great in permanent installations on decks, patios, and around pools, they also offer a great temporary solution for installations in apartments and condos that can easily be removed when needed. For a custom fit, the interlocking patio tiles can be easily cut with a skill saw or jigsaw to accommodate areas of all shapes and sizes. Add 3rd Street Inn® Wooden Deck Flooring to your home and bring your space to life!
We recommend using a UV rated weatherproof sealant twice yearly. This sealant is a crucial step in the life of the decking tiles and can extend the life of the decking tiles, in some cases, pending the climate, by 1 to 2 years.
The life of a decking tile is heavily dependent on the climate of where they are located. Hot, humid climates, rainy climates, and cold, snowy climates can cause the decking tiles to deteriorate faster than using them in a climate controlled environment, like inside of a house or indoor venue.

 Atlantis Plumbing
When your pipes burst, a toilet overflows, or you notice suspicious dampness, you need more than a plumber—you need an emergency plumber in Atlanta
you can trust. Meet Atlantis Plumbing, a family-owned, trusted local company serving the greater Atlanta area with fast, friendly, and reliable plumbing services 24/7.
Decades of Experience Rooted in the Community
Established over 60 years ago and now with thousands of satisfied customers, Atlantis Plumbing has built a reputation on steady, dependable service. Their licensed professionals bring years of experience to every job, giving you peace of mind when you're dealing with urgent, unexpected plumbing disasters.
24/7 Availability When You Need It Most
Emergencies don't wait for business hours—and neither does Atlantis. With around-the-clock service, including live operators ready to take your call, they ensure help is just a phone call away. Whether it’s the middle of the night or a busy weekend, Atlantis is on call and on site fast.
Upfront Pricing and Honest Communication
A plumbing emergency shouldn't add financial stress. Atlantis offers transparent, upfront pricing so you're never blindsided. Before any work begins, they'll provide a clear estimate—no hidden fees, no surprises.
Speed Meets Expertise
Emergencies demand swift action—but not at the cost of quality. Atlantis strikes the perfect balance: rapid response paired with the skilled, licensed professionals who understand the complexity of modern plumbing systems.
Fully Equipped to Handle Any Crisis
From burst water lines to sewer backups and leaking water heaters, Atlantis’s team carries the tools and know-how to address your emergency promptly:
• Water leaks: Quick diagnosis and repair, including high water bill analysis.
• Clogged drains and sewer issues: Advanced solutions ranging from snaking to hydro-jetting or camera inspection.
• Sewer repair & replacement: Trenchless methods available to minimize disruption.
• Water heaters: Repair or replacement—gas, electric, or tankless.
• Polybutylene pipes: Experts in identifying and replacing this outdated material.
• Gas leaks: Safe, professional response (after gas company clearance).
Trusted Service with a Personal Touch
Emergencies are stressful. Atlantis eases the burden with professional, courteous technicians who get the job done with respect and care for your home. Their approach is old-fashioned in the best way—friendly, honest, and dedicated to customer satisfaction.
Multiple local voices have recommended them as the one plumber they’d always call. It's that level of trust that assures homeowners and businesses alike in times of crisis.
Comprehensive Coverage Throughout Metro Atlanta
Whether you're in Atlanta proper or surrounding areas—like Marietta, Smyrna, Roswell, or Lawrenceville—Atlantis covers it. Their reach spans Fulton, Cobb, Gwinnett, Dekalb, Cherokee, and more, ensuring emergency plumbing help isn't far when you need it most.
Value Beyond the Emergency
Atlantis doesn’t just put out fires—they help prevent them. With services like free high water bill analysis and long-term maintenance options, they add value that stretches well beyond the immediate fix.
They offer senior and military discounts, plus financing with approved credit—helping ease the financial burden of unavoidable plumbing repairs.
Hiring an Emergency Plumber: Why Atlantis Stands Out
1. 24/7 live support—get help when it counts.
2. Licensed, experienced plumbers—quality you can rely on.
3. Transparent pricing—know what you're paying.
4. Quick, efficient responses—fast relief without sacrificing standards.
5. Wide range of services—from leaks to sewers to water heaters.
6. Easy scheduling and flexible payment options—designed for your convenience.
Sample Emergency Scenarios & How Atlantis Helps
Your Basement Is Flooding at 2 AM
A frozen pipe has burst, sending water everywhere. You call Atlantis. Their team answers immediately, dispatches licensed plumbers within the hour, stops the leak, assesses the damage, and begins cleanup and pipe repair—all before breakfast.
Sewer Backup During Dinner Party
Your main sewer line backs up, and your guests are greeting more than your cooking. Atlantis arrives pronto, uses a camera inspection to pinpoint the blockage, resolves it with hydro-jetting or replacement, and gets everything draining again—without using your yard as a trench.
Unexplained Spike in Your Water Bill
You notice a huge spike in your bill—but no visible leak. Atlantis sends a tech for a free high water bill analysis, finds a small underground leak, and repairs it promptly—saving you money on unnecessary wastage.
Water Heater Fails on a Winter Morning
No hot water on a chilly morning? Atlantis arrives, diagnoses the heater issue, and either repairs it or replaces it with a similarly warranted unit—serving gas, electric, or tankless systems with equal confidence.
Outdated Polybutylene Pipes Start Failing
You suspect your home has older polybutylene piping prone to leaks. Atlantis offers specialized inspection and replacement options, bringing your plumbing system back up to modern safety and reliability standards.
Final Thought
In crisis situations, you don’t want to waste time or money. Atlantis Plumbing delivers fast, knowledgeable, and compassionate emergency plumbing services across Atlanta. With fair pricing, skilled professionals, and full-service capabilities—from leak detection to sewer repair to water heater replacement—you’re not just hiring a plumber. You’re hiring peace of mind.
When plumbing emergencies strike, remember: Atlantis Plumbing is standing by, 24/7, ready to restore order to your home or business.
 Dixie Belle Paint Company
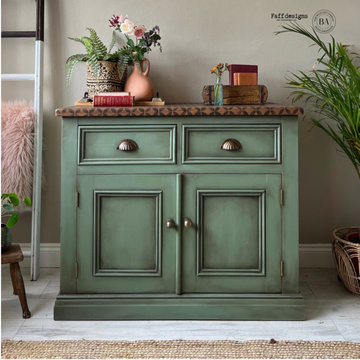
Materials Needed:
Side Console
Dixie Belle White Lightning Cleaner
Dixie Belle Weeping Willow Chalk Paint
Dixie Belle Best Dang Wax (Clear)
Dixie Belle Chocolate Chalk Mineral Paint
Dixie Belle Retro Lattice Stencil
Dixie Belle Coffee Bean Chalk Mineral Paint
Dixie Belle Synthetic Paintbrush
Clean, lint-free cloths
Before You Begin:
Ensure that your side console is clean and free from any dust, dirt, or grease. If necessary, sand the surface lightly to create a smooth painting surface.
Step 1: Clean with White Lightning
Use Dixie Belle White Lightning Cleaner to thoroughly clean the side console. This will remove any lingering residues and prepare the surface for painting. Follow the instructions on the cleaner, and make sure the surface is completely dry before proceeding.
Step 2: Paint with Weeping Willow
Stir the Weeping Willow Chalk Paint well before use. Apply an even coat of Weeping Willow paint to the entire side console using a paintbrush or foam roller. Allow the first coat to dry completely before applying a second coat if needed. The chalk paint dries relatively quickly, but follow the recommended drying time on the product.
Step 3: Apply Best Dang Wax with Chocolate Chalk Paint
After the Weeping Willow paint has dried, use a clean cloth or brush to apply a layer of Best Dang Wax (Clear) over the painted surface. For added depth and dimension, mix a small amount of Chocolate Chalk Mineral Paint into the wax. Apply the wax mixture evenly, focusing on details and edges. Allow the wax to dry and buff it to a desired sheen using a clean, lint-free cloth.
Step 4: Stencil the Top with Retro Lattice
Secure the Retro Lattice Stencil to the top of the side console using painter's tape to prevent it from moving during the stenciling process. Using a brush or foam roller, apply Coffee Bean Chalk Mineral Paint over the stencil, ensuring even coverage. Carefully remove the stencil while the paint is still wet to reveal the pattern. Allow the painted design to dry completely.
Step 5: Finishing Touches
Inspect the entire side console for any touch-ups or additional detailing. If needed, apply extra coats of paint or wax to achieve the desired finish. Once satisfied with the results, allow the piece to cure fully according to the paint manufacturer's recommendations.
Step 6: Enjoy Your Upcycled Side Console
Place your revamped side console in its designated space and revel in the transformation. The combination of Weeping Willow, Best Dang Wax, and the Retro Lattice stencil has turned a simple side console into a unique and visually appealing piece of upcycled furniture, adding charm and character to your living space.
 Talon Construction Inc.
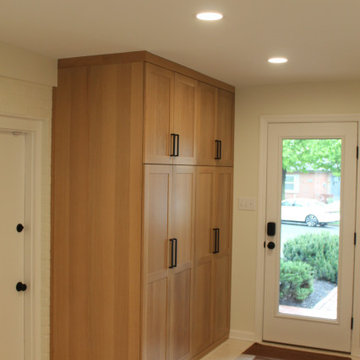
To find a Frederick kitchen contractor with a great reputation, follow these steps:
Start by asking friends, family members, neighbors, or colleagues who have recently had their kitchens remodeled. Personal recommendations are valuable as they come from people you trust.
Look for online reviews on websites like Google, Houzz, or Yelp. These platforms often feature customer feedback and ratings for local contractors, providing insight into their reputation and the quality of their work.
Check the websites of local kitchen contractors in Frederic. A reputable contractor typically showcases their previous projects, customer testimonials, and certifications on their website.
Ensure that the contractor is licensed, insured, and bonded. A valid license and insurance coverage indicate professionalism and a commitment to their work.
Look for contractors who are members of professional organizations, such as the National Kitchen and Bath Association (NKBA) or the National Association of the Remodeling Industry (NARI). Membership in these organizations often signifies a dedication to industry standards and best practices.
Ask for References. Don't hesitate to ask potential contractors for references of past clients. Contact these references and ask about their experience working with the contractor, the quality of work, and overall satisfaction.
Remember that a great reputation is built on a history of satisfied customers and quality workmanship. Take your time to research and find the best kitchen contractor for your needs.
 Nor'east chimney and vent
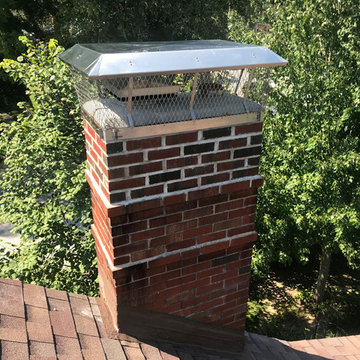
Is your chimney capped? Here at Nor'east, we recommend that every chimney has its own full coverage cap in order to protect it from rain, snow, and leaves that could find their way down the flues.
 3rd Street Inn
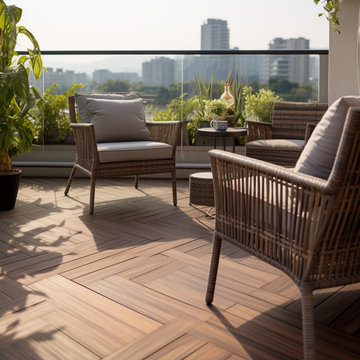
★ 3RD STREET INN® DECK TILES - 3rd Street Inn® Deck Tiles are made from 100% solid acacia hardwood. Acacia is known for its excellent resistance to rot and decay from outdoor elements including rain, sun, mold, mildew, and insects. Each 3rd Street Inn® Interlocking Patio Tile provides 12"x12" (1 Square Foot) of coverage and is available as a 6-pack (6 Square Feet), 10-pack (10 Square Feet), and 20-pack (20 Square Feet).
★ EASY INSTALLATION & NO HARDWARE NEEDED - 3RD STREET INN® interlocking deck flooring features snap-lock connectors for easy DIY installation without the use of tools or hardware. Install our interlocking deck cover tiles in your area by lining them up and then stepping on the seams until you hear an audible "click" to lock them in. All 3rd Street Inn® deck flooring options are made completely hardware free so that there aren't any components to rust and break down in the outdoor elements like other inferior tile patio decking
★ INDOOR AND OUTDOOR DECK FLOORING - 3rd Street Inn® Patio Tiles create a beautiful space both inside and outside. All that is needed is a solid surface and the deck flooring can be laid directly on top of it. Our composite deck tiles can be installed on top of concrete, wood, carpet, pavers, or any other solid surface. Great for decks, patios, balconies, around pools, saunas, showers, sun rooms, mud rooms, bedrooms, and more.
★ DURABLE BEAUTY - 3rd Street Inn® interlocking composite deck tiles are sanded and oiled for a beautiful, scratch resistant finish. All 3rd Street Inn® outdoor patio flooring is non-slip and great for high or low traffic areas inside or outside of the home. To increase the lifespan of your tile decking when used for outdoor applications, standard decking care is recommended. For best results, coat your decking with a UV-rated weatherproofing sealer twice a year and re-stain as needed. The tile decking can also be painted different colors in order to create the look that you want!
★ VERSATILE INSTALLATION OPTIONS- 3rd Street Inn® Interlocking Flooring Tiles not only look great in permanent installations on decks, patios, and around pools, they also offer a great temporary solution for installations in apartments and condos that can easily be removed when needed. For a custom fit, the interlocking patio tiles can be easily cut with a skill saw or jigsaw to accommodate areas of all shapes and sizes. Add 3rd Street Inn® Wooden Deck Flooring to your home and bring your space to life!
We recommend using a UV rated weatherproof sealant twice yearly. This sealant is a crucial step in the life of the decking tiles and can extend the life of the decking tiles, in some cases, pending the climate, by 1 to 2 years.
The life of a decking tile is heavily dependent on the climate of where they are located. Hot, humid climates, rainy climates, and cold, snowy climates can cause the decking tiles to deteriorate faster than using them in a climate controlled environment, like inside of a house or indoor venue.
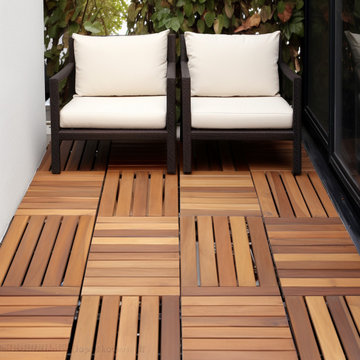 3rd Street Inn
★ 3RD STREET INN® DECK TILES - 3rd Street Inn® Deck Tiles are made from 100% solid acacia hardwood. Acacia is known for its excellent resistance to rot and decay from outdoor elements including rain, sun, mold, mildew, and insects. Each 3rd Street Inn® Interlocking Patio Tile provides 12"x12" (1 Square Foot) of coverage and is available as a 6-pack (6 Square Feet), 10-pack (10 Square Feet), and 20-pack (20 Square Feet).
★ EASY INSTALLATION & NO HARDWARE NEEDED - 3RD STREET INN® interlocking deck flooring features snap-lock connectors for easy DIY installation without the use of tools or hardware. Install our interlocking deck cover tiles in your area by lining them up and then stepping on the seams until you hear an audible "click" to lock them in. All 3rd Street Inn® deck flooring options are made completely hardware free so that there aren't any components to rust and break down in the outdoor elements like other inferior tile patio decking
★ INDOOR AND OUTDOOR DECK FLOORING - 3rd Street Inn® Patio Tiles create a beautiful space both inside and outside. All that is needed is a solid surface and the deck flooring can be laid directly on top of it. Our composite deck tiles can be installed on top of concrete, wood, carpet, pavers, or any other solid surface. Great for decks, patios, balconies, around pools, saunas, showers, sun rooms, mud rooms, bedrooms, and more.
★ DURABLE BEAUTY - 3rd Street Inn® interlocking composite deck tiles are sanded and oiled for a beautiful, scratch resistant finish. All 3rd Street Inn® outdoor patio flooring is non-slip and great for high or low traffic areas inside or outside of the home. To increase the lifespan of your tile decking when used for outdoor applications, standard decking care is recommended. For best results, coat your decking with a UV-rated weatherproofing sealer twice a year and re-stain as needed. The tile decking can also be painted different colors in order to create the look that you want!
★ VERSATILE INSTALLATION OPTIONS- 3rd Street Inn® Interlocking Flooring Tiles not only look great in permanent installations on decks, patios, and around pools, they also offer a great temporary solution for installations in apartments and condos that can easily be removed when needed. For a custom fit, the interlocking patio tiles can be easily cut with a skill saw or jigsaw to accommodate areas of all shapes and sizes. Add 3rd Street Inn® Wooden Deck Flooring to your home and bring your space to life!
We recommend using a UV rated weatherproof sealant twice yearly. This sealant is a crucial step in the life of the decking tiles and can extend the life of the decking tiles, in some cases, pending the climate, by 1 to 2 years.
The life of a decking tile is heavily dependent on the climate of where they are located. Hot, humid climates, rainy climates, and cold, snowy climates can cause the decking tiles to deteriorate faster than using them in a climate controlled environment, like inside of a house or indoor venue.
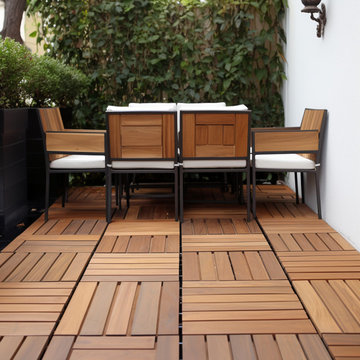 3rd Street Inn
★ 3RD STREET INN® DECK TILES - 3rd Street Inn® Deck Tiles are made from 100% solid acacia hardwood. Acacia is known for its excellent resistance to rot and decay from outdoor elements including rain, sun, mold, mildew, and insects. Each 3rd Street Inn® Interlocking Patio Tile provides 12"x12" (1 Square Foot) of coverage and is available as a 6-pack (6 Square Feet), 10-pack (10 Square Feet), and 20-pack (20 Square Feet).
★ EASY INSTALLATION & NO HARDWARE NEEDED - 3RD STREET INN® interlocking deck flooring features snap-lock connectors for easy DIY installation without the use of tools or hardware. Install our interlocking deck cover tiles in your area by lining them up and then stepping on the seams until you hear an audible "click" to lock them in. All 3rd Street Inn® deck flooring options are made completely hardware free so that there aren't any components to rust and break down in the outdoor elements like other inferior tile patio decking
★ INDOOR AND OUTDOOR DECK FLOORING - 3rd Street Inn® Patio Tiles create a beautiful space both inside and outside. All that is needed is a solid surface and the deck flooring can be laid directly on top of it. Our composite deck tiles can be installed on top of concrete, wood, carpet, pavers, or any other solid surface. Great for decks, patios, balconies, around pools, saunas, showers, sun rooms, mud rooms, bedrooms, and more.
★ DURABLE BEAUTY - 3rd Street Inn® interlocking composite deck tiles are sanded and oiled for a beautiful, scratch resistant finish. All 3rd Street Inn® outdoor patio flooring is non-slip and great for high or low traffic areas inside or outside of the home. To increase the lifespan of your tile decking when used for outdoor applications, standard decking care is recommended. For best results, coat your decking with a UV-rated weatherproofing sealer twice a year and re-stain as needed. The tile decking can also be painted different colors in order to create the look that you want!
★ VERSATILE INSTALLATION OPTIONS- 3rd Street Inn® Interlocking Flooring Tiles not only look great in permanent installations on decks, patios, and around pools, they also offer a great temporary solution for installations in apartments and condos that can easily be removed when needed. For a custom fit, the interlocking patio tiles can be easily cut with a skill saw or jigsaw to accommodate areas of all shapes and sizes. Add 3rd Street Inn® Wooden Deck Flooring to your home and bring your space to life!
We recommend using a UV rated weatherproof sealant twice yearly. This sealant is a crucial step in the life of the decking tiles and can extend the life of the decking tiles, in some cases, pending the climate, by 1 to 2 years.
The life of a decking tile is heavily dependent on the climate of where they are located. Hot, humid climates, rainy climates, and cold, snowy climates can cause the decking tiles to deteriorate faster than using them in a climate controlled environment, like inside of a house or indoor venue.
 Talon Construction Inc.
To find a Frederick kitchen contractor with a great reputation, follow these steps:
Start by asking friends, family members, neighbors, or colleagues who have recently had their kitchens remodeled. Personal recommendations are valuable as they come from people you trust.
Look for online reviews on websites like Google, Houzz, or Yelp. These platforms often feature customer feedback and ratings for local contractors, providing insight into their reputation and the quality of their work.
Check the websites of local kitchen contractors in Frederic. A reputable contractor typically showcases their previous projects, customer testimonials, and certifications on their website.
Ensure that the contractor is licensed, insured, and bonded. A valid license and insurance coverage indicate professionalism and a commitment to their work.
Look for contractors who are members of professional organizations, such as the National Kitchen and Bath Association (NKBA) or the National Association of the Remodeling Industry (NARI). Membership in these organizations often signifies a dedication to industry standards and best practices.
Ask for References. Don't hesitate to ask potential contractors for references of past clients. Contact these references and ask about their experience working with the contractor, the quality of work, and overall satisfaction.
Remember that a great reputation is built on a history of satisfied customers and quality workmanship. Take your time to research and find the best kitchen contractor for your needs.
 Windy City Painters
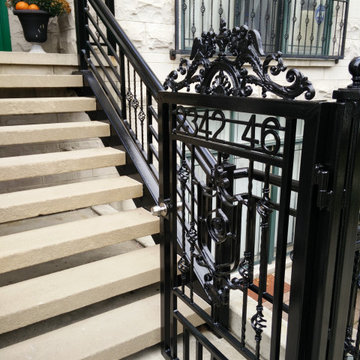
Ever notice how your iron fence looks more rust than paint after another brutal Chicago winter? That is usually the moment homeowners start searching for a painting contractor who actually understands metal - not just someone who will brush a coat of black paint over active corrosion and call it done. At Windy City Painters, iron fence restoration is one of our most requested services on the North Side and Near West Side, and for good reason. These fences are old, they are beautiful, and they deserve a proper finish system.
PROJECT OVERVIEW
This project involved a full ornamental iron fence on a North Side greystone property. The fence was original to the building - likely installed in the 1910s or 1920s - and had gone through multiple paint cycles without any rust conversion work. By the time Windy City Painters arrived, the horizontal rails showed active pitting, the vertical spindles had surface rust under lifting paint, and two corner posts had minor joint separation. The homeowner wanted the fence restored to a sharp satin black finish that would hold through multiple Chicago winters.
MATERIALS AND PRODUCTS
Ospho Rust Converter - phosphoric acid formula that chemically neutralizes iron oxide and converts it to iron phosphate, a stable paintable surface. Used on all pitted and actively corroded areas before primer application.
Rust-Oleum DTM Rust-Inhibitive Primer - direct-to-metal primer that bonds to both converted rust zones and bare metal, blocking moisture intrusion at the substrate level.
Sherwin-Williams DTM Acrylic Topcoat - flexible, moisture-resistant finish formulated to expand and contract with metal through temperature cycling. Applied in two finish coats in satin black.
For cases with deeper rust penetration, Corroseal Water-Based Rust Converter and Metal Primer is an alternative that combines conversion and priming in a single product, useful on complex ornamental profiles where two-product systems are harder to apply.
THE PROCESS
Step 1 - Mechanical Preparation. Windy City Painters wire-wheels all loose rust, flaking paint, and scale using angle grinders fitted with wire wheel attachments. On heavily pitted sections, needle gun descaling is used to reach rust in tight ornamental grooves. This step is non-negotiable. No coating bonds reliably to iron oxide, and skipping this step is the single most common reason iron fence paint fails within a year.
Step 2 - Rust Conversion. Ospho is brushed into all pitted and bare metal areas and allowed to fully react. The surface shifts from orange to a grayish-black iron phosphate layer. This stable base accepts primer without the risk of rust migrating upward through the paint film over time.
Step 3 - Primer Coat. Rust-Oleum DTM rust-inhibitive primer is applied full coverage over the entire fence surface, including areas that appeared clean but showed minor surface oxidation. DTM primer acts as a moisture barrier and mechanical adhesion layer for the finish coats.
Step 4 - Finish Coats. Two coats of Sherwin-Williams DTM acrylic topcoat are applied in satin black, with adequate dry time between coats. The DTM formula remains flexible after cure, allowing the iron to expand and contract through Chicago temperature swings without the topcoat cracking or peeling at joints.
CHICAGO-SPECIFIC CHALLENGES
Ornamental iron on Chicago greystones, two-flats, and Victorian brownstones was almost never hot-dip galvanized. It was painted from installation and has relied on continuous paint maintenance ever since. Chicago winters add specific stress: freeze-thaw cycles force water into any paint film crack, expanding it; road salt spray elevates corrosive chloride exposure; and humidity during spring thaw keeps metal surfaces wet for extended periods. This combination accelerates rust spread beneath paint films that appear intact on the surface.
WHAT TO EXPECT LONG-TERM
A properly prepped and primed iron fence finished with a DTM topcoat system should hold 5-8 years in Chicago conditions before any touch-up is warranted. Annual inspection of joints, welds, and areas near grade level will catch early moisture entry before it becomes a larger rust issue. Windy City Painters recommends scheduling touch-up earlier rather than waiting for full paint failure to protect the prep investment.
PRO TIPS
Tip 1 - Address joint separation before painting. If fence rails have separated at welds or mechanical joints, water will enter and rust will restart from inside the connection point regardless of the exterior coating. Flag any separated joints for welding before any paint system is applied.
Tip 2 - Never use latex house paint on iron fences. Standard exterior latex lacks the adhesion and flexibility for bare metal. Always use a product labeled DTM or specify a rust-inhibitive primer underneath any finish coat applied to iron.
Tip 3 - Paint in late spring or early fall. Iron fences exposed to full sun in peak summer heat can reach surface temperatures that cause solvent-based coatings to blister during application. Ideal application conditions are 50-85 degrees Fahrenheit with low humidity and no direct intense sun on the metal surface.
Learn more about iron fence painting cost in Chicago and schedule your free estimate at windypainters.com
FAQ
Q: What does iron fence painting cost in Chicago?
A: Windy City Painters typically prices residential iron fence painting at $8-$18 per linear foot. Variables include rust severity, spindle density, ornamental profile complexity, and whether rust conversion products like Ospho or Corroseal are required before priming.
Q: Can you paint over rust without grinding it off first?
A: No. Windy City Painters always performs mechanical prep before any coating. Wire wheel grinding removes loose scale and flaking paint. Rust converters handle residual oxidation chemically. Skipping this step means the new paint film will delaminate within one season.
Q: How do I know if my iron fence needs a welder before painting?
A: Windy City Painters inspects all joints and rail connections during the estimate. Rail separation, cracked welds, or sections that flex when pressed indicate structural issues that should be welded before any paint system is applied to avoid reopening at stress points.
Q: What is the difference between Ospho and Corroseal?
A: Both are rust converters. Ospho is a phosphoric acid solution applied as a separate step before priming, giving maximum control over conversion and primer selection. Corroseal combines conversion and primer in one product, which works well on complex ornamental profiles where a two-step system is harder to apply evenly.
Q: How long does the paint last on an iron fence in Chicago?
A: With full mechanical prep, rust conversion, DTM primer, and two DTM topcoats, Windy City Painters clients typically see 5-8 years of performance before touch-up is needed, even through Chicago freeze-thaw cycling and road salt exposure.
Q: Do you paint iron fences that are still structurally sound but heavily rusted on the surface?
A: Yes. Surface rust, even heavy pitting, does not necessarily indicate structural failure. Windy City Painters evaluates each fence individually. As long as the metal is sound under the rust, proper mechanical prep and a rust converter restore the surface to a paintable condition.
 LEDVANS
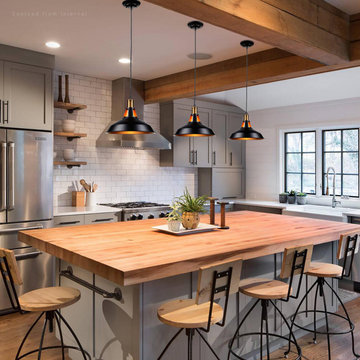
If there are no additional light sources, the pendant light can be hung slightly higher, with the recommended installation height of about 3.28 feet from the table surface. This allows for a larger area of light coverage and provides the opportunity to place taller plants beneath the pendant light to fill the space, decorate the dining table, and create a focal point in the room together with the pendant light.
 Home Improvements
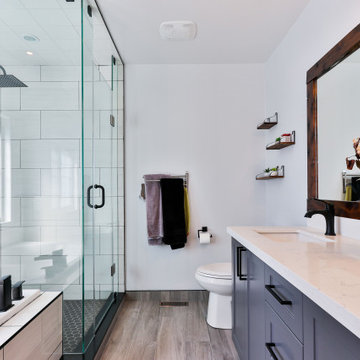
Embarking on a bathroom remodeling project is an exciting endeavor that can greatly enhance the functionality, aesthetics, and value of your home. However, finding a reliable and skilled contractor in a bustling city like Los Angeles can be a daunting task. To simplify the process and ensure a successful bathroom renovation, we have compiled a comprehensive guide on how to find a reputable bathroom remodeling contractor in Los Angeles, California.
Start with Online Research:
The first step in your quest for a reliable contractor is to conduct thorough online research. Utilize search engines like Google to find bathroom remodeling contractors in Los Angeles. Be sure to include specific keywords such as "bathroom remodeling," "contractor," and "Los Angeles" to refine your search results.
Check Online Directories and Review Platforms:
Explore online directories and review platforms like Yelp, Angie's List, and Houzz to find a curated list of bathroom remodeling contractors in Los Angeles. These platforms often provide detailed information about contractors, including customer reviews, ratings, project photos, and contact details. Assess the overall rating and read through multiple reviews to gauge the contractor's reputation and reliability.
Seek Recommendations:
Ask friends, family, neighbors, and colleagues who have recently undergone a bathroom remodeling project in Los Angeles for recommendations. Personal referrals can provide valuable insights and firsthand experiences that online research may not uncover. Inquire about the contractor's professionalism, craftsmanship, adherence to timelines, and overall satisfaction with the project.
Verify Credentials and Licensing:
Once you have shortlisted potential contractors, it is crucial to verify their credentials and licensing. Check if they are licensed by the Contractors State License Board (CSLB) in California. A valid license ensures that the contractor meets the state's requirements and regulations. Additionally, inquire about their insurance coverage to protect against any potential liabilities during the remodeling process.
Evaluate Experience and Expertise:
Assess the experience and expertise of the contractors on your list. Look for contractors who specialize in bathroom remodeling and have a proven track record of successful projects. Review their portfolios or ask for references to see examples of their previous work. A skilled contractor should be able to handle a variety of bathroom designs and styles, and provide creative solutions to meet your specific needs.
Schedule In-Person Consultations:
Arrange in-person consultations with the shortlisted contractors. Use this opportunity to discuss your remodeling goals, budget, timeline, and any specific requirements you may have. A reputable contractor will listen attentively, provide insights, and offer suggestions based on their expertise. Pay attention to their communication style, professionalism, and responsiveness, as these qualities are crucial for a smooth working relationship.
Request Detailed Quotes and Contracts:
Ask the contractors for detailed written quotes that outline the project's scope, materials, labor costs, and any additional expenses. A comprehensive quote will help you compare the estimates provided by different contractors effectively. Once you have selected a contractor, ensure that you have a detailed contract in place that covers all aspects of the project, including timelines, payment schedules, warranties, and dispute resolution processes.
Seek Permits and Building Code Compliance:
Bathroom remodeling projects often require permits and adherence to building codes. A reputable contractor will be familiar with the local building regulations in Los Angeles and should handle the permit application process on your behalf. Verify that the contractor will obtain the necessary permits and ensure that all work is compliant with local codes and regulations.
Conclusion:
Finding a bathroom remodeling contractor in Los Angeles, California, may seem overwhelming, but by following these guidelines, you can streamline the process and select a contractor who meets your expectations. Conduct thorough online research, seek recommendations, verify credentials, evaluate experience, and schedule in-person consultations to make an informed decision.

 Zepboo
This is a case study of a client living in Barcelona, Spain. The client's residence is a 150-square-meter home. The client's preferred style is a mix of modern and rustic country, predominantly featuring white, black, and wooden tones, complemented by colorful decorations. The client's objective was to find a pendant light for the dining area that would align with the bohemian and country farmhouse style of her dining room. With a dining table and chairs crafted from natural wood, she wanted the lighting to perfectly complement the overall ambiance of the dining space.
We selected this round, wicker pendant light for her, as it harmoniously matched the desired style. With a lighting coverage of up to 15 square meters, and considering the generous size of the client's dining area, we recommended that she purchase two pendant lights to ensure ample illumination.
Upon receiving the products, the client expressed her satisfaction with how well the pendant lights aligned with her requirements. We are delighted to share this case study with everyone, hoping to provide inspiration and ideas for their own home renovations.
 Zepboo
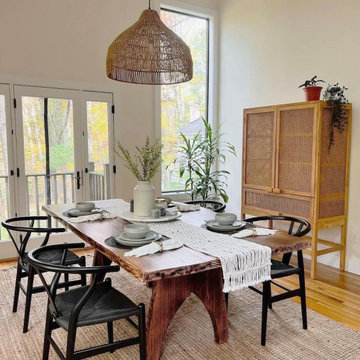
This is a case study of a client living in Barcelona, Spain. The client's residence is a 150-square-meter home. The client's preferred style is a mix of modern and rustic country, predominantly featuring white, black, and wooden tones, complemented by colorful decorations. The client's objective was to find a pendant light for the dining area that would align with the bohemian and country farmhouse style of her dining room. With a dining table and chairs crafted from natural wood, she wanted the lighting to perfectly complement the overall ambiance of the dining space.
We selected this round, wicker pendant light for her, as it harmoniously matched the desired style. With a lighting coverage of up to 15 square meters, and considering the generous size of the client's dining area, we recommended that she purchase two pendant lights to ensure ample illumination.
Upon receiving the products, the client expressed her satisfaction with how well the pendant lights aligned with her requirements. We are delighted to share this case study with everyone, hoping to provide inspiration and ideas for their own home renovations.
 Zepboo
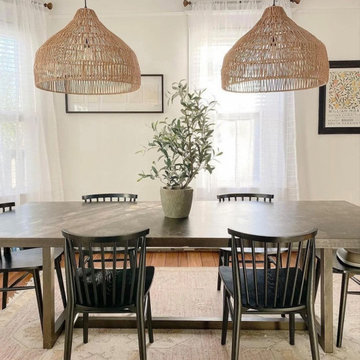
This is a case study of a client living in Barcelona, Spain. The client's residence is a 150-square-meter home. The client's preferred style is a mix of modern and rustic country, predominantly featuring white, black, and wooden tones, complemented by colorful decorations. The client's objective was to find a pendant light for the dining area that would align with the bohemian and country farmhouse style of her dining room. With a dining table and chairs crafted from natural wood, she wanted the lighting to perfectly complement the overall ambiance of the dining space.
We selected this round, wicker pendant light for her, as it harmoniously matched the desired style. With a lighting coverage of up to 15 square meters, and considering the generous size of the client's dining area, we recommended that she purchase two pendant lights to ensure ample illumination.
Upon receiving the products, the client expressed her satisfaction with how well the pendant lights aligned with her requirements. We are delighted to share this case study with everyone, hoping to provide inspiration and ideas for their own home renovations.
 Zepboo
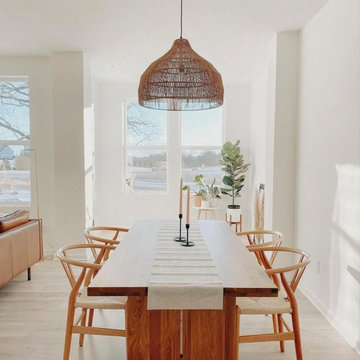
This is a case study of a client living in Barcelona, Spain. The client's residence is a 150-square-meter home. The client's preferred style is a mix of modern and rustic country, predominantly featuring white, black, and wooden tones, complemented by colorful decorations. The client's objective was to find a pendant light for the dining area that would align with the bohemian and country farmhouse style of her dining room. With a dining table and chairs crafted from natural wood, she wanted the lighting to perfectly complement the overall ambiance of the dining space.
We selected this round, wicker pendant light for her, as it harmoniously matched the desired style. With a lighting coverage of up to 15 square meters, and considering the generous size of the client's dining area, we recommended that she purchase two pendant lights to ensure ample illumination.
Upon receiving the products, the client expressed her satisfaction with how well the pendant lights aligned with her requirements. We are delighted to share this case study with everyone, hoping to provide inspiration and ideas for their own home renovations.
 Zepboo
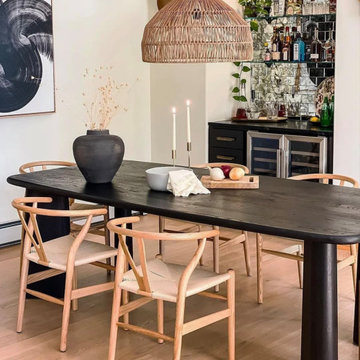
This is a case study of a client living in Barcelona, Spain. The client's residence is a 150-square-meter home. The client's preferred style is a mix of modern and rustic country, predominantly featuring white, black, and wooden tones, complemented by colorful decorations. The client's objective was to find a pendant light for the dining area that would align with the bohemian and country farmhouse style of her dining room. With a dining table and chairs crafted from natural wood, she wanted the lighting to perfectly complement the overall ambiance of the dining space.
We selected this round, wicker pendant light for her, as it harmoniously matched the desired style. With a lighting coverage of up to 15 square meters, and considering the generous size of the client's dining area, we recommended that she purchase two pendant lights to ensure ample illumination.
Upon receiving the products, the client expressed her satisfaction with how well the pendant lights aligned with her requirements. We are delighted to share this case study with everyone, hoping to provide inspiration and ideas for their own home renovations.
2