
Search results for "Dehumidifier" in Home Design Ideas
 HG Luxury Homes
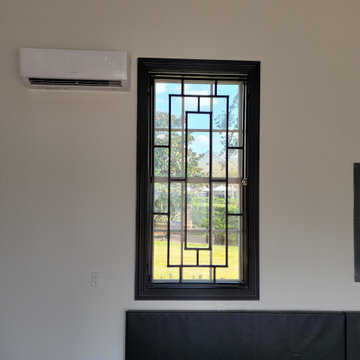
Garage Remodel to Basketball Court with lockers and Iron Window dressing.
Home gym - home gym idea in Houston
Home gym - home gym idea in Houston
 PerfectView Remodeling
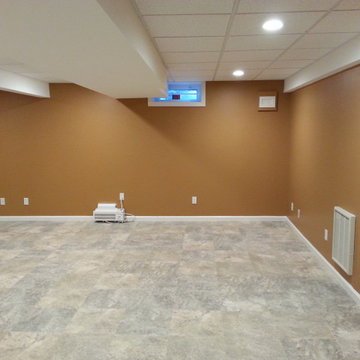
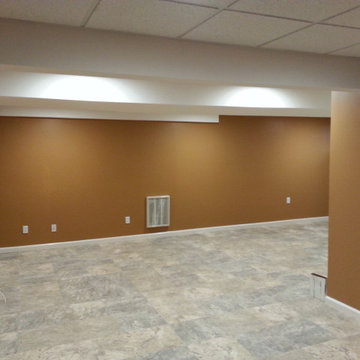
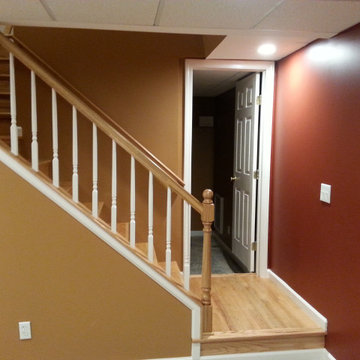
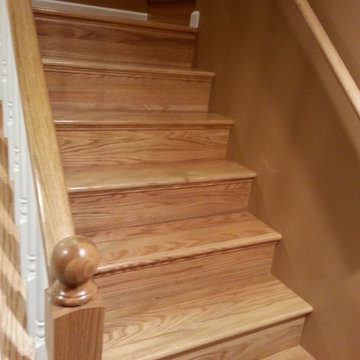
Finished basement with suspended acoustical ceiling, electrical, doors, molding & vinyl flooring. Al mechanicals & structural beams have been rerouted & concealed. Finished staircase to basement with hardwood treads, hardwood floor landing, handrails & banister.
 PerfectView Remodeling
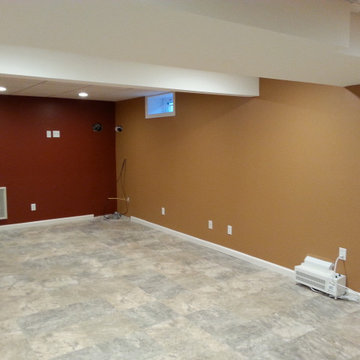
Finished basement with suspended acoustical ceiling, electrical, doors, molding & vinyl flooring. Al mechanicals & structural beams have been rerouted & concealed. Finished staircase to basement with hardwood treads, hardwood floor landing, handrails & banister.
Find the right local pro for your project

 Lindy Architect
Open concept Kitchen Dining and Living room
Den on the Ground floor
Large kitchen with eat in area
Door off the garage to a corridor leading to a pantry , laundry room and powder room
6500 sf home including the basement
Highly Insulated House
"Passive House" design
ICF construction for great air tightness and continuous insulation from footing to roof.
Triple glazed windows from Germany
R36 Foam insulation in basement slab
R50 spray foam under roof deck, creating a heated space in the attic for AC mechanical.
Air source heat pump – hot water from cooling and dehumidifying the space.
Extra wide and tall 2-car garage with loft storage area and door to the house for easy unloading.
Metal roof with airspace for a cool roof.
Large basement with Tall 9 foot Ceilings, heated floors.
Ceiling Heights: 10 foot tall ground floor; 9 foot tall second floor. Renderings by Cadaxx
 Diane Whalen Architect
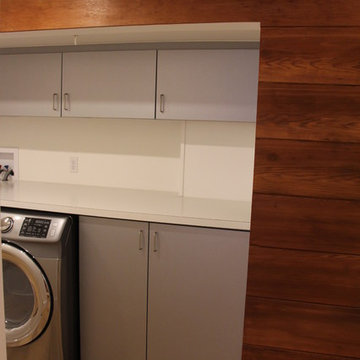
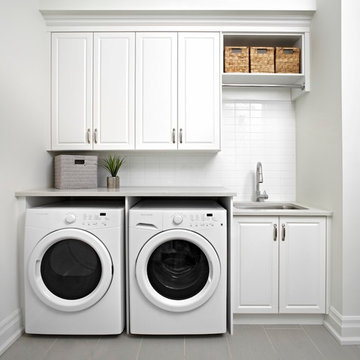
The laundry room cabinet doors conceal the laundry chute and dehumidifier.
Example of a trendy laundry room design in Ottawa
Example of a trendy laundry room design in Ottawa
 Tile Doctor Ltd
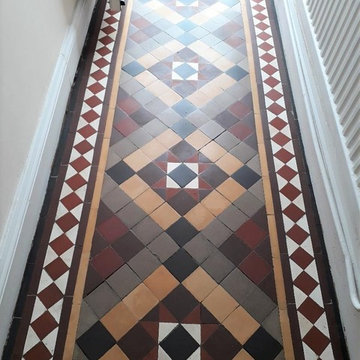
As is often the case in years past and for whatever reason many homeowners covered their decorative Victorian hallway tiles in a variety of products from carpet to laminate flooring. These days the trend has reversed and quite rightly many homeowners now realise the value a tiled floor can bring to a property and look to us to have it restored.
Our client had purchased a property in Norfolk seaport of Kings Lynn and, on lifting the dirty old carpet and decaying underlay in the hallway, discovered a beautiful tiled entrance hall. It was obvious that a previous owner had decided to lay carpet over the tiles as an easy way of hiding the result of careless renovation and decorating which had resulted in a thick coating of plaster, paint, carpet tape glue and various other contaminants which had become firmly stuck to the surface. There were also two small rectangular black and brown tiles missing behind the front door which had been damaged during the removal of some old lead pipes.
This was clearly a job which would need somewhat more than a scrubbing brush and a bottle of Flash!
Our first job was to remove as much of the solid contaminants as possible by hand with floor scrapers and a steamer which softened the more stubborn lumps. We then applied Tile Doctor Remove & Go which is a powerful alkaline stripper to the whole area, left it to dwell on the surface for twenty minutes and then scrubbed it in using a rotary machine fitted with a black scrubbing pad. The resulting slurry was then power rinsed and extracted away using our Ninja machine which is a high-power industrial vacuum. Any remaining patches where the carpet tape had been stuck down were spot treated using Tile Doctor Nanotech HBU which made short work of the hardened glue.
The result was a clean floor, but the surface still felt slightly rough and pitted, a problem which we resolved using the rotary machine fitted with a 200-grit diamond burnishing pad followed by a 400-grit pad with a little 400 grit honing powder which left the surface smooth, silky and ready for the application of a sealer.
Finally, we acid washed the whole area using Tile Doctor Acid Gel, a slow release product which would neutralise any remaining chemicals, improve new sealer adhesion and inhibit the future production of any efflorescence salts. We had used a fair amount of water during the cleaning process, so we left the floor to dry off thoroughly overnight with assistance from our commercial dehumidifier.
On our return the following day, we discussed the sealer options with the client and recommended using microporous Tile Doctor Colour Grow which is an impregnating sealer that seeps into the pores of the stone protecting it from within. It will provide an excellent fluid resistant seal whilst enhancing the natural colours in the stone, additionally it’s fully breathable thereby enabling any moisture trapped under the floor to rise through the floor and evaporate. This is important on old floors like this where no damp-proof membrane was installed. The sealer was applied with a paint pad in tow coats and allowed to dry for an hour before buffing the floor with a hog’s hair pad to give a rich natural-look sheen finish.
The Victorian tiles responded well to the treatments which were completed in two consecutive days. My client was extremely pleased with the results and left the following comment:
“My floor was in poor condition after being buried under carpet as well as many, many years of paint and muck. I enjoyed the time they spent at my home and wouldn’t hesitate to use (or recommend) the Tile Doctor service in the future.”
Nick White
Norfolk Tile Doctor
 Tile Doctor Ltd
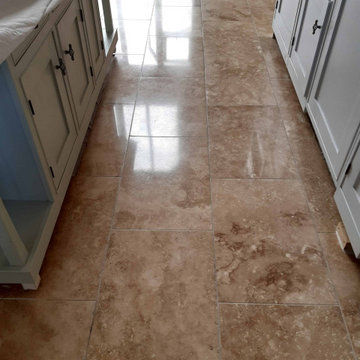
Located in Burgh Castle West of Great Yarmouth, this Travertine stone floor was a classic example of an incomplete installation. By incomplete I mean the tiler had done a fine job of laying and grouting the tiles but had left it at that and not sealed the stone. Natural stone like Travertine is porous and needs a sealer to stop dirt becoming ingrained in its pores, a sealer will also improve its appearance.
Without a sealer this floor now looked very dull, pale, rather damaged with pitting and heavily soiled with ingrained dirt. Pitting in stone like this is a natural feature of Travertine however it can be exacerbated with the use of acid cleaning products. This was a floor in urgent need of a face lift, and I was confident it could be transformed into a very beautiful floor.
I think it is true to say that most tilers will skilfully lay a floor for you but usually don’t have the knowledge, experience or equipment to finish the surface properly and when it comes to sealing many will recommend a product and suggest you take care of it yourself. Naturally if your find yourself in that position don’t insist the tiler does it, better to give us a call and have it done properly.
Our first job was to backfill the larger pits in the stone which as I mentioned are a natural feature of travertine material, but they can trap dirt and so its best if they are plugged with a suitably rigid filler. Also, if left alone the larger holes can quickly become larger as their edges crumble and break up leading to the entire tile becoming unstable. Replacing a tile in a floor like this is possible however its an extremely awkward job to do and it can be difficult to find an exact match for replacement.
Filling was done using a two-part, neutral cream-coloured polyester compound which gels in about fifteen minutes after addition of the catalyst. After this initial period, the excess product is trimmed off level with the surface of the tile before it sets harder than the stone itself in around sixty minutes. The fully cured compound can then be cut and machined as though it were part of the stone structure.
Our second job was to remove deep scratches caused by the unprotected feet of workmen’s ladders. This was done using Tile Doctor 50-grit and 100-grit diamond hand burnishing pads with a little water as a cutting medium. Shallower scratching present across the rest of the floor was removed using a Tile Doctor 200-grit soft milling pad driven by our Klindex 17″ rotary machine.
This abrasive action produces a fine slurry which was then rinsed with water and extracted using our 400psi Ninja machine in preparation for the next stage of the refinishing process. These machines were an expensive investment for our business however they are very robust and effective producing a good result that saves time.
Next task was to restore the polished appearance of the Travertine which was done using the application of a set of Tile Doctor burnishing pads. The process starts by applying a coarse 400-grit diamond pad, again fitted to the Klindex rotary machine. This cleans the tile and improves the matt finish left by the milling pad; again, the slurry was rinse-extracted before moving on to the next pad in the set. Next came the finer diamond polishing stages of 800 grit and 1500 grit, slurry being removed as before between the grades. By this time, all the scratches had been removed and the Travertine floor had visually pleasing even sheen across the whole surface. The last pad in the set is applied dry with a little water sprayed onto the tile so we left the area to dry out thoroughly overnight with the assistance of our large capacity dehumidifier.
Returning the following morning, we found that the floor had dried out perfectly and was ready to be vacuumed and spray burnished with the last pad in the set which is a 3000-grit very fine pad applied using a small amount of water sprayed from a trigger bottle resulting in a deep, rich shine across the floor surface.
Last step in the face lift was to seal the floor with a generous coat of Tile Doctor Ultra-Seal, a premium grade penetrating sealer recommended for use in Kitchens and food preparation areas. Having left the floor to soak up as much of the Tile Doctor Ultra-Seal as it could, the excess product was removed and the whole area allowed to dry completely with the assistance of our industrial air moving fan. Finally, the floor was spray buffed to a deep shine using a white maintenance pad.
The client was extremely pleased with our results and was amazed at the variation of colours within the stone which had never been visible previously.
Nick White
Norfolk Tile Doctor

 TOC design & construction inc.
Remediate excessive moisture
Although moisture can appear as condensation on the inside of basement walls and isn’t a difficult thing to resolve, serious water problems have their source outside the basement. Thus, inexpensive interior “fixes” such as sump pumps or dehumidifiers will mitigate seasonal dampness to a degree, but living spaces may still smell musty and be plagued by mold. Increasing sunlight and ventilation is always welcome, but to keep moisture from entering, you’ll need a solution that stops water before it gets through the basement walls.
 Tile Doctor Ltd
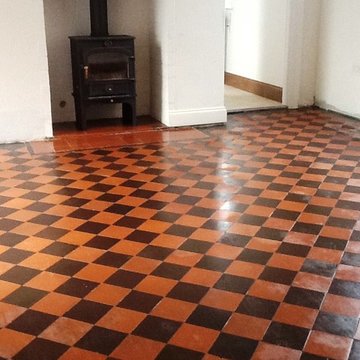
A customer called me out to take a look at restoring the Red and Black Victorian Quarry tiles floor they had discovered under linoleum In the kitchen of their house in the town of Rushden.
I carried out a patch test to see which products would have the best results and although most of the old sealants had worn of over time there was still glue from the lino and patches of sealer that would have to be dealt with. A quote was given and accepted and the work was booked in to the customer’s convenience.
After vacuuming and mopping the floor I decided my best course of action would be to spray Tile Doctor Remove and Go to 25% of the area, this was then scrubbed in by machine using a black stripping pad. This area was then rinsed off with an extraction machine and the process repeated over the rest of the floor. I then inspected the floor and noticed a few shiny patches where the sealant hadn’t been fully removed so I then tackled these stubborn areas by hand with a second application of Remove & Go. A final rinse to the whole floor was given to make sure no trace of cleaning product remained before sealing.
As much water as possible was removed using the extraction machine and a dehumidifier installed and left for seven days to assist the drying process.
On my return I confirmed the floor had dried thoroughly by taking took damp meter readings in different parts of the floor. All was well and so I proceeded to seal the tiles using multiple coats of Tile Doctor Seal and Go which matched the customers’ requirements of gloss finish.
As the pictures show there was a vast improvement in the floor and the customer was very pleased with the results. They were also given information on maintenance of this type of floor to keep it looking its best for years to come.
 Tile Doctor Ltd
Earlier this year I was invited over to a property in the village of Silfield near Wymondham in Norfolk to inspect a Limestone tiled floor. Now I don’t usually quote my clients, but this is how the owner of the property had described the floor in the enquiry I received from Tile Doctor.
“Grout Black, where tiles have divots, dirt is encased,
plus no shine to floor, sealant non-existent.”
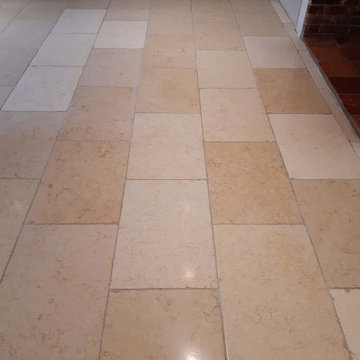
The problems listed were quite comprehensive and having had chance to survey the floor we found them to be quite accurate and really could not disagree with her comments! The Limestone tiles had been laid throughout the Kitchen diner and it was clear the sealer had worn off completely allowing dirt to become ingrained in the Limestone tiles and especially the grout which had turned black.
I understood from the owner that the grout lines should have been a pale cream colour rather than the black it was now, additionally the natural pitting in the Limestone was full of the same black contaminants. I ran a quick water test on the tiles to see if there was a seal present and it confirmed that if there had ever been one it was now completely compromised. The lack of sealer had allowed all liquid spills and dirt to soak straight into the tile making it dirty and exceedingly difficult to clean.
A large birthday celebration party had been planned and our client was desperate for the floor to be brought back to life beforehand. Although I couldn’t start immediately due to other commitments, it was able to return in time to get the floor clean for the party.
Our first job was to tackle the severe soiling trapped in the pits and grout lines. To do this a very strong dilution (2:1 ratio) of Tile Doctor Pro-Clean was applied to the floor and left to soak into the tile and grout for about 10 minutes. Then is was scrubbed into the tiles with help from a rotary buffer fitted with a soft/medium long-bristled nylon brush. The resulting slurry was then power rinsed with 60-degree hot water and extracted with our 400psi machine which jetted out all the black, oily contaminants from the grout and pits.
The floor was speed dried with the assistance of a large air mover. Once dry to the touch our attention was turned to filling the now exposed pitts in the Limestone tiles and two cracks with an appropriately coloured fast cure epoxy compound. Having allowed the filler time to reach full hardness, we ground down the excess material with 100 and 200 grit hand burnishing blocks in preparation for the next stage.
We find the best way to renovate the appearance of stone is to use a process called burnishing which hones the stone and beings up the polish. For this you need a set of 17-inch diamond encrusted burnishing pads. The pads fit the rotary buffer and are applied to the floor in sequence from 400, 800 and then 1500 grit using water to lubricate the process. The waster turns into a slurry as you work, and this is then rinsed off the floor with water after each pad and extracted using a wet vacuum. The floor was then left to dry thoroughly overnight with the assistance of our large capacity dehumidifier.
Returning the following day, we thoroughly vacuumed the floor to remove any remaining powder and grit left from the previous day’s wet work before spray burnishing the surface with a Tile Doctor 3000-grit diamond pad. This last pad really beings up the polished appearance of the Limestone and gave the tiles a deep and rich shine.
This last pad is applied without water and so leaves the floor dry and ready to for a new sealer to be applied. Our sealer of choice was Tile Doctor Ultra Seal, it’s a premium penetrating sealer that soaks into the pores of the stone protecting it from within. Ultra-Seal doesn’t alter the natural appearance of the stone giving it undetectable protection from staining. Having allowed the sealed floor to dry with the assistance of our air mover, the whole area was buffed using a white buffing pad and a small amount of finely sprayed water to remove any light smearing before vacuuming once again to finish.
My client was delighted with the result and left the following feedback for us:
“Totally renewed two flooring areas in our house to what looks like a recently laid floor. I have already had so many compliments without even telling people it had been professionally cleaned! Nick and Sue are always very easy to have about, inconspicuous and hard working. Absolutely delighted with the outcome and would recommend without hesitation. Thank you so much!”
For aftercare cleaning I recommended Tile Doctor Stone Soap, its designed for cleaning polished stone floors and will help build-up the patina. It’s a neutral pH product so won’t prematurely erode the sealer like many tile cleaning products you find in supermarkets which are really sold for cleaning glazed ceramic tiles not sealed natural stone.
Nick White
Norfolk Tile Doctor
 UpperKey
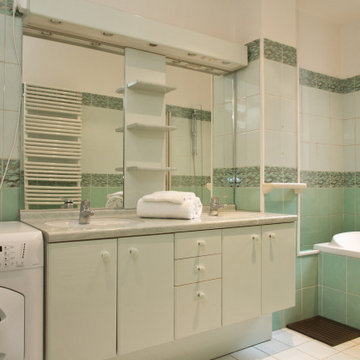
In many Parisian apartments, the bathroom may not have a window or a ventilation system. This can lead to issues with humidity and mold growth, which can be harmful to both the occupants of the apartment and the building itself. To combat this issue, some Parisians have installed dehumidifiers or air purifiers in their bathrooms, while others may leave the door open or use natural remedies such as vinegar or essential oils to combat moisture and odor. Despite these challenges, Parisians continue to make the most of their bathroom facilities, finding creative and practical solutions to the unique issues posed by their apartments' design and layout.
 Tile Doctor Ltd
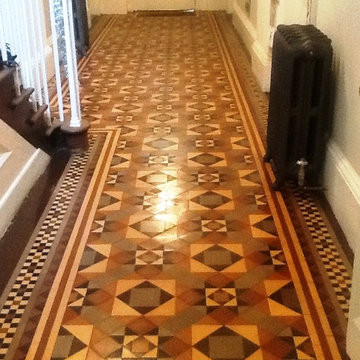
This hallway floor was actually at a house in the town of Stamford which is just over the northern border of Northamptonshire and slightly out of my area; however I was recommended to the owner by another client which is always welcome and a testimonial in itself. I work right across the county so it wasn’t long before I was in the general area and arranged a visit to carry out an inspection of the Victorian Quarry tiled floor and provide a quote for a full restoration.
The owner of the house had just moved in recently and although the floor was in good overall physical, it was in need of a thorough clean and new seal to bring back some life to the tiles. Additionally she was having lots of other building work done to the house and she wanted to retain this as an original feature of the property. My quote was accepted and I was able to book the work in for the following week.
These first photos show how dull the floor looked due to a build-up of builder’s dust and general wear and tear. They also show some of the equipment needed to undertake the following cleaning process.
I used a brush and vacuum to remove as much loose debris and dust from the surface of the floor as possible. I then applied a strong dilution of Tile Doctor Pro Clean to the floor which is a strong alkaline cleaner which can also be used to remove sealers; the solution was left it to dwell for roughly ten minutes before agitating it with scrubbing pads and brushes to remove the muck that was lifted to the surface. This was then wet-vacuumed twice to remove all the slurry and neutralise any chemicals.
As it was such an old property I then used a steamer to heat up the tiles and draw up any contaminants and assist with the drying process. I also chose to install two fans and a dehumidifier to dry the floor even further.
With the cleaning process complete – and achieving a marked difference to the appearance of the floor – I left the tiles to finish drying for 24 hours.
Upon my return to the house, I checked for any excess moisture by running damp tests as this has the potential to affect the performance of the sealer. Once satisfied with the results, I sealed the floor with two coats of Tile Doctor Colour Grow, a colour enhancing sealant which offers both a robust surface seal and an aesthetically pleasing finish.
I also carried out water repellency tests to ensure the sealer was working as expected and the floor had sufficient protection and will be hard-wearing for a hallway which is a high traffic area.
On my client’s return to the house she was very happy with the final results – in fact, she was also in contact about some further work in the New Year!
Phil Vissian
Northamptonshire Tile Doctor
 Dunrite Contracting
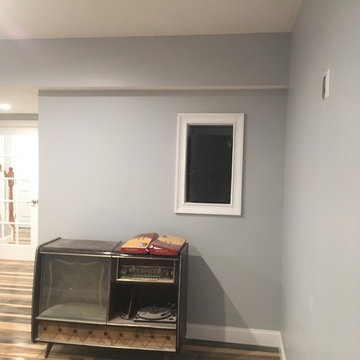
The built in is for a dehumidifier that has electrical and plumbing done so you never have to empty a pan again
Example of a trendy basement design in New York
Example of a trendy basement design in New York
 PerfectView Remodeling
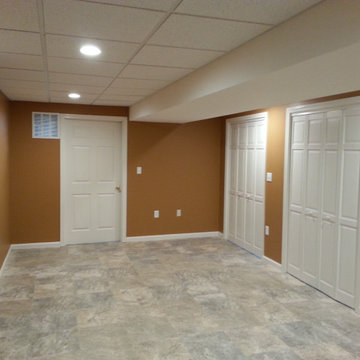
Finished basement with suspended acoustical ceiling, electrical, doors, molding & vinyl flooring. Al mechanicals & structural beams have been rerouted & concealed. Finished staircase to basement with hardwood treads, hardwood floor landing, handrails & banister.
 PerfectView Remodeling
Finished basement with suspended acoustical ceiling, electrical, doors, molding & vinyl flooring. Al mechanicals & structural beams have been rerouted & concealed. Finished staircase to basement with hardwood treads, hardwood floor landing, handrails & banister.
 PerfectView Remodeling
Finished basement with suspended acoustical ceiling, electrical, doors, molding & vinyl flooring. Al mechanicals & structural beams have been rerouted & concealed. Finished staircase to basement with hardwood treads, hardwood floor landing, handrails & banister.
 PerfectView Remodeling
Finished basement with suspended acoustical ceiling, electrical, doors, molding & vinyl flooring. Al mechanicals & structural beams have been rerouted & concealed. Finished staircase to basement with hardwood treads, hardwood floor landing, handrails & banister.
 User
UserLaundry room - traditional single-wall laundry room idea in Toronto with an undermount sink, raised-panel cabinets, white cabinets, white walls, a side-by-side washer/dryer and gray countertops


9