
Search results for "Draw desired" in Home Design Ideas
 FullerHouse Remodeling
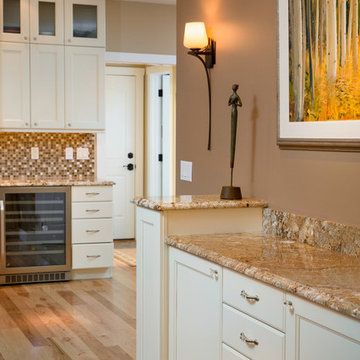
FullerHouse Construction Project: Arapahoe Ridge, Boulder CO whole house remodel
Our clients’ modest, 2,100 SF 1960’s Ranch had received only a few minor cosmetic upgrades since its original construction. And given a need for more space and a desire to stay in their neighborhood – the prime Arapahoe Ridge neighborhood of Boulder – our clients knew their home was due for a major renovation.
By the time DAJ Designs of Louisville had completed drawings, it was clear that very little of the original house was going to remain the same.
To create the space and configuration they desired, the first goal was to add a 2nd story, allocated solely for the new Master Suite, with its own private Balcony. But to create additional space needed for the Kitchen and walk-in pantry, we also pushed out into the original Garage footprint, subsequently extending the Garage to create room for 3+ vehicles. We also reworked nearly every other interior partition wall on the main floor to accommodate a spacious Great Room, 2 kids’ bedrooms, an Office, 2 bathrooms, and a dedicated Laundry room.
With clean white Craftsman details for the Exterior and interior trim and doors, natural granite counters, glass tiles, and creamy white Shaker-style cabinetry, our clients’ good taste added a timeless warmth to their now larger (3,000 SF) and more functional home.
 McCoy Homes, Inc.
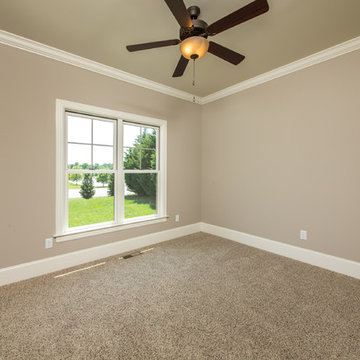
Billy and one of our subcontracted designers located a home plan online that they believed had a great exterior, and would draw potential buyers to the home due to the curb appeal that the home offered. They took the plan then made interior adjustments as well as added some desired exterior features that would keep the layout, and look of the home on target for the style of homes that MHI is custom to building. Once changes were made Billy had our architect draw up the plan and we named this beautiful home the Havencrest Plan. The name was given as we feel this home will be a Haven (place of refuge) for any homeowner.
Philip Slowiak Photography
 Cowbell Designs
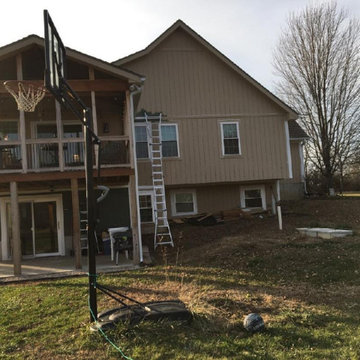
“An ideal client inspired this project, fostering a relationship built on mutual respect and teamwork. The Schlagenbusch family’s desire for closeness led to an extension of their 30-year-old home. This created a new residence within the existing structure, allowing the parents to enjoy panoramic views and continue growing with their family.”
Find the right local pro for your project
 Calliope Design Inc.
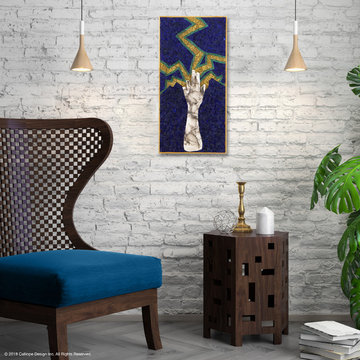
Electrify is part of an experimental body of work with a limited color palette and using life-casted hand pointing upward. It describes the ability to recognize and draw upon inner energy to manifest desired change. Directing it towards the desire. The design is simple yet potent. We are the Masters of our own Universe. The key is take responsibility knowing there’s a solution to every block encountered. Something to ponder.
This Legacy Art Panel is ready to bedazzle a living room, office, wellness center, virtually any interior space to expand its story.
Be inspired. The possibilities are endless.
You can collect a Legacy Art Panel as available from the studio or have a custom Legacy Art Panel created to fit your space. Email Caryn at caryn@ calliopedesign.com.
Location: Perfect to accommodate an interior design of a living room, meditation room, office space, virtually any interior space that calls for a Legacy Art Panel.
Medium: Mixed media
Materials: Horsehair raku fired, life-casted hand, beach glass and 18 ct. gold
Dimensions: 12” w x 24” h, framed
Available As Is: Yes
 McCoy Homes, Inc.
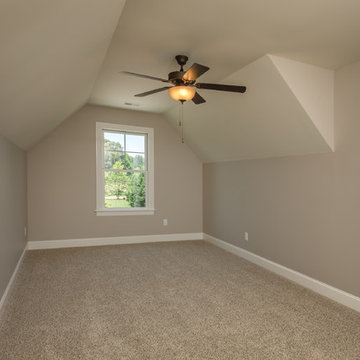
Billy and one of our subcontracted designers located a home plan online that they believed had a great exterior, and would draw potential buyers to the home due to the curb appeal that the home offered. They took the plan then made interior adjustments as well as added some desired exterior features that would keep the layout, and look of the home on target for the style of homes that MHI is custom to building. Once changes were made Billy had our architect draw up the plan and we named this beautiful home the Havencrest Plan. The name was given as we feel this home will be a Haven (place of refuge) for any homeowner.
Philip Slowiak Photography
 McCoy Homes, Inc.
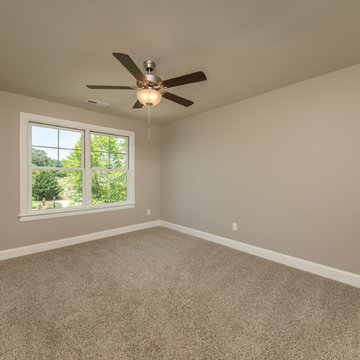
Billy and one of our subcontracted designers located a home plan online that they believed had a great exterior, and would draw potential buyers to the home due to the curb appeal that the home offered. They took the plan then made interior adjustments as well as added some desired exterior features that would keep the layout, and look of the home on target for the style of homes that MHI is custom to building. Once changes were made Billy had our architect draw up the plan and we named this beautiful home the Havencrest Plan. The name was given as we feel this home will be a Haven (place of refuge) for any homeowner.
Philip Slowiak Photography
 FullerHouse Remodeling
FullerHouse Construction Project: Arapahoe Ridge, Boulder CO whole house remodel
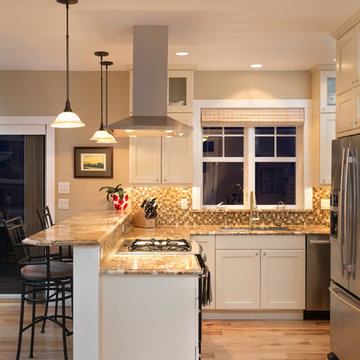
Our clients’ modest, 2,100 SF 1960’s Ranch had received only a few minor cosmetic upgrades since its original construction. And given a need for more space and a desire to stay in their neighborhood – the prime Arapahoe Ridge neighborhood of Boulder – our clients knew their home was due for a major renovation.
By the time DAJ Designs of Louisville had completed drawings, it was clear that very little of the original house was going to remain the same.
To create the space and configuration they desired, the first goal was to add a 2nd story, allocated solely for the new Master Suite, with its own private Balcony. But to create additional space needed for the Kitchen and walk-in pantry, we also pushed out into the original Garage footprint, subsequently extending the Garage to create room for 3+ vehicles. We also reworked nearly every other interior partition wall on the main floor to accommodate a spacious Great Room, 2 kids’ bedrooms, an Office, 2 bathrooms, and a dedicated Laundry room.
With clean white Craftsman details for the Exterior and interior trim and doors, natural granite counters, glass tiles, and creamy white Shaker-style cabinetry, our clients’ good taste added a timeless warmth to their now larger (3,000 SF) and more functional home.
 Cowbell Designs
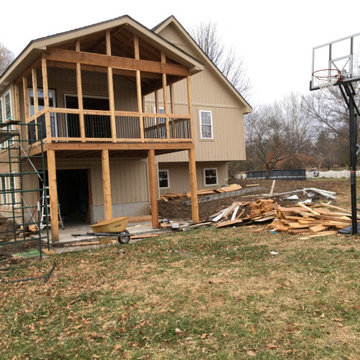
“An ideal client inspired this project, fostering a relationship built on mutual respect and teamwork. The Schlagenbusch family’s desire for closeness led to an extension of their 30-year-old home. This created a new residence within the existing structure, allowing the parents to enjoy panoramic views and continue growing with their family.”

 Talon Construction Inc.
Designing and building a kitchen addition is a complex process that involves multiple steps and considerations. Here is a general outline to help you get started on your kitchen addition project:
Define Your Goals and Budget:
• Determine the purpose of the kitchen addition. Is it for more cooking space, a dining area, or a combination of both?
• Establish a realistic budget for your project. Consider all costs, including construction, permits, materials, and furnishings.
Hire a Design Professional:
• Seek the services of a design build company who specializes in kitchen additions.
• Discuss your vision, needs, and budget with the design professional to create a design concept.
Site Evaluation:
• Assess the existing space and structural condition of your home to ensure it can support the addition.
• Consider factors like zoning regulations, setbacks, and building codes.
Design Development:
• Collaborate with your design professional to refine the concept, including the layout, size, and architectural style.
• Choose materials, finishes, and fixtures that fit your design and budget.
Obtain Permits:
• Consult with your local design build contractor to determine the necessary permits and approvals.
• Prepare and submit all required documents, including architectural drawings and engineering plans.
Create Construction Documents:
• Work with your design build professional to develop detailed construction drawings and specifications.
• These documents will serve as a guide for contractors during construction.
Hire a design build contractor:
• Check references, credentials, and licenses before selecting a contractor.
• Sign a detailed contract that outlines the scope of work, timeline, and payment schedule.
Construction Phase:
• Demolition: If needed, remove any existing structures or walls.
• Foundation: Construct the foundation for the addition.
• Framing: Build the structural framework of the addition.
• Plumbing, Electrical, and HVAC: Install or update utilities as required.
• Insulation: Ensure proper insulation for energy efficiency.
• Drywall and Finish Work: Complete the walls and ceilings.
• Flooring and Cabinetry: Install flooring and kitchen cabinets.
• Appliances and Fixtures: Add appliances, plumbing fixtures, and lighting.
• Paint and Finish: Apply paint and finishes to achieve the desired look.
• Final Inspection: Schedule inspections to ensure compliance with building codes.
Final Inspections and Approvals:
• Arrange for final inspections to ensure the addition meets all safety and code requirements.
• Obtain any necessary certificates of occupancy or compliance.
Move In and Enjoy:
• Once all inspections and approvals are received, you can move into your new kitchen addition and start enjoying it.
Remember that every kitchen addition project is unique, so adapt this outline to your specific needs and circumstances. Consulting with professionals and obtaining the required permits and inspections is crucial to a successful and safe project.
 Pathway Design & Construction
Water leaks can be frustrating and happen often unexpectedly… especially when the water is coming from your upstairs neighbor!
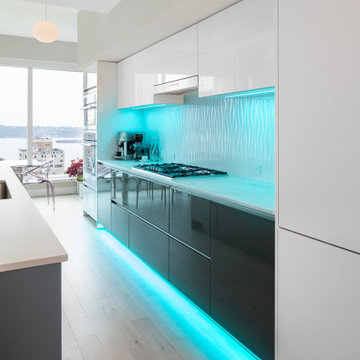
Once the leak occurred, the homeowners decided that it was the perfect opportunity to create their dream kitchen and entryway. The decision was made and the homeowners went shopping to purchase materials for their renovation. One problem; they hadn’t hired a contractor yet. They quickly discovered they would need help building their dream kitchen and entryway which is where we came in.
Scope:
Create a versatile space that reflects the homeowners’ vibrant personalities where they could cook, work, relax and entertain.
Desired features include:
Color changing LED tape lighting was essential to help create ambiance.
Smaller can lights with updated trim to modernize the lighting.
Disguising a “workspace” into the island design.
Installing a compost bin that doubles as a wine chiller for entertaining.
Separate wine bar.
Installing an intricate piece of mirror art and lighting in the entryway.
Installing custom waved back splash tile.
Challenges:
Creating a working set of construction plans from cabinet drawings was a challenge. The process entailed continuous communication with the clients including several walkthroughs before final installation of each aspect throughout the project.
Incorporating high-gloss and muted surfaces into the space without creating glare from the natural light coming in from many existing windows.
Wavy tile became difficult to install with the desired layout of backsplash outlet style and locations.
Solutions:
The core design issues were resolved with exceptional communication between our field team and the homeowners.
Satin finish countertops and matte paint offset the high gloss cabinetry and backsplash.
Because of the size of tiles in the space, the outlets needed to be cut in the center of the tile to look uniform. Time and a steady hand made this possible for the best visual result.
Result:
Thoughtful execution helped to create a versatile dream kitchen and entry way that also provides an at-home workspace. This now versatile space is useful and aesthetically pleasing, exceeding the homeowners’ vision. The small details ranging from accent lighting to the compost bin turned wine chiller make this a luxurious statement piece.
 McCoy Homes, Inc.
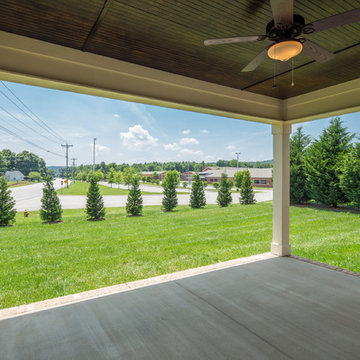
Billy and one of our subcontracted designers located a home plan online that they believed had a great exterior, and would draw potential buyers to the home due to the curb appeal that the home offered. They took the plan then made interior adjustments as well as added some desired exterior features that would keep the layout, and look of the home on target for the style of homes that MHI is custom to building. Once changes were made Billy had our architect draw up the plan and we named this beautiful home the Havencrest Plan. The name was given as we feel this home will be a Haven (place of refuge) for any homeowner.
Philip Slowiak Photography
 FullerHouse Remodeling
FullerHouse Construction Project: Arapahoe Ridge, Boulder CO whole house remodel
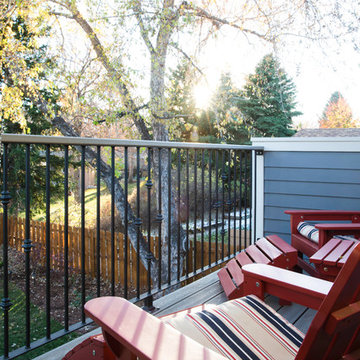
Our clients’ modest, 2,100 SF 1960’s Ranch had received only a few minor cosmetic upgrades since its original construction. And given a need for more space and a desire to stay in their neighborhood – the prime Arapahoe Ridge neighborhood of Boulder – our clients knew their home was due for a major renovation.
By the time DAJ Designs of Louisville had completed drawings, it was clear that very little of the original house was going to remain the same.
To create the space and configuration they desired, the first goal was to add a 2nd story, allocated solely for the new Master Suite, with its own private Balcony. But to create additional space needed for the Kitchen and walk-in pantry, we also pushed out into the original Garage footprint, subsequently extending the Garage to create room for 3+ vehicles. We also reworked nearly every other interior partition wall on the main floor to accommodate a spacious Great Room, 2 kids’ bedrooms, an Office, 2 bathrooms, and a dedicated Laundry room.
With clean white Craftsman details for the Exterior and interior trim and doors, natural granite counters, glass tiles, and creamy white Shaker-style cabinetry, our clients’ good taste added a timeless warmth to their now larger (3,000 SF) and more functional home.
 McCoy Homes, Inc.
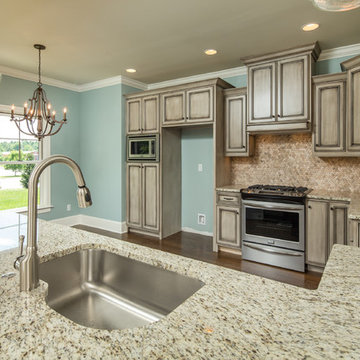
Billy and one of our subcontracted designers located a home plan online that they believed had a great exterior, and would draw potential buyers to the home due to the curb appeal that the home offered. They took the plan then made interior adjustments as well as added some desired exterior features that would keep the layout, and look of the home on target for the style of homes that MHI is custom to building. Once changes were made Billy had our architect draw up the plan and we named this beautiful home the Havencrest Plan. The name was given as we feel this home will be a Haven (place of refuge) for any homeowner.
Philip Slowiak Photography
 Talon Construction Inc.
Designing and building a kitchen addition is a complex process that involves multiple steps and considerations. Here is a general outline to help you get started on your kitchen addition project:
Define Your Goals and Budget:
• Determine the purpose of the kitchen addition. Is it for more cooking space, a dining area, or a combination of both?
• Establish a realistic budget for your project. Consider all costs, including construction, permits, materials, and furnishings.
Hire a Design Professional:
• Seek the services of a design build company who specializes in kitchen additions.
• Discuss your vision, needs, and budget with the design professional to create a design concept.
Site Evaluation:
• Assess the existing space and structural condition of your home to ensure it can support the addition.
• Consider factors like zoning regulations, setbacks, and building codes.
Design Development:
• Collaborate with your design professional to refine the concept, including the layout, size, and architectural style.
• Choose materials, finishes, and fixtures that fit your design and budget.
Obtain Permits:
• Consult with your local design build contractor to determine the necessary permits and approvals.
• Prepare and submit all required documents, including architectural drawings and engineering plans.
Create Construction Documents:
• Work with your design build professional to develop detailed construction drawings and specifications.
• These documents will serve as a guide for contractors during construction.
Hire a design build contractor:
• Check references, credentials, and licenses before selecting a contractor.
• Sign a detailed contract that outlines the scope of work, timeline, and payment schedule.
Construction Phase:
• Demolition: If needed, remove any existing structures or walls.
• Foundation: Construct the foundation for the addition.
• Framing: Build the structural framework of the addition.
• Plumbing, Electrical, and HVAC: Install or update utilities as required.
• Insulation: Ensure proper insulation for energy efficiency.
• Drywall and Finish Work: Complete the walls and ceilings.
• Flooring and Cabinetry: Install flooring and kitchen cabinets.
• Appliances and Fixtures: Add appliances, plumbing fixtures, and lighting.
• Paint and Finish: Apply paint and finishes to achieve the desired look.
• Final Inspection: Schedule inspections to ensure compliance with building codes.
Final Inspections and Approvals:
• Arrange for final inspections to ensure the addition meets all safety and code requirements.
• Obtain any necessary certificates of occupancy or compliance.
Move In and Enjoy:
• Once all inspections and approvals are received, you can move into your new kitchen addition and start enjoying it.
Remember that every kitchen addition project is unique, so adapt this outline to your specific needs and circumstances. Consulting with professionals and obtaining the required permits and inspections is crucial to a successful and safe project.
 Talon Construction Inc.
Designing and building a kitchen addition is a complex process that involves multiple steps and considerations. Here is a general outline to help you get started on your kitchen addition project:
Define Your Goals and Budget:
• Determine the purpose of the kitchen addition. Is it for more cooking space, a dining area, or a combination of both?
• Establish a realistic budget for your project. Consider all costs, including construction, permits, materials, and furnishings.
Hire a Design Professional:
• Seek the services of a design build company who specializes in kitchen additions.
• Discuss your vision, needs, and budget with the design professional to create a design concept.
Site Evaluation:
• Assess the existing space and structural condition of your home to ensure it can support the addition.
• Consider factors like zoning regulations, setbacks, and building codes.
Design Development:
• Collaborate with your design professional to refine the concept, including the layout, size, and architectural style.
• Choose materials, finishes, and fixtures that fit your design and budget.
Obtain Permits:
• Consult with your local design build contractor to determine the necessary permits and approvals.
• Prepare and submit all required documents, including architectural drawings and engineering plans.
Create Construction Documents:
• Work with your design build professional to develop detailed construction drawings and specifications.
• These documents will serve as a guide for contractors during construction.
Hire a design build contractor:
• Check references, credentials, and licenses before selecting a contractor.
• Sign a detailed contract that outlines the scope of work, timeline, and payment schedule.
Construction Phase:
• Demolition: If needed, remove any existing structures or walls.
• Foundation: Construct the foundation for the addition.
• Framing: Build the structural framework of the addition.
• Plumbing, Electrical, and HVAC: Install or update utilities as required.
• Insulation: Ensure proper insulation for energy efficiency.
• Drywall and Finish Work: Complete the walls and ceilings.
• Flooring and Cabinetry: Install flooring and kitchen cabinets.
• Appliances and Fixtures: Add appliances, plumbing fixtures, and lighting.
• Paint and Finish: Apply paint and finishes to achieve the desired look.
• Final Inspection: Schedule inspections to ensure compliance with building codes.
Final Inspections and Approvals:
• Arrange for final inspections to ensure the addition meets all safety and code requirements.
• Obtain any necessary certificates of occupancy or compliance.
Move In and Enjoy:
• Once all inspections and approvals are received, you can move into your new kitchen addition and start enjoying it.
Remember that every kitchen addition project is unique, so adapt this outline to your specific needs and circumstances. Consulting with professionals and obtaining the required permits and inspections is crucial to a successful and safe project.
 FullerHouse Remodeling
FullerHouse Construction Project: Arapahoe Ridge, Boulder CO whole house remodel
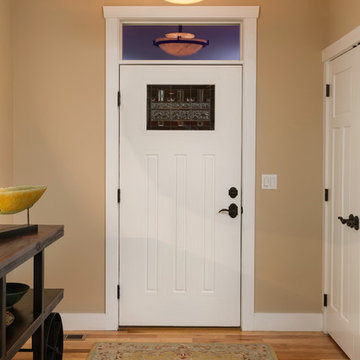
Our clients’ modest, 2,100 SF 1960’s Ranch had received only a few minor cosmetic upgrades since its original construction. And given a need for more space and a desire to stay in their neighborhood – the prime Arapahoe Ridge neighborhood of Boulder – our clients knew their home was due for a major renovation.
By the time DAJ Designs of Louisville had completed drawings, it was clear that very little of the original house was going to remain the same.
To create the space and configuration they desired, the first goal was to add a 2nd story, allocated solely for the new Master Suite, with its own private Balcony. But to create additional space needed for the Kitchen and walk-in pantry, we also pushed out into the original Garage footprint, subsequently extending the Garage to create room for 3+ vehicles. We also reworked nearly every other interior partition wall on the main floor to accommodate a spacious Great Room, 2 kids’ bedrooms, an Office, 2 bathrooms, and a dedicated Laundry room.
With clean white Craftsman details for the Exterior and interior trim and doors, natural granite counters, glass tiles, and creamy white Shaker-style cabinetry, our clients’ good taste added a timeless warmth to their now larger (3,000 SF) and more functional home.
 McCoy Homes, Inc.
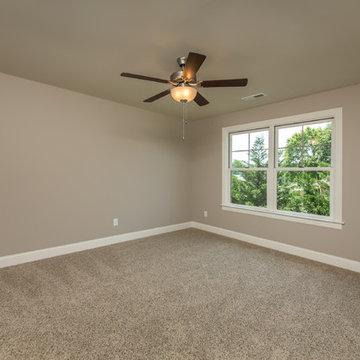
Billy and one of our subcontracted designers located a home plan online that they believed had a great exterior, and would draw potential buyers to the home due to the curb appeal that the home offered. They took the plan then made interior adjustments as well as added some desired exterior features that would keep the layout, and look of the home on target for the style of homes that MHI is custom to building. Once changes were made Billy had our architect draw up the plan and we named this beautiful home the Havencrest Plan. The name was given as we feel this home will be a Haven (place of refuge) for any homeowner.
Philip Slowiak Photography
 Pathway Design & Construction
Water leaks can be frustrating and happen often unexpectedly… especially when the water is coming from your upstairs neighbor!
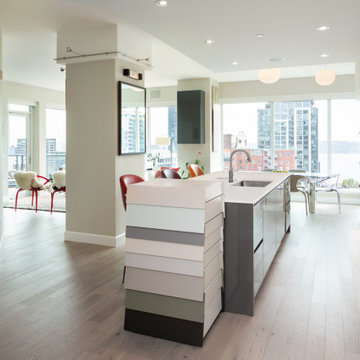
Once the leak occurred, the homeowners decided that it was the perfect opportunity to create their dream kitchen and entryway. The decision was made and the homeowners went shopping to purchase materials for their renovation. One problem; they hadn’t hired a contractor yet. They quickly discovered they would need help building their dream kitchen and entryway which is where we came in.
Scope:
Create a versatile space that reflects the homeowners’ vibrant personalities where they could cook, work, relax and entertain.
Desired features include:
Color changing LED tape lighting was essential to help create ambiance.
Smaller can lights with updated trim to modernize the lighting.
Disguising a “workspace” into the island design.
Installing a compost bin that doubles as a wine chiller for entertaining.
Separate wine bar.
Installing an intricate piece of mirror art and lighting in the entryway.
Installing custom waved back splash tile.
Challenges:
Creating a working set of construction plans from cabinet drawings was a challenge. The process entailed continuous communication with the clients including several walkthroughs before final installation of each aspect throughout the project.
Incorporating high-gloss and muted surfaces into the space without creating glare from the natural light coming in from many existing windows.
Wavy tile became difficult to install with the desired layout of backsplash outlet style and locations.
Solutions:
The core design issues were resolved with exceptional communication between our field team and the homeowners.
Satin finish countertops and matte paint offset the high gloss cabinetry and backsplash.
Because of the size of tiles in the space, the outlets needed to be cut in the center of the tile to look uniform. Time and a steady hand made this possible for the best visual result.
Result:
Thoughtful execution helped to create a versatile dream kitchen and entry way that also provides an at-home workspace. This now versatile space is useful and aesthetically pleasing, exceeding the homeowners’ vision. The small details ranging from accent lighting to the compost bin turned wine chiller make this a luxurious statement piece.
 Talon Construction Inc.
Designing and building a kitchen addition is a complex process that involves multiple steps and considerations. Here is a general outline to help you get started on your kitchen addition project:
Define Your Goals and Budget:
• Determine the purpose of the kitchen addition. Is it for more cooking space, a dining area, or a combination of both?
• Establish a realistic budget for your project. Consider all costs, including construction, permits, materials, and furnishings.
Hire a Design Professional:
• Seek the services of a design build company who specializes in kitchen additions.
• Discuss your vision, needs, and budget with the design professional to create a design concept.
Site Evaluation:
• Assess the existing space and structural condition of your home to ensure it can support the addition.
• Consider factors like zoning regulations, setbacks, and building codes.
Design Development:
• Collaborate with your design professional to refine the concept, including the layout, size, and architectural style.
• Choose materials, finishes, and fixtures that fit your design and budget.
Obtain Permits:
• Consult with your local design build contractor to determine the necessary permits and approvals.
• Prepare and submit all required documents, including architectural drawings and engineering plans.
Create Construction Documents:
• Work with your design build professional to develop detailed construction drawings and specifications.
• These documents will serve as a guide for contractors during construction.
Hire a design build contractor:
• Check references, credentials, and licenses before selecting a contractor.
• Sign a detailed contract that outlines the scope of work, timeline, and payment schedule.
Construction Phase:
• Demolition: If needed, remove any existing structures or walls.
• Foundation: Construct the foundation for the addition.
• Framing: Build the structural framework of the addition.
• Plumbing, Electrical, and HVAC: Install or update utilities as required.
• Insulation: Ensure proper insulation for energy efficiency.
• Drywall and Finish Work: Complete the walls and ceilings.
• Flooring and Cabinetry: Install flooring and kitchen cabinets.
• Appliances and Fixtures: Add appliances, plumbing fixtures, and lighting.
• Paint and Finish: Apply paint and finishes to achieve the desired look.
• Final Inspection: Schedule inspections to ensure compliance with building codes.
Final Inspections and Approvals:
• Arrange for final inspections to ensure the addition meets all safety and code requirements.
• Obtain any necessary certificates of occupancy or compliance.
Move In and Enjoy:
• Once all inspections and approvals are received, you can move into your new kitchen addition and start enjoying it.
Remember that every kitchen addition project is unique, so adapt this outline to your specific needs and circumstances. Consulting with professionals and obtaining the required permits and inspections is crucial to a successful and safe project.
 Lagois Design Build Renovate
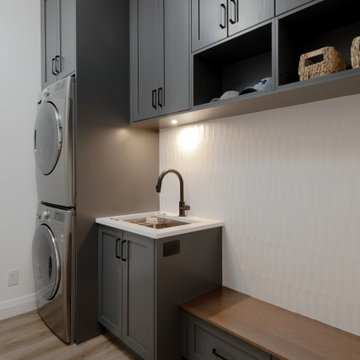
They always loved their house – its shape and size, and the piece of land it sits on; but the interior left a lot to be desired. In fact, they hated it. They wanted it to be aesthetically more pleasing and to have much more function and flow.
These homeowners challenged Lagois to make it the home of their dreams, and that’s exactly what happened. One of the homeowners loves to cook, but the kitchen was dark. The space was difficult and frustrating. The new kitchen is bigger, brighter, and more functional. It now has all the prep space he needs and the task lighting he always wanted.
They also love their new spa bathroom, which is beautiful and warm and exactly what they had in mind. One of the homeowners describes himself as fussy and impatient, and at first he had been anxious about the whole prospect of renovation. He said afterwards that the team made him feel comfortable, listened to, and unconcerned.
One factor that made them so at ease with choosing Lagois was the “in house” aspect of their services. The person who designed their home, the one who did the drawings, and the person who managed the construction are all Lagois employees. The homeowners liked knowing those critical functions weren’t outsourced.
Another thing they love about their home is the finishes that are exactly to their taste. The homeowners are delighted with the new interior of their home. It is now something they love – both outside and inside.
8