
Search results for "Edinburgh's" in Home Design Ideas
 Platinum Homes by Mark Molthan
Page // Agency
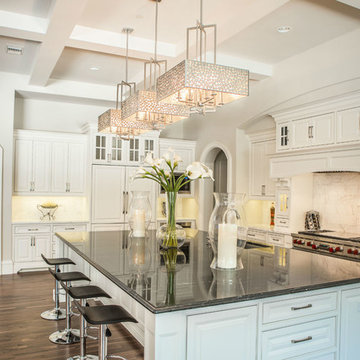
Inspiration for a huge transitional medium tone wood floor open concept kitchen remodel in Dallas with an undermount sink, raised-panel cabinets, white cabinets, marble countertops, white backsplash, stainless steel appliances and an island
Inspiration for a huge transitional medium tone wood floor open concept kitchen remodel in Dallas with an undermount sink, raised-panel cabinets, white cabinets, marble countertops, white backsplash, stainless steel appliances and an island
 Monarch Interiors
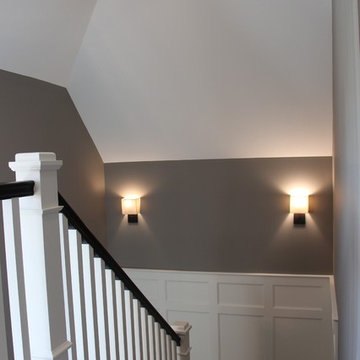
Inspiration for a mid-sized modern carpeted u-shaped staircase remodel in Cleveland with carpeted risers
 Decorative Woodwork At Home
www.finium.ca
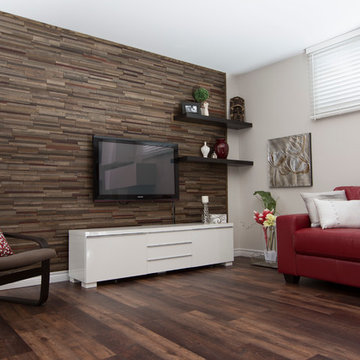
Inspiration for a contemporary living room remodel in Salt Lake City
Inspiration for a contemporary living room remodel in Salt Lake City
Find the right local pro for your project

 Hillcrest Builders
Hillcrest Builders invites you to the 2,534 sq.ft. "Edinburg" This house has 3 bedrooms, 2.5 baths, and includes a 3 car garage. The entry from the garage has been designed for organization and ease with an oversize Mudroom with open cubbies and a boot wash. The Kitchen features cabinets to ceiling with a built-in hutch that overlooks the Dining. The Kitchen has a deluxe island for entertaining along with a walk-in pantry for ample storage. The Dining opens up to a a spacious Sun room allowing for daylight and great flexibility for entertaining an d daily living. The Master Suite is located on the second floor and includes a generous shower and large walk-in closet. There is also a finished Bonus Room.
 Rosemount Woods, Inc.
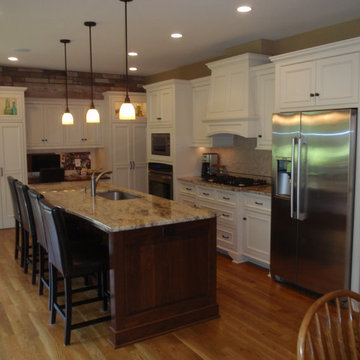
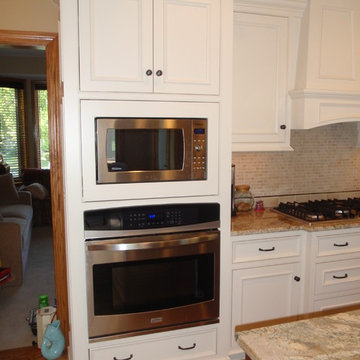
Example of a mid-sized classic galley medium tone wood floor eat-in kitchen design in Minneapolis with a double-bowl sink, beaded inset cabinets, white cabinets, granite countertops, beige backsplash, ceramic backsplash, stainless steel appliances and beige walls


 Rosemount Woods, Inc.
Example of a mid-sized classic galley medium tone wood floor eat-in kitchen design in Minneapolis with a double-bowl sink, beaded inset cabinets, white cabinets, granite countertops, beige backsplash, ceramic backsplash, stainless steel appliances and beige walls




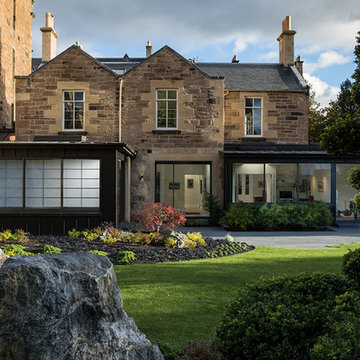
 Julie Moir Messervy Design Studio (JMMDS)
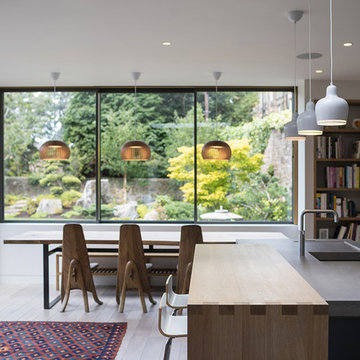
A pair of world travelers with a deep love of Japan asked JMMDS to design a Japanese-inspired landscape that would complement the contemporary renovation of their home in Edinburgh, Scotland. JMMDS created a plan that included a handsome cut-stone patio, meandering stepping stone paths, sweeping bed lines, stony mounds, a grassy pool of space, and swaths of elegant plantings.
JMMDS was on site during the installation to craft the mounds and place the plants and stones. Julie Moir Messervy set out the ancient pieces of gneiss from Scotland’s Isle of Lewis.
With the planting design, JMMDS sought to evoke the feeling of a traditional Japanese garden using locally suitable plants. The designers and clients visited nurseries in search of distinctive plant specimens, including cloud-pruned hollies, craggy pines, Japanese maples of varied color and habit, and a particularly notable Japanese snowbell tree. Beneath these, they laid drifts of sedges, hellebores, European gingers, ferns, and Solomon’s Seal. Evergreen azaleas, juniper, rhododendrons, and hebe were clustered around the lawn. JMMDS placed bamboos within root-controlled patio beds and planted mondo grass, sedums, and mosses among the stepping stones.
Project designers: Julie Moir Messervy, Principal; Erica Bowman, Senior Landscape Architect
Collaborators: Helen Lucas Architects, Steven Ogilvie (garden installers)
Photography: Angus Bremner

Sponsored
Sunbury, OH

J.Holderby - Renovations
Franklin County's Leading General Contractors - 2X Best of Houzz!
 Dragonwood Doors & Lumber
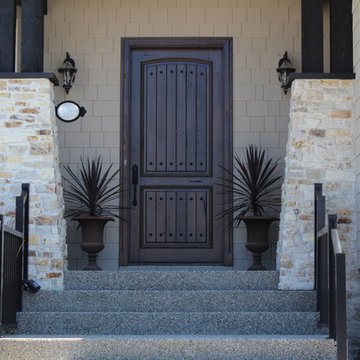
The Edinburgh is a square top solid medieval walnut exterior entrance door, with subtle iron details and a classical, timeless feel.
Mid-sized mountain style front door photo in Vancouver with a dark wood front door
Mid-sized mountain style front door photo in Vancouver with a dark wood front door
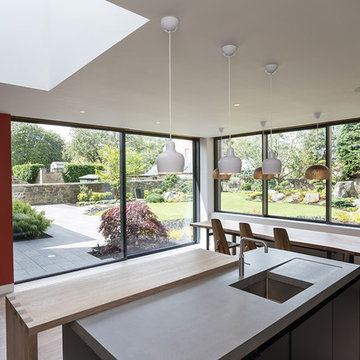 Julie Moir Messervy Design Studio (JMMDS)
A pair of world travelers with a deep love of Japan asked JMMDS to design a Japanese-inspired landscape that would complement the contemporary renovation of their home in Edinburgh, Scotland. JMMDS created a plan that included a handsome cut-stone patio, meandering stepping stone paths, sweeping bed lines, stony mounds, a grassy pool of space, and swaths of elegant plantings.
JMMDS was on site during the installation to craft the mounds and place the plants and stones. Julie Moir Messervy set out the ancient pieces of gneiss from Scotland’s Isle of Lewis.
With the planting design, JMMDS sought to evoke the feeling of a traditional Japanese garden using locally suitable plants. The designers and clients visited nurseries in search of distinctive plant specimens, including cloud-pruned hollies, craggy pines, Japanese maples of varied color and habit, and a particularly notable Japanese snowbell tree. Beneath these, they laid drifts of sedges, hellebores, European gingers, ferns, and Solomon’s Seal. Evergreen azaleas, juniper, rhododendrons, and hebe were clustered around the lawn. JMMDS placed bamboos within root-controlled patio beds and planted mondo grass, sedums, and mosses among the stepping stones.
Project designers: Julie Moir Messervy, Principal; Erica Bowman, Senior Landscape Architect
Collaborators: Helen Lucas Architects, Steven Ogilvie (garden installers)
Photography: Angus Bremner
 Julie Moir Messervy Design Studio (JMMDS)
A pair of world travelers with a deep love of Japan asked JMMDS to design a Japanese-inspired landscape that would complement the contemporary renovation of their home in Edinburgh, Scotland. JMMDS created a plan that included a handsome cut-stone patio, meandering stepping stone paths, sweeping bed lines, stony mounds, a grassy pool of space, and swaths of elegant plantings.
JMMDS was on site during the installation to craft the mounds and place the plants and stones. Julie Moir Messervy set out the ancient pieces of gneiss from Scotland’s Isle of Lewis.
With the planting design, JMMDS sought to evoke the feeling of a traditional Japanese garden using locally suitable plants. The designers and clients visited nurseries in search of distinctive plant specimens, including cloud-pruned hollies, craggy pines, Japanese maples of varied color and habit, and a particularly notable Japanese snowbell tree. Beneath these, they laid drifts of sedges, hellebores, European gingers, ferns, and Solomon’s Seal. Evergreen azaleas, juniper, rhododendrons, and hebe were clustered around the lawn. JMMDS placed bamboos within root-controlled patio beds and planted mondo grass, sedums, and mosses among the stepping stones.
Project designers: Julie Moir Messervy, Principal; Erica Bowman, Senior Landscape Architect
Collaborators: Helen Lucas Architects, Steven Ogilvie (garden installers)
Photography: Angus Bremner
 Tile Doctor Ltd
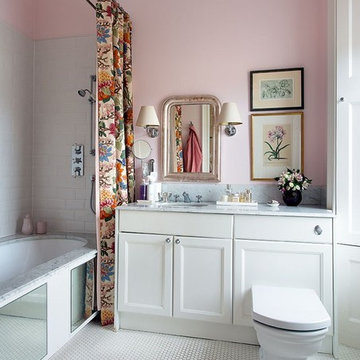
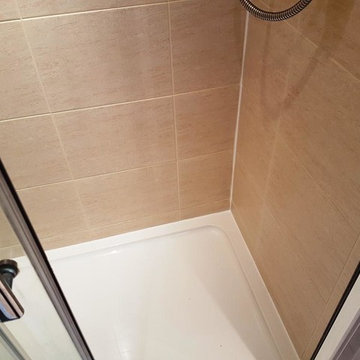
This is a great example of the difference we can make to a Shower Cubicle which suffer from a build up of soap scum, mould and staining from the dyes in shampoos and soaps etc.
This particular cubicle was installed at a property in the city of Edinburgh. The walls were Ceramic tiles which are ideal for shower areas as the glaze makes them completely water proof. However with grout being cementitious it does attract dirt and this shower was no different.
Cleaning Ceramic Tiled Shower Cubicle
The first step was to remove the wire accessory holder and then soak all the tile and grout in a strong solution of Tile Doctor Pro-Clean. I find decanting into a spray bottle works best as it mixes it with air which makes it easier to stick to the wall.
With the Pro-Clean in place it was then hand scrubbed to get the tile and especially the grout clean of all the mould and other stains. The shower walls were rinsed down and the process repeated where necessary.
Grout Colouring Shower Wall Tiles
With the tiles and grout now clean we could see that the grout was still discoloured in some areas where it had been badly stained. One option at this point would be rake out the grout and replace with new however overtime it would only discolour again, so in agreement with the customer we applied a grout colourant in a Limestone colour to better match the tile.
The Grout Colourant would ensure all the grout had a consistent appearance while also adding an impenetrable barrier that will keep its appearance for a long time. It takes a little time to do but is easily applied with a small brush and then you wipe off any excess that gets onto the tile.
The next step was to strip out the mastic silicone sealant strip from around the base of the shower cubicle and replace with new. I used high quality silicone sealant that left nice lines and fresh look, don’t use cheap sealant as it will soon discolour and some have been known to shrink.
Deep cleaning and re-colouring the grout made a huge difference; the shower cubicle has been transformed and now looks like a new installation.
Thomas Wilson
Edinburgh Tile Doctor
Sponsored
Westerville, OH

Custom Home Works
Franklin County's Award-Winning Design, Build and Remodeling Expert
 Tile Doctor Ltd
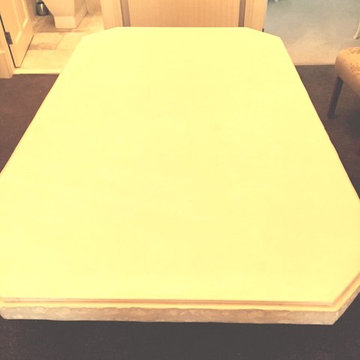
Here is a Limestone table that we stripped, cleaned and sealed in Edinburgh city centre. As you can see from the photographs below the old sealer/wax coating had started to deteriorate and wear off in places leaving the table looking dirty and the client hated the waxy/yellow shine finish it left so asked us to remove the old seal completely and make the Limestone look completely natural.
To remove the remaining wax coating the table was smothered in strong solution of Tile Doctor Pro-Clean which is an effective cleaning product that will strip off old sealers when used in a concentrated form. The solution was left to dwell for a while before being scrubbed in by hand and then rinsed off with water.
To make the job easier the table was cleaned in two sections and the process repeated a number of times in order to remove all the wax. Once complete the table was given a final clean using Tile Doctor Neutral Clean which is a PH neutral cleaning product to remove any trace of Pro-Clean and neutralise the stone before sealing.
The table was dried thoroughly before being sealed using three coats of Tile Doctor Colour Grow which is a penetrating sealer that soaks into the pores of the stone improving its natural colours and protecting it against staining from within.
The difference was remarkable and my client was delighted with the result.
Thomas Wilson
Edinburgh Tile Doctor
 Dragonwood Doors & Lumber
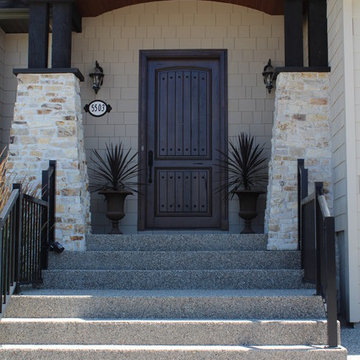
The Edinburgh is a square top solid medieval walnut exterior entrance door, with subtle iron details and a classical, timeless feel.
Front door - mid-sized rustic front door idea in Vancouver with a dark wood front door
Front door - mid-sized rustic front door idea in Vancouver with a dark wood front door
 Tile Doctor Ltd
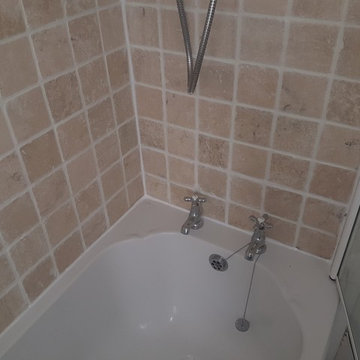
Here’s a quick example of an interesting tiled shower cubicle at a property in Edinburgh that was well overdue for a refresh, including deep cleaning and recolouring do the grout lines that had become stained and mouldy. This is a problem that the majority of property owners experience due to the simple fact that shower cubicles come into contact with damaging acid-based shampoos and soaps on a daily basis.
The short-term solution for this is to wash the shower cubicle down with water after each use, however busy people do not always remember to do so! The prognosis is bad discolouration, mould growth and staining if the problem if proper care isn’t taken. In this case, the problem had worsened to the point that the property owner decided to contact Tile a Doctor to provide a thorough refresh of the tiles.
Our process for refreshing shower cubicles in a similar state to this one is simple, but highly effective. I started by mixing a strong solution of our high alkaline cleaner, known as Tile Doctor Pro Clean (diluted to an appropriate level with water), before applying it directly to the tile and grout.
Next, I worked it in using specialised handheld grout brushes , with the alkaline in the Pro Clean neutralising the acidic staining and mould growth had leaving the area clean and fresh. Pro Clean is suitable for use on all kinds of natural stone, and on both verticals and horizontal surfaces. Once satisfied the grout had been cleaned to the best of my abilities, I quickly dried the entire area using a heat gun.
To restore the appearance of the installation back to it’s optimal appearance I chose to recolour the grout lines with our Light Grey grout colourant, which matched in very nicely. This is just one of ten different colours of grout colourant we offer. The colourant was left to dry for a short period before I cleaned off any excess. The final stage of the refresh involved stripping off the old discoloured silicone from around the bath and replacing it with fresh silicone.
The customer was very impressed by the speed and efficiency of the refresh. With the work completed to a high standard in just a few hours, she now has one less problem to worry about – and a very smart looking shower cubicle! Another satisfied customer.
Thomas Wilson
Edinburgh Tile Doctor
6